LumberJocks Woodworking Forum banner
61 - 80 of 543 Posts
Bottled sawdust

Boys and girls, I just finished watching another one of those videos where the author advises the use of sawdust in the glue squeeze out to create that seamless join especially when you finish up using a zig saw instead of the zag saw…
GREAT TIP!

Now if you are like me, there is never enough time to finish clamping before the glue starts to set, let alone go foraging for enough sawdust to mix into the squeeze out/gaps… and sometimes I have craters.

If you are a clean freak… OOPS, the shop would be spotless and if you are not then the sawdust on the floor should be contaminated by cigarette butts, empty tinnies and leftover micro-waved leftovers.

I went to my supermarket and could not find any bottled sawdust on the shelf; I lodged a serious complaint with the manager. Arriving home and failing a Google search, I decided to bottle my own brew.

I am a dust freak… (the missus says I use the word "dust" too freely…) so I have posse of cyclone collectors (Dust Deputies) front ends to all my dust collectors and shop vacs.

One of the DD's is for my sanding and from that I can harvest very fine sawdust. Another one "front ends" behind my mitre saw. This can supply me with the coarse dust.
Image


Some of that dust I then sieve to give me the medium dust…, here's the proof,
Image


Now a lot will say that the saw dust may not match the job… especially if you use diversified timber. I suggest farm more frequently after processing specific timbers… alternatively put some of that scrap we all brag about and spend a few hours making dedicated dust, bottle it
Image


and try not to mix it up with your favourite alcoholic beverage.

Often you'll be caught with your pants down and don't have matching saw dust, I feel that a contrasting "hair line" is better than a gaping hole or congealed glue (often yellow, white or grey) that cannot be coloured without excavating the fill… and then you fill it with what?

Just make sure you have reserves and next to the project during glue up.

Hope this may inspire some to make some saw instead of the traditional bull.
Dear DDW
Dead Duck Walking,

I see some jars and cake making items kleptoed from the kitchen … thats death sentence behaviour LBD.

A woodchipper comes to mind.

As for being caught with your pants down, to the best of my knowledge I havent met a duck yet that actually wears pants.

You really do not need that much sawdust (unless you are building something measured in cubits) just put some in a zip lock bag write the species on it, stash it away in a safe place and you will live longer.
Then after dark try to sneak all the wifes gear back into the kitchen unnoticed ensuring that you remove any evidence of tampering first.

BTW where is the video link please.
 

Attachments

Discussion starter · #62 ·
Bottled sawdust

Boys and girls, I just finished watching another one of those videos where the author advises the use of sawdust in the glue squeeze out to create that seamless join especially when you finish up using a zig saw instead of the zag saw…
GREAT TIP!

Now if you are like me, there is never enough time to finish clamping before the glue starts to set, let alone go foraging for enough sawdust to mix into the squeeze out/gaps… and sometimes I have craters.

If you are a clean freak… OOPS, the shop would be spotless and if you are not then the sawdust on the floor should be contaminated by cigarette butts, empty tinnies and leftover micro-waved leftovers.

I went to my supermarket and could not find any bottled sawdust on the shelf; I lodged a serious complaint with the manager. Arriving home and failing a Google search, I decided to bottle my own brew.

I am a dust freak… (the missus says I use the word "dust" too freely…) so I have posse of cyclone collectors (Dust Deputies) front ends to all my dust collectors and shop vacs.

One of the DD's is for my sanding and from that I can harvest very fine sawdust. Another one "front ends" behind my mitre saw. This can supply me with the coarse dust.
Image


Some of that dust I then sieve to give me the medium dust…, here's the proof,
Image


Now a lot will say that the saw dust may not match the job… especially if you use diversified timber. I suggest farm more frequently after processing specific timbers… alternatively put some of that scrap we all brag about and spend a few hours making dedicated dust, bottle it
Image


and try not to mix it up with your favourite alcoholic beverage.

Often you'll be caught with your pants down and don't have matching saw dust, I feel that a contrasting "hair line" is better than a gaping hole or congealed glue (often yellow, white or grey) that cannot be coloured without excavating the fill… and then you fill it with what?

Just make sure you have reserves and next to the project during glue up.

Hope this may inspire some to make some saw instead of the traditional bull.
..... You really do not need that much sawdust…..
- robscastle
Some of the gaps in my joinery make the Grand Canyon look like a hairline crack.

If I die before I use it up, I won't remember regretting the over indulgence and if I don't die I'll get to refill the bottle.

I make/made pens and used sawdust to fill voids… with fat fingers its easier to wastefully overfill than repeat, repeat, repeat! Also in a gigantic glue up I'm not gonna say that that crack needs .2372g of sawdust… I'll round it up to .2375g… hang the waste!

PS. The missus wanted to know how dare you consider her kitchen goodies are sawdust?
 

Attachments

Bottled sawdust

Boys and girls, I just finished watching another one of those videos where the author advises the use of sawdust in the glue squeeze out to create that seamless join especially when you finish up using a zig saw instead of the zag saw…
GREAT TIP!

Now if you are like me, there is never enough time to finish clamping before the glue starts to set, let alone go foraging for enough sawdust to mix into the squeeze out/gaps… and sometimes I have craters.

If you are a clean freak… OOPS, the shop would be spotless and if you are not then the sawdust on the floor should be contaminated by cigarette butts, empty tinnies and leftover micro-waved leftovers.

I went to my supermarket and could not find any bottled sawdust on the shelf; I lodged a serious complaint with the manager. Arriving home and failing a Google search, I decided to bottle my own brew.

I am a dust freak… (the missus says I use the word "dust" too freely…) so I have posse of cyclone collectors (Dust Deputies) front ends to all my dust collectors and shop vacs.

One of the DD's is for my sanding and from that I can harvest very fine sawdust. Another one "front ends" behind my mitre saw. This can supply me with the coarse dust.
Image


Some of that dust I then sieve to give me the medium dust…, here's the proof,
Image


Now a lot will say that the saw dust may not match the job… especially if you use diversified timber. I suggest farm more frequently after processing specific timbers… alternatively put some of that scrap we all brag about and spend a few hours making dedicated dust, bottle it
Image


and try not to mix it up with your favourite alcoholic beverage.

Often you'll be caught with your pants down and don't have matching saw dust, I feel that a contrasting "hair line" is better than a gaping hole or congealed glue (often yellow, white or grey) that cannot be coloured without excavating the fill… and then you fill it with what?

Just make sure you have reserves and next to the project during glue up.

Hope this may inspire some to make some saw instead of the traditional bull.
and the pants?

Image


Or more correctly the absence of them?

Do you need to borrow my other tape measure?

Image
 

Attachments

Discussion starter · #64 ·
Bottled sawdust

Boys and girls, I just finished watching another one of those videos where the author advises the use of sawdust in the glue squeeze out to create that seamless join especially when you finish up using a zig saw instead of the zag saw…
GREAT TIP!

Now if you are like me, there is never enough time to finish clamping before the glue starts to set, let alone go foraging for enough sawdust to mix into the squeeze out/gaps… and sometimes I have craters.

If you are a clean freak… OOPS, the shop would be spotless and if you are not then the sawdust on the floor should be contaminated by cigarette butts, empty tinnies and leftover micro-waved leftovers.

I went to my supermarket and could not find any bottled sawdust on the shelf; I lodged a serious complaint with the manager. Arriving home and failing a Google search, I decided to bottle my own brew.

I am a dust freak… (the missus says I use the word "dust" too freely…) so I have posse of cyclone collectors (Dust Deputies) front ends to all my dust collectors and shop vacs.

One of the DD's is for my sanding and from that I can harvest very fine sawdust. Another one "front ends" behind my mitre saw. This can supply me with the coarse dust.
Image


Some of that dust I then sieve to give me the medium dust…, here's the proof,
Image


Now a lot will say that the saw dust may not match the job… especially if you use diversified timber. I suggest farm more frequently after processing specific timbers… alternatively put some of that scrap we all brag about and spend a few hours making dedicated dust, bottle it
Image


and try not to mix it up with your favourite alcoholic beverage.

Often you'll be caught with your pants down and don't have matching saw dust, I feel that a contrasting "hair line" is better than a gaping hole or congealed glue (often yellow, white or grey) that cannot be coloured without excavating the fill… and then you fill it with what?

Just make sure you have reserves and next to the project during glue up.

Hope this may inspire some to make some saw instead of the traditional bull.
Do you need to borrow my other tape measure?

Image

- robscastle
Sorry rc, I'm colour blind… cannot read yellow… does it measure in grams?

Now you know who wears the pants in my family!
 

Attachments

Bottled sawdust

Boys and girls, I just finished watching another one of those videos where the author advises the use of sawdust in the glue squeeze out to create that seamless join especially when you finish up using a zig saw instead of the zag saw…
GREAT TIP!

Now if you are like me, there is never enough time to finish clamping before the glue starts to set, let alone go foraging for enough sawdust to mix into the squeeze out/gaps… and sometimes I have craters.

If you are a clean freak… OOPS, the shop would be spotless and if you are not then the sawdust on the floor should be contaminated by cigarette butts, empty tinnies and leftover micro-waved leftovers.

I went to my supermarket and could not find any bottled sawdust on the shelf; I lodged a serious complaint with the manager. Arriving home and failing a Google search, I decided to bottle my own brew.

I am a dust freak… (the missus says I use the word "dust" too freely…) so I have posse of cyclone collectors (Dust Deputies) front ends to all my dust collectors and shop vacs.

One of the DD's is for my sanding and from that I can harvest very fine sawdust. Another one "front ends" behind my mitre saw. This can supply me with the coarse dust.
Image


Some of that dust I then sieve to give me the medium dust…, here's the proof,
Image


Now a lot will say that the saw dust may not match the job… especially if you use diversified timber. I suggest farm more frequently after processing specific timbers… alternatively put some of that scrap we all brag about and spend a few hours making dedicated dust, bottle it
Image


and try not to mix it up with your favourite alcoholic beverage.

Often you'll be caught with your pants down and don't have matching saw dust, I feel that a contrasting "hair line" is better than a gaping hole or congealed glue (often yellow, white or grey) that cannot be coloured without excavating the fill… and then you fill it with what?

Just make sure you have reserves and next to the project during glue up.

Hope this may inspire some to make some saw instead of the traditional bull.
Great story LBD but wouldn't it be easier to cut/plane/fit joints together perfectly before gluing to save all this hassle?
 

Attachments

Discussion starter · #66 ·
Bottled sawdust

Boys and girls, I just finished watching another one of those videos where the author advises the use of sawdust in the glue squeeze out to create that seamless join especially when you finish up using a zig saw instead of the zag saw…
GREAT TIP!

Now if you are like me, there is never enough time to finish clamping before the glue starts to set, let alone go foraging for enough sawdust to mix into the squeeze out/gaps… and sometimes I have craters.

If you are a clean freak… OOPS, the shop would be spotless and if you are not then the sawdust on the floor should be contaminated by cigarette butts, empty tinnies and leftover micro-waved leftovers.

I went to my supermarket and could not find any bottled sawdust on the shelf; I lodged a serious complaint with the manager. Arriving home and failing a Google search, I decided to bottle my own brew.

I am a dust freak… (the missus says I use the word "dust" too freely…) so I have posse of cyclone collectors (Dust Deputies) front ends to all my dust collectors and shop vacs.

One of the DD's is for my sanding and from that I can harvest very fine sawdust. Another one "front ends" behind my mitre saw. This can supply me with the coarse dust.
Image


Some of that dust I then sieve to give me the medium dust…, here's the proof,
Image


Now a lot will say that the saw dust may not match the job… especially if you use diversified timber. I suggest farm more frequently after processing specific timbers… alternatively put some of that scrap we all brag about and spend a few hours making dedicated dust, bottle it
Image


and try not to mix it up with your favourite alcoholic beverage.

Often you'll be caught with your pants down and don't have matching saw dust, I feel that a contrasting "hair line" is better than a gaping hole or congealed glue (often yellow, white or grey) that cannot be coloured without excavating the fill… and then you fill it with what?

Just make sure you have reserves and next to the project during glue up.

Hope this may inspire some to make some saw instead of the traditional bull.
Great story LBD but wouldn t it be easier to cut/plane/fit joints together perfectly before gluing to save all this hassle?

- Pjonesy
Sorry Pj, but I am a mere mortal not a kiwi… we all strive for perfect cuts and then look in the mirror and find the face is covered in razor nicks.

There has been far too many times when I need to resort to using a post glue up filler… during glue ups I often think of this technique but never have sawdust handy. This is just a method to farm in case you might need it.

If the joint is perfect squeeze out with sawdust is easier to sand and if there's nothing to fill… that mistake is a bonus.

For people that use the sawdust in squeeze out method, I'd be interested in how they get their sawdust filler.
 

Attachments

Discussion starter · #67 ·
Sharing shop vacs between power tools.

Boys and Girls,

While this may be old hat to most, I've had enough friends (another one today/yesterday) saying that it's a good idea, so I thought it might be worth a shout out.

If you have a shop vac with an automatic outlet and share it amongst a number of tools during the one session, bridge the two with a power outlet plugged into the dusty.
Image


You can then plug each of the power tools into a spare outlet and give them all access to the dusty without dancing the power point shuffle.
Image


No matter which tool you turn on, it will automatically activates the dusty… just don't forget to switch
the hose… and watch both ends ends if you have more than one hose feeding the one dusty.
Image


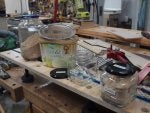
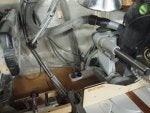
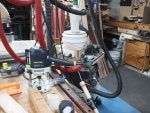
I use the same concept sharing the same dusty between my 2 mitre saws,
Image


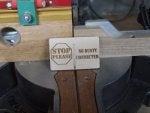
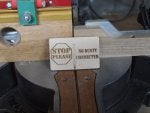
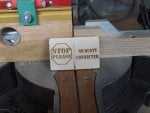
with a gentle reminder sign to get my act together,
Image


which is toggled depending on the status of each saw. This sign is a very recent addition making clean up less arduous chore…

MY other (central) dusty also has provision for sharing, albeit loosely attached, as it is used to vacuum the full workshop and occasionally used for tools,
Image


If you already perform this practice, there's no need to read this article.
 

Attachments

Sharing shop vacs between power tools.

Boys and Girls,

While this may be old hat to most, I've had enough friends (another one today/yesterday) saying that it's a good idea, so I thought it might be worth a shout out.

If you have a shop vac with an automatic outlet and share it amongst a number of tools during the one session, bridge the two with a power outlet plugged into the dusty.
Image


You can then plug each of the power tools into a spare outlet and give them all access to the dusty without dancing the power point shuffle.
Image


No matter which tool you turn on, it will automatically activates the dusty… just don't forget to switch
the hose… and watch both ends ends if you have more than one hose feeding the one dusty.
Image


I use the same concept sharing the same dusty between my 2 mitre saws,
Image


with a gentle reminder sign to get my act together,
Image


which is toggled depending on the status of each saw. This sign is a very recent addition making clean up less arduous chore…

MY other (central) dusty also has provision for sharing, albeit loosely attached, as it is used to vacuum the full workshop and occasionally used for tools,
Image


If you already perform this practice, there's no need to read this article.
Yep! Tats worth a post.
 

Attachments

Sharing shop vacs between power tools.

Boys and Girls,

While this may be old hat to most, I've had enough friends (another one today/yesterday) saying that it's a good idea, so I thought it might be worth a shout out.

If you have a shop vac with an automatic outlet and share it amongst a number of tools during the one session, bridge the two with a power outlet plugged into the dusty.
Image


You can then plug each of the power tools into a spare outlet and give them all access to the dusty without dancing the power point shuffle.
Image


No matter which tool you turn on, it will automatically activates the dusty… just don't forget to switch
the hose… and watch both ends ends if you have more than one hose feeding the one dusty.
Image


I use the same concept sharing the same dusty between my 2 mitre saws,
Image


with a gentle reminder sign to get my act together,
Image


which is toggled depending on the status of each saw. This sign is a very recent addition making clean up less arduous chore…

MY other (central) dusty also has provision for sharing, albeit loosely attached, as it is used to vacuum the full workshop and occasionally used for tools,
Image


If you already perform this practice, there's no need to read this article.
I have to do this … sit down and figure it out …. right now I'm just using my lungs :<((((
 

Attachments

Sharing shop vacs between power tools.

Boys and Girls,

While this may be old hat to most, I've had enough friends (another one today/yesterday) saying that it's a good idea, so I thought it might be worth a shout out.

If you have a shop vac with an automatic outlet and share it amongst a number of tools during the one session, bridge the two with a power outlet plugged into the dusty.
Image


You can then plug each of the power tools into a spare outlet and give them all access to the dusty without dancing the power point shuffle.
Image


No matter which tool you turn on, it will automatically activates the dusty… just don't forget to switch
the hose… and watch both ends ends if you have more than one hose feeding the one dusty.
Image


I use the same concept sharing the same dusty between my 2 mitre saws,
Image


with a gentle reminder sign to get my act together,
Image


which is toggled depending on the status of each saw. This sign is a very recent addition making clean up less arduous chore…

MY other (central) dusty also has provision for sharing, albeit loosely attached, as it is used to vacuum the full workshop and occasionally used for tools,
Image


If you already perform this practice, there's no need to read this article.
Well thought out and executed.

What exactly is a "dusty"?
I have what's probably a good guess, but thought I would make sure I know by asking.
Thanks.
 

Attachments

Sharing shop vacs between power tools.

Boys and Girls,

While this may be old hat to most, I've had enough friends (another one today/yesterday) saying that it's a good idea, so I thought it might be worth a shout out.

If you have a shop vac with an automatic outlet and share it amongst a number of tools during the one session, bridge the two with a power outlet plugged into the dusty.
Image


You can then plug each of the power tools into a spare outlet and give them all access to the dusty without dancing the power point shuffle.
Image


No matter which tool you turn on, it will automatically activates the dusty… just don't forget to switch
the hose… and watch both ends ends if you have more than one hose feeding the one dusty.
Image


I use the same concept sharing the same dusty between my 2 mitre saws,
Image


with a gentle reminder sign to get my act together,
Image


which is toggled depending on the status of each saw. This sign is a very recent addition making clean up less arduous chore…

MY other (central) dusty also has provision for sharing, albeit loosely attached, as it is used to vacuum the full workshop and occasionally used for tools,
Image


If you already perform this practice, there's no need to read this article.
Wife just got me a set up the other day. Now comes the hard part, I have to get off my big butt and instal it.( Damn, I could not get her to do That part.)
 

Attachments

Sharing shop vacs between power tools.

Boys and Girls,

While this may be old hat to most, I've had enough friends (another one today/yesterday) saying that it's a good idea, so I thought it might be worth a shout out.

If you have a shop vac with an automatic outlet and share it amongst a number of tools during the one session, bridge the two with a power outlet plugged into the dusty.
Image


You can then plug each of the power tools into a spare outlet and give them all access to the dusty without dancing the power point shuffle.
Image


No matter which tool you turn on, it will automatically activates the dusty… just don't forget to switch
the hose… and watch both ends ends if you have more than one hose feeding the one dusty.
Image


I use the same concept sharing the same dusty between my 2 mitre saws,
Image


with a gentle reminder sign to get my act together,
Image


which is toggled depending on the status of each saw. This sign is a very recent addition making clean up less arduous chore…

MY other (central) dusty also has provision for sharing, albeit loosely attached, as it is used to vacuum the full workshop and occasionally used for tools,
Image


If you already perform this practice, there's no need to read this article.
What exactly is a "dusty"?
I have what s probably a good guess, but thought I would make sure I know by asking.
Thanks.

- jimintx
Agreed Jim, what the heck is a dusty? A cute name for a dust deputy? What???!!! Of course, telling me there is no need to read this article at the end of the article kind of misses the point, doesn't it. Good thing there was some great stuff here!!!
 

Attachments

Discussion starter · #73 ·
Sharing shop vacs between power tools.

Boys and Girls,

While this may be old hat to most, I've had enough friends (another one today/yesterday) saying that it's a good idea, so I thought it might be worth a shout out.

If you have a shop vac with an automatic outlet and share it amongst a number of tools during the one session, bridge the two with a power outlet plugged into the dusty.
Image


You can then plug each of the power tools into a spare outlet and give them all access to the dusty without dancing the power point shuffle.
Image


No matter which tool you turn on, it will automatically activates the dusty… just don't forget to switch
the hose… and watch both ends ends if you have more than one hose feeding the one dusty.
Image


I use the same concept sharing the same dusty between my 2 mitre saws,
Image


with a gentle reminder sign to get my act together,
Image


which is toggled depending on the status of each saw. This sign is a very recent addition making clean up less arduous chore…

MY other (central) dusty also has provision for sharing, albeit loosely attached, as it is used to vacuum the full workshop and occasionally used for tools,
Image


If you already perform this practice, there's no need to read this article.
…. right now I m just using my lungs :<((((
- GR8HUNTER
At least there's no bags to change… most shop vacs have only 1 bag, while you are gifted with two lungs!

What exactly is a "dusty"?
Sorry jimintx and Dwain, You are 90% half right. I do have a Dust Deputy front ending all (most) of my serious dust collectors which may have endeared me to generically refer to all my various dust collection units as "dusty" (even the broom)... I have enough Deputys to form a fair sized posse…

In the past I have referred to my dust collectors as "DD" but that was misleading and Oneida threatened to sue me… just kidding (about being sued).
Wife just got me a set up the other day. Now comes the hard part, I have to get off my big butt and instal it.( Damn, I could not get her to do That part.)

- Orvile Baker
Hey OB-1,That is one mean lady… forget her birthday/anniversary?

Take it from me, dust extraction is the second most important equipment in a workshop… just in the shadow of a generous, toll free beer fridge!
 

Attachments

Sharing shop vacs between power tools.

Boys and Girls,

While this may be old hat to most, I've had enough friends (another one today/yesterday) saying that it's a good idea, so I thought it might be worth a shout out.

If you have a shop vac with an automatic outlet and share it amongst a number of tools during the one session, bridge the two with a power outlet plugged into the dusty.
Image


You can then plug each of the power tools into a spare outlet and give them all access to the dusty without dancing the power point shuffle.
Image


No matter which tool you turn on, it will automatically activates the dusty… just don't forget to switch
the hose… and watch both ends ends if you have more than one hose feeding the one dusty.
Image


I use the same concept sharing the same dusty between my 2 mitre saws,
Image


with a gentle reminder sign to get my act together,
Image


which is toggled depending on the status of each saw. This sign is a very recent addition making clean up less arduous chore…

MY other (central) dusty also has provision for sharing, albeit loosely attached, as it is used to vacuum the full workshop and occasionally used for tools,
Image


If you already perform this practice, there's no need to read this article.
Come on guys everybody should know its a Slim thing that plays music in the workshop!

Now about that toll free beer fridge thats the next dilemma? ... and wait there is more!
Yep I saw the last liner too! ... no doubt this was LBD at his Komputer after the post

Image


He is a fern king funny boy
 

Attachments

Discussion starter · #75 ·
Sharing shop vacs between power tools.

Boys and Girls,

While this may be old hat to most, I've had enough friends (another one today/yesterday) saying that it's a good idea, so I thought it might be worth a shout out.

If you have a shop vac with an automatic outlet and share it amongst a number of tools during the one session, bridge the two with a power outlet plugged into the dusty.
Image


You can then plug each of the power tools into a spare outlet and give them all access to the dusty without dancing the power point shuffle.
Image


No matter which tool you turn on, it will automatically activates the dusty… just don't forget to switch
the hose… and watch both ends ends if you have more than one hose feeding the one dusty.
Image


I use the same concept sharing the same dusty between my 2 mitre saws,
Image


with a gentle reminder sign to get my act together,
Image


which is toggled depending on the status of each saw. This sign is a very recent addition making clean up less arduous chore…

MY other (central) dusty also has provision for sharing, albeit loosely attached, as it is used to vacuum the full workshop and occasionally used for tools,
Image


If you already perform this practice, there's no need to read this article.
If only the Slim (in shape… not presence) was me!

.... that toll free beer fridge thats the next dilemma? .....
- robscastle
NOPE! You forgot to mention generous (as in size)... YEP! Gonna need a bigger workshop.
 

Attachments

Sharing shop vacs between power tools.

Boys and Girls,

While this may be old hat to most, I've had enough friends (another one today/yesterday) saying that it's a good idea, so I thought it might be worth a shout out.

If you have a shop vac with an automatic outlet and share it amongst a number of tools during the one session, bridge the two with a power outlet plugged into the dusty.
Image


You can then plug each of the power tools into a spare outlet and give them all access to the dusty without dancing the power point shuffle.
Image


No matter which tool you turn on, it will automatically activates the dusty… just don't forget to switch
the hose… and watch both ends ends if you have more than one hose feeding the one dusty.
Image


I use the same concept sharing the same dusty between my 2 mitre saws,
Image


with a gentle reminder sign to get my act together,
Image


which is toggled depending on the status of each saw. This sign is a very recent addition making clean up less arduous chore…

MY other (central) dusty also has provision for sharing, albeit loosely attached, as it is used to vacuum the full workshop and occasionally used for tools,
Image


If you already perform this practice, there's no need to read this article.
OK I give up … whats it all about?
 

Attachments

Discussion starter · #77 ·
Sharing shop vacs between power tools.

Boys and Girls,

While this may be old hat to most, I've had enough friends (another one today/yesterday) saying that it's a good idea, so I thought it might be worth a shout out.

If you have a shop vac with an automatic outlet and share it amongst a number of tools during the one session, bridge the two with a power outlet plugged into the dusty.
Image


You can then plug each of the power tools into a spare outlet and give them all access to the dusty without dancing the power point shuffle.
Image


No matter which tool you turn on, it will automatically activates the dusty… just don't forget to switch
the hose… and watch both ends ends if you have more than one hose feeding the one dusty.
Image


I use the same concept sharing the same dusty between my 2 mitre saws,
Image


with a gentle reminder sign to get my act together,
Image


which is toggled depending on the status of each saw. This sign is a very recent addition making clean up less arduous chore…

MY other (central) dusty also has provision for sharing, albeit loosely attached, as it is used to vacuum the full workshop and occasionally used for tools,
Image


If you already perform this practice, there's no need to read this article.
OK I give up … whats it all about?

- robscastle
The fridge is not the dilema… It's getting a workshop big enough to fit a decent sized fridge, is.

And if you refer to Dusty… I wish I was Slim (gutless) and still alive.
 

Attachments

Sharing shop vacs between power tools.

Boys and Girls,

While this may be old hat to most, I've had enough friends (another one today/yesterday) saying that it's a good idea, so I thought it might be worth a shout out.

If you have a shop vac with an automatic outlet and share it amongst a number of tools during the one session, bridge the two with a power outlet plugged into the dusty.
Image


You can then plug each of the power tools into a spare outlet and give them all access to the dusty without dancing the power point shuffle.
Image


No matter which tool you turn on, it will automatically activates the dusty… just don't forget to switch
the hose… and watch both ends ends if you have more than one hose feeding the one dusty.
Image


I use the same concept sharing the same dusty between my 2 mitre saws,
Image


with a gentle reminder sign to get my act together,
Image


which is toggled depending on the status of each saw. This sign is a very recent addition making clean up less arduous chore…

MY other (central) dusty also has provision for sharing, albeit loosely attached, as it is used to vacuum the full workshop and occasionally used for tools,
Image


If you already perform this practice, there's no need to read this article.
Thats the Man !
Slim Dusty, AO MBE Australian country music singer-songwriter, guitarist and producer, who was an Australian cultural icon and one of the country's most awarded stars

Image
 

Attachments

Discussion starter · #79 ·
Sharing shop vacs between power tools.

Boys and Girls,

While this may be old hat to most, I've had enough friends (another one today/yesterday) saying that it's a good idea, so I thought it might be worth a shout out.

If you have a shop vac with an automatic outlet and share it amongst a number of tools during the one session, bridge the two with a power outlet plugged into the dusty.
Image


You can then plug each of the power tools into a spare outlet and give them all access to the dusty without dancing the power point shuffle.
Image


No matter which tool you turn on, it will automatically activates the dusty… just don't forget to switch
the hose… and watch both ends ends if you have more than one hose feeding the one dusty.
Image


I use the same concept sharing the same dusty between my 2 mitre saws,
Image


with a gentle reminder sign to get my act together,
Image


which is toggled depending on the status of each saw. This sign is a very recent addition making clean up less arduous chore…

MY other (central) dusty also has provision for sharing, albeit loosely attached, as it is used to vacuum the full workshop and occasionally used for tools,
Image


If you already perform this practice, there's no need to read this article.
And he was a duck lover!
 

Attachments

Sharing shop vacs between power tools.

Boys and Girls,

While this may be old hat to most, I've had enough friends (another one today/yesterday) saying that it's a good idea, so I thought it might be worth a shout out.

If you have a shop vac with an automatic outlet and share it amongst a number of tools during the one session, bridge the two with a power outlet plugged into the dusty.
Image


You can then plug each of the power tools into a spare outlet and give them all access to the dusty without dancing the power point shuffle.
Image


No matter which tool you turn on, it will automatically activates the dusty… just don't forget to switch
the hose… and watch both ends ends if you have more than one hose feeding the one dusty.
Image


I use the same concept sharing the same dusty between my 2 mitre saws,
Image


with a gentle reminder sign to get my act together,
Image


which is toggled depending on the status of each saw. This sign is a very recent addition making clean up less arduous chore…

MY other (central) dusty also has provision for sharing, albeit loosely attached, as it is used to vacuum the full workshop and occasionally used for tools,
Image


If you already perform this practice, there's no need to read this article.
Nice tip, thanks! What kind of automatic outlet are you using? Does it sense power draw on a socket and turns on another socket (the one vacuum is on)?

I wonder if this approach can be used with something like power actuating blast gates… To complete the laziness routine, so to speak. :)

Regards,
Alex.
 

Attachments

61 - 80 of 543 Posts