LumberJocks Woodworking Forum banner
21 - 40 of 543 Posts
Discussion starter · #21 ·
3D Printing in the Workshop

While this topic doesn't strictly fit into the guidelines of timber product, it does incorporate the processing of said prerequisite, however, to err on the side of veto wizards I decided to blog instead of projecting it.

Image


Image


Image


Image


Image


Image


We need to set the mood!

Once upon a time there was this aging geriatric, living in Churchill Australia that was getting paranoid about dust inhalation into his alcohol infested body. He chose to purchase a Shop-Vac and attached a few tools to with the deft application of copious reels of duct tape… and all was good. As the tools began to breed like rabbits, the old man realised that he may need to invest in another Shop-Vac (or look alike). He purchased a 2.5" "shop-vac" rated the same hose dimension as his previous one and was hoping for integrated compliance. Glory be… why is 2.5" in "Shop-Vac" speak different in size to the 2.5" in "Hitachi" speak. More duct tape and frustration attempting to integrate… and all was NOT good.

I'm sure this is not a rare tale of Robinson Crusoe (mis-located in Churchill), as I am certain most of us can relate to this chagrin.

Whilst pursuing the gratification of attending one of our local wood shows, several years ago, there was this revolutionary stand selling 3D printers. While the interest was huge, the sales was little huge. Somehow I had the insight to contemplate the use of 3D printed items in a workshop and I bit the bullet, fired a few shots and proceeded to procure one. much to the missus's sacrifice of another pair of shoes… she has expensive shoes (I dare not say big feet). My immediate though was about shop-vac integration through customised couplings. Well I was not disappointed.

I now do not fear dust extraction compatibility with any tool I possess and at times scrap the proprietary supplied adapter for a shop made (3D printed) customised one.

While 3D printed paraphernalia can be used throughout the house I have tried to limit my contribution to items I have created for the workshop. Rather than clutter this blog with a myriad of photographic illustrations, I have created the following post-Christmas "STOCKING FILLER" to highlight what I have blundered across for use in the workshop (be warned… there are 90+ pickies in the PDF… guaranteed cure for insomnia).

Now for a touch of woodworking. You can (as I have) create many of these items on a lathe, however, repeatability is not a push button on that skew chisel. I can churn off as many 3D's as I like and all the same… I often disguise some with different colours just to confuse myself.

I hope I can get some people's creative juices flowing, as not all workshop creations are made of wood… especially regarding workshop aids.

Thanks for taking the time to get this far!
... way over my head unfortunately.

- robscastle
Shouldn't be if you had a "loving" daughter.

Please… any ladies out there that were once a daughter, please do not reach for the rabbi knife… I love my daughter… it's her parent I blame.
 

Attachments

3D Printing in the Workshop

While this topic doesn't strictly fit into the guidelines of timber product, it does incorporate the processing of said prerequisite, however, to err on the side of veto wizards I decided to blog instead of projecting it.

Image


Image


Image


Image


Image


Image


We need to set the mood!

Once upon a time there was this aging geriatric, living in Churchill Australia that was getting paranoid about dust inhalation into his alcohol infested body. He chose to purchase a Shop-Vac and attached a few tools to with the deft application of copious reels of duct tape… and all was good. As the tools began to breed like rabbits, the old man realised that he may need to invest in another Shop-Vac (or look alike). He purchased a 2.5" "shop-vac" rated the same hose dimension as his previous one and was hoping for integrated compliance. Glory be… why is 2.5" in "Shop-Vac" speak different in size to the 2.5" in "Hitachi" speak. More duct tape and frustration attempting to integrate… and all was NOT good.

I'm sure this is not a rare tale of Robinson Crusoe (mis-located in Churchill), as I am certain most of us can relate to this chagrin.

Whilst pursuing the gratification of attending one of our local wood shows, several years ago, there was this revolutionary stand selling 3D printers. While the interest was huge, the sales was little huge. Somehow I had the insight to contemplate the use of 3D printed items in a workshop and I bit the bullet, fired a few shots and proceeded to procure one. much to the missus's sacrifice of another pair of shoes… she has expensive shoes (I dare not say big feet). My immediate though was about shop-vac integration through customised couplings. Well I was not disappointed.

I now do not fear dust extraction compatibility with any tool I possess and at times scrap the proprietary supplied adapter for a shop made (3D printed) customised one.

While 3D printed paraphernalia can be used throughout the house I have tried to limit my contribution to items I have created for the workshop. Rather than clutter this blog with a myriad of photographic illustrations, I have created the following post-Christmas "STOCKING FILLER" to highlight what I have blundered across for use in the workshop (be warned… there are 90+ pickies in the PDF… guaranteed cure for insomnia).

Now for a touch of woodworking. You can (as I have) create many of these items on a lathe, however, repeatability is not a push button on that skew chisel. I can churn off as many 3D's as I like and all the same… I often disguise some with different colours just to confuse myself.

I hope I can get some people's creative juices flowing, as not all workshop creations are made of wood… especially regarding workshop aids.

Thanks for taking the time to get this far!
OMG I just realised what that was all about,... too late for me, ...and no such luck with the loving daughter

And the duck tales continue
 

Attachments

3D Printing in the Workshop

While this topic doesn't strictly fit into the guidelines of timber product, it does incorporate the processing of said prerequisite, however, to err on the side of veto wizards I decided to blog instead of projecting it.

Image


Image


Image


Image


Image


Image


We need to set the mood!

Once upon a time there was this aging geriatric, living in Churchill Australia that was getting paranoid about dust inhalation into his alcohol infested body. He chose to purchase a Shop-Vac and attached a few tools to with the deft application of copious reels of duct tape… and all was good. As the tools began to breed like rabbits, the old man realised that he may need to invest in another Shop-Vac (or look alike). He purchased a 2.5" "shop-vac" rated the same hose dimension as his previous one and was hoping for integrated compliance. Glory be… why is 2.5" in "Shop-Vac" speak different in size to the 2.5" in "Hitachi" speak. More duct tape and frustration attempting to integrate… and all was NOT good.

I'm sure this is not a rare tale of Robinson Crusoe (mis-located in Churchill), as I am certain most of us can relate to this chagrin.

Whilst pursuing the gratification of attending one of our local wood shows, several years ago, there was this revolutionary stand selling 3D printers. While the interest was huge, the sales was little huge. Somehow I had the insight to contemplate the use of 3D printed items in a workshop and I bit the bullet, fired a few shots and proceeded to procure one. much to the missus's sacrifice of another pair of shoes… she has expensive shoes (I dare not say big feet). My immediate though was about shop-vac integration through customised couplings. Well I was not disappointed.

I now do not fear dust extraction compatibility with any tool I possess and at times scrap the proprietary supplied adapter for a shop made (3D printed) customised one.

While 3D printed paraphernalia can be used throughout the house I have tried to limit my contribution to items I have created for the workshop. Rather than clutter this blog with a myriad of photographic illustrations, I have created the following post-Christmas "STOCKING FILLER" to highlight what I have blundered across for use in the workshop (be warned… there are 90+ pickies in the PDF… guaranteed cure for insomnia).

Now for a touch of woodworking. You can (as I have) create many of these items on a lathe, however, repeatability is not a push button on that skew chisel. I can churn off as many 3D's as I like and all the same… I often disguise some with different colours just to confuse myself.

I hope I can get some people's creative juices flowing, as not all workshop creations are made of wood… especially regarding workshop aids.

Thanks for taking the time to get this far!
Nice blog LittleBlackDuck. I received my first printer as a birthday gift a few months ago. As you already noted, 3D Printers are incredibly useful to a woodworker. Many fasteners, tools and fixtures can be created at the push of a button and a fraction of the cost. All it takes is a little time and some plastic filament. Even if you are not good with 3D CAD design, the Thingiverse.com (among other websites) has hundreds of premade designs that can be downloaded and printed on your machine. The Thingiverse.com website is somewhat akin to Lumberjocks.com except it is for 3D Printer enthusiasts. Take a look at the link. You may wonder how you ever lived without a 3D printer.

Here is an dremel attachment made by Frankenwaeldler on Thingiverse.com:

Image
 

Attachments

3D Printing in the Workshop

While this topic doesn't strictly fit into the guidelines of timber product, it does incorporate the processing of said prerequisite, however, to err on the side of veto wizards I decided to blog instead of projecting it.

Image


Image


Image


Image


Image


Image


We need to set the mood!

Once upon a time there was this aging geriatric, living in Churchill Australia that was getting paranoid about dust inhalation into his alcohol infested body. He chose to purchase a Shop-Vac and attached a few tools to with the deft application of copious reels of duct tape… and all was good. As the tools began to breed like rabbits, the old man realised that he may need to invest in another Shop-Vac (or look alike). He purchased a 2.5" "shop-vac" rated the same hose dimension as his previous one and was hoping for integrated compliance. Glory be… why is 2.5" in "Shop-Vac" speak different in size to the 2.5" in "Hitachi" speak. More duct tape and frustration attempting to integrate… and all was NOT good.

I'm sure this is not a rare tale of Robinson Crusoe (mis-located in Churchill), as I am certain most of us can relate to this chagrin.

Whilst pursuing the gratification of attending one of our local wood shows, several years ago, there was this revolutionary stand selling 3D printers. While the interest was huge, the sales was little huge. Somehow I had the insight to contemplate the use of 3D printed items in a workshop and I bit the bullet, fired a few shots and proceeded to procure one. much to the missus's sacrifice of another pair of shoes… she has expensive shoes (I dare not say big feet). My immediate though was about shop-vac integration through customised couplings. Well I was not disappointed.

I now do not fear dust extraction compatibility with any tool I possess and at times scrap the proprietary supplied adapter for a shop made (3D printed) customised one.

While 3D printed paraphernalia can be used throughout the house I have tried to limit my contribution to items I have created for the workshop. Rather than clutter this blog with a myriad of photographic illustrations, I have created the following post-Christmas "STOCKING FILLER" to highlight what I have blundered across for use in the workshop (be warned… there are 90+ pickies in the PDF… guaranteed cure for insomnia).

Now for a touch of woodworking. You can (as I have) create many of these items on a lathe, however, repeatability is not a push button on that skew chisel. I can churn off as many 3D's as I like and all the same… I often disguise some with different colours just to confuse myself.

I hope I can get some people's creative juices flowing, as not all workshop creations are made of wood… especially regarding workshop aids.

Thanks for taking the time to get this far!
Duck, you can start a business just selling your stocking stuffers.
 

Attachments

Discussion starter · #25 ·
3D Printing in the Workshop

While this topic doesn't strictly fit into the guidelines of timber product, it does incorporate the processing of said prerequisite, however, to err on the side of veto wizards I decided to blog instead of projecting it.

Image


Image


Image


Image


Image


Image


We need to set the mood!

Once upon a time there was this aging geriatric, living in Churchill Australia that was getting paranoid about dust inhalation into his alcohol infested body. He chose to purchase a Shop-Vac and attached a few tools to with the deft application of copious reels of duct tape… and all was good. As the tools began to breed like rabbits, the old man realised that he may need to invest in another Shop-Vac (or look alike). He purchased a 2.5" "shop-vac" rated the same hose dimension as his previous one and was hoping for integrated compliance. Glory be… why is 2.5" in "Shop-Vac" speak different in size to the 2.5" in "Hitachi" speak. More duct tape and frustration attempting to integrate… and all was NOT good.

I'm sure this is not a rare tale of Robinson Crusoe (mis-located in Churchill), as I am certain most of us can relate to this chagrin.

Whilst pursuing the gratification of attending one of our local wood shows, several years ago, there was this revolutionary stand selling 3D printers. While the interest was huge, the sales was little huge. Somehow I had the insight to contemplate the use of 3D printed items in a workshop and I bit the bullet, fired a few shots and proceeded to procure one. much to the missus's sacrifice of another pair of shoes… she has expensive shoes (I dare not say big feet). My immediate though was about shop-vac integration through customised couplings. Well I was not disappointed.

I now do not fear dust extraction compatibility with any tool I possess and at times scrap the proprietary supplied adapter for a shop made (3D printed) customised one.

While 3D printed paraphernalia can be used throughout the house I have tried to limit my contribution to items I have created for the workshop. Rather than clutter this blog with a myriad of photographic illustrations, I have created the following post-Christmas "STOCKING FILLER" to highlight what I have blundered across for use in the workshop (be warned… there are 90+ pickies in the PDF… guaranteed cure for insomnia).

Now for a touch of woodworking. You can (as I have) create many of these items on a lathe, however, repeatability is not a push button on that skew chisel. I can churn off as many 3D's as I like and all the same… I often disguise some with different colours just to confuse myself.

I hope I can get some people's creative juices flowing, as not all workshop creations are made of wood… especially regarding workshop aids.

Thanks for taking the time to get this far!
..... I received my first printer as a birthday gift…. !

- mochasatin
Damn mochachino-in-classy-linen. I now know why it's good to get old… another birthday.

I love to stand on my soapbox (increases my 4' 15 1/2" height - 5' 3.5" in metric) and preach to the converted… lies are easie0r to remember. I love to tout the benefits of a 3D printer. Not every ones cuppa-tea (personally I prefer coffee) but it is now becoming a valid Wikipedia segment.

Have managed to come to "incestual" terms with Thingiverse. I have plagiarised quite a few patterns but "modesty" has prevented me from reverse APBing them (my bad - a lot of my designs [pictures] can be gleamed in my "STOCKING FILLER")... its lengthy but inclusive!

PS. I SketchUP… what "complexity" do you embrace?
 

Attachments

3D Printing in the Workshop

While this topic doesn't strictly fit into the guidelines of timber product, it does incorporate the processing of said prerequisite, however, to err on the side of veto wizards I decided to blog instead of projecting it.

Image


Image


Image


Image


Image


Image


We need to set the mood!

Once upon a time there was this aging geriatric, living in Churchill Australia that was getting paranoid about dust inhalation into his alcohol infested body. He chose to purchase a Shop-Vac and attached a few tools to with the deft application of copious reels of duct tape… and all was good. As the tools began to breed like rabbits, the old man realised that he may need to invest in another Shop-Vac (or look alike). He purchased a 2.5" "shop-vac" rated the same hose dimension as his previous one and was hoping for integrated compliance. Glory be… why is 2.5" in "Shop-Vac" speak different in size to the 2.5" in "Hitachi" speak. More duct tape and frustration attempting to integrate… and all was NOT good.

I'm sure this is not a rare tale of Robinson Crusoe (mis-located in Churchill), as I am certain most of us can relate to this chagrin.

Whilst pursuing the gratification of attending one of our local wood shows, several years ago, there was this revolutionary stand selling 3D printers. While the interest was huge, the sales was little huge. Somehow I had the insight to contemplate the use of 3D printed items in a workshop and I bit the bullet, fired a few shots and proceeded to procure one. much to the missus's sacrifice of another pair of shoes… she has expensive shoes (I dare not say big feet). My immediate though was about shop-vac integration through customised couplings. Well I was not disappointed.

I now do not fear dust extraction compatibility with any tool I possess and at times scrap the proprietary supplied adapter for a shop made (3D printed) customised one.

While 3D printed paraphernalia can be used throughout the house I have tried to limit my contribution to items I have created for the workshop. Rather than clutter this blog with a myriad of photographic illustrations, I have created the following post-Christmas "STOCKING FILLER" to highlight what I have blundered across for use in the workshop (be warned… there are 90+ pickies in the PDF… guaranteed cure for insomnia).

Now for a touch of woodworking. You can (as I have) create many of these items on a lathe, however, repeatability is not a push button on that skew chisel. I can churn off as many 3D's as I like and all the same… I often disguise some with different colours just to confuse myself.

I hope I can get some people's creative juices flowing, as not all workshop creations are made of wood… especially regarding workshop aids.

Thanks for taking the time to get this far!
Hi LBD,

I stumbled across your blog from another 3D printer post. I picked up a 3D printer last year (Ender 5) and have always been frustrated with the non-standard duct collection fittings. Thanks for the idea, now I can sell my duct tape stocks and simply print my own adapters.
 

Attachments

Discussion starter · #27 ·
3D Printing in the Workshop

While this topic doesn't strictly fit into the guidelines of timber product, it does incorporate the processing of said prerequisite, however, to err on the side of veto wizards I decided to blog instead of projecting it.

Image


Image


Image


Image


Image


Image


We need to set the mood!

Once upon a time there was this aging geriatric, living in Churchill Australia that was getting paranoid about dust inhalation into his alcohol infested body. He chose to purchase a Shop-Vac and attached a few tools to with the deft application of copious reels of duct tape… and all was good. As the tools began to breed like rabbits, the old man realised that he may need to invest in another Shop-Vac (or look alike). He purchased a 2.5" "shop-vac" rated the same hose dimension as his previous one and was hoping for integrated compliance. Glory be… why is 2.5" in "Shop-Vac" speak different in size to the 2.5" in "Hitachi" speak. More duct tape and frustration attempting to integrate… and all was NOT good.

I'm sure this is not a rare tale of Robinson Crusoe (mis-located in Churchill), as I am certain most of us can relate to this chagrin.

Whilst pursuing the gratification of attending one of our local wood shows, several years ago, there was this revolutionary stand selling 3D printers. While the interest was huge, the sales was little huge. Somehow I had the insight to contemplate the use of 3D printed items in a workshop and I bit the bullet, fired a few shots and proceeded to procure one. much to the missus's sacrifice of another pair of shoes… she has expensive shoes (I dare not say big feet). My immediate though was about shop-vac integration through customised couplings. Well I was not disappointed.

I now do not fear dust extraction compatibility with any tool I possess and at times scrap the proprietary supplied adapter for a shop made (3D printed) customised one.

While 3D printed paraphernalia can be used throughout the house I have tried to limit my contribution to items I have created for the workshop. Rather than clutter this blog with a myriad of photographic illustrations, I have created the following post-Christmas "STOCKING FILLER" to highlight what I have blundered across for use in the workshop (be warned… there are 90+ pickies in the PDF… guaranteed cure for insomnia).

Now for a touch of woodworking. You can (as I have) create many of these items on a lathe, however, repeatability is not a push button on that skew chisel. I can churn off as many 3D's as I like and all the same… I often disguise some with different colours just to confuse myself.

I hope I can get some people's creative juices flowing, as not all workshop creations are made of wood… especially regarding workshop aids.

Thanks for taking the time to get this far!
... Thanks for the idea, now I can sell my duct tape stocks and simply print my own adapters.
- JimYoung
Glad it gave you ideas JY. Not trying to teach you how to suck eggs, just remember to taper it slightly, only about 1-2mm along a 50-60mm length for that better fit.
You'll find that you can now make all your tools so incestuous that you'll never know who's coupled with whom.
 

Attachments

3D Printing in the Workshop

While this topic doesn't strictly fit into the guidelines of timber product, it does incorporate the processing of said prerequisite, however, to err on the side of veto wizards I decided to blog instead of projecting it.

Image


Image


Image


Image


Image


Image


We need to set the mood!

Once upon a time there was this aging geriatric, living in Churchill Australia that was getting paranoid about dust inhalation into his alcohol infested body. He chose to purchase a Shop-Vac and attached a few tools to with the deft application of copious reels of duct tape… and all was good. As the tools began to breed like rabbits, the old man realised that he may need to invest in another Shop-Vac (or look alike). He purchased a 2.5" "shop-vac" rated the same hose dimension as his previous one and was hoping for integrated compliance. Glory be… why is 2.5" in "Shop-Vac" speak different in size to the 2.5" in "Hitachi" speak. More duct tape and frustration attempting to integrate… and all was NOT good.

I'm sure this is not a rare tale of Robinson Crusoe (mis-located in Churchill), as I am certain most of us can relate to this chagrin.

Whilst pursuing the gratification of attending one of our local wood shows, several years ago, there was this revolutionary stand selling 3D printers. While the interest was huge, the sales was little huge. Somehow I had the insight to contemplate the use of 3D printed items in a workshop and I bit the bullet, fired a few shots and proceeded to procure one. much to the missus's sacrifice of another pair of shoes… she has expensive shoes (I dare not say big feet). My immediate though was about shop-vac integration through customised couplings. Well I was not disappointed.

I now do not fear dust extraction compatibility with any tool I possess and at times scrap the proprietary supplied adapter for a shop made (3D printed) customised one.

While 3D printed paraphernalia can be used throughout the house I have tried to limit my contribution to items I have created for the workshop. Rather than clutter this blog with a myriad of photographic illustrations, I have created the following post-Christmas "STOCKING FILLER" to highlight what I have blundered across for use in the workshop (be warned… there are 90+ pickies in the PDF… guaranteed cure for insomnia).

Now for a touch of woodworking. You can (as I have) create many of these items on a lathe, however, repeatability is not a push button on that skew chisel. I can churn off as many 3D's as I like and all the same… I often disguise some with different colours just to confuse myself.

I hope I can get some people's creative juices flowing, as not all workshop creations are made of wood… especially regarding workshop aids.

Thanks for taking the time to get this far!
how the hell did i miss this,even papadan was on it?
 

Attachments

Discussion starter · #29 ·
3D Printing in the Workshop

While this topic doesn't strictly fit into the guidelines of timber product, it does incorporate the processing of said prerequisite, however, to err on the side of veto wizards I decided to blog instead of projecting it.

Image


Image


Image


Image


Image


Image


We need to set the mood!

Once upon a time there was this aging geriatric, living in Churchill Australia that was getting paranoid about dust inhalation into his alcohol infested body. He chose to purchase a Shop-Vac and attached a few tools to with the deft application of copious reels of duct tape… and all was good. As the tools began to breed like rabbits, the old man realised that he may need to invest in another Shop-Vac (or look alike). He purchased a 2.5" "shop-vac" rated the same hose dimension as his previous one and was hoping for integrated compliance. Glory be… why is 2.5" in "Shop-Vac" speak different in size to the 2.5" in "Hitachi" speak. More duct tape and frustration attempting to integrate… and all was NOT good.

I'm sure this is not a rare tale of Robinson Crusoe (mis-located in Churchill), as I am certain most of us can relate to this chagrin.

Whilst pursuing the gratification of attending one of our local wood shows, several years ago, there was this revolutionary stand selling 3D printers. While the interest was huge, the sales was little huge. Somehow I had the insight to contemplate the use of 3D printed items in a workshop and I bit the bullet, fired a few shots and proceeded to procure one. much to the missus's sacrifice of another pair of shoes… she has expensive shoes (I dare not say big feet). My immediate though was about shop-vac integration through customised couplings. Well I was not disappointed.

I now do not fear dust extraction compatibility with any tool I possess and at times scrap the proprietary supplied adapter for a shop made (3D printed) customised one.

While 3D printed paraphernalia can be used throughout the house I have tried to limit my contribution to items I have created for the workshop. Rather than clutter this blog with a myriad of photographic illustrations, I have created the following post-Christmas "STOCKING FILLER" to highlight what I have blundered across for use in the workshop (be warned… there are 90+ pickies in the PDF… guaranteed cure for insomnia).

Now for a touch of woodworking. You can (as I have) create many of these items on a lathe, however, repeatability is not a push button on that skew chisel. I can churn off as many 3D's as I like and all the same… I often disguise some with different colours just to confuse myself.

I hope I can get some people's creative juices flowing, as not all workshop creations are made of wood… especially regarding workshop aids.

Thanks for taking the time to get this far!
how the hell did i miss this,even papadan was on it?
- pottz
********************e… I thought I had you blocked, don't wan't you getting ideas and printing a couple of genitalia extensions.
 

Attachments

Discussion starter · #30 ·
Metal bolts in timber threads.

Boys and Girls, if you are only interested in bargain basement solutions, please jump in the lift and press "G" for "Going Down to the bargain basement", exit the lift and go home without reading further.

Image


I am here to readily assist you in parting with your hard earned shekels without remorse, and if you are interested in a better solution (at a cost), read on. No… I don't have shares in the product and the retailer is not related to the "waterfowl family Anatidae" (Ducks 2u).

In the past I have occasionally used metal bolts in timber by cutting the timber thread using an appropriate tap from a low end tap and die set.
Image

I labelled the oft used taps so I didn't have to think each time,
Image


Then one day when I was trying to find that elusive imperial bit of hardware in our local dedicated fasteners retailer, I saw a set of taps and associated drill bits designed to handle our standard metric hardware and advertised as specifically suitable for woodworkers. Being a sceptic, I was mesmerised by the ad and even though I thoroughly quizzed the sales person, soon after I was heading back to my workshop to test my new thread making kit.
Image

I used to use this as a demo of wooden threads to woodworking guests in my workshop,
Image


I'm not going to say that after that I always used metal bolts in timber threads, but when I have used them, I was never disappointed. I am continually amazed at the amount of pressure that could be applied before the humble timber turned into fire wood.

Back in February 2017 I saw this video about timber threaders being designed by "The Wood Whisperer " and an accomplice. Being a fan of timber threads I couldn't resist the temptation to place an order.

Today, August 2017 (a mere 6 moths later), my set of imperial and metric taps arrived. I immediately made a bee line (ok, teleported down using the phone booth) to my workshop and decided to compare my "original dedicated" 10mm tap with the newly arrived Spagnoulo (TWW) offering.
Image


As always, it wouldn't be a Duck's Tale if I didn't digress. I was vaguely aware that my newly acquisitioned NOVA Drill Press had a tap feature and under duress, I quickly perused the instruction relating to that function.
Image


After a few button presses, the drill was configured to do some tapping (if only it could do the same with beer).
Image

While the speed is displayed as 900rpm, for tapping it was automatically reduced to 100rpm (what a bonus).

Now let's digress from the digression and waddle back to the story. I loaded each of the two 10mm taps and drilled the recommended holes.
Image

Image


Scurrying for a couple of 10mm bolts I was fortunate to find some as I would have had to tackle a couple of 12mm bolts with my die (and I didn't want to die today… never thought about tapping 12mm holes… DOH!).
Image


After threading the two bolts, I tried the wobble test… I passed it with flying colours as I hadn't had a drink all afternoon, however, the original tap exhibited a slight wobble while the new tap was virtually immovable. Now I will reflect that I have not had any issues with the old threads as once the bolt was cranked up, all play was taken out. The TWW taps were designed with greater tolerances and to give you an indication, the old tap's specs recommended an 8.5mm hole while the new one's was suggested at 7.5mm. Overall the TWW threads were much tighter providing a more secure fit. As screwing progressed (hmm.. do you screw a bolt as you don't bolt a screw… preferably, unless your old… I digress if you hadn't noticed), I had to resort to using a spanner much earlier than the "original" tap.

Now not everyone taken in by my silken salesmanship will purchase the taps and then go out and spend $2,400 on a tap assisting NOVA drill press. Well for all you skinflints the TWW taps are just as much at home with the use of a drill (cordless, or for you senior seniors, a corded one) though variable speed is recommended.
Image


When using the hand held drill, the lead in may not be exactly 90° but as you progress even just slightly in, it aligns with the pre drilled hole and creates as tight a fit as with the NOVA. The taps can be used in a drill with either a variable or hex chuck.

The new set is now ready to be bolted to the wall,
Image


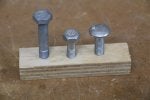
You may all wonder what was that lonely first picture doing… Well he's part of the following conspiracy in presenting my acid test to all you skeptics out there… you know who you are!

Drilled a hole in a piece of pine and tapped it with a 10mm bit,
Image

Remember the first picture? OK, here it is again in case the grey matter is having a sabbatical,
Image

Decided to attack it with an 8mm allen key from the safety of my mini vice,
Image

After a significant amount of torque and fear of risking another hernia, I eased up on the bolt,
Image

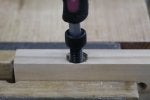
You may have noticed that the head "countersunk" a good 5mm+ into the pine without affecting the integrity of the thread.

You may say it's only pine… "It's only pine!" That is why I managed to countersink, hardwood would (pardon the stutter) provide greater grip and countersinking resistance.

What does all this mean? Anyone wants a set of metric taps with complimentary drill bits. I paid $90 for the set and am prepared to relinquish it to a friendly home for maybe a donation of a cask of vino (locally).

For all those not interested in this topic, please go back and re-read the 1st paragraph and don't bother to read the rest.

PS. If you all stay good Boys and Girls and eat all your greens, I may post a review about wooden threads. Some may scream NO MORE and by pure mathematics, the remainder didn't, but you'll all have nightmares wondering if and when.
 

Attachments

Metal bolts in timber threads.

Boys and Girls, if you are only interested in bargain basement solutions, please jump in the lift and press "G" for "Going Down to the bargain basement", exit the lift and go home without reading further.

Image


I am here to readily assist you in parting with your hard earned shekels without remorse, and if you are interested in a better solution (at a cost), read on. No… I don't have shares in the product and the retailer is not related to the "waterfowl family Anatidae" (Ducks 2u).

In the past I have occasionally used metal bolts in timber by cutting the timber thread using an appropriate tap from a low end tap and die set.
Image

I labelled the oft used taps so I didn't have to think each time,
Image


Then one day when I was trying to find that elusive imperial bit of hardware in our local dedicated fasteners retailer, I saw a set of taps and associated drill bits designed to handle our standard metric hardware and advertised as specifically suitable for woodworkers. Being a sceptic, I was mesmerised by the ad and even though I thoroughly quizzed the sales person, soon after I was heading back to my workshop to test my new thread making kit.
Image

I used to use this as a demo of wooden threads to woodworking guests in my workshop,
Image


I'm not going to say that after that I always used metal bolts in timber threads, but when I have used them, I was never disappointed. I am continually amazed at the amount of pressure that could be applied before the humble timber turned into fire wood.

Back in February 2017 I saw this video about timber threaders being designed by "The Wood Whisperer " and an accomplice. Being a fan of timber threads I couldn't resist the temptation to place an order.

Today, August 2017 (a mere 6 moths later), my set of imperial and metric taps arrived. I immediately made a bee line (ok, teleported down using the phone booth) to my workshop and decided to compare my "original dedicated" 10mm tap with the newly arrived Spagnoulo (TWW) offering.
Image


As always, it wouldn't be a Duck's Tale if I didn't digress. I was vaguely aware that my newly acquisitioned NOVA Drill Press had a tap feature and under duress, I quickly perused the instruction relating to that function.
Image


After a few button presses, the drill was configured to do some tapping (if only it could do the same with beer).
Image

While the speed is displayed as 900rpm, for tapping it was automatically reduced to 100rpm (what a bonus).

Now let's digress from the digression and waddle back to the story. I loaded each of the two 10mm taps and drilled the recommended holes.
Image

Image


Scurrying for a couple of 10mm bolts I was fortunate to find some as I would have had to tackle a couple of 12mm bolts with my die (and I didn't want to die today… never thought about tapping 12mm holes… DOH!).
Image


After threading the two bolts, I tried the wobble test… I passed it with flying colours as I hadn't had a drink all afternoon, however, the original tap exhibited a slight wobble while the new tap was virtually immovable. Now I will reflect that I have not had any issues with the old threads as once the bolt was cranked up, all play was taken out. The TWW taps were designed with greater tolerances and to give you an indication, the old tap's specs recommended an 8.5mm hole while the new one's was suggested at 7.5mm. Overall the TWW threads were much tighter providing a more secure fit. As screwing progressed (hmm.. do you screw a bolt as you don't bolt a screw… preferably, unless your old… I digress if you hadn't noticed), I had to resort to using a spanner much earlier than the "original" tap.

Now not everyone taken in by my silken salesmanship will purchase the taps and then go out and spend $2,400 on a tap assisting NOVA drill press. Well for all you skinflints the TWW taps are just as much at home with the use of a drill (cordless, or for you senior seniors, a corded one) though variable speed is recommended.
Image


When using the hand held drill, the lead in may not be exactly 90° but as you progress even just slightly in, it aligns with the pre drilled hole and creates as tight a fit as with the NOVA. The taps can be used in a drill with either a variable or hex chuck.

The new set is now ready to be bolted to the wall,
Image


You may all wonder what was that lonely first picture doing… Well he's part of the following conspiracy in presenting my acid test to all you skeptics out there… you know who you are!

Drilled a hole in a piece of pine and tapped it with a 10mm bit,
Image

Remember the first picture? OK, here it is again in case the grey matter is having a sabbatical,
Image

Decided to attack it with an 8mm allen key from the safety of my mini vice,
Image

After a significant amount of torque and fear of risking another hernia, I eased up on the bolt,
Image

You may have noticed that the head "countersunk" a good 5mm+ into the pine without affecting the integrity of the thread.

You may say it's only pine… "It's only pine!" That is why I managed to countersink, hardwood would (pardon the stutter) provide greater grip and countersinking resistance.

What does all this mean? Anyone wants a set of metric taps with complimentary drill bits. I paid $90 for the set and am prepared to relinquish it to a friendly home for maybe a donation of a cask of vino (locally).

For all those not interested in this topic, please go back and re-read the 1st paragraph and don't bother to read the rest.

PS. If you all stay good Boys and Girls and eat all your greens, I may post a review about wooden threads. Some may scream NO MORE and by pure mathematics, the remainder didn't, but you'll all have nightmares wondering if and when.
LMAO :<))
 

Attachments

Metal bolts in timber threads.

Boys and Girls, if you are only interested in bargain basement solutions, please jump in the lift and press "G" for "Going Down to the bargain basement", exit the lift and go home without reading further.

Image


I am here to readily assist you in parting with your hard earned shekels without remorse, and if you are interested in a better solution (at a cost), read on. No… I don't have shares in the product and the retailer is not related to the "waterfowl family Anatidae" (Ducks 2u).

In the past I have occasionally used metal bolts in timber by cutting the timber thread using an appropriate tap from a low end tap and die set.
Image

I labelled the oft used taps so I didn't have to think each time,
Image


Then one day when I was trying to find that elusive imperial bit of hardware in our local dedicated fasteners retailer, I saw a set of taps and associated drill bits designed to handle our standard metric hardware and advertised as specifically suitable for woodworkers. Being a sceptic, I was mesmerised by the ad and even though I thoroughly quizzed the sales person, soon after I was heading back to my workshop to test my new thread making kit.
Image

I used to use this as a demo of wooden threads to woodworking guests in my workshop,
Image


I'm not going to say that after that I always used metal bolts in timber threads, but when I have used them, I was never disappointed. I am continually amazed at the amount of pressure that could be applied before the humble timber turned into fire wood.

Back in February 2017 I saw this video about timber threaders being designed by "The Wood Whisperer " and an accomplice. Being a fan of timber threads I couldn't resist the temptation to place an order.

Today, August 2017 (a mere 6 moths later), my set of imperial and metric taps arrived. I immediately made a bee line (ok, teleported down using the phone booth) to my workshop and decided to compare my "original dedicated" 10mm tap with the newly arrived Spagnoulo (TWW) offering.
Image


As always, it wouldn't be a Duck's Tale if I didn't digress. I was vaguely aware that my newly acquisitioned NOVA Drill Press had a tap feature and under duress, I quickly perused the instruction relating to that function.
Image


After a few button presses, the drill was configured to do some tapping (if only it could do the same with beer).
Image

While the speed is displayed as 900rpm, for tapping it was automatically reduced to 100rpm (what a bonus).

Now let's digress from the digression and waddle back to the story. I loaded each of the two 10mm taps and drilled the recommended holes.
Image

Image


Scurrying for a couple of 10mm bolts I was fortunate to find some as I would have had to tackle a couple of 12mm bolts with my die (and I didn't want to die today… never thought about tapping 12mm holes… DOH!).
Image


After threading the two bolts, I tried the wobble test… I passed it with flying colours as I hadn't had a drink all afternoon, however, the original tap exhibited a slight wobble while the new tap was virtually immovable. Now I will reflect that I have not had any issues with the old threads as once the bolt was cranked up, all play was taken out. The TWW taps were designed with greater tolerances and to give you an indication, the old tap's specs recommended an 8.5mm hole while the new one's was suggested at 7.5mm. Overall the TWW threads were much tighter providing a more secure fit. As screwing progressed (hmm.. do you screw a bolt as you don't bolt a screw… preferably, unless your old… I digress if you hadn't noticed), I had to resort to using a spanner much earlier than the "original" tap.

Now not everyone taken in by my silken salesmanship will purchase the taps and then go out and spend $2,400 on a tap assisting NOVA drill press. Well for all you skinflints the TWW taps are just as much at home with the use of a drill (cordless, or for you senior seniors, a corded one) though variable speed is recommended.
Image


When using the hand held drill, the lead in may not be exactly 90° but as you progress even just slightly in, it aligns with the pre drilled hole and creates as tight a fit as with the NOVA. The taps can be used in a drill with either a variable or hex chuck.

The new set is now ready to be bolted to the wall,
Image


You may all wonder what was that lonely first picture doing… Well he's part of the following conspiracy in presenting my acid test to all you skeptics out there… you know who you are!

Drilled a hole in a piece of pine and tapped it with a 10mm bit,
Image

Remember the first picture? OK, here it is again in case the grey matter is having a sabbatical,
Image

Decided to attack it with an 8mm allen key from the safety of my mini vice,
Image

After a significant amount of torque and fear of risking another hernia, I eased up on the bolt,
Image

You may have noticed that the head "countersunk" a good 5mm+ into the pine without affecting the integrity of the thread.

You may say it's only pine… "It's only pine!" That is why I managed to countersink, hardwood would (pardon the stutter) provide greater grip and countersinking resistance.

What does all this mean? Anyone wants a set of metric taps with complimentary drill bits. I paid $90 for the set and am prepared to relinquish it to a friendly home for maybe a donation of a cask of vino (locally).

For all those not interested in this topic, please go back and re-read the 1st paragraph and don't bother to read the rest.

PS. If you all stay good Boys and Girls and eat all your greens, I may post a review about wooden threads. Some may scream NO MORE and by pure mathematics, the remainder didn't, but you'll all have nightmares wondering if and when.
I am eating my greens and waiting for the review…..
 

Attachments

Metal bolts in timber threads.

Boys and Girls, if you are only interested in bargain basement solutions, please jump in the lift and press "G" for "Going Down to the bargain basement", exit the lift and go home without reading further.

Image


I am here to readily assist you in parting with your hard earned shekels without remorse, and if you are interested in a better solution (at a cost), read on. No… I don't have shares in the product and the retailer is not related to the "waterfowl family Anatidae" (Ducks 2u).

In the past I have occasionally used metal bolts in timber by cutting the timber thread using an appropriate tap from a low end tap and die set.
Image

I labelled the oft used taps so I didn't have to think each time,
Image


Then one day when I was trying to find that elusive imperial bit of hardware in our local dedicated fasteners retailer, I saw a set of taps and associated drill bits designed to handle our standard metric hardware and advertised as specifically suitable for woodworkers. Being a sceptic, I was mesmerised by the ad and even though I thoroughly quizzed the sales person, soon after I was heading back to my workshop to test my new thread making kit.
Image

I used to use this as a demo of wooden threads to woodworking guests in my workshop,
Image


I'm not going to say that after that I always used metal bolts in timber threads, but when I have used them, I was never disappointed. I am continually amazed at the amount of pressure that could be applied before the humble timber turned into fire wood.

Back in February 2017 I saw this video about timber threaders being designed by "The Wood Whisperer " and an accomplice. Being a fan of timber threads I couldn't resist the temptation to place an order.

Today, August 2017 (a mere 6 moths later), my set of imperial and metric taps arrived. I immediately made a bee line (ok, teleported down using the phone booth) to my workshop and decided to compare my "original dedicated" 10mm tap with the newly arrived Spagnoulo (TWW) offering.
Image


As always, it wouldn't be a Duck's Tale if I didn't digress. I was vaguely aware that my newly acquisitioned NOVA Drill Press had a tap feature and under duress, I quickly perused the instruction relating to that function.
Image


After a few button presses, the drill was configured to do some tapping (if only it could do the same with beer).
Image

While the speed is displayed as 900rpm, for tapping it was automatically reduced to 100rpm (what a bonus).

Now let's digress from the digression and waddle back to the story. I loaded each of the two 10mm taps and drilled the recommended holes.
Image

Image


Scurrying for a couple of 10mm bolts I was fortunate to find some as I would have had to tackle a couple of 12mm bolts with my die (and I didn't want to die today… never thought about tapping 12mm holes… DOH!).
Image


After threading the two bolts, I tried the wobble test… I passed it with flying colours as I hadn't had a drink all afternoon, however, the original tap exhibited a slight wobble while the new tap was virtually immovable. Now I will reflect that I have not had any issues with the old threads as once the bolt was cranked up, all play was taken out. The TWW taps were designed with greater tolerances and to give you an indication, the old tap's specs recommended an 8.5mm hole while the new one's was suggested at 7.5mm. Overall the TWW threads were much tighter providing a more secure fit. As screwing progressed (hmm.. do you screw a bolt as you don't bolt a screw… preferably, unless your old… I digress if you hadn't noticed), I had to resort to using a spanner much earlier than the "original" tap.

Now not everyone taken in by my silken salesmanship will purchase the taps and then go out and spend $2,400 on a tap assisting NOVA drill press. Well for all you skinflints the TWW taps are just as much at home with the use of a drill (cordless, or for you senior seniors, a corded one) though variable speed is recommended.
Image


When using the hand held drill, the lead in may not be exactly 90° but as you progress even just slightly in, it aligns with the pre drilled hole and creates as tight a fit as with the NOVA. The taps can be used in a drill with either a variable or hex chuck.

The new set is now ready to be bolted to the wall,
Image


You may all wonder what was that lonely first picture doing… Well he's part of the following conspiracy in presenting my acid test to all you skeptics out there… you know who you are!

Drilled a hole in a piece of pine and tapped it with a 10mm bit,
Image

Remember the first picture? OK, here it is again in case the grey matter is having a sabbatical,
Image

Decided to attack it with an 8mm allen key from the safety of my mini vice,
Image

After a significant amount of torque and fear of risking another hernia, I eased up on the bolt,
Image

You may have noticed that the head "countersunk" a good 5mm+ into the pine without affecting the integrity of the thread.

You may say it's only pine… "It's only pine!" That is why I managed to countersink, hardwood would (pardon the stutter) provide greater grip and countersinking resistance.

What does all this mean? Anyone wants a set of metric taps with complimentary drill bits. I paid $90 for the set and am prepared to relinquish it to a friendly home for maybe a donation of a cask of vino (locally).

For all those not interested in this topic, please go back and re-read the 1st paragraph and don't bother to read the rest.

PS. If you all stay good Boys and Girls and eat all your greens, I may post a review about wooden threads. Some may scream NO MORE and by pure mathematics, the remainder didn't, but you'll all have nightmares wondering if and when.
I'll go with the above two, plus nightmares.
 

Attachments

Metal bolts in timber threads.

Boys and Girls, if you are only interested in bargain basement solutions, please jump in the lift and press "G" for "Going Down to the bargain basement", exit the lift and go home without reading further.

Image


I am here to readily assist you in parting with your hard earned shekels without remorse, and if you are interested in a better solution (at a cost), read on. No… I don't have shares in the product and the retailer is not related to the "waterfowl family Anatidae" (Ducks 2u).

In the past I have occasionally used metal bolts in timber by cutting the timber thread using an appropriate tap from a low end tap and die set.
Image

I labelled the oft used taps so I didn't have to think each time,
Image


Then one day when I was trying to find that elusive imperial bit of hardware in our local dedicated fasteners retailer, I saw a set of taps and associated drill bits designed to handle our standard metric hardware and advertised as specifically suitable for woodworkers. Being a sceptic, I was mesmerised by the ad and even though I thoroughly quizzed the sales person, soon after I was heading back to my workshop to test my new thread making kit.
Image

I used to use this as a demo of wooden threads to woodworking guests in my workshop,
Image


I'm not going to say that after that I always used metal bolts in timber threads, but when I have used them, I was never disappointed. I am continually amazed at the amount of pressure that could be applied before the humble timber turned into fire wood.

Back in February 2017 I saw this video about timber threaders being designed by "The Wood Whisperer " and an accomplice. Being a fan of timber threads I couldn't resist the temptation to place an order.

Today, August 2017 (a mere 6 moths later), my set of imperial and metric taps arrived. I immediately made a bee line (ok, teleported down using the phone booth) to my workshop and decided to compare my "original dedicated" 10mm tap with the newly arrived Spagnoulo (TWW) offering.
Image


As always, it wouldn't be a Duck's Tale if I didn't digress. I was vaguely aware that my newly acquisitioned NOVA Drill Press had a tap feature and under duress, I quickly perused the instruction relating to that function.
Image


After a few button presses, the drill was configured to do some tapping (if only it could do the same with beer).
Image

While the speed is displayed as 900rpm, for tapping it was automatically reduced to 100rpm (what a bonus).

Now let's digress from the digression and waddle back to the story. I loaded each of the two 10mm taps and drilled the recommended holes.
Image

Image


Scurrying for a couple of 10mm bolts I was fortunate to find some as I would have had to tackle a couple of 12mm bolts with my die (and I didn't want to die today… never thought about tapping 12mm holes… DOH!).
Image


After threading the two bolts, I tried the wobble test… I passed it with flying colours as I hadn't had a drink all afternoon, however, the original tap exhibited a slight wobble while the new tap was virtually immovable. Now I will reflect that I have not had any issues with the old threads as once the bolt was cranked up, all play was taken out. The TWW taps were designed with greater tolerances and to give you an indication, the old tap's specs recommended an 8.5mm hole while the new one's was suggested at 7.5mm. Overall the TWW threads were much tighter providing a more secure fit. As screwing progressed (hmm.. do you screw a bolt as you don't bolt a screw… preferably, unless your old… I digress if you hadn't noticed), I had to resort to using a spanner much earlier than the "original" tap.

Now not everyone taken in by my silken salesmanship will purchase the taps and then go out and spend $2,400 on a tap assisting NOVA drill press. Well for all you skinflints the TWW taps are just as much at home with the use of a drill (cordless, or for you senior seniors, a corded one) though variable speed is recommended.
Image


When using the hand held drill, the lead in may not be exactly 90° but as you progress even just slightly in, it aligns with the pre drilled hole and creates as tight a fit as with the NOVA. The taps can be used in a drill with either a variable or hex chuck.

The new set is now ready to be bolted to the wall,
Image


You may all wonder what was that lonely first picture doing… Well he's part of the following conspiracy in presenting my acid test to all you skeptics out there… you know who you are!

Drilled a hole in a piece of pine and tapped it with a 10mm bit,
Image

Remember the first picture? OK, here it is again in case the grey matter is having a sabbatical,
Image

Decided to attack it with an 8mm allen key from the safety of my mini vice,
Image

After a significant amount of torque and fear of risking another hernia, I eased up on the bolt,
Image

You may have noticed that the head "countersunk" a good 5mm+ into the pine without affecting the integrity of the thread.

You may say it's only pine… "It's only pine!" That is why I managed to countersink, hardwood would (pardon the stutter) provide greater grip and countersinking resistance.

What does all this mean? Anyone wants a set of metric taps with complimentary drill bits. I paid $90 for the set and am prepared to relinquish it to a friendly home for maybe a donation of a cask of vino (locally).

For all those not interested in this topic, please go back and re-read the 1st paragraph and don't bother to read the rest.

PS. If you all stay good Boys and Girls and eat all your greens, I may post a review about wooden threads. Some may scream NO MORE and by pure mathematics, the remainder didn't, but you'll all have nightmares wondering if and when.
I'm hoping you discuss threading wooden dowels. And something about foie gras…
 

Attachments

Metal bolts in timber threads.

Boys and Girls, if you are only interested in bargain basement solutions, please jump in the lift and press "G" for "Going Down to the bargain basement", exit the lift and go home without reading further.

Image


I am here to readily assist you in parting with your hard earned shekels without remorse, and if you are interested in a better solution (at a cost), read on. No… I don't have shares in the product and the retailer is not related to the "waterfowl family Anatidae" (Ducks 2u).

In the past I have occasionally used metal bolts in timber by cutting the timber thread using an appropriate tap from a low end tap and die set.
Image

I labelled the oft used taps so I didn't have to think each time,
Image


Then one day when I was trying to find that elusive imperial bit of hardware in our local dedicated fasteners retailer, I saw a set of taps and associated drill bits designed to handle our standard metric hardware and advertised as specifically suitable for woodworkers. Being a sceptic, I was mesmerised by the ad and even though I thoroughly quizzed the sales person, soon after I was heading back to my workshop to test my new thread making kit.
Image

I used to use this as a demo of wooden threads to woodworking guests in my workshop,
Image


I'm not going to say that after that I always used metal bolts in timber threads, but when I have used them, I was never disappointed. I am continually amazed at the amount of pressure that could be applied before the humble timber turned into fire wood.

Back in February 2017 I saw this video about timber threaders being designed by "The Wood Whisperer " and an accomplice. Being a fan of timber threads I couldn't resist the temptation to place an order.

Today, August 2017 (a mere 6 moths later), my set of imperial and metric taps arrived. I immediately made a bee line (ok, teleported down using the phone booth) to my workshop and decided to compare my "original dedicated" 10mm tap with the newly arrived Spagnoulo (TWW) offering.
Image


As always, it wouldn't be a Duck's Tale if I didn't digress. I was vaguely aware that my newly acquisitioned NOVA Drill Press had a tap feature and under duress, I quickly perused the instruction relating to that function.
Image


After a few button presses, the drill was configured to do some tapping (if only it could do the same with beer).
Image

While the speed is displayed as 900rpm, for tapping it was automatically reduced to 100rpm (what a bonus).

Now let's digress from the digression and waddle back to the story. I loaded each of the two 10mm taps and drilled the recommended holes.
Image

Image


Scurrying for a couple of 10mm bolts I was fortunate to find some as I would have had to tackle a couple of 12mm bolts with my die (and I didn't want to die today… never thought about tapping 12mm holes… DOH!).
Image


After threading the two bolts, I tried the wobble test… I passed it with flying colours as I hadn't had a drink all afternoon, however, the original tap exhibited a slight wobble while the new tap was virtually immovable. Now I will reflect that I have not had any issues with the old threads as once the bolt was cranked up, all play was taken out. The TWW taps were designed with greater tolerances and to give you an indication, the old tap's specs recommended an 8.5mm hole while the new one's was suggested at 7.5mm. Overall the TWW threads were much tighter providing a more secure fit. As screwing progressed (hmm.. do you screw a bolt as you don't bolt a screw… preferably, unless your old… I digress if you hadn't noticed), I had to resort to using a spanner much earlier than the "original" tap.

Now not everyone taken in by my silken salesmanship will purchase the taps and then go out and spend $2,400 on a tap assisting NOVA drill press. Well for all you skinflints the TWW taps are just as much at home with the use of a drill (cordless, or for you senior seniors, a corded one) though variable speed is recommended.
Image


When using the hand held drill, the lead in may not be exactly 90° but as you progress even just slightly in, it aligns with the pre drilled hole and creates as tight a fit as with the NOVA. The taps can be used in a drill with either a variable or hex chuck.

The new set is now ready to be bolted to the wall,
Image


You may all wonder what was that lonely first picture doing… Well he's part of the following conspiracy in presenting my acid test to all you skeptics out there… you know who you are!

Drilled a hole in a piece of pine and tapped it with a 10mm bit,
Image

Remember the first picture? OK, here it is again in case the grey matter is having a sabbatical,
Image

Decided to attack it with an 8mm allen key from the safety of my mini vice,
Image

After a significant amount of torque and fear of risking another hernia, I eased up on the bolt,
Image

You may have noticed that the head "countersunk" a good 5mm+ into the pine without affecting the integrity of the thread.

You may say it's only pine… "It's only pine!" That is why I managed to countersink, hardwood would (pardon the stutter) provide greater grip and countersinking resistance.

What does all this mean? Anyone wants a set of metric taps with complimentary drill bits. I paid $90 for the set and am prepared to relinquish it to a friendly home for maybe a donation of a cask of vino (locally).

For all those not interested in this topic, please go back and re-read the 1st paragraph and don't bother to read the rest.

PS. If you all stay good Boys and Girls and eat all your greens, I may post a review about wooden threads. Some may scream NO MORE and by pure mathematics, the remainder didn't, but you'll all have nightmares wondering if and when.
There's actually quite a lot to the geometry of bolts and threaded holes (for an exhaustive treatment of the subject, I recommend the Machinist Handbook).

Two of the key parameters are the major and minor diameters. Major diameter is what you measure when you put the flat faces of a caliper on the outer points of a bolt thread, and minor diameter is what you measure when you put the knife edges of a caliper as deep into the threaded grooves as possible.

The size of the pilot hole for the tapped hole is always larger than the minor diameter and smaller than the major diameter, and it will determine the amount of thread engagement (usually either 50% or 75%) between the surfaces of the bolt threads and the surfaces of the threads in the tapped hole.

Turning threads in harder materials (i.e. carbon steel) is very hard on the tooling and can break the tap in the hole if too much force is applied too quickly, so a larger pilot hole and less thread engagement is necessary for successful tapping, and it is acceptable, as the metals are hard and rigid.

For softer metals like aluminum and brass, more thread engagement is desired, as the metals are soft and can peen over (stripping the threads), but fortunately, these metals also cut more easily, so you can use a smaller pilot hole.

There are a lot of different styles of taps for threading holes as well, but the two major categories are cutting and forming, with the former cutting out the metal and the later pressing the geometry into the metal (these are usually used on high volume production applications). Cutting taps (pretty much what all hobby peeps have experience with) vary in the number of cutting flutes (typically 2, 3 or 4), the material (carbide or tool steel), the coatings (none, cobalt or tin) and taper of the leading edge.

So for threaded holes in wood, you would ideally have a pilot hole that was just a shade over the minor diameter of the bolt and the tap would be a cutting tap with nice deep grooves in-between the cutting edges to remove the wood waste (probably 2 or 3 flute, with deep flutes) and likely don't require as much of a taper to get the cut started.

Mark obviously did his homework and then either special ordered some odd ball taps of an existing design that were well suited for wood, or worked with somebody to come up with something new and had them manufactured to his specification.
 

Attachments

Metal bolts in timber threads.

Boys and Girls, if you are only interested in bargain basement solutions, please jump in the lift and press "G" for "Going Down to the bargain basement", exit the lift and go home without reading further.

Image


I am here to readily assist you in parting with your hard earned shekels without remorse, and if you are interested in a better solution (at a cost), read on. No… I don't have shares in the product and the retailer is not related to the "waterfowl family Anatidae" (Ducks 2u).

In the past I have occasionally used metal bolts in timber by cutting the timber thread using an appropriate tap from a low end tap and die set.
Image

I labelled the oft used taps so I didn't have to think each time,
Image


Then one day when I was trying to find that elusive imperial bit of hardware in our local dedicated fasteners retailer, I saw a set of taps and associated drill bits designed to handle our standard metric hardware and advertised as specifically suitable for woodworkers. Being a sceptic, I was mesmerised by the ad and even though I thoroughly quizzed the sales person, soon after I was heading back to my workshop to test my new thread making kit.
Image

I used to use this as a demo of wooden threads to woodworking guests in my workshop,
Image


I'm not going to say that after that I always used metal bolts in timber threads, but when I have used them, I was never disappointed. I am continually amazed at the amount of pressure that could be applied before the humble timber turned into fire wood.

Back in February 2017 I saw this video about timber threaders being designed by "The Wood Whisperer " and an accomplice. Being a fan of timber threads I couldn't resist the temptation to place an order.

Today, August 2017 (a mere 6 moths later), my set of imperial and metric taps arrived. I immediately made a bee line (ok, teleported down using the phone booth) to my workshop and decided to compare my "original dedicated" 10mm tap with the newly arrived Spagnoulo (TWW) offering.
Image


As always, it wouldn't be a Duck's Tale if I didn't digress. I was vaguely aware that my newly acquisitioned NOVA Drill Press had a tap feature and under duress, I quickly perused the instruction relating to that function.
Image


After a few button presses, the drill was configured to do some tapping (if only it could do the same with beer).
Image

While the speed is displayed as 900rpm, for tapping it was automatically reduced to 100rpm (what a bonus).

Now let's digress from the digression and waddle back to the story. I loaded each of the two 10mm taps and drilled the recommended holes.
Image

Image


Scurrying for a couple of 10mm bolts I was fortunate to find some as I would have had to tackle a couple of 12mm bolts with my die (and I didn't want to die today… never thought about tapping 12mm holes… DOH!).
Image


After threading the two bolts, I tried the wobble test… I passed it with flying colours as I hadn't had a drink all afternoon, however, the original tap exhibited a slight wobble while the new tap was virtually immovable. Now I will reflect that I have not had any issues with the old threads as once the bolt was cranked up, all play was taken out. The TWW taps were designed with greater tolerances and to give you an indication, the old tap's specs recommended an 8.5mm hole while the new one's was suggested at 7.5mm. Overall the TWW threads were much tighter providing a more secure fit. As screwing progressed (hmm.. do you screw a bolt as you don't bolt a screw… preferably, unless your old… I digress if you hadn't noticed), I had to resort to using a spanner much earlier than the "original" tap.

Now not everyone taken in by my silken salesmanship will purchase the taps and then go out and spend $2,400 on a tap assisting NOVA drill press. Well for all you skinflints the TWW taps are just as much at home with the use of a drill (cordless, or for you senior seniors, a corded one) though variable speed is recommended.
Image


When using the hand held drill, the lead in may not be exactly 90° but as you progress even just slightly in, it aligns with the pre drilled hole and creates as tight a fit as with the NOVA. The taps can be used in a drill with either a variable or hex chuck.

The new set is now ready to be bolted to the wall,
Image


You may all wonder what was that lonely first picture doing… Well he's part of the following conspiracy in presenting my acid test to all you skeptics out there… you know who you are!

Drilled a hole in a piece of pine and tapped it with a 10mm bit,
Image

Remember the first picture? OK, here it is again in case the grey matter is having a sabbatical,
Image

Decided to attack it with an 8mm allen key from the safety of my mini vice,
Image

After a significant amount of torque and fear of risking another hernia, I eased up on the bolt,
Image

You may have noticed that the head "countersunk" a good 5mm+ into the pine without affecting the integrity of the thread.

You may say it's only pine… "It's only pine!" That is why I managed to countersink, hardwood would (pardon the stutter) provide greater grip and countersinking resistance.

What does all this mean? Anyone wants a set of metric taps with complimentary drill bits. I paid $90 for the set and am prepared to relinquish it to a friendly home for maybe a donation of a cask of vino (locally).

For all those not interested in this topic, please go back and re-read the 1st paragraph and don't bother to read the rest.

PS. If you all stay good Boys and Girls and eat all your greens, I may post a review about wooden threads. Some may scream NO MORE and by pure mathematics, the remainder didn't, but you'll all have nightmares wondering if and when.
Another great post. Thanks for making me aware that such tools exist and where to find them.
 

Attachments

Discussion starter · #37 ·
Metal bolts in timber threads.

Boys and Girls, if you are only interested in bargain basement solutions, please jump in the lift and press "G" for "Going Down to the bargain basement", exit the lift and go home without reading further.

Image


I am here to readily assist you in parting with your hard earned shekels without remorse, and if you are interested in a better solution (at a cost), read on. No… I don't have shares in the product and the retailer is not related to the "waterfowl family Anatidae" (Ducks 2u).

In the past I have occasionally used metal bolts in timber by cutting the timber thread using an appropriate tap from a low end tap and die set.
Image

I labelled the oft used taps so I didn't have to think each time,
Image


Then one day when I was trying to find that elusive imperial bit of hardware in our local dedicated fasteners retailer, I saw a set of taps and associated drill bits designed to handle our standard metric hardware and advertised as specifically suitable for woodworkers. Being a sceptic, I was mesmerised by the ad and even though I thoroughly quizzed the sales person, soon after I was heading back to my workshop to test my new thread making kit.
Image

I used to use this as a demo of wooden threads to woodworking guests in my workshop,
Image


I'm not going to say that after that I always used metal bolts in timber threads, but when I have used them, I was never disappointed. I am continually amazed at the amount of pressure that could be applied before the humble timber turned into fire wood.

Back in February 2017 I saw this video about timber threaders being designed by "The Wood Whisperer " and an accomplice. Being a fan of timber threads I couldn't resist the temptation to place an order.

Today, August 2017 (a mere 6 moths later), my set of imperial and metric taps arrived. I immediately made a bee line (ok, teleported down using the phone booth) to my workshop and decided to compare my "original dedicated" 10mm tap with the newly arrived Spagnoulo (TWW) offering.
Image


As always, it wouldn't be a Duck's Tale if I didn't digress. I was vaguely aware that my newly acquisitioned NOVA Drill Press had a tap feature and under duress, I quickly perused the instruction relating to that function.
Image


After a few button presses, the drill was configured to do some tapping (if only it could do the same with beer).
Image

While the speed is displayed as 900rpm, for tapping it was automatically reduced to 100rpm (what a bonus).

Now let's digress from the digression and waddle back to the story. I loaded each of the two 10mm taps and drilled the recommended holes.
Image

Image


Scurrying for a couple of 10mm bolts I was fortunate to find some as I would have had to tackle a couple of 12mm bolts with my die (and I didn't want to die today… never thought about tapping 12mm holes… DOH!).
Image


After threading the two bolts, I tried the wobble test… I passed it with flying colours as I hadn't had a drink all afternoon, however, the original tap exhibited a slight wobble while the new tap was virtually immovable. Now I will reflect that I have not had any issues with the old threads as once the bolt was cranked up, all play was taken out. The TWW taps were designed with greater tolerances and to give you an indication, the old tap's specs recommended an 8.5mm hole while the new one's was suggested at 7.5mm. Overall the TWW threads were much tighter providing a more secure fit. As screwing progressed (hmm.. do you screw a bolt as you don't bolt a screw… preferably, unless your old… I digress if you hadn't noticed), I had to resort to using a spanner much earlier than the "original" tap.

Now not everyone taken in by my silken salesmanship will purchase the taps and then go out and spend $2,400 on a tap assisting NOVA drill press. Well for all you skinflints the TWW taps are just as much at home with the use of a drill (cordless, or for you senior seniors, a corded one) though variable speed is recommended.
Image


When using the hand held drill, the lead in may not be exactly 90° but as you progress even just slightly in, it aligns with the pre drilled hole and creates as tight a fit as with the NOVA. The taps can be used in a drill with either a variable or hex chuck.

The new set is now ready to be bolted to the wall,
Image


You may all wonder what was that lonely first picture doing… Well he's part of the following conspiracy in presenting my acid test to all you skeptics out there… you know who you are!

Drilled a hole in a piece of pine and tapped it with a 10mm bit,
Image

Remember the first picture? OK, here it is again in case the grey matter is having a sabbatical,
Image

Decided to attack it with an 8mm allen key from the safety of my mini vice,
Image

After a significant amount of torque and fear of risking another hernia, I eased up on the bolt,
Image

You may have noticed that the head "countersunk" a good 5mm+ into the pine without affecting the integrity of the thread.

You may say it's only pine… "It's only pine!" That is why I managed to countersink, hardwood would (pardon the stutter) provide greater grip and countersinking resistance.

What does all this mean? Anyone wants a set of metric taps with complimentary drill bits. I paid $90 for the set and am prepared to relinquish it to a friendly home for maybe a donation of a cask of vino (locally).

For all those not interested in this topic, please go back and re-read the 1st paragraph and don't bother to read the rest.

PS. If you all stay good Boys and Girls and eat all your greens, I may post a review about wooden threads. Some may scream NO MORE and by pure mathematics, the remainder didn't, but you'll all have nightmares wondering if and when.
..... for an exhaustive treatment of the subject, I recommend the Machinist Handbook).....

- Mainiac Matt
Phew MM, that is one technical explanation. I was going to mention all that in this post but somehow it must have just accidentally slipped my mind or got lost amongst my scientific layman's prattle.

You have found my Achilles heel. For someone that burdens others with long winded posts, I have this abhorrent trepidation of reading. For this transgression, I have been chastised countless times.

You are 100% correct in surmising Mark had external help, and they did have the taps made to their specifications, hence the 6 months wait. He and his co-designer have released some videos which I have alluded to as he explains the threader much better than I ever could.

The main intention of this post is to get the point across that metal bolts in a wooden thread seem to have a place in the workshop and if people are inclined to venture down that path, Mark's little puppies (if one is prepared to pay that few extra shekels) do a better job than the taps most people would have access to through the normal home hardware type of tap and die sets.

I suppose having said all that, the jury may still be out on their endurance during seasonal wood movement, however, I believe that somewhere I read (correction saw in a video) that it didn't seem an issue.
 

Attachments

Discussion starter · #38 ·
Metal bolts in timber threads.

Boys and Girls, if you are only interested in bargain basement solutions, please jump in the lift and press "G" for "Going Down to the bargain basement", exit the lift and go home without reading further.

Image


I am here to readily assist you in parting with your hard earned shekels without remorse, and if you are interested in a better solution (at a cost), read on. No… I don't have shares in the product and the retailer is not related to the "waterfowl family Anatidae" (Ducks 2u).

In the past I have occasionally used metal bolts in timber by cutting the timber thread using an appropriate tap from a low end tap and die set.
Image

I labelled the oft used taps so I didn't have to think each time,
Image


Then one day when I was trying to find that elusive imperial bit of hardware in our local dedicated fasteners retailer, I saw a set of taps and associated drill bits designed to handle our standard metric hardware and advertised as specifically suitable for woodworkers. Being a sceptic, I was mesmerised by the ad and even though I thoroughly quizzed the sales person, soon after I was heading back to my workshop to test my new thread making kit.
Image

I used to use this as a demo of wooden threads to woodworking guests in my workshop,
Image


I'm not going to say that after that I always used metal bolts in timber threads, but when I have used them, I was never disappointed. I am continually amazed at the amount of pressure that could be applied before the humble timber turned into fire wood.

Back in February 2017 I saw this video about timber threaders being designed by "The Wood Whisperer " and an accomplice. Being a fan of timber threads I couldn't resist the temptation to place an order.

Today, August 2017 (a mere 6 moths later), my set of imperial and metric taps arrived. I immediately made a bee line (ok, teleported down using the phone booth) to my workshop and decided to compare my "original dedicated" 10mm tap with the newly arrived Spagnoulo (TWW) offering.
Image


As always, it wouldn't be a Duck's Tale if I didn't digress. I was vaguely aware that my newly acquisitioned NOVA Drill Press had a tap feature and under duress, I quickly perused the instruction relating to that function.
Image


After a few button presses, the drill was configured to do some tapping (if only it could do the same with beer).
Image

While the speed is displayed as 900rpm, for tapping it was automatically reduced to 100rpm (what a bonus).

Now let's digress from the digression and waddle back to the story. I loaded each of the two 10mm taps and drilled the recommended holes.
Image

Image


Scurrying for a couple of 10mm bolts I was fortunate to find some as I would have had to tackle a couple of 12mm bolts with my die (and I didn't want to die today… never thought about tapping 12mm holes… DOH!).
Image


After threading the two bolts, I tried the wobble test… I passed it with flying colours as I hadn't had a drink all afternoon, however, the original tap exhibited a slight wobble while the new tap was virtually immovable. Now I will reflect that I have not had any issues with the old threads as once the bolt was cranked up, all play was taken out. The TWW taps were designed with greater tolerances and to give you an indication, the old tap's specs recommended an 8.5mm hole while the new one's was suggested at 7.5mm. Overall the TWW threads were much tighter providing a more secure fit. As screwing progressed (hmm.. do you screw a bolt as you don't bolt a screw… preferably, unless your old… I digress if you hadn't noticed), I had to resort to using a spanner much earlier than the "original" tap.

Now not everyone taken in by my silken salesmanship will purchase the taps and then go out and spend $2,400 on a tap assisting NOVA drill press. Well for all you skinflints the TWW taps are just as much at home with the use of a drill (cordless, or for you senior seniors, a corded one) though variable speed is recommended.
Image


When using the hand held drill, the lead in may not be exactly 90° but as you progress even just slightly in, it aligns with the pre drilled hole and creates as tight a fit as with the NOVA. The taps can be used in a drill with either a variable or hex chuck.

The new set is now ready to be bolted to the wall,
Image


You may all wonder what was that lonely first picture doing… Well he's part of the following conspiracy in presenting my acid test to all you skeptics out there… you know who you are!

Drilled a hole in a piece of pine and tapped it with a 10mm bit,
Image

Remember the first picture? OK, here it is again in case the grey matter is having a sabbatical,
Image

Decided to attack it with an 8mm allen key from the safety of my mini vice,
Image

After a significant amount of torque and fear of risking another hernia, I eased up on the bolt,
Image

You may have noticed that the head "countersunk" a good 5mm+ into the pine without affecting the integrity of the thread.

You may say it's only pine… "It's only pine!" That is why I managed to countersink, hardwood would (pardon the stutter) provide greater grip and countersinking resistance.

What does all this mean? Anyone wants a set of metric taps with complimentary drill bits. I paid $90 for the set and am prepared to relinquish it to a friendly home for maybe a donation of a cask of vino (locally).

For all those not interested in this topic, please go back and re-read the 1st paragraph and don't bother to read the rest.

PS. If you all stay good Boys and Girls and eat all your greens, I may post a review about wooden threads. Some may scream NO MORE and by pure mathematics, the remainder didn't, but you'll all have nightmares wondering if and when.
.... Thanks for making me aware that such tools exist and where to find them…..

- tyvekboy
No woories t'k', that was my primary intention.
 

Attachments

Metal bolts in timber threads.

Boys and Girls, if you are only interested in bargain basement solutions, please jump in the lift and press "G" for "Going Down to the bargain basement", exit the lift and go home without reading further.

Image


I am here to readily assist you in parting with your hard earned shekels without remorse, and if you are interested in a better solution (at a cost), read on. No… I don't have shares in the product and the retailer is not related to the "waterfowl family Anatidae" (Ducks 2u).

In the past I have occasionally used metal bolts in timber by cutting the timber thread using an appropriate tap from a low end tap and die set.
Image

I labelled the oft used taps so I didn't have to think each time,
Image


Then one day when I was trying to find that elusive imperial bit of hardware in our local dedicated fasteners retailer, I saw a set of taps and associated drill bits designed to handle our standard metric hardware and advertised as specifically suitable for woodworkers. Being a sceptic, I was mesmerised by the ad and even though I thoroughly quizzed the sales person, soon after I was heading back to my workshop to test my new thread making kit.
Image

I used to use this as a demo of wooden threads to woodworking guests in my workshop,
Image


I'm not going to say that after that I always used metal bolts in timber threads, but when I have used them, I was never disappointed. I am continually amazed at the amount of pressure that could be applied before the humble timber turned into fire wood.

Back in February 2017 I saw this video about timber threaders being designed by "The Wood Whisperer " and an accomplice. Being a fan of timber threads I couldn't resist the temptation to place an order.

Today, August 2017 (a mere 6 moths later), my set of imperial and metric taps arrived. I immediately made a bee line (ok, teleported down using the phone booth) to my workshop and decided to compare my "original dedicated" 10mm tap with the newly arrived Spagnoulo (TWW) offering.
Image


As always, it wouldn't be a Duck's Tale if I didn't digress. I was vaguely aware that my newly acquisitioned NOVA Drill Press had a tap feature and under duress, I quickly perused the instruction relating to that function.
Image


After a few button presses, the drill was configured to do some tapping (if only it could do the same with beer).
Image

While the speed is displayed as 900rpm, for tapping it was automatically reduced to 100rpm (what a bonus).

Now let's digress from the digression and waddle back to the story. I loaded each of the two 10mm taps and drilled the recommended holes.
Image

Image


Scurrying for a couple of 10mm bolts I was fortunate to find some as I would have had to tackle a couple of 12mm bolts with my die (and I didn't want to die today… never thought about tapping 12mm holes… DOH!).
Image


After threading the two bolts, I tried the wobble test… I passed it with flying colours as I hadn't had a drink all afternoon, however, the original tap exhibited a slight wobble while the new tap was virtually immovable. Now I will reflect that I have not had any issues with the old threads as once the bolt was cranked up, all play was taken out. The TWW taps were designed with greater tolerances and to give you an indication, the old tap's specs recommended an 8.5mm hole while the new one's was suggested at 7.5mm. Overall the TWW threads were much tighter providing a more secure fit. As screwing progressed (hmm.. do you screw a bolt as you don't bolt a screw… preferably, unless your old… I digress if you hadn't noticed), I had to resort to using a spanner much earlier than the "original" tap.

Now not everyone taken in by my silken salesmanship will purchase the taps and then go out and spend $2,400 on a tap assisting NOVA drill press. Well for all you skinflints the TWW taps are just as much at home with the use of a drill (cordless, or for you senior seniors, a corded one) though variable speed is recommended.
Image


When using the hand held drill, the lead in may not be exactly 90° but as you progress even just slightly in, it aligns with the pre drilled hole and creates as tight a fit as with the NOVA. The taps can be used in a drill with either a variable or hex chuck.

The new set is now ready to be bolted to the wall,
Image


You may all wonder what was that lonely first picture doing… Well he's part of the following conspiracy in presenting my acid test to all you skeptics out there… you know who you are!

Drilled a hole in a piece of pine and tapped it with a 10mm bit,
Image

Remember the first picture? OK, here it is again in case the grey matter is having a sabbatical,
Image

Decided to attack it with an 8mm allen key from the safety of my mini vice,
Image

After a significant amount of torque and fear of risking another hernia, I eased up on the bolt,
Image

You may have noticed that the head "countersunk" a good 5mm+ into the pine without affecting the integrity of the thread.

You may say it's only pine… "It's only pine!" That is why I managed to countersink, hardwood would (pardon the stutter) provide greater grip and countersinking resistance.

What does all this mean? Anyone wants a set of metric taps with complimentary drill bits. I paid $90 for the set and am prepared to relinquish it to a friendly home for maybe a donation of a cask of vino (locally).

For all those not interested in this topic, please go back and re-read the 1st paragraph and don't bother to read the rest.

PS. If you all stay good Boys and Girls and eat all your greens, I may post a review about wooden threads. Some may scream NO MORE and by pure mathematics, the remainder didn't, but you'll all have nightmares wondering if and when.
Very interesting, now will store this in the back of my memory and will have to ask for help to find it when I really need it, but the info is there so I know it can be done and looks to hold surprisingly well I must add.
 

Attachments

Metal bolts in timber threads.

Boys and Girls, if you are only interested in bargain basement solutions, please jump in the lift and press "G" for "Going Down to the bargain basement", exit the lift and go home without reading further.

Image


I am here to readily assist you in parting with your hard earned shekels without remorse, and if you are interested in a better solution (at a cost), read on. No… I don't have shares in the product and the retailer is not related to the "waterfowl family Anatidae" (Ducks 2u).

In the past I have occasionally used metal bolts in timber by cutting the timber thread using an appropriate tap from a low end tap and die set.
Image

I labelled the oft used taps so I didn't have to think each time,
Image


Then one day when I was trying to find that elusive imperial bit of hardware in our local dedicated fasteners retailer, I saw a set of taps and associated drill bits designed to handle our standard metric hardware and advertised as specifically suitable for woodworkers. Being a sceptic, I was mesmerised by the ad and even though I thoroughly quizzed the sales person, soon after I was heading back to my workshop to test my new thread making kit.
Image

I used to use this as a demo of wooden threads to woodworking guests in my workshop,
Image


I'm not going to say that after that I always used metal bolts in timber threads, but when I have used them, I was never disappointed. I am continually amazed at the amount of pressure that could be applied before the humble timber turned into fire wood.

Back in February 2017 I saw this video about timber threaders being designed by "The Wood Whisperer " and an accomplice. Being a fan of timber threads I couldn't resist the temptation to place an order.

Today, August 2017 (a mere 6 moths later), my set of imperial and metric taps arrived. I immediately made a bee line (ok, teleported down using the phone booth) to my workshop and decided to compare my "original dedicated" 10mm tap with the newly arrived Spagnoulo (TWW) offering.
Image


As always, it wouldn't be a Duck's Tale if I didn't digress. I was vaguely aware that my newly acquisitioned NOVA Drill Press had a tap feature and under duress, I quickly perused the instruction relating to that function.
Image


After a few button presses, the drill was configured to do some tapping (if only it could do the same with beer).
Image

While the speed is displayed as 900rpm, for tapping it was automatically reduced to 100rpm (what a bonus).

Now let's digress from the digression and waddle back to the story. I loaded each of the two 10mm taps and drilled the recommended holes.
Image

Image


Scurrying for a couple of 10mm bolts I was fortunate to find some as I would have had to tackle a couple of 12mm bolts with my die (and I didn't want to die today… never thought about tapping 12mm holes… DOH!).
Image


After threading the two bolts, I tried the wobble test… I passed it with flying colours as I hadn't had a drink all afternoon, however, the original tap exhibited a slight wobble while the new tap was virtually immovable. Now I will reflect that I have not had any issues with the old threads as once the bolt was cranked up, all play was taken out. The TWW taps were designed with greater tolerances and to give you an indication, the old tap's specs recommended an 8.5mm hole while the new one's was suggested at 7.5mm. Overall the TWW threads were much tighter providing a more secure fit. As screwing progressed (hmm.. do you screw a bolt as you don't bolt a screw… preferably, unless your old… I digress if you hadn't noticed), I had to resort to using a spanner much earlier than the "original" tap.

Now not everyone taken in by my silken salesmanship will purchase the taps and then go out and spend $2,400 on a tap assisting NOVA drill press. Well for all you skinflints the TWW taps are just as much at home with the use of a drill (cordless, or for you senior seniors, a corded one) though variable speed is recommended.
Image


When using the hand held drill, the lead in may not be exactly 90° but as you progress even just slightly in, it aligns with the pre drilled hole and creates as tight a fit as with the NOVA. The taps can be used in a drill with either a variable or hex chuck.

The new set is now ready to be bolted to the wall,
Image


You may all wonder what was that lonely first picture doing… Well he's part of the following conspiracy in presenting my acid test to all you skeptics out there… you know who you are!

Drilled a hole in a piece of pine and tapped it with a 10mm bit,
Image

Remember the first picture? OK, here it is again in case the grey matter is having a sabbatical,
Image

Decided to attack it with an 8mm allen key from the safety of my mini vice,
Image

After a significant amount of torque and fear of risking another hernia, I eased up on the bolt,
Image

You may have noticed that the head "countersunk" a good 5mm+ into the pine without affecting the integrity of the thread.

You may say it's only pine… "It's only pine!" That is why I managed to countersink, hardwood would (pardon the stutter) provide greater grip and countersinking resistance.

What does all this mean? Anyone wants a set of metric taps with complimentary drill bits. I paid $90 for the set and am prepared to relinquish it to a friendly home for maybe a donation of a cask of vino (locally).

For all those not interested in this topic, please go back and re-read the 1st paragraph and don't bother to read the rest.

PS. If you all stay good Boys and Girls and eat all your greens, I may post a review about wooden threads. Some may scream NO MORE and by pure mathematics, the remainder didn't, but you'll all have nightmares wondering if and when.
If you are still willing to relinquish those metric bits and drills, Id gladly take them off your hands :)

Ive even a project to use them on this week! Hows that!
 

Attachments

21 - 40 of 543 Posts