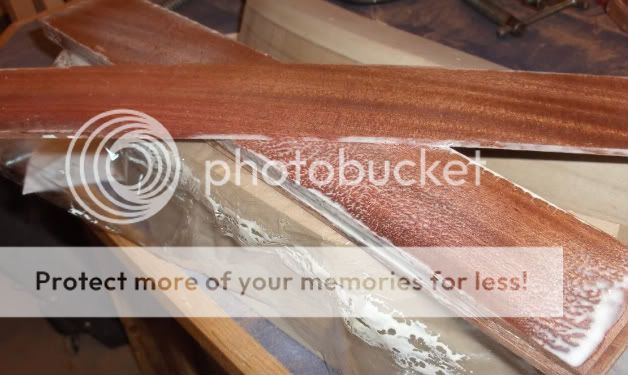
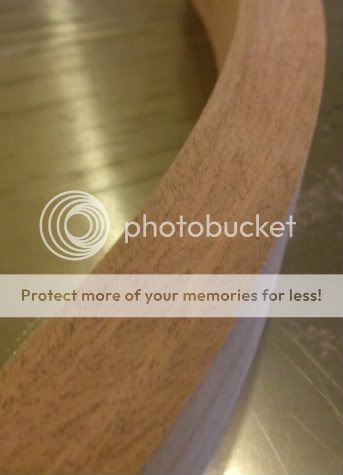
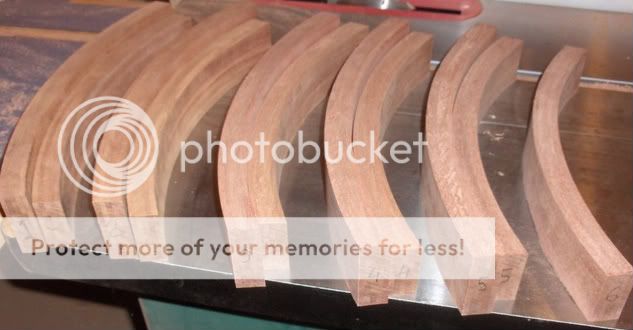
LumberJocks Woodworking Forum banner
124K views 179 replies 41 participants last post by  sras  
#1 ·
Mahogany Kitchen Stool Project

Well, here we go. I have been working on the design and preparation of this project for 3 years. The final prototype was just completed.


This is my second prototype. The first one was a quick (that is a relative term) mock up to see if I had the size correct. I built this out of scrap 2Ă—4s and screws. Pieces were only roughly shaped. After building this, we determined that it was about a half inch too tall.


The second prototype was built as a prelude to actual construction. Each stool has 42 mortise and tenon joints. Several of them are angled and others are on curved parts. By making a full prototype, I have a scale pattern to verify the layout of each piece before I cut into my lumber.


Also, I get a chance to make mistakes and learn. I ended up missing on three or four dimensions and had to patch parts up. I have chosen to form the curved parts by laminating thin strips. The two curved boards on the back formed very well, but the 5 slats did have some spring back. I'll need to adjust the form or move to thinner strips. Stay tuned on that one.

Finally, I get one last chance to check my design choices. In this case, my wife and I felt that the slats on the back were spaced a little too far apart. It ended up crowding the gap to the legs. I changed the design and moved the slats a little closer together.

I'll outline how I intend to proceed with this blog. I'll post updates on the construction as I go. Woodworking is a spare time activity for me. Weeks may go by with only a little activity. I'll post a few "flashback" entries where I will cover my design process.

I'll also keep a log of construction hours. This will not include design or prototyping time.

Cutting rough stock : 2 hrs
Cutting legs to width and thickness: 4 hrs 20 min
Cutting thin stock for seat back laminations: 3 hrs

Total so far: 9 hrs 20 min
 
#6 ·
Captian,
I am a little nervous about getting all four legs to be square. I am thinking about glue up fixtures.

Finish is a long way off, but I have had my best luck with General Finishes wipe on products. My big question will be if I want to pre finish any (or all) parts.
 
#7 ·
Very Nice. I like the curved pieces a lot and they all mesh real well with the design. Looks like a winner all the way around. Great approach with the prototype. I still have a prototype of Rodel's arts & crafts chair in pine in my loft, but haven't come further with it. I'm looking forward to seeing your blogs on this project.
 
#10 ·
Mike(s),
The design was inspired by chairs for our kitchen table. That helped narrow down the infinite design options. I'll show more in a future entry.

Ellen,
My one criticism of our kitchen chairs was the construction. These stools should be much sturdier.
 
#11 ·
If you're nervous about gluing the four legs square to each other, keep in mind that good joinery will force the legs toward square. It should also be relatively easy to measure the diagonals and clamp the long side a bit and remeasure. Just don't be too hasty about popping the chairs out of the clamps like I tend to do. It takes several hours at 50F for Titebond II to cure in my garage. Also, make sure your glue-up platform is flat.

At least your chairs are square. Rodel's are trapezoizal. Hopefully, squaring them will be the same process…
 
#12 ·
Thanks for the input Captian,
Actually, the side rails angle in forming a trapezoid and the rear legs are angled out. Combine that with the curved parts and that's where I start thinking about glue up jigs. I'll have to play around a bit when the time comes.
Good point about the joinery. The prototype is not glued up and it sits square. People have been making chairs that touch all four feet for a very long time. I ought to be able to figure it out.
Keep the suggestions coming - that's how I'll figure it out.
 
#13 ·
Oh, if you're in the same trapezoid situation, then I would recommend loose-tenon joinery. If you make the mortises perpendicular to the mating surfaces, then regardless of the angle the pieces make with each other, the joints will be "square". I found this out when making that Ipe bistro table a few years ago that had legs at a 3 degree angle, so the aprons had to match.

I've made my own router jigs and loose tenons in the past, but I think I'm going to give the Beadlock Pro system a test-drive for my first chair.
 
#18 ·
Hey Bud
Been follow your blog as best I can, never noticed how many chairs you are making?

Figured I'd start at the beginning and ask.

Hope you are enjoying your time spent on this project. Very precise work.

Regards
DAN
 
#21 ·
Begin Rough Cutting

Back in early November, I went to my favorite lumber yard and started looking at what kind of wood to use. I was interested in mahogany, but wanted to check out my options. They had some very nice ribbon mahogany. I went home and gave it some more thought. The next weekend, I made the plunge.


I had only one problem, I kept seeing pieces that looked too nice to pass up! I ended up with way more than I needed for this project. I can rationalize it that I saved gas by not making an extra trip ;) You can see 3 fir 2Ă—4's on top of the stack. They ended up being the material for my prototype.

Even though I had plenty of material, I took it as a challenge to try to get the most use out of each and every board foot. I spent way too much time on this, but I packed in the pieces in the most compact cut layout I could. Here is the result after 3 or 4 iterations on my CAD system.


I'm hopeful I will end up with only small blocks of scrap and a big pile of sawdust!

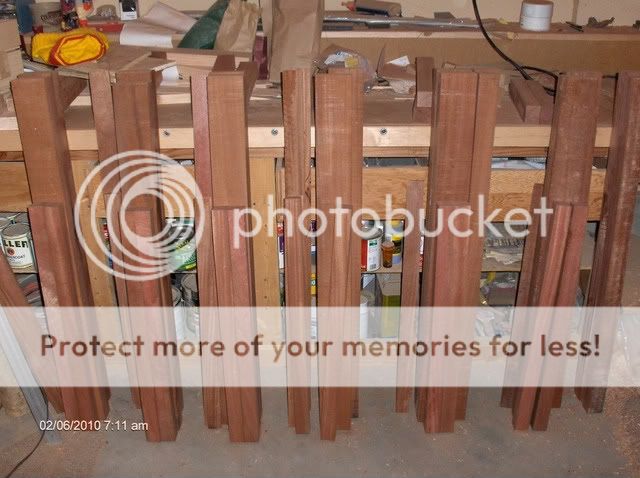
Fast forward to last weekend. I finally was able to start cutting the legs. Here is where I ended up.


I got the width and thickness rough cut and then ran them through my planer. I learned something about my dial calipers. I bought a nice one with resolution down to 0.001 inches. The resolution makes it nice to know exactly what dimension I am at. On the other hand, I don't need to worry about being off by 0.001 or 0.002 inches. If I can't see the difference when I hold two pieces up to each other, I am happy.

Current time log:
Cutting rough stock: 2 hrs
Cutting legs to width and thickness: 4 hrs 20 min
Cutting thin stock for seat back laminations: 3 hrs 15 min
Prepping laminations: 15 min

Total so far: 9 hrs 50 min
 
#32 ·
Preparing Lamination Strips

There are three curved parts in each stool. These are formed by gluing up thin strips to create a thicker laminated part. The three parts are:

1. Seat Back - 7/8" thick (formed with 5 or 6 strips)
2. Back Rest - 7/8" thick (formed with 5 or 6 strips)
3. Slats - 3/8" thick (formed with 3 or 4 strips) (5 per stool)

As I plan the construction, I start to realize that I have 6 stools with 7 curved parts each. That works out to 42 glue ups. Each one requires a full day for the glue to cure. I do have three different forms, but this is still a lot of time - 30 glue ups are for the back slats. I need to get the glue up process started first. I can work on shaping the other pieces while the glue dries on the laminated parts.

The 7/8" thick parts were prototyped with 6 layers. They formed fine with no spring back. I prefer to use fewer, thicker strips and end up with one less glue joint. I'll be testing out the first glue up with 5 strips and see how it goes.

The 3/8" slats were prototyped with 3 layers. There was some spring back that made it difficult to align parts for assembly. I need to reduce the spring back. My plan is to try to modify the form and test it with another prototype glue up.

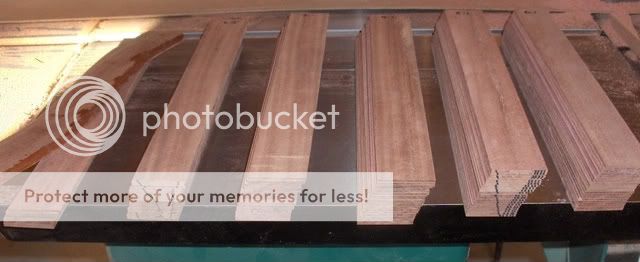
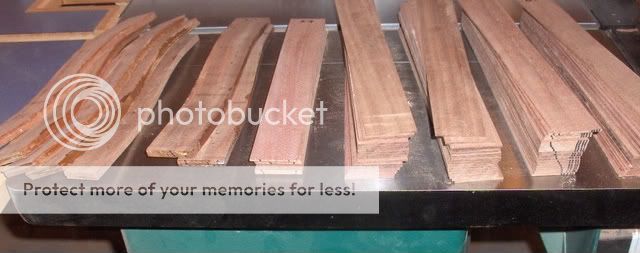
The wood for the laminations was resawn off the Back Leg stock. I ended up with pieces about 1/2" thick and 3 5/8" wide. They were long enough to provide two pieces for the glue up. I then resawed these to give me 2 long strips. Now I am up to 4 pieces for the glue up.


I figured I would share some of the things I do when resawing. First I use a 7 1/4 inch thin kerf blade. The kerf is only 1/16". This helps me get the most out of each piece. If the board is too wide, I need to stay with one of my larger blades. I do not have a zero clearance insert (yet), so I use a long scrap of thin plywood and clamp it to my saw table. I raise the blade through the plywood and I end up with a temporary zero clearance solution. Finally, I use a marking technique to keep track of which board each pair of strips came from.

I use my hand saw and make a set of marks across the end of the board.


In this case I have marked this piece as belonging to stool number 4. By angling the marks, I can return the two pieces to the same orientation as before the resaw cut. Each stool has 2 boards (one for the Seat Back and one for the Back Rest). I mark the second board for stool number 4 with 4 cuts, but I place them in a different spacing.

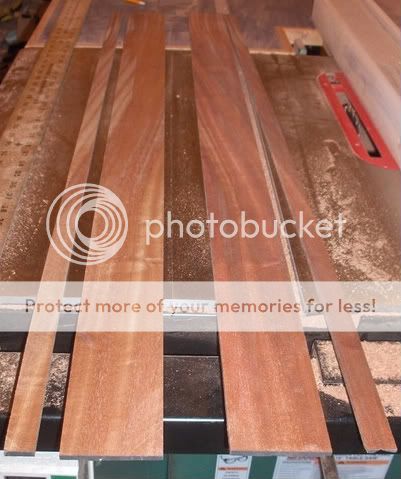
I now have strips of wood that can provide 4 pieces for my glue up, but I need 5 or 6. Fortunately, my strips are wider than I need. When I rip them to the desired width, I have two narrow pieces left over. In the case of the Seat Back, these two narrow strips can be glued together. This way all the wood comes from the same board and I should be able to keep the colors matched.


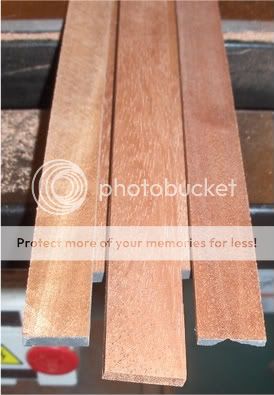
Once I let the glue dry and clean up the piece, I have 3 strips of wood. Each is long enough to give me two pieces for a total of 6 parts for the lamination.


The strip on the right is the glued up one. The Back Rest is wider. As a result, my left over pieces are not wide enough to make the third strip.


In this case, I have added a third piece of left over stock to make the strip wide enough.


This entry is long enough. I'll cover more later.

Current time log:
Cutting rough stock: 2 hrs
Cutting legs to width and thickness: 4 hrs 20 min
Cutting thin stock for seat back laminations: 3 hrs 35 min
Prepping laminations: 2 hrs 20 min
Glue up Laminations: 35 min

Total so far: 12 hrs 40 min
 
#42 ·
Setting laminations to final thickness

Once I have the 3 lamination blanks cut to width I thickness sand the strips to reach the final dimension. I have tried using my planer, but when the strips get this thin it is easy to end up with damage. I set my ShopSmith up as a disc sander and use a thicknessing jig. I first showed the use of this in a previous blog. There was some interest in a more detailed description so here it is.

Here is the setup.


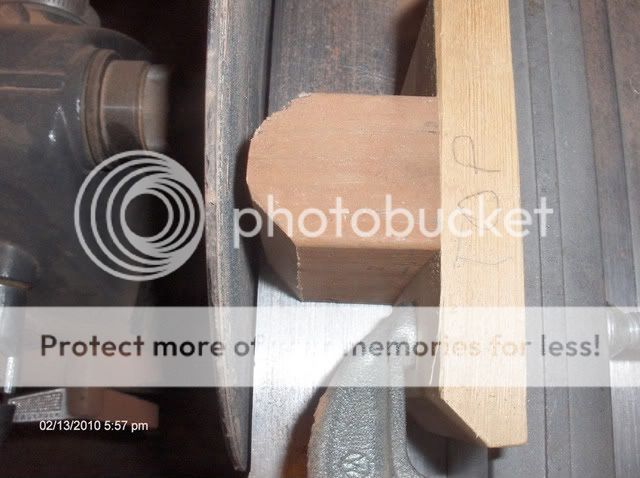
Basically it is a 3 1/2 inch tall bullnosed block clamped to the fence. The block is set up closer to the edge of the table than the desired final thickness of the strip. In this case I want strips 0.175" thick so the block is set about 1/8" from the edge of the table. The disc is initially positioned from the block at the current strip thickness (just over 0.2 inches in this case). I take advantage of the quill advance capability of the ShopSmith and move the disc closer to the block after each pass.


The construction of the block is pretty staright forward. I cut a bevel on each end of a 2Ă—4 leaving about 1/4" flat on the end. I then cut the beveled end off making sure I had enough length to accomodate the clamp I will be using. Make sure the cut is square. Then mount the beveled piece to a cross piece. The final step is to true up the edge. I clamped the block to the fence and set it up hanging over the table. I then advanced the disc against the block. This way I have the functional edge of the block exactly parallel to the disc.


Once this was done I marked the top side (see top two photos). If I were to flip this over, I might get tapered width strips (that would be bad).

A final set up element is to mount a dust collection hose underneath the table next to the disc. I don't always do this, but this project has a lot of strips to sand. In no time, I had my shop coated with fine mahogany powder. The hose does a good job of collecting most of the dust. I took this shot while sanding a strip. You can see some of the dust in the picture.


Finally, here are a few operating tips.

1. Do not let your fingers touch the disc! Use long strips - they should extend 3 or 4 inches past each side of the disc to give you good finger access.
2. Set the block up to contact the disc on its downward motion. Setting block close to center can result in the strip being pushed back at you.
3. Feed the strip in until there is only 3 or 4 inches of strip left, then pull the strip out on the exit side.
4. Allow about 3 inches on each end as waste. The strips can taper a bit as you start the strip or pull it out.
5. Keep the strip feeding in as straight as possible. Letting it bump against the disc any where but at the block can result in gouges.
6. The exception to #5 is if you are sanding very thin strips. Then the strip can fall between the table and the disc - in fact there may be no table exposed past the block. In this case rest the strip on the table, bend it into the gap and bend it back onto the table once you can reach it safely. I have managed to sand strips as thin as 0.02"
7. Use light passes. I take off about 0.005 each time. You can force a bigger cut, but I worry about deflections and not getting a consistent strip.
8. One time past the disc will not remove all the material. I have made as many as 5 passes without changing the spacing.
9. You can control how much is removed in a pass by how quickly you feed the strip. This gets easier on the 2nd or 3rd pass at the same gap between the fence and disc.

I have been using this method for several years. I am able to set my strip thickness to within 0.004" (+/- 0.002").

If you have a conventional disc sander, you could shim the block closer after each pass - or get fancy and build an adjustable version.

The next entry will cover glueing up some curved parts. As always, comments are welcome.

Current time log:
Cutting rough stock: 2 hrs
Cutting legs to width and thickness: 4 hrs 20 min
Cutting thin stock for seat back laminations: 3 hrs 35 min
Prepping laminations: 3 hrs 20 min
Glue up Laminations: 1 hr 35 min
Trim Laminated Parts: 15 min

Total so far: 15 hrs 5 min
 
#51 ·
Laminating Seat Back and Back Rest

Once I have my strips sanded to thickness, I can cut them and get the five pieces I need for gluing. I have enough material for six so I'll have a strip left over. There are a couple of cases where I ended up with damage on part of a strip and that sixth piece was nice to have.

First, I sort my six long strips and find which end I want to have in the final part. I look for color, grain direction and any character that I might want to have on the outer faces. Then I mark for cutting. I use the inner form and rock it along the strips to get the length.


I then set aside one piece and cut the last two to length. Next, I spend a few minutes and sort and re-arrange the pieces. I am looking for the two nicest surfaces to be on the outside as well as have uniform color and grain direction on the top edge. This can take several tries before I find a combination I am happy with. I then mark the pieces to make sure I keep the orientation unchanged.

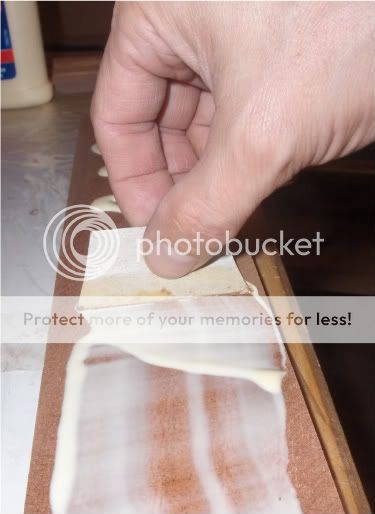
Now it is time to apply glue. I use yellow wood glue - it has a fairly slow set up time and that is a good thing for this operation. I just use a piece of cardboard to get an even coat.


I coat one face and make sure the entire surface is coated and fairly even. I can see wood grain through most of the glue. If I have too much, I transfer it to the next surface to be glued.


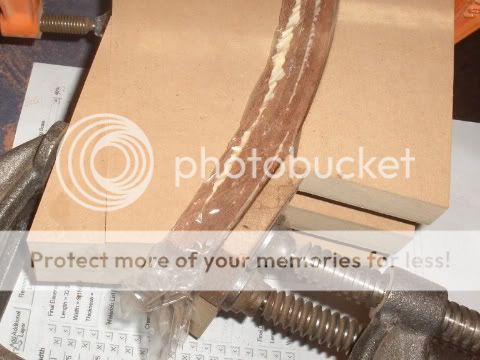
One thing that you do NOT want to do is glue your piece to the fixture. To prevent this, I use a piece of stretch wrap (from the kitchen). Then I put the stack into the fixture and start to draw it together.


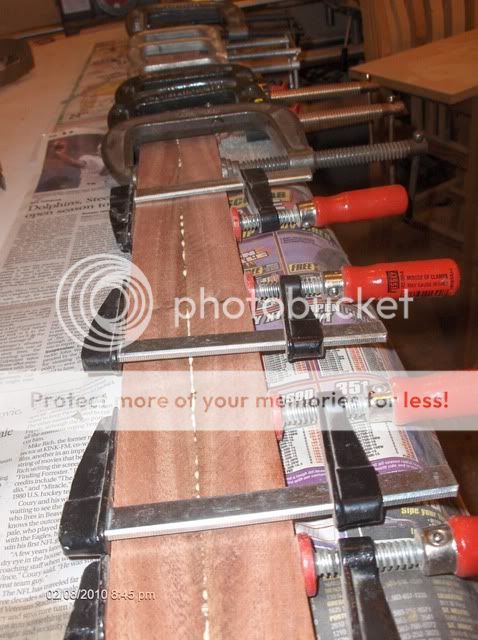
The fixture has two arcs offset by the thickness of the part. These arcs were cut carefully to ensure that I would get even pressure along the glue joints. After the first clamp is at its limit, I add two more clamps. As I draw these two in, the first clamp comes off.


The outer form of the fixture is set up to be a jig for cutting the tenons. As a result, they are short and do not pull the ends in to the inner fixture. So I add C-clamps on each end.


After getting all 6 clamps tightened, I set the assembly aside for 24 hours. I have two fixtures - one for the curve at the back of the seat and one for the curve at the top of the back rest (you can refer back to a picture of the prototype here). The two pieces have a different radius.


I checked the spring back after when I unclamped the first part. There was about 1/16 of an inch at the center. I used 6 laminations in the prototype and there was less than half that much. I like fewer glue joints , so I will live with this much spring back.


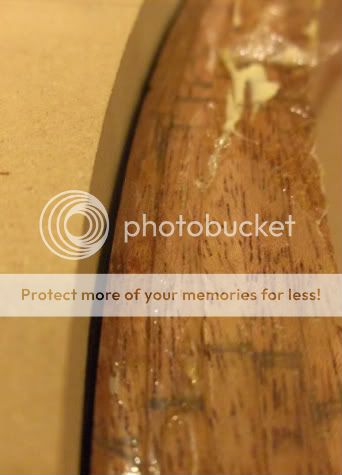
My first glue up had a little too much glue. The squeeze out wicked onto the face of the part. I used less on the rest of the parts and never had this issue again. It only took a little sanding to remove the squeeze out.


On one piece, I had a swirl in the grain that looked cool. It was on two of my parts so by placing one on the inner face and the other on the outer, I could give the illusion that the swirl went all the way through the part. Unfortuantely, the part on the outer surface broke during clamp up. I had to unclamp, unwrap, remove the broken part, retrieve my spare 6th part, rearrange for grain and color, clean the glue off the new outer surface and reclamp. It was a bit of scramble, but it all worked out.


After unclamping, I trim the part to width and length. I am very pleased with how these parts are turning out. The glue lines are hard to find and the parts are very uniform.


Here is a shot of eleven of the twelve parts. It has taken a while to get this far, but I am pleased with my pace.


Current time log:
Cutting rough stock: 2 hrs
Cutting legs to width and thickness: 4 hrs 20 min
Seat Back and Back Rest
> Cutting thin stock for laminations: 3 hrs 35 min
> Prepping laminations: 8 hrs 40 min
> Glue up Laminations: 3 hr 50 min
> Trim Laminated Parts: 2 hr 25 min

Total so far: 24 hrs 40 min
 
#59 ·
Finding shop time in a busy schedule -or- Making slats & cutting pieces

The next step in this project is making the curved slats for the back of the stool. The process is the same as for the curved parts with a couple exceptions. First the pieces for each set of slats are cut from two blocks. These blocks were next to each other when cut from the large stock. Instead of marking with a saw cut as I did last time, I used a permanent marker.


By angling one stripe across both blocks, I am able to keep the strips in order. The total number of stripes tells me which stool this set of strips belong to.

The other difference is the clamping jig.


This jig has two curves and required careful adjustment to create a tight fitting result.

But, this is not what I want to write about for this post. I think it would be nice to share how I find shop time. We all have busy schedules and, at least for me, the woodshop takes a lower priority. I find that I can fit in shop time a little bit at a time.

I start out with a stack of strips to be glued up. This makes a good example of how to find shop time.


My shop is located off the back of my garage. Gluing up a set of 4 strips takes 10 to 15 minutes. If I can find that much time before I leave for work, I have enough time to glue one more set.


As the days go by, I find that the pile slowly shifts from only one done to only a few left to do.


And then the day comes when I have glued the last one up!


Then there are days when I have more time. That is when I can take the rest of the wood and start to cut it into final pieces.


In this case, there is a bit of prep work to make sure that the grain runs from one part to the next wherever possible. There were several 15 to 30 minute sessions where I just focused on marking the pieces.


Once again, cutting the pieces is done a little bit at a time. The longest session was less than 2 hours. Over time, the pile of big parts turns into a pile of smaller parts.


And once again, the day came when the last pieces were cut.


There is likely some extra time in this project that results from working in small sessions. For me the tradeoff is that I get to make progress and spend time in the shop more often.

The project is now to the point where all the pieces have been cut to thickness and width (well almost all … ). Next is cutting to length and then cutting mortises.


Current time log:

Cutting rough stock: 2 hrs
Cutting legs to width and thickness: 4 hrs 20 min

Seat Back and Back Rest
> Cutting thin stock for laminations: 3 hrs 35 min
> Prepping laminations: 8 hrs 40 min
> Glue up Laminations: 3 hr 50 min
> Trim Laminated Parts: 2 hr 25 min

Back Slats
> Cutting thin stock for laminations: 1 hr 55 min
> Prepping laminations: 3 hrs
> Glue up Laminations: 6 hrs 5 min
> Trim Laminated Parts: 10 min

Lower rail parts
>Cut to width and thickness: 10 hrs

Total so far: 44 hrs (7+ hrs per stool)
 
#71 ·
While visions of perfection dance in my head

I deal with correcting mistakes instead!

It has been quite a while since my last post, but I AM still working on this project. In addition to regular life, we have had a week long vacation, business trips (including 2 weeks in China), a family illness and preparing for RAGBRAI . The shop time has been hard to come by.

I figured this would be a good time to confess and share how I am dealing with this round of unexpected issues.

Dull Bandsaw Blade

I started to shape one side of the back legs. I knew my bandsaw had a dull blade, but I got lazy and told myself that I could just leave a little extra wood. Wrong. The blade took on a twist and curved right past my line. Stopped and bought a new blade (one with a better tooth profile) and the rest of the cuts went fine. But I was stuck with one leg that needed help.

My solution was to flatten out the damaged area and glue a patch on.


After the glue dried, I smoothed the sides. The grain matched quite well.


Once I did the final shaping, there is a faint glue line that I think willl nearly disappear once the wood darkens (sorry no pic)

Router Pattern

This one was an act of real poor thinking. I had been shaping several legs and always being careful to turn the router on and off only when it was stable on the template.

Except this ONE time.

I lifted the router while it was on and the bit cut into the pattern :( The solution here was automotive body filler (Bondo).


The filler was applied to the cut and then sanded smooth.


Chipout

The base of the leg flares out and it was not a surprise that I had some chipout. Most of the time, I could find the missing piece and glue it back in. One time I had to make a patch. I squared up the chipped area and flattened it with a sharp chisel.


I found a piece of wood with matching color and glued a block in.


Mortises and Tenons

This project has a LOT of mortises and tenons. I took extra time to draw each mortise and then I would check it against my pattern piece.

Foolproof - right?

Wrong!

Every once in a while, I would forget to check a piece against my pattern. As luck would have it, one time I skipped checking was on a part where I had shifted the mortise location 1/2 inch. Back to gluing patches… I came up with a fairly creative soution to apply pressure while the glue dried. Luckily, this particular joint has a tenon shoulder that will completely cover this patch.


I managed to cut a tenon or two a little thin. More patches. These are completely hidden inside the mortises. I should point out the black dot on the end of the tenon. This is my technique for preserving the orientation of each piece. The black dot is always in the top right front corner of each piece.


The Big One

When I first did the rough cutting of the legs, I had one kick back incident. The only damage was the blade dug into the side of one of the legs. I saved the scrap from shaping the leg to get a good color match.


I used my laminate trimmer to create a pocket of even depth. Then I created a paper pattern by rubbing a pencil over the recessed area. I cut a thin slice off my patch piece and placed the pattern to match the grain.


It took a while to get the patch shape to match the cutout area. Lots of hand filing.


I glued the patch in place with just a little extra thickness. A little sanding and this is what I ended up with. I had hoped for a little better color match, but it is down next to the floor so hopefully it won't be too big of a distraction.


I have been cutting a lot of motises and tenons. Not the most thrilling blog material, but I'll try to show where I am with my next post.

Current time log:

Cutting rough stock: 2 hrs

Legs
> Cutting to width and thickness: 4 hrs 20 min
> Cut to final length: 3 hrs 30 min
> Shaping: 5 hrs 50 min
> Mortises: 10 hrs 35 min

Seat Back and Back Rest
> Cutting thin stock for laminations: 3 hrs 35 min
> Prepping laminations: 8 hrs 40 min
> Glue up Laminations: 3 hr 50 min
> Trim Laminated Parts: 2 hr 25 min

Back Slats
> Cutting thin stock for laminations: 1 hr 55 min
> Prepping laminations: 3 hrs
> Glue up Laminations: 6 hrs 5 min
> Trim Laminated Parts: 10 min

Lower rail parts
> Cut to width and thickness: 10 hrs
> Cut to length: 1 hr 30 min
> Tenon: 13 hrs 20 min

Total so far: 78 hrs 45 min (13+ hrs per stool)