Another toy BullDozer
Been playing with another wood toy project.
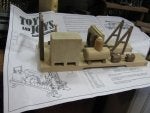
Bought and down loaded the plans for the Bull Dozer from Wood Store Net.
I was looking at the High Gear Dozer from Toys and Joys but you have to order the plans which is fine but I wanted to get started now not two weeks from now.
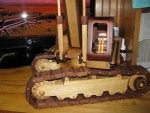
Well here's what I've got done so far.
![Image]()
Now I'm going to start at the Beginning. LOL
I'm building with Walnut I found while scrounging and Mahogany from a bed also found lumber.
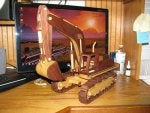
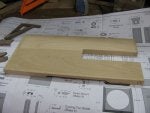
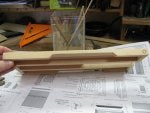
The plans show a flat blade for the front but as I'm doing with a lot of this build I'm taking ideas from the Toys and Joys pictures and making this a little more of a show toy and not a kids play toy.
So I'm cutting out the center of the blade to make it more real to life.
To make the blade I clamped my sliding fence down and just tacked a angled fence to get the cut.
Fast and easy.
![Image]()
![Image]()
![Image]()
Once I get working I forget to take pictures, and I jump around a lot.
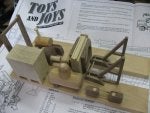
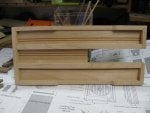
While the blades glued up and drying I worked on the base and as it was drying I built the cabin.
It's pretty cool in my shop so the glue is taking a lot longer to dry.
![Image]()
![Image]()
Now a little work on the cabin.
![Image]()
![Image]()
![Image]()
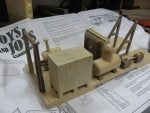
I added the radiator because after I got the base and engine compartment built and started sanding it a large screw hole showed its ugly face so had to come up with a work around or start over, hey I love a good radiator so why not.
![Image]()
![Image]()
I used store bought wheels they look so much better.
The plans called for 1" wheels down below but Hobby Lobby didn't have any so I got 1 1/2" and made a jig and sanded them down to fit.
I hated to have to make the jig but once it was made the job went really fast and their all just right plus now I have the jig to make my own wheels if I need to.
The more I look at it the better the 1" wheels look.
The stock wheels would have looked like the bigger wheels these look different like their supposed to be there. lol
I would have loved to build the real tracks for this build like on the T&Y build but we'll save that for next time.
I still may buy the T&Y plans mainly for the tracks setup.
![Image]()
![Image]()
![Image]()
![Image]()
That's all for now thanks for looking in.
Been playing with another wood toy project.
Bought and down loaded the plans for the Bull Dozer from Wood Store Net.
I was looking at the High Gear Dozer from Toys and Joys but you have to order the plans which is fine but I wanted to get started now not two weeks from now.
Well here's what I've got done so far.
Now I'm going to start at the Beginning. LOL
I'm building with Walnut I found while scrounging and Mahogany from a bed also found lumber.
The plans show a flat blade for the front but as I'm doing with a lot of this build I'm taking ideas from the Toys and Joys pictures and making this a little more of a show toy and not a kids play toy.
So I'm cutting out the center of the blade to make it more real to life.
To make the blade I clamped my sliding fence down and just tacked a angled fence to get the cut.
Fast and easy.
Once I get working I forget to take pictures, and I jump around a lot.
While the blades glued up and drying I worked on the base and as it was drying I built the cabin.
It's pretty cool in my shop so the glue is taking a lot longer to dry.
Now a little work on the cabin.
I added the radiator because after I got the base and engine compartment built and started sanding it a large screw hole showed its ugly face so had to come up with a work around or start over, hey I love a good radiator so why not.
I used store bought wheels they look so much better.
The plans called for 1" wheels down below but Hobby Lobby didn't have any so I got 1 1/2" and made a jig and sanded them down to fit.
I hated to have to make the jig but once it was made the job went really fast and their all just right plus now I have the jig to make my own wheels if I need to.
The more I look at it the better the 1" wheels look.
The stock wheels would have looked like the bigger wheels these look different like their supposed to be there. lol
I would have loved to build the real tracks for this build like on the T&Y build but we'll save that for next time.
I still may buy the T&Y plans mainly for the tracks setup.
That's all for now thanks for looking in.