LumberJocks Woodworking Forum banner
41 - 60 of 3,208 Posts
Excavator Toys & Joys #1

Finally got the plans for the Toys & Joys Excavator.
I had the plans for the Wood Stores Excavator but just wanted to try my hand at building some tracks.
Before I started this project I've checked out a bunch of other builds on this site and man there's some OUT STANDING work going on around here!!!

I'm going to be using walnut and sassafras.
I wanted the sassafras for the root beer smell but it just stinks! LOL
Sassafras looks a lot like oak but with more figure.
Image


They say to start on sheet one and go from there but I wanted to get the base built first and that's on pages 2 & 3.
Upper track base
lower track base
round spacer
The main base.
Image

There are a couple a tabs that need to be glued on but I added notches for added strength, plus changed to walnut for a little color.
Image

Gluing on the fender and fender brackets.
Image

Image

Image


All so worked on the engine compartment.

Image

That's all for today thanks for looking in.
I,m glad with this blog!! Keep on going.
The more people come up with these kinds of blogs the more toy builders there will come. My next T and J project will maybe also this excavator.
 

Attachments

Discussion starter · #42 ·
Excavator Toys & Joys #1

Finally got the plans for the Toys & Joys Excavator.
I had the plans for the Wood Stores Excavator but just wanted to try my hand at building some tracks.
Before I started this project I've checked out a bunch of other builds on this site and man there's some OUT STANDING work going on around here!!!

I'm going to be using walnut and sassafras.
I wanted the sassafras for the root beer smell but it just stinks! LOL
Sassafras looks a lot like oak but with more figure.
Image


They say to start on sheet one and go from there but I wanted to get the base built first and that's on pages 2 & 3.
Upper track base
lower track base
round spacer
The main base.
Image

There are a couple a tabs that need to be glued on but I added notches for added strength, plus changed to walnut for a little color.
Image

Gluing on the fender and fender brackets.
Image

Image

Image


All so worked on the engine compartment.

Image

That's all for today thanks for looking in.
Thanks guys!
Dutchy hope you don't mind I tried my hand at doctoring the pictures with some notes like you do and it added a new dimension to playing with these posts.
 

Attachments

Discussion starter · #43 ·
Excavator Day 2

Cleaned up the mating edges then sanded some more on the base and engine cover then,
played with the booms and bucket.
Image


Image

Made the booms in three parts to add a little color and just change it around a little.
Still need to plane down the booms some more .

Image

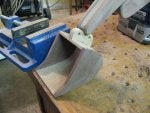
The bucket took quite a bit a work, first glue it all up then cut it out then sand sand sand.
I cut out the inside of the bucket then sanded it up really good then glued up the sides.
The main bucket is all end grain [1/4" thick] it could be easily broken so did all the inside work then glued the side on and we're safe to move to the out side of the bucket.

Gluing up the bucket.
Image


Gluing up the boom.
I like to use stick glue to hold the patterns on the wood.
I should also add I take the plans to my copier and print out all the parts needed, two or three copy's to cut up for the patterns.
Image

Image


If the tornado's don't get us tonight I'll start in the cabin tomorrow..
Saving the best for last, tracks.
 

Attachments

Discussion starter · #44 ·
Excavator Day 2

Cleaned up the mating edges then sanded some more on the base and engine cover then,
played with the booms and bucket.
Image


Image

Made the booms in three parts to add a little color and just change it around a little.
Still need to plane down the booms some more .

Image

The bucket took quite a bit a work, first glue it all up then cut it out then sand sand sand.
I cut out the inside of the bucket then sanded it up really good then glued up the sides.
The main bucket is all end grain [1/4" thick] it could be easily broken so did all the inside work then glued the side on and we're safe to move to the out side of the bucket.

Gluing up the bucket.
Image


Gluing up the boom.
I like to use stick glue to hold the patterns on the wood.
I should also add I take the plans to my copier and print out all the parts needed, two or three copy's to cut up for the patterns.
Image

Image


If the tornado's don't get us tonight I'll start in the cabin tomorrow..
Saving the best for last, tracks.
Want to see one mind blowing excavator.
http://www.talkfestool.com/vb/woodworking-projects/4076-wood-model-excavator.html
 

Attachments

Excavator Day 2

Cleaned up the mating edges then sanded some more on the base and engine cover then,
played with the booms and bucket.
Image


Image

Made the booms in three parts to add a little color and just change it around a little.
Still need to plane down the booms some more .

Image

The bucket took quite a bit a work, first glue it all up then cut it out then sand sand sand.
I cut out the inside of the bucket then sanded it up really good then glued up the sides.
The main bucket is all end grain [1/4" thick] it could be easily broken so did all the inside work then glued the side on and we're safe to move to the out side of the bucket.

Gluing up the bucket.
Image


Gluing up the boom.
I like to use stick glue to hold the patterns on the wood.
I should also add I take the plans to my copier and print out all the parts needed, two or three copy's to cut up for the patterns.
Image

Image


If the tornado's don't get us tonight I'll start in the cabin tomorrow..
Saving the best for last, tracks.
Still need to plane down the booms some more, You would have lots of benefit from a drumsander :)

You have weighty books sir.

I have seen the blowing excavator and I wonder whether I will continue toy building. Incredible to see such cracks.

Thanks for sharing.
 

Attachments

Excavator Day 2

Cleaned up the mating edges then sanded some more on the base and engine cover then,
played with the booms and bucket.
Image


Image

Made the booms in three parts to add a little color and just change it around a little.
Still need to plane down the booms some more .

Image

The bucket took quite a bit a work, first glue it all up then cut it out then sand sand sand.
I cut out the inside of the bucket then sanded it up really good then glued up the sides.
The main bucket is all end grain [1/4" thick] it could be easily broken so did all the inside work then glued the side on and we're safe to move to the out side of the bucket.

Gluing up the bucket.
Image


Gluing up the boom.
I like to use stick glue to hold the patterns on the wood.
I should also add I take the plans to my copier and print out all the parts needed, two or three copy's to cut up for the patterns.
Image

Image


If the tornado's don't get us tonight I'll start in the cabin tomorrow..
Saving the best for last, tracks.
Very Very nice, I really like what you are doing with the wood Combinations
And I agree with Dutchy I am not sure I will build anymore after looking at that one All I can say is wow
 

Attachments

Discussion starter · #47 ·
Excavator Day 2

Cleaned up the mating edges then sanded some more on the base and engine cover then,
played with the booms and bucket.
Image


Image

Made the booms in three parts to add a little color and just change it around a little.
Still need to plane down the booms some more .

Image

The bucket took quite a bit a work, first glue it all up then cut it out then sand sand sand.
I cut out the inside of the bucket then sanded it up really good then glued up the sides.
The main bucket is all end grain [1/4" thick] it could be easily broken so did all the inside work then glued the side on and we're safe to move to the out side of the bucket.

Gluing up the bucket.
Image


Gluing up the boom.
I like to use stick glue to hold the patterns on the wood.
I should also add I take the plans to my copier and print out all the parts needed, two or three copy's to cut up for the patterns.
Image

Image


If the tornado's don't get us tonight I'll start in the cabin tomorrow..
Saving the best for last, tracks.
We've got to remember, we're building beautiful or at least fun to build toys while he was making a peace of art that took him years.
 

Attachments

Discussion starter · #48 ·
Escavator day 3

Played with the cabin today, thankfully the bad weather went around us here in Huntsville al.
Went to Google and searched for a more modern looking cabin.
The picture I liked was of the whole machine so the cabin was to small so took the picture printed it out then enlarger it. It took 4 tries at different sized before I found the right size.
Then made 4 copy's and cut and pasted on the wood cut them out and it's done.
Sounds easy but it took all day.
I was planning to go rounder with the cabin but as I got working a more square one came into being.
I will be smoothing the edges but not as rounded as the one picture shows.
Image


I thought when I got back into toy building that the band saw would be my main tool but the scroll saw does a much better job on the small stuff and you don't have to do as much sanding.
Don't want it to sound like there's no sanding just makes smaller gouges that have to be sanded out.

Image


Image


Image


Image


Image

I would glue the side to the back clamp it up and sand something then
glue up the top and sand something and or get the next part ready to glue up.

Image


This is one of those deals where between glue ups it's sand sand sand.

Image


Here's a photo story of the build so far.
http://s1273.photobucket.com/user/heretolearn7/Excavator/story
 

Attachments

Escavator day 3

Played with the cabin today, thankfully the bad weather went around us here in Huntsville al.
Went to Google and searched for a more modern looking cabin.
The picture I liked was of the whole machine so the cabin was to small so took the picture printed it out then enlarger it. It took 4 tries at different sized before I found the right size.
Then made 4 copy's and cut and pasted on the wood cut them out and it's done.
Sounds easy but it took all day.
I was planning to go rounder with the cabin but as I got working a more square one came into being.
I will be smoothing the edges but not as rounded as the one picture shows.
Image


I thought when I got back into toy building that the band saw would be my main tool but the scroll saw does a much better job on the small stuff and you don't have to do as much sanding.
Don't want it to sound like there's no sanding just makes smaller gouges that have to be sanded out.

Image


Image


Image


Image


Image

I would glue the side to the back clamp it up and sand something then
glue up the top and sand something and or get the next part ready to glue up.

Image


This is one of those deals where between glue ups it's sand sand sand.

Image


Here's a photo story of the build so far.
http://s1273.photobucket.com/user/heretolearn7/Excavator/story
Very cool. Can't wait to see it when done.
 

Attachments

Escavator day 3

Played with the cabin today, thankfully the bad weather went around us here in Huntsville al.
Went to Google and searched for a more modern looking cabin.
The picture I liked was of the whole machine so the cabin was to small so took the picture printed it out then enlarger it. It took 4 tries at different sized before I found the right size.
Then made 4 copy's and cut and pasted on the wood cut them out and it's done.
Sounds easy but it took all day.
I was planning to go rounder with the cabin but as I got working a more square one came into being.
I will be smoothing the edges but not as rounded as the one picture shows.
Image


I thought when I got back into toy building that the band saw would be my main tool but the scroll saw does a much better job on the small stuff and you don't have to do as much sanding.
Don't want it to sound like there's no sanding just makes smaller gouges that have to be sanded out.

Image


Image


Image


Image


Image

I would glue the side to the back clamp it up and sand something then
glue up the top and sand something and or get the next part ready to glue up.

Image


This is one of those deals where between glue ups it's sand sand sand.

Image


Here's a photo story of the build so far.
http://s1273.photobucket.com/user/heretolearn7/Excavator/story
This is the cabin I like!
 

Attachments

Escavator day 3

Played with the cabin today, thankfully the bad weather went around us here in Huntsville al.
Went to Google and searched for a more modern looking cabin.
The picture I liked was of the whole machine so the cabin was to small so took the picture printed it out then enlarger it. It took 4 tries at different sized before I found the right size.
Then made 4 copy's and cut and pasted on the wood cut them out and it's done.
Sounds easy but it took all day.
I was planning to go rounder with the cabin but as I got working a more square one came into being.
I will be smoothing the edges but not as rounded as the one picture shows.
Image


I thought when I got back into toy building that the band saw would be my main tool but the scroll saw does a much better job on the small stuff and you don't have to do as much sanding.
Don't want it to sound like there's no sanding just makes smaller gouges that have to be sanded out.

Image


Image


Image


Image


Image

I would glue the side to the back clamp it up and sand something then
glue up the top and sand something and or get the next part ready to glue up.

Image


This is one of those deals where between glue ups it's sand sand sand.

Image


Here's a photo story of the build so far.
http://s1273.photobucket.com/user/heretolearn7/Excavator/story
great progress and looks awesome.
 

Attachments

Discussion starter · #52 ·
Escavator day 3

Played with the cabin today, thankfully the bad weather went around us here in Huntsville al.
Went to Google and searched for a more modern looking cabin.
The picture I liked was of the whole machine so the cabin was to small so took the picture printed it out then enlarger it. It took 4 tries at different sized before I found the right size.
Then made 4 copy's and cut and pasted on the wood cut them out and it's done.
Sounds easy but it took all day.
I was planning to go rounder with the cabin but as I got working a more square one came into being.
I will be smoothing the edges but not as rounded as the one picture shows.
Image


I thought when I got back into toy building that the band saw would be my main tool but the scroll saw does a much better job on the small stuff and you don't have to do as much sanding.
Don't want it to sound like there's no sanding just makes smaller gouges that have to be sanded out.

Image


Image


Image


Image


Image

I would glue the side to the back clamp it up and sand something then
glue up the top and sand something and or get the next part ready to glue up.

Image


This is one of those deals where between glue ups it's sand sand sand.

Image


Here's a photo story of the build so far.
http://s1273.photobucket.com/user/heretolearn7/Excavator/story
Dale I really can't wait to see it but that just puts me in the hunt for my next project. ol
Thanks Julian
Dutchy it is looking better than the boxy plan cabin but after looking at yours last night I wish I had thinned the posts down a little bit more.
I guess it's my being new at this I think it needs to be heavy duty when a little finer touch is needed.
 

Attachments

Escavator day 3

Played with the cabin today, thankfully the bad weather went around us here in Huntsville al.
Went to Google and searched for a more modern looking cabin.
The picture I liked was of the whole machine so the cabin was to small so took the picture printed it out then enlarger it. It took 4 tries at different sized before I found the right size.
Then made 4 copy's and cut and pasted on the wood cut them out and it's done.
Sounds easy but it took all day.
I was planning to go rounder with the cabin but as I got working a more square one came into being.
I will be smoothing the edges but not as rounded as the one picture shows.
Image


I thought when I got back into toy building that the band saw would be my main tool but the scroll saw does a much better job on the small stuff and you don't have to do as much sanding.
Don't want it to sound like there's no sanding just makes smaller gouges that have to be sanded out.

Image


Image


Image


Image


Image

I would glue the side to the back clamp it up and sand something then
glue up the top and sand something and or get the next part ready to glue up.

Image


This is one of those deals where between glue ups it's sand sand sand.

Image


Here's a photo story of the build so far.
http://s1273.photobucket.com/user/heretolearn7/Excavator/story
I really like your changes to the cabin very nice .
I will for sure use your idea if I should build another , that is if I ever finish this loader.
It has given me more than a few issues and if it was not for Dutchy I probably would still be on page one of the plans.
Thanks Dutchy.
Dee1
 

Attachments

Discussion starter · #54 ·
Excavator day 4

Had to fix two really dumb mistakes, I glued up the booms before I cut out the places for them to bolt up.
Would have taken 10 minutes I put in a couple a hours trying to cut them out with out buggering it up.
I have the technology but shore is a lot easier if you do it right the first time.
Image


Finally got to play with the tracks this after noon.
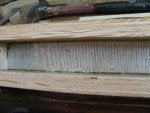
Cut out the lumber to length then needed 3/8" for the treads so split some walnut and while I'm at it will be making a set of mahogany treads too because I'm sure there will be another crane,excavator or bull dozer in my future.
I cut about 200, 1 1/2" x1 1/4" blank treads both walnut and mahogany.
Used my table saw sled, if you notice it has a very low fence which make it easy for me to use it sitting down.
With a fine Skill saw blade it makes some really clean cuts.
Image


Started building a jig for the treads THANKS DUTCHY FOR THE HOW TO ON GETTING THIS GREAT JIG built.
Sure is a labor saver.

Image


Image


Image

Used carpet tape to help keep the treads in place while they were being cut.
Image


Image

Sanded up what I could reach while it's all together like this.
You can get a lot done ganging it up like this.

Image

Glued some sand paper to a stick so I could reach all those narrow groves.
Image


Dutchy one last thing, what kind of clearance do you try to keep between the tracks?
I've cut all of one side of the sets and tomorrow I'll be cutting the other so is it better for the tracks to be sloppy lose or just how tight do you like it to be?
Image
 

Attachments

Excavator day 4

Had to fix two really dumb mistakes, I glued up the booms before I cut out the places for them to bolt up.
Would have taken 10 minutes I put in a couple a hours trying to cut them out with out buggering it up.
I have the technology but shore is a lot easier if you do it right the first time.
Image


Finally got to play with the tracks this after noon.
Cut out the lumber to length then needed 3/8" for the treads so split some walnut and while I'm at it will be making a set of mahogany treads too because I'm sure there will be another crane,excavator or bull dozer in my future.
I cut about 200, 1 1/2" x1 1/4" blank treads both walnut and mahogany.
Used my table saw sled, if you notice it has a very low fence which make it easy for me to use it sitting down.
With a fine Skill saw blade it makes some really clean cuts.
Image


Started building a jig for the treads THANKS DUTCHY FOR THE HOW TO ON GETTING THIS GREAT JIG built.
Sure is a labor saver.

Image


Image


Image

Used carpet tape to help keep the treads in place while they were being cut.
Image


Image

Sanded up what I could reach while it's all together like this.
You can get a lot done ganging it up like this.

Image

Glued some sand paper to a stick so I could reach all those narrow groves.
Image


Dutchy one last thing, what kind of clearance do you try to keep between the tracks?
I've cut all of one side of the sets and tomorrow I'll be cutting the other so is it better for the tracks to be sloppy lose or just how tight do you like it to be?
Image
Now that's an ingenious way to make all those track components…...very clever engineering!
 

Attachments

Excavator day 4

Had to fix two really dumb mistakes, I glued up the booms before I cut out the places for them to bolt up.
Would have taken 10 minutes I put in a couple a hours trying to cut them out with out buggering it up.
I have the technology but shore is a lot easier if you do it right the first time.
Image


Finally got to play with the tracks this after noon.
Cut out the lumber to length then needed 3/8" for the treads so split some walnut and while I'm at it will be making a set of mahogany treads too because I'm sure there will be another crane,excavator or bull dozer in my future.
I cut about 200, 1 1/2" x1 1/4" blank treads both walnut and mahogany.
Used my table saw sled, if you notice it has a very low fence which make it easy for me to use it sitting down.
With a fine Skill saw blade it makes some really clean cuts.
Image


Started building a jig for the treads THANKS DUTCHY FOR THE HOW TO ON GETTING THIS GREAT JIG built.
Sure is a labor saver.

Image


Image


Image

Used carpet tape to help keep the treads in place while they were being cut.
Image


Image

Sanded up what I could reach while it's all together like this.
You can get a lot done ganging it up like this.

Image

Glued some sand paper to a stick so I could reach all those narrow groves.
Image


Dutchy one last thing, what kind of clearance do you try to keep between the tracks?
I've cut all of one side of the sets and tomorrow I'll be cutting the other so is it better for the tracks to be sloppy lose or just how tight do you like it to be?
Image
Apologies to Dutchy as I must have missed his original post on the jig…..
 

Attachments

Discussion starter · #57 ·
Excavator day 4

Had to fix two really dumb mistakes, I glued up the booms before I cut out the places for them to bolt up.
Would have taken 10 minutes I put in a couple a hours trying to cut them out with out buggering it up.
I have the technology but shore is a lot easier if you do it right the first time.
Image


Finally got to play with the tracks this after noon.
Cut out the lumber to length then needed 3/8" for the treads so split some walnut and while I'm at it will be making a set of mahogany treads too because I'm sure there will be another crane,excavator or bull dozer in my future.
I cut about 200, 1 1/2" x1 1/4" blank treads both walnut and mahogany.
Used my table saw sled, if you notice it has a very low fence which make it easy for me to use it sitting down.
With a fine Skill saw blade it makes some really clean cuts.
Image


Started building a jig for the treads THANKS DUTCHY FOR THE HOW TO ON GETTING THIS GREAT JIG built.
Sure is a labor saver.

Image


Image


Image

Used carpet tape to help keep the treads in place while they were being cut.
Image


Image

Sanded up what I could reach while it's all together like this.
You can get a lot done ganging it up like this.

Image

Glued some sand paper to a stick so I could reach all those narrow groves.
Image


Dutchy one last thing, what kind of clearance do you try to keep between the tracks?
I've cut all of one side of the sets and tomorrow I'll be cutting the other so is it better for the tracks to be sloppy lose or just how tight do you like it to be?
Image
I could use a little help.
I want to hing the door and don't want any thing to big so any suggestions would be appreciated.
 

Attachments

Excavator day 4

Had to fix two really dumb mistakes, I glued up the booms before I cut out the places for them to bolt up.
Would have taken 10 minutes I put in a couple a hours trying to cut them out with out buggering it up.
I have the technology but shore is a lot easier if you do it right the first time.
Image


Finally got to play with the tracks this after noon.
Cut out the lumber to length then needed 3/8" for the treads so split some walnut and while I'm at it will be making a set of mahogany treads too because I'm sure there will be another crane,excavator or bull dozer in my future.
I cut about 200, 1 1/2" x1 1/4" blank treads both walnut and mahogany.
Used my table saw sled, if you notice it has a very low fence which make it easy for me to use it sitting down.
With a fine Skill saw blade it makes some really clean cuts.
Image


Started building a jig for the treads THANKS DUTCHY FOR THE HOW TO ON GETTING THIS GREAT JIG built.
Sure is a labor saver.

Image


Image


Image

Used carpet tape to help keep the treads in place while they were being cut.
Image


Image

Sanded up what I could reach while it's all together like this.
You can get a lot done ganging it up like this.

Image

Glued some sand paper to a stick so I could reach all those narrow groves.
Image


Dutchy one last thing, what kind of clearance do you try to keep between the tracks?
I've cut all of one side of the sets and tomorrow I'll be cutting the other so is it better for the tracks to be sloppy lose or just how tight do you like it to be?
Image
I could use a little help.
I want to hing the door and don t want any thing to big so any suggestions would be appreciated.

- htl
What about small jewellery box hinges??
or a strip of calico glued to both the door & the door pillar??
 

Attachments

Excavator day 4

Had to fix two really dumb mistakes, I glued up the booms before I cut out the places for them to bolt up.
Would have taken 10 minutes I put in a couple a hours trying to cut them out with out buggering it up.
I have the technology but shore is a lot easier if you do it right the first time.
Image


Finally got to play with the tracks this after noon.
Cut out the lumber to length then needed 3/8" for the treads so split some walnut and while I'm at it will be making a set of mahogany treads too because I'm sure there will be another crane,excavator or bull dozer in my future.
I cut about 200, 1 1/2" x1 1/4" blank treads both walnut and mahogany.
Used my table saw sled, if you notice it has a very low fence which make it easy for me to use it sitting down.
With a fine Skill saw blade it makes some really clean cuts.
Image


Started building a jig for the treads THANKS DUTCHY FOR THE HOW TO ON GETTING THIS GREAT JIG built.
Sure is a labor saver.

Image


Image


Image

Used carpet tape to help keep the treads in place while they were being cut.
Image


Image

Sanded up what I could reach while it's all together like this.
You can get a lot done ganging it up like this.

Image

Glued some sand paper to a stick so I could reach all those narrow groves.
Image


Dutchy one last thing, what kind of clearance do you try to keep between the tracks?
I've cut all of one side of the sets and tomorrow I'll be cutting the other so is it better for the tracks to be sloppy lose or just how tight do you like it to be?
Image
I like to see you have used my idea! Your welcome! A reason for me to keep on posting blogs about the building process of my toy making adventures. The clearance I gave it is about 0,8 mm. (We in europe use a comma where americans use a dot and use a dot where americans use a comma, which has already cost a lot of money in silicon valley :)) This 0,8mm unintentionally wasn't divided proportionally. When all the tracks where ready I sometimes sanded a little to make the run pliable (I hope I have used the wright word)

Image
 

Attachments

Discussion starter · #60 ·
Excavator day 4

Had to fix two really dumb mistakes, I glued up the booms before I cut out the places for them to bolt up.
Would have taken 10 minutes I put in a couple a hours trying to cut them out with out buggering it up.
I have the technology but shore is a lot easier if you do it right the first time.
Image


Finally got to play with the tracks this after noon.
Cut out the lumber to length then needed 3/8" for the treads so split some walnut and while I'm at it will be making a set of mahogany treads too because I'm sure there will be another crane,excavator or bull dozer in my future.
I cut about 200, 1 1/2" x1 1/4" blank treads both walnut and mahogany.
Used my table saw sled, if you notice it has a very low fence which make it easy for me to use it sitting down.
With a fine Skill saw blade it makes some really clean cuts.
Image


Started building a jig for the treads THANKS DUTCHY FOR THE HOW TO ON GETTING THIS GREAT JIG built.
Sure is a labor saver.

Image


Image


Image

Used carpet tape to help keep the treads in place while they were being cut.
Image


Image

Sanded up what I could reach while it's all together like this.
You can get a lot done ganging it up like this.

Image

Glued some sand paper to a stick so I could reach all those narrow groves.
Image


Dutchy one last thing, what kind of clearance do you try to keep between the tracks?
I've cut all of one side of the sets and tomorrow I'll be cutting the other so is it better for the tracks to be sloppy lose or just how tight do you like it to be?
Image
Thanks Dutchy for the timely reply, now all I have to do is translate it to english. lol
The funny thing is the more I build this small stuff the easier it is with metric.
I went back and took a closer look at your pictures and I could see the dowels between the fingers so being really tight ain't right.
Ps And under stand every word.

Thanks Crowie but would like to stay with wood if at all possible.
I'll need to do some more research on this.
 

Attachments

41 - 60 of 3,208 Posts