LumberJocks Woodworking Forum banner

Wooden Models

Tags
1929 ford van 1932 buick 1935 ford 1935 model 1951 ford 1955 ford 32 buick 32 chevy hot rod 32 chevy wooden model 32 chevy wooden toy 32 ford 32 lincoln kb 32 tow truck 34 chevy coupe 34 coupe 4 4 wheel 4runner model build automata axle axle springs belly bump model build bob cat bobacat bobcat loader bobcat model bobcat toy boring out a dowel box car buick building a caboose building wooden hummer bull dozer bull dozer build bull dozer model bull dozer model build bull dozer treads bulldozer bumpers caboose caboose build car car build car model car spoke wheels car spoked rims car wheel build caterpillar caterpillar antomata cattle car cattle car build cattle car train chevy chevy vette coal model train build coal train combined car train construction construction equipment construction model construction toy construction toys corvette crane custom model truck wheels daf delivery truck diesel train diesel train model diesel truck dir car diy delivery truck diy tires diy toy wheels diy train diy wheels doweling jig dozer build dozer high track dozer drilling rig ducthy build dump truck dump truck model dump truck suspension dutchs plans dutchy dutchy build dutchy model dutchy plan dutchy plans dutchys excavator dutchys plans ebonizing model tires escavator excavator excavator build excavator model excavator model build excavator tread making flat track ford 1935 ford truck ford truck model ford van 1929 ford van model build fork lift fork lift model gatto gatto train car grill making how to half scratch built truck heavy duty wheels hi gear dozer high track dozer hot rod hot rod chevy hot rod model hot rod model build how to how to build a model train how too htl htl 4 hummer hummer build hummer model hummer tires indy car indy car model jig joys and joys truck kenwort model build kenworth kenworth mack kenworth model locomotive log skidder lowboy trailer lowboy trailer model lr mack mack mack lr mack lr model mack truck mack truck model mack truck model build mack truck steering how to mag wheel maker mahogany make wood wheels making model spoke wheels making tires making toy wheels making wheels making wooden wheels maple mean wheels mining truck mining truck model model model 1935 ford model a wheel making model build model build toy model building model bull dozer model bulldozer model caboose model car model car build model cattle car model dozer model dump truck model excavator model fender work model ford model front and back suspension that works model hummer model jig model making model making jig model motor model rocket ship model semi model spoke wheel making model steering model sub model tire making model tires model toy model train model train build model train building model train model train how to model train toy train model truck model truck build model wheel jig model wheel making model wheel making model jig model wheels models morgan mud flaps mustang nautilus model build nautilus scratch build nautilus wooden oak train car old time tires old truck build passenger car passenger train car pickup truck pickup truck build plans poplar train power wagon 6x6 power wagon body work power wagon model build power wagon video prerunner model build race car race car hauler race car model race car totter railway breakdown crane model rat rod reading reading train reading train build ripper tine sanding sassafras scale model scratch build scratch build motor scratch build train car scratch build truck model scratch built scratch built caboose scratch built car scratch built diesel train scratch built model truck scratch built rocket ship scratch built sub scratch built train scratch built truck scratch built vw bus scratch built wheels scratch built wooden train scratch built wrecker bed semi model wheels semi trailer model build semi truck semi truck build semi truck model semi truck model build shop smith train skidder spoke wheels spoke wheels build springs sprint car sprint racer start build steam engine steam train steer loader steer loader bobacat steerable front end suspension t rex tablesaw tanker truck tender tire jig tire making tire making jig tj tow truck 1932 tower tower crane toy toy and joy toy and joys toy build toy build dozer toy build htl toy build truck toy building toy bull dozer toy caboose build toy car toy car build toy dozer toy dump truck toy excavator toy hummer toy jig toy making toy mining truck toy model toy model build toy motor toy power wagon toy rocket ship build toy semi truck toy tires toy train toy train build toy train car toy truck toy truck wood truck toy vw build toy vw bus build toy wheel making toy wheel making jig toy wheels toyjoys toyota model build toyota prerunner toys toys and joy toys and joys toys and joys dozer toys and joys model toys and joys train toys and joys truck toys joys tpy wheel making tracks trailer train train build train car train cars train cattle car train chimney train engine train model train model car train shelves train tender train tires train track build train wheels treads triceratops truck truck axles truck build truck model truck tires truck toy build trucks unimug video vw bus model build vw bus model build vw bus toy build vw model vw model build vw toy vw truck vw truck model vw truck toy walnut walnut truck well drilling rig wheel how to wheel jig wheel making wheel making jig wheel making tire making wheel wells wheels wheels for wooden train wood burning train wood car wood hot rod wood model wood model building wood store wood tires wood toy wood toy how to wood toy truck wood toys wood train wood truck wood wheels wood working jig wooden body wooden caboose wooden cattle car wooden excavator wooden hot rod wooden model wooden model build wooden model truck build wooden sub wooden tires wooden toy wooden toy build wooden toy truck wooden train wooden train car wooden train track wooden truck wooden truck body wooden truck build wooden wheels wrecker truck wrecker truck model ws tracker build
3 reading
2M views 3.2K replies 115 participants last post by  GR8HUNTER  
#1 ·
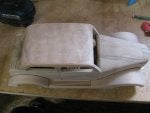
Another toy BullDozer

Been playing with another wood toy project.
Bought and down loaded the plans for the Bull Dozer from Wood Store Net.
I was looking at the High Gear Dozer from Toys and Joys but you have to order the plans which is fine but I wanted to get started now not two weeks from now.

Well here's what I've got done so far.
Image


Now I'm going to start at the Beginning. LOL
I'm building with Walnut I found while scrounging and Mahogany from a bed also found lumber.
The plans show a flat blade for the front but as I'm doing with a lot of this build I'm taking ideas from the Toys and Joys pictures and making this a little more of a show toy and not a kids play toy.
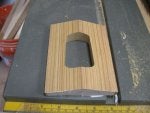
So I'm cutting out the center of the blade to make it more real to life.

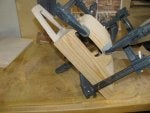
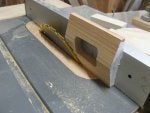
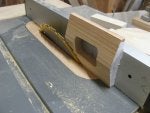
To make the blade I clamped my sliding fence down and just tacked a angled fence to get the cut.
Fast and easy.
Image


Image


Image


Once I get working I forget to take pictures, and I jump around a lot.
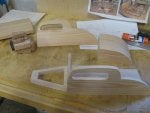
While the blades glued up and drying I worked on the base and as it was drying I built the cabin.
It's pretty cool in my shop so the glue is taking a lot longer to dry.
Image


Image


Now a little work on the cabin.
Image


Image


Image


I added the radiator because after I got the base and engine compartment built and started sanding it a large screw hole showed its ugly face so had to come up with a work around or start over, hey I love a good radiator so why not.

Image


Image


I used store bought wheels they look so much better.
The plans called for 1" wheels down below but Hobby Lobby didn't have any so I got 1 1/2" and made a jig and sanded them down to fit.
I hated to have to make the jig but once it was made the job went really fast and their all just right plus now I have the jig to make my own wheels if I need to.
The more I look at it the better the 1" wheels look.
The stock wheels would have looked like the bigger wheels these look different like their supposed to be there. lol

I would have loved to build the real tracks for this build like on the T&Y build but we'll save that for next time.
I still may buy the T&Y plans mainly for the tracks setup.
Image

Image


Image


Image


That's all for now thanks for looking in.
 

Attachments

#2,735 ·
Chevy Corvette 1953 Chevy Corvette

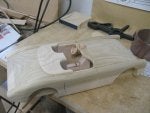
My 1962 Corvette is looking more and more like a 1953 Vette, the first one.
It has a single head light per side and rounded fenders.
This has caused me a few problems which I hope I can work my way around.
Image


Image


Image


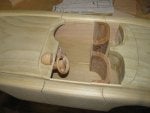
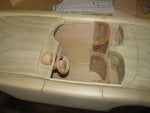
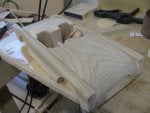
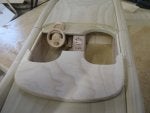
Everything is looking ok at this point till I started to make the seats and there's way to much space for your feet.
Using the 1962 pictures for the out side and kind a guessing on the inside I made the inside way to large.
I got back on the web and with some deep digging found some 1953 picture looking down on the inside so I can get the spacing right.
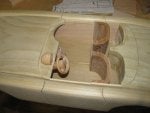
So I had to take out half my work today and start over but all should work out in the end.
The trunk and folding roof take up a lot more room than you would think.
I had the space between the wind shield and back of the roof right but needed to make more room for the folding roof.

So here's my ouch pictures, after I got everything back under control I HOPE!!!
Image


Image


Now to make a cover to hide the bugger,the cover is needed so not really a problem in the long run.
 

Attachments

#2,736 ·
Chevy Corvette 1953 Chevy Corvette

My 1962 Corvette is looking more and more like a 1953 Vette, the first one.
It has a single head light per side and rounded fenders.
This has caused me a few problems which I hope I can work my way around.
Image


Image


Image


Everything is looking ok at this point till I started to make the seats and there's way to much space for your feet.
Using the 1962 pictures for the out side and kind a guessing on the inside I made the inside way to large.
I got back on the web and with some deep digging found some 1953 picture looking down on the inside so I can get the spacing right.
So I had to take out half my work today and start over but all should work out in the end.
The trunk and folding roof take up a lot more room than you would think.
I had the space between the wind shield and back of the roof right but needed to make more room for the folding roof.

So here's my ouch pictures, after I got everything back under control I HOPE!!!
Image


Image


Now to make a cover to hide the bugger,the cover is needed so not really a problem in the long run.
It is looking very fine.
 

Attachments

#2,744 ·
Chevy Corvette 1953 Making what's wrong right

I guess I'm not much of a modern car builder, give me square parts and all is well. lol

Here's the bad part and then the fix.

Image


There's a lot a work that went on between these two pictures.
Image


Image


Image


Image


Now we got her back to right.
I know this isn't true Vette styling but it is what it is.
I am having a hard time coming up with a seat that works so will be playing with the wheels and sleep on the seat thing.
 

Attachments

#2,745 ·
Chevy Corvette 1953 Making what's wrong right

I guess I'm not much of a modern car builder, give me square parts and all is well. lol

Here's the bad part and then the fix.

Image


There's a lot a work that went on between these two pictures.
Image


Image


Image


Image


Now we got her back to right.
I know this isn't true Vette styling but it is what it is.
I am having a hard time coming up with a seat that works so will be playing with the wheels and sleep on the seat thing.
Well, well, what you have done really looks good, as for the true Vette design if it varies a little so what Jazz it up into a customized sports car.
 

Attachments

#2,756 ·
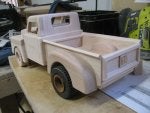
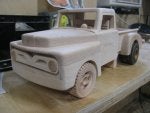
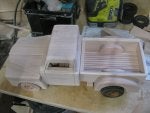
Ford pickup 1951

Got a slow start on the 1951 Pickup.
This is a Toys and Joys plan, in maple.
There are quite a few Beautiful ford pickups on the site so here's my slant on it.

Image


Image


Image


Image


Image
 

Attachments

#2,757 ·
Ford pickup 1951

Got a slow start on the 1951 Pickup.
This is a Toys and Joys plan, in maple.
There are quite a few Beautiful ford pickups on the site so here's my slant on it.

Image


Image


Image


Image


Image
looks real close to a ford hood for sure I can certainly tell it is a Ford :<)))
 

Attachments

#2,773 ·
Ford pickup 1955 glueing it up and getting ready for some wheels

I haven't been in the shop for around two weeks as a monster of all ear infection had got the better of me, but did work the last two days so heading for the finish with this project.
Image


I finely found a place for my last signature plate.
Image


Image


Trying to figure out a way to use up some of my left over tires but may just have to make a set, we'll see.
I do like the look of a set a Dually on the back how about you?

Image


Image


Image


Image


#4 over and out!
 

Attachments

#2,774 ·
Ford pickup 1955 glueing it up and getting ready for some wheels

I haven't been in the shop for around two weeks as a monster of all ear infection had got the better of me, but did work the last two days so heading for the finish with this project.
Image


I finely found a place for my last signature plate.
Image


Image


Trying to figure out a way to use up some of my left over tires but may just have to make a set, we'll see.
I do like the look of a set a Dually on the back how about you?

Image


Image


Image


Image


#4 over and out!
looking good.
 

Attachments

#2,793 ·
Ford pickup 1955 Made some wheels

Made a set a wheels for the Ford.
Still a lot a clean up but you get the idea.
Don't know about the rims, I drilled the holes a little to close to the centers, so may need to try again.
Image


Image


Image


Funny to me the grill looks up side down but that's the way their designed.

Image


May try again something like this front rim.
Image


Here's how the wheels turned out.
Image


Image


Image


Image


Project post is here.
 

Attachments

#2,794 ·
Ford pickup 1955 Made some wheels

Made a set a wheels for the Ford.
Still a lot a clean up but you get the idea.
Don't know about the rims, I drilled the holes a little to close to the centers, so may need to try again.
Image


Image


Image


Funny to me the grill looks up side down but that's the way their designed.

Image


May try again something like this front rim.
Image


Here's how the wheels turned out.
Image


Image


Image


Image


Project post is here.
Lookin good!
 

Attachments

#2,803 ·
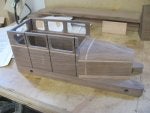
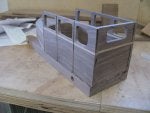
1932 Buick Sedan #2

1932 Buick Sedan #2

The project page is here.


Finally got up the gumption to get in the shop clean it up and start on the 32 Buick.
I get out of breath just walking to the shop but once I get sat down can get some work done. :-]
Image


Going with walnut with oak trim this time around.
My cabinet shop friend got me some nice walnut chunks to play with.

Image


I don't have the patience to glue on the small trim parts so will just make them part of the main build.

Image


Image


Image


Image


Image
 

Attachments

#2,804 ·
1932 Buick Sedan #2

1932 Buick Sedan #2

The project page is here.


Finally got up the gumption to get in the shop clean it up and start on the 32 Buick.
I get out of breath just walking to the shop but once I get sat down can get some work done. :-]
Image


Going with walnut with oak trim this time around.
My cabinet shop friend got me some nice walnut chunks to play with.

Image


I don't have the patience to glue on the small trim parts so will just make them part of the main build.

Image


Image


Image


Image


Image
Good start keep us posted.
 

Attachments

#2,817 ·
1932 Buick Sedan #3

Got a little more done.
Image


Image


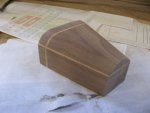
Shaping the roof.
I super glue a square chunk a scrap to the bottom and this keeps everything squared up to sand to the mark.
Image


Image


When done just hit it with something and it's done.
Image


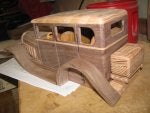
I was going to use walnut but had this wild looking block a oak.
Image


Image


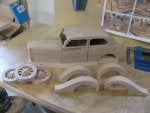
As always have to see what it will look like with some wheels but was happy to find I already have some tires made up, just need to build the spoke rims.
Image
 

Attachments

#2,818 ·
1932 Buick Sedan #3

Got a little more done.
Image


Image


Shaping the roof.
I super glue a square chunk a scrap to the bottom and this keeps everything squared up to sand to the mark.
Image


Image


When done just hit it with something and it's done.
Image


I was going to use walnut but had this wild looking block a oak.
Image


Image


As always have to see what it will look like with some wheels but was happy to find I already have some tires made up, just need to build the spoke rims.
Image
Almost done
 

Attachments

#2,828 ·
1932 Buick Sedan #4

Filling in the blank pages.
Radiator check.
Image


Image


Made up the fenders but will wait for wheels to check fit.
Image


Then on to the bonnet vents.
Image


Last played with the luggage rack.

Image


Tomorrow may get started on the wheels and these are just a tad different than my last try, so we'll see how that works out. lol
 

Attachments

#2,829 ·
1932 Buick Sedan #4

Filling in the blank pages.
Radiator check.
Image


Image


Made up the fenders but will wait for wheels to check fit.
Image


Then on to the bonnet vents.
Image


Last played with the luggage rack.

Image


Tomorrow may get started on the wheels and these are just a tad different than my last try, so we'll see how that works out. lol
looking really nice #4 :<))))) I have to get back out in the shop myself with being in the hospital again its not too much fun :<))
 

Attachments

#2,841 ·
1932 Buick Sedan #6 Wheels and fenders glued up

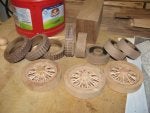
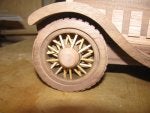
This is my third time making these spoke wheels.
I feel like I did a better job last time being bigger they show off the spokes better, but hey got to keep trying new things.

I already had some tire blanks made up, when the tools set up it pays to make more.
So drilled out the centers and made some walnut rim blanks.
Image


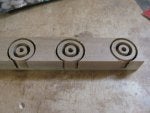
See the rims with the centers cut out where the spokes will go I did this on the drill press with my Harbor Freight hole saw set.
I figured out what I needed between the rim and axle post and just kept using the different sized hole saw bits till I had it all cut out, then just a little scraping with a wood chisel to smooth out the bottom and it's made. No lathe work for these wheels. lol

One more tip don't drill all the way through leave a 1/8" to hold it all together till the spokes are drilled.

Image


Been needing a way to speed up the marking of the blanks so built a jig that holds the blank to the pattern so every thing goes much faster and gets it right.
I used to glue the pattern on the wood but many times the pattern would not be centered so this jig works much better.

Image


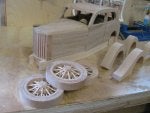
Fast foreword and the spokes are drilled and glued in, you need to check out my last spoke how to to see how it's done.
The lighter wheels are the extras from my last spoke build.
Image


Took the rims to the drum sander and sanded to fit the tires.
Image


Image


Then I could mount them and see how the fenders needed to fit.
Image


Image


Image


The project page is here.
 

Attachments

#2,842 ·
1932 Buick Sedan #6 Wheels and fenders glued up

This is my third time making these spoke wheels.
I feel like I did a better job last time being bigger they show off the spokes better, but hey got to keep trying new things.

I already had some tire blanks made up, when the tools set up it pays to make more.
So drilled out the centers and made some walnut rim blanks.
Image


See the rims with the centers cut out where the spokes will go I did this on the drill press with my Harbor Freight hole saw set.
I figured out what I needed between the rim and axle post and just kept using the different sized hole saw bits till I had it all cut out, then just a little scraping with a wood chisel to smooth out the bottom and it's made. No lathe work for these wheels. lol

One more tip don't drill all the way through leave a 1/8" to hold it all together till the spokes are drilled.

Image


Been needing a way to speed up the marking of the blanks so built a jig that holds the blank to the pattern so every thing goes much faster and gets it right.
I used to glue the pattern on the wood but many times the pattern would not be centered so this jig works much better.

Image


Fast foreword and the spokes are drilled and glued in, you need to check out my last spoke how to to see how it's done.
The lighter wheels are the extras from my last spoke build.
Image


Took the rims to the drum sander and sanded to fit the tires.
Image


Image


Then I could mount them and see how the fenders needed to fit.
Image


Image


Image


The project page is here.
Phenomenal…
 

Attachments

#2,853 ·
1932 Tow Truck #1

Needed to get out of the house so grabbed my folders of plans and hit the shop.
I usually pick a plan and print out the parts I need.
Not up to any thing complicated so found the old tanker truck plans that I have built before.
One of Toys and Joys older very simple plans.
Here's what I made with the plans last time.
Image


As much as I like making cattle cars for my trains may try adding a cattle mover rear end.
/>Here's what I have in mind.
Image


Here's what I got done today.

Frame [white oak] and bonnet [walnut].
You ask why the oak frame well trying to save a little of my walnut stash.
Image


cabin parts.
Image


Radiators are all ways interesting to me.
Tried making the main radiator frame walnut but the inside of the grill will be oak with a walnut back.
Image


Image


I put a small bearing on my flush cut router bit to make a groove for the radiator core.
Image


Image


As I said have no idea where I'm going with this but will have fun no matter what it turns out to be.
 

Attachments

#2,854 ·
1932 Tow Truck #1

Needed to get out of the house so grabbed my folders of plans and hit the shop.
I usually pick a plan and print out the parts I need.
Not up to any thing complicated so found the old tanker truck plans that I have built before.
One of Toys and Joys older very simple plans.
Here's what I made with the plans last time.
Image


As much as I like making cattle cars for my trains may try adding a cattle mover rear end.
/>Here's what I have in mind.
Image


Here's what I got done today.

Frame [white oak] and bonnet [walnut].
You ask why the oak frame well trying to save a little of my walnut stash.
Image


cabin parts.
Image


Radiators are all ways interesting to me.
Tried making the main radiator frame walnut but the inside of the grill will be oak with a walnut back.
Image


Image


I put a small bearing on my flush cut router bit to make a groove for the radiator core.
Image


Image


As I said have no idea where I'm going with this but will have fun no matter what it turns out to be.
That is the best way to build for yourself!

Plans are SOMEONE else's idea of what you want to make!
 

Attachments

#2,860 ·
1932 Tow Truck #2

Still haven't made up my mind if it's pick up or panel truck or farm all?
Image


Image


Image


Image


Image


Image


Image


I'm just about to the point I better figure out what I'm making? :-[
 

Attachments

#2,861 ·
1932 Tow Truck #2

Still haven't made up my mind if it's pick up or panel truck or farm all?
Image


Image


Image


Image


Image


Image


Image


I'm just about to the point I better figure out what I'm making? :-[
Love the seat pattern Bruce and wow, the ute [aka pickup] is looking good!!
 

Attachments

#2,869 ·
1932 Tow Truck #3

The more I built and looked around the tow truck just kept coming up, so it's going to be a tow truck.

How about a hot rod tow truck?
It has a lowered frame, big tires and the roof was lowered.

Haven't started the winch yet but the truck itself is pretty close.

Thought it might need a tool box, this was before the tow truck came to be.
Image


Then on with the fenders.
Image

Image


Image


Played with a bumper.
Image


A tow truck needs a ton a storage, so more tool boxes.

Image
 

Attachments

#2,870 ·
1932 Tow Truck #3

The more I built and looked around the tow truck just kept coming up, so it's going to be a tow truck.

How about a hot rod tow truck?
It has a lowered frame, big tires and the roof was lowered.

Haven't started the winch yet but the truck itself is pretty close.

Thought it might need a tool box, this was before the tow truck came to be.
Image


Then on with the fenders.
Image

Image


Image


Played with a bumper.
Image


A tow truck needs a ton a storage, so more tool boxes.

Image
Looking good.

Now the winch; A tripod style would be vintage appropriate, I think. Two supports toward the front with the winch between them and the middle one in the back at a very different angle to be the cable carrier.

If possible turn the reel in one piece and then mount through the support arms before they get attached to the bed.
If this is going to be played with; I recommend a little old candle wax rubbed into the winch axle, where it goes through the supports. White wax if possible-it disappears without leaving a color trail.

I am looking forward to seeing the unit working!
 

Attachments

#2,877 ·
1932 Tow Truck #4

Finally got a chance and gumption to get in the shop and play with the truck.
Figured out a simple winch set up, just wasn't up to building gears but you still get the idea.
This is a hand cranked winch and can be cranked from 3 different points for different gear ratios.
Image


Image


Image


Image


Image


The winch will be farther back but just have it in there for now.

Image


Image
 

Attachments

#2,878 ·
1932 Tow Truck #4

Finally got a chance and gumption to get in the shop and play with the truck.
Figured out a simple winch set up, just wasn't up to building gears but you still get the idea.
This is a hand cranked winch and can be cranked from 3 different points for different gear ratios.
Image


Image


Image


Image


Image


The winch will be farther back but just have it in there for now.

Image


Image
:)
 

Attachments

#2,890 ·
Mining Truck 1&2

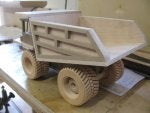
Playing with another Mining Truck as I already had some wheels ready from the last time I built one.
This time will use walnut and maple as this is what's scraps are in the shop.
The wheels are 3" so are 1 1/4" smaller than the plans call for, because of this I shrunk the plans down to work.
I just don't need a model with 4 1/4" wheels way to big, I built the hummer and man is it a big monster of a model.
Here's what the wheels would have looked like.

Image


Takes quite a bit a time to get enough wide wood made up for this truck.
Image


Image


Image


Parts just set in place so you get an idea of what's going on.
Image


Image


Image


Image

Image
 

Attachments

#2,891 ·
Mining Truck 1&2

Playing with another Mining Truck as I already had some wheels ready from the last time I built one.
This time will use walnut and maple as this is what's scraps are in the shop.
The wheels are 3" so are 1 1/4" smaller than the plans call for, because of this I shrunk the plans down to work.
I just don't need a model with 4 1/4" wheels way to big, I built the hummer and man is it a big monster of a model.
Here's what the wheels would have looked like.

Image


Takes quite a bit a time to get enough wide wood made up for this truck.
Image


Image


Image


Parts just set in place so you get an idea of what's going on.
Image


Image


Image


Image

Image
Looking good. What will be a Caterpillar 775D or maybe a Komatsu WA600 ?
 

Attachments

#2,907 ·
Reading Passenger Car Gatto Plan

Got started on the Gatto passenger car that should fill out that train set.
I built the Reading train a while back and then bought the Gatto plan set that goes along with it for the cars.
This is Plan#29
I almost didn't build it because it's so long and with the other cars and Train will really be a long one for sure.
As you can see in the picture I clamped down a board to the edge of the table so as I glued up the sides I could add some pressure as the super glue kicked in.
Not shown but I held a square to it as I held it to keep every thing squared up.
Image


There are 26 chairs to make yuck!!! LOL
Image


I put Danish oil on the seats as once the roof is on it ain't going to get done.

Image


Then on with the roof.

Image


Image


I cut the last board at an angle for the roof and glues it on but just needed a little more work, so took it to the table saw and did a job on my nerves cutting it, but that got it close enough to sand it to right.
So So glad the box was square or this could have got tricky!!!

Image


Image


Image

This is going to be one long car!!!
This was done over many short days.
 

Attachments

#2,908 ·
Reading Passenger Car Gatto Plan

Got started on the Gatto passenger car that should fill out that train set.
I built the Reading train a while back and then bought the Gatto plan set that goes along with it for the cars.
This is Plan#29
I almost didn't build it because it's so long and with the other cars and Train will really be a long one for sure.
As you can see in the picture I clamped down a board to the edge of the table so as I glued up the sides I could add some pressure as the super glue kicked in.
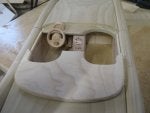
Not shown but I held a square to it as I held it to keep every thing squared up.
Image


There are 26 chairs to make yuck!!! LOL
Image


I put Danish oil on the seats as once the roof is on it ain't going to get done.

Image


Then on with the roof.

Image


Image


I cut the last board at an angle for the roof and glues it on but just needed a little more work, so took it to the table saw and did a job on my nerves cutting it, but that got it close enough to sand it to right.
So So glad the box was square or this could have got tricky!!!

Image


Image


Image

This is going to be one long car!!!
This was done over many short days.
A new one to follow. Nice! And looking good.
 

Attachments

#2,926 ·
Cattle cars number 3&4

Yes we are making another one, in fact I'll be building two.
Just wanted to make something quick and like building for my Reading train so a cattle car or two it will be.
I've tries explaining how I glue and cut the sides for the car,
and it has always been an after thought so this time I took pictures as I did it so should come out more logical.

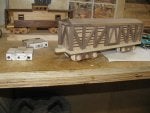
This is walnut and maple and is a scratch build from pictures.

They will look something like this when done.
Image


Cutting grooves in the floor with the miter saw.
Yes it could be done with the tip I'm showing next but not that safe with this thin a wood.
Image


Image


Image


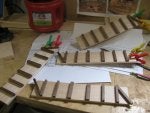
Now on to the sides, cutting the slats.
First I glue on all the braces, [and glue them really good!]

Image


Image


I use this jig to shape and fine tune the angles.
Image


Image


Now that the braces are all glued on,
I set the table saw blade to just cut the sides and just a tad of the braces.

For this project I made a 3/8" spacer board and set it between the blade and fence and move the fence next to the spacer and blade.
Image


Lock the fence and take out the spacer and make first cut.
In this picture I've already made the cut.
Image


Now slide the side back over the blade and loosen the fence to add the spacer.

Image


Add the spacer and slide fence over and lock, then take out spacer.
Image

Image


Your now ready for cut number two.
Image


Again slide the board over the blade, add the spacer and lock down the fence.
Image


Image


Image


We're now ready for the third cut, and we keep this up till we have all we need.

Image


Image


Image


Image


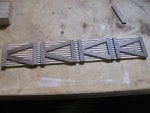
I used the same method for the ends and then started gluing it up.
The board inside is just to square it up.
Image


Image


Image


Image


Here's the link to the first time I made a cattle car.


I hope this was helpful to some one.
 

Attachments

#2,927 ·
Cattle cars number 3&4

Yes we are making another one, in fact I'll be building two.
Just wanted to make something quick and like building for my Reading train so a cattle car or two it will be.
I've tries explaining how I glue and cut the sides for the car,
and it has always been an after thought so this time I took pictures as I did it so should come out more logical.

This is walnut and maple and is a scratch build from pictures.

They will look something like this when done.
Image


Cutting grooves in the floor with the miter saw.
Yes it could be done with the tip I'm showing next but not that safe with this thin a wood.
Image


Image


Image


Now on to the sides, cutting the slats.
First I glue on all the braces, [and glue them really good!]

Image


Image


I use this jig to shape and fine tune the angles.
Image


Image


Now that the braces are all glued on,
I set the table saw blade to just cut the sides and just a tad of the braces.

For this project I made a 3/8" spacer board and set it between the blade and fence and move the fence next to the spacer and blade.
Image


Lock the fence and take out the spacer and make first cut.
In this picture I've already made the cut.
Image


Now slide the side back over the blade and loosen the fence to add the spacer.

Image


Add the spacer and slide fence over and lock, then take out spacer.
Image

Image


Your now ready for cut number two.
Image


Again slide the board over the blade, add the spacer and lock down the fence.
Image


Image


Image


We're now ready for the third cut, and we keep this up till we have all we need.

Image


Image


Image


Image


I used the same method for the ends and then started gluing it up.
The board inside is just to square it up.
Image


Image


Image


Image


Here's the link to the first time I made a cattle car.


I hope this was helpful to some one.
What a great job. It looks so authentic I can smell the cattle from here.
 

Attachments

#2,932 ·
Cattle cars number 3&4 Doors & Roof

Got a little more added to the car.
Glued up the top and cut to shape.
Image


Image


Then on to the doors.
Image


Super thin door slats so need to be careful cutting them out.
Image


Image


Image


Then played with making some trucks and wheels.
Image


Been hard at it but getting er done.
Image
 

Attachments

#2,933 ·
Cattle cars number 3&4 Doors & Roof

Got a little more added to the car.
Glued up the top and cut to shape.
Image


Image


Then on to the doors.
Image


Super thin door slats so need to be careful cutting them out.
Image


Image


Image


Then played with making some trucks and wheels.
Image


Been hard at it but getting er done.
Image
Coming right along keep us posted.
 

Attachments

#2,937 ·
Getting started on an old car

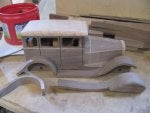
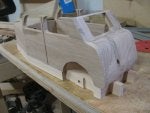
I build this Toys and Joys car [1932 Ford] way back but used pine and just was never happy with the way it came out so lets try it again with some oak.
This is a very simple [old] plan so doesn't come with many details.

Cut out the sides and frame then sand sand sand!!!
Image


Image


Glue up for the hood, I don't have much of this really figured oak so will be facing some plywood to get it done.
Image


Here I'm taking off the masking tape and pattern for the frame really makes clean up easy.
Image


Picture of the parts.
Image


Image


Image


Image


Image

Image


Will need to be playing with some spoke wheels in the near future me thinks. :-]
 

Attachments

#2,938 ·
Getting started on an old car

I build this Toys and Joys car [1932 Ford] way back but used pine and just was never happy with the way it came out so lets try it again with some oak.
This is a very simple [old] plan so doesn't come with many details.

Cut out the sides and frame then sand sand sand!!!
Image


Image


Glue up for the hood, I don't have much of this really figured oak so will be facing some plywood to get it done.
Image


Here I'm taking off the masking tape and pattern for the frame really makes clean up easy.
Image


Picture of the parts.
Image


Image


Image


Image


Image

Image


Will need to be playing with some spoke wheels in the near future me thinks. :-]
this car will look pretty good in oak :<))))
 

Attachments

#2,945 ·
32 Ford working on the radiator

It's coming together.
Image


I always love playing with the radiator or grill.
I made sure I built it and glued it to the bonnet before I glued the hood to the frame as last time I forgot and made my work a lot harder.
It's so much easier to sand the grill and hood as one part with out the frame and other parts in the way.

Here you can see the plywood heart of the hood.
Image

Image

Image


Then glue it all up and sand every thing flush.
Image

Image


The oak has some nice grain to it but had to work around a lot a worm holes as you can see in the last picture.
Running out of it but the spare tire should hide this bugger.

Image


Image
 

Attachments

#2,946 ·
32 Ford working on the radiator

It's coming together.
Image


I always love playing with the radiator or grill.
I made sure I built it and glued it to the bonnet before I glued the hood to the frame as last time I forgot and made my work a lot harder.
It's so much easier to sand the grill and hood as one part with out the frame and other parts in the way.

Here you can see the plywood heart of the hood.
Image

Image

Image


Then glue it all up and sand every thing flush.
Image

Image


The oak has some nice grain to it but had to work around a lot a worm holes as you can see in the last picture.
Running out of it but the spare tire should hide this bugger.

Image


Image
Looking good Bruce.
Like the way you've done the radiator.
 

Attachments

#2,954 ·
32 Ford working on the roof and insides

Played around with making a fat steering wheel or two.
Used the same steps I would for making a spoke wheel will try some smaller spokes [tooth picks] next go round.
I started out making four but two didn't survive the operation.
Image


Once the spokes are glued in you can cut the front and back on the band saw to break it loose from the back and get the thickness you want.
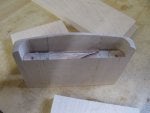
Image


Image


Image


Please remember that on most of the things I show it's a first try so may not always turn out the best but you got to start some where, and just might spark an idea for some one.

Then on with the roof and got a start on the wheel wells.
I've been buying quality hole saw bits as I need a new size here lately and it has really saved me a ton a sanding on the insides of wheel wells and the like.
And then you guessed it a ton a sanding on all the body parts.. ;-[
Image


Image


The wheels are left overs from my last try at spoke wheels.
May try to copy these but probable easier to just make a new set so they all match up right.
I've got a lot a long narrow scraps of oak so I better start cutting and gluing it up for wheel blanks.

Here's a note on sanding disks and a problem I've been having.

Over time I have had the pads on the bottom of my Ryobi and Harbor Freight sanders get where they wouldn't hold the pads any more because the sand paper would split apart and ware out the Hook and Lock Backing part of the sander.
This was because I had been getting the sand paper that has cuts so it can work on more than one size sander but the cut areas would catch on something and would roll up and expose the Hook and Lock Backing of the sander and ware out the Hook and Lock Backing pad.
So now I have two sanders that work just fine but can't hold any sand paper.

The short of it.

So what I'm trying to say is get the pads that are all in one and not cut up for use with more than one size sander.

Don't get this if you want your sander to last.
Image


But try and find these as they won't come apart and mess up the sander.
Image
 

Attachments

#2,955 ·
32 Ford working on the roof and insides

Played around with making a fat steering wheel or two.
Used the same steps I would for making a spoke wheel will try some smaller spokes [tooth picks] next go round.
I started out making four but two didn't survive the operation.
Image


Once the spokes are glued in you can cut the front and back on the band saw to break it loose from the back and get the thickness you want.
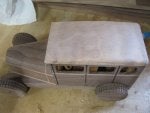
Image


Image


Image


Please remember that on most of the things I show it's a first try so may not always turn out the best but you got to start some where, and just might spark an idea for some one.

Then on with the roof and got a start on the wheel wells.
I've been buying quality hole saw bits as I need a new size here lately and it has really saved me a ton a sanding on the insides of wheel wells and the like.
And then you guessed it a ton a sanding on all the body parts.. ;-[
Image


Image


The wheels are left overs from my last try at spoke wheels.
May try to copy these but probable easier to just make a new set so they all match up right.
I've got a lot a long narrow scraps of oak so I better start cutting and gluing it up for wheel blanks.

Here's a note on sanding disks and a problem I've been having.

Over time I have had the pads on the bottom of my Ryobi and Harbor Freight sanders get where they wouldn't hold the pads any more because the sand paper would split apart and ware out the Hook and Lock Backing part of the sander.
This was because I had been getting the sand paper that has cuts so it can work on more than one size sander but the cut areas would catch on something and would roll up and expose the Hook and Lock Backing of the sander and ware out the Hook and Lock Backing pad.
So now I have two sanders that work just fine but can't hold any sand paper.

The short of it.

So what I'm trying to say is get the pads that are all in one and not cut up for use with more than one size sander.

Don't get this if you want your sander to last.
Image


But try and find these as they won't come apart and mess up the sander.
Image
Wheels and steering wheel idea nice blog entries!
 

Attachments

#2,969 ·
32 Hot Rod Chevy Coupe

I keep giving away my hot rods so lets try it one more time.
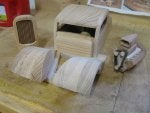
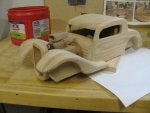
I hid the big motor on the last one so thought I would leave the hood off this time to let it be seen, will also be putting the fenders on it, adds a ton a work but really makes for one sweet looking ride.

Lowered the roof about a half inch and lowered the body to where the frame is covered, there's a name for it but ain't coming to me right now.

+++ Up Date+++
cutting body = chop,
lowering over chassis = channeling
...chop n channel.

These are Toys and Joys plans and one from way back when they weren't putting frames on their models which make for a great first time build, you don't have to worry about the frame not lining up or other problem that can get a new builder in trouble.
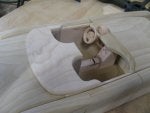
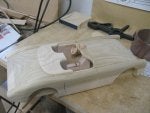
That being said I had to cut out for the motor.

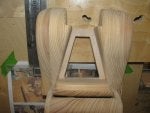
Image


Already have a motor for it, so we'll see how that works.
Image

Image


Image


Had to get the inners made and finished so I could close it all up.

Image


Image


Image


Image


#4 over and out
 

Attachments

#2,970 ·
32 Hot Rod Chevy Coupe

I keep giving away my hot rods so lets try it one more time.
I hid the big motor on the last one so thought I would leave the hood off this time to let it be seen, will also be putting the fenders on it, adds a ton a work but really makes for one sweet looking ride.

Lowered the roof about a half inch and lowered the body to where the frame is covered, there's a name for it but ain't coming to me right now.

+++ Up Date+++
cutting body = chop,
lowering over chassis = channeling
...chop n channel.

These are Toys and Joys plans and one from way back when they weren't putting frames on their models which make for a great first time build, you don't have to worry about the frame not lining up or other problem that can get a new builder in trouble.
That being said I had to cut out for the motor.

Image


Already have a motor for it, so we'll see how that works.
Image

Image


Image


Had to get the inners made and finished so I could close it all up.

Image


Image


Image


Image


#4 over and out
WOW, Bruce your progress is as always first class, thank you
 

Attachments

#2,980 ·
32 Hot Rod Chevy Coupe

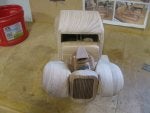
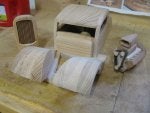
Worked on the radiator and front fenders.
Image


Image


Added a smaller bearing to my flush cuter bit.
Adds just enough lip to get er done.
Image


Image


Image


Image


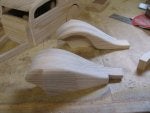
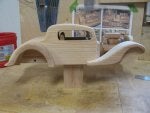
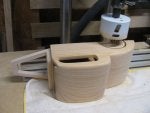
Then on to the front fenders.
Image


Image


Image


#4 over and out
 

Attachments

#2,981 ·
32 Hot Rod Chevy Coupe

Worked on the radiator and front fenders.
Image


Image


Added a smaller bearing to my flush cuter bit.
Adds just enough lip to get er done.
Image


Image


Image


Image


Then on to the front fenders.
Image


Image


Image


#4 over and out
Thank you Bruce… This will definitely help me… Cheers
 

Attachments

#2,985 ·
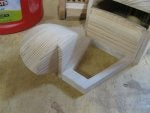
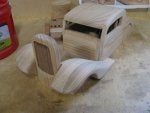
32 Hot Rod Chevy Coupe Fenders & radiator installed

This fir sure make sanding quick but the dings it gets are a pain!

Image


Going to have some really wide tires on the back so needed to cut some more out.
These quality hole saws make quick,clean work of it with very little sanding a big plus in my book..
Image


Then need to figure how the radiator will fit in, really took my time with this as any part of it buggered up would mean tons a redoes. :-[

Image


Image


Image


Image


Image


Image


Image


Image


Image


Image


Image


It's coming together now.
#4 over and out.
 

Attachments

#2,986 ·
32 Hot Rod Chevy Coupe Fenders & radiator installed

This fir sure make sanding quick but the dings it gets are a pain!

Image


Going to have some really wide tires on the back so needed to cut some more out.
These quality hole saws make quick,clean work of it with very little sanding a big plus in my book..
Image


Then need to figure how the radiator will fit in, really took my time with this as any part of it buggered up would mean tons a redoes. :-[

Image


Image


Image


Image


Image


Image


Image


Image


Image


Image


Image


It's coming together now.
#4 over and out.
Amazing fenders…absolutely amazing!!
 

Attachments