LumberJocks Woodworking Forum banner
28K views 85 replies 12 participants last post by  Rick Dennington  
#1 ·
What the boss wanted...

Ok…We have a local store..sells close-outs and other items…and some furniture stuff. Boss saw a cabinet she liked..and brought home an ad for it…
Image


Hmmm…ok, and she wants me to build a version? Because it isn't the right size….went to the store, with camera and a tape measure in hand..had to go back across the freshly sealed parking lot, to get a pen and paper…this is what I found…
Image


Hmmm..it only stands 36" tall? length is what she wants..at 54". Drawers?
Image


Fake. Ok, we can do that….full length frame & panel door. Top?
Image


Don't think I will use the metal corner details….or a top that is 3" thick….bottom shelf is also that thick…and sits on four little 3" high blocks…..

We can do a better job. Boss wants this to be 41" tall….and is out shopping for a "fireplace insert" (electric)..so far, most have been around $200…..OddLots only wants $100 more for the entire cabinet?

Well did a deal with a friend of mine…and brought home some 1×6 Ash planks..
Image


Started with 4 planks…at almost 12' long, they were a tad too long to haul in my van, let alone work with in the shop..did have some decent grain, though..
Image


Ok…needed to make two end panels…3/4" x 15" x 41", or something close to that. Some of these planks were a bit too long…too much waste. chose the five shortest out of the 8…and hauled them to the shop…

Part one. Stay tuned for the next exciting episode….
 

Attachments

#2 ·
What the boss wanted...

Ok…We have a local store..sells close-outs and other items…and some furniture stuff. Boss saw a cabinet she liked..and brought home an ad for it…
Image


Hmmm…ok, and she wants me to build a version? Because it isn't the right size….went to the store, with camera and a tape measure in hand..had to go back across the freshly sealed parking lot, to get a pen and paper…this is what I found…
Image


Hmmm..it only stands 36" tall? length is what she wants..at 54". Drawers?
Image


Fake. Ok, we can do that….full length frame & panel door. Top?
Image


Don't think I will use the metal corner details….or a top that is 3" thick….bottom shelf is also that thick…and sits on four little 3" high blocks…..

We can do a better job. Boss wants this to be 41" tall….and is out shopping for a "fireplace insert" (electric)..so far, most have been around $200…..OddLots only wants $100 more for the entire cabinet?

Well did a deal with a friend of mine…and brought home some 1×6 Ash planks..
Image


Started with 4 planks…at almost 12' long, they were a tad too long to haul in my van, let alone work with in the shop..did have some decent grain, though..
Image


Ok…needed to make two end panels…3/4" x 15" x 41", or something close to that. Some of these planks were a bit too long…too much waste. chose the five shortest out of the 8…and hauled them to the shop…

Part one. Stay tuned for the next exciting episode….
I know yours will be many times nicer and many times less expensive!
 

Attachments

#3 ·
What the boss wanted...

Ok…We have a local store..sells close-outs and other items…and some furniture stuff. Boss saw a cabinet she liked..and brought home an ad for it…
Image


Hmmm…ok, and she wants me to build a version? Because it isn't the right size….went to the store, with camera and a tape measure in hand..had to go back across the freshly sealed parking lot, to get a pen and paper…this is what I found…
Image


Hmmm..it only stands 36" tall? length is what she wants..at 54". Drawers?
Image


Fake. Ok, we can do that….full length frame & panel door. Top?
Image


Don't think I will use the metal corner details….or a top that is 3" thick….bottom shelf is also that thick…and sits on four little 3" high blocks…..

We can do a better job. Boss wants this to be 41" tall….and is out shopping for a "fireplace insert" (electric)..so far, most have been around $200…..OddLots only wants $100 more for the entire cabinet?

Well did a deal with a friend of mine…and brought home some 1×6 Ash planks..
Image


Started with 4 planks…at almost 12' long, they were a tad too long to haul in my van, let alone work with in the shop..did have some decent grain, though..
Image


Ok…needed to make two end panels…3/4" x 15" x 41", or something close to that. Some of these planks were a bit too long…too much waste. chose the five shortest out of the 8…and hauled them to the shop…

Part one. Stay tuned for the next exciting episode….
Ain't it nice when a plan comes together…? I like the Ash you picked out much better than the one in the store that you took a picture of….!!! Like lew said, your's will be much nicer, and better built….I've seen your work…...!!
 

Attachments

#4 ·
Starting up

Ok, these were hauled to the shop…took a couple trips..
Image


All five needed to be cut down to around 41" long..leaves a bit to trim on the ends when done..
Image


Marked out a cut line, trying to get the "best" of the board IN the 41"...the rest will be on stand-by for smaller parts
Image


Worked my way down the stack…each board was set up on a pair of scrap pine boards, and the a clamp to hold them all still, while I cut the excess wood off….

Image


As much as I like my handsaws…this wasn't the time for them…I also snapped a couple lines, after I had found the chalk box..
Image


Thinking that the bandsaw could at least follow the blue lines? Wrong…it followed ( or tried to) the grain….wavy cuts, like it was afraid to even get any of that blue on it's blade…
Image


Ganged the two parts up….and tried the #8 Jointer..It was just hopping along, hitting a high spot, now and then.
Got out a jack plane, to bring those high spots down a bit, so the jointer could plane the entire edge…
Image


About time this fancy plane saw some real action..
Image


Yes…it IS a jack plane. Once it was done, a few full length passes with that HEAVY #8 to get a straight edge.
So, now I have four 1×6 x 41"s for two panels….ends of the cabinet. The two narrow boards are fillers to be glued between the 1×6s
Image


Used one of the narrow boards to mark a straight edge on each of the 1×6s….then decided to lay out one panel..

Image


back was hurting..decided to take a break, for a while….all four 1×6s will need their edges jointed, in order to do a glue up…

Stay tuned….
 

Attachments

#5 ·
Starting up

Ok, these were hauled to the shop…took a couple trips..
Image


All five needed to be cut down to around 41" long..leaves a bit to trim on the ends when done..
Image


Marked out a cut line, trying to get the "best" of the board IN the 41"...the rest will be on stand-by for smaller parts
Image


Worked my way down the stack…each board was set up on a pair of scrap pine boards, and the a clamp to hold them all still, while I cut the excess wood off….

Image


As much as I like my handsaws…this wasn't the time for them…I also snapped a couple lines, after I had found the chalk box..
Image


Thinking that the bandsaw could at least follow the blue lines? Wrong…it followed ( or tried to) the grain….wavy cuts, like it was afraid to even get any of that blue on it's blade…
Image


Ganged the two parts up….and tried the #8 Jointer..It was just hopping along, hitting a high spot, now and then.
Got out a jack plane, to bring those high spots down a bit, so the jointer could plane the entire edge…
Image


About time this fancy plane saw some real action..
Image


Yes…it IS a jack plane. Once it was done, a few full length passes with that HEAVY #8 to get a straight edge.
So, now I have four 1×6 x 41"s for two panels….ends of the cabinet. The two narrow boards are fillers to be glued between the 1×6s
Image


Used one of the narrow boards to mark a straight edge on each of the 1×6s….then decided to lay out one panel..

Image


back was hurting..decided to take a break, for a while….all four 1×6s will need their edges jointed, in order to do a glue up…

Stay tuned….
That's a bunch of boards!
 

Attachments

#7 ·
1st panel glued up

Just couldn't stay out of the shop, that day ( paid for it the next..OW!) so after supper, I went back to the shop..
Image


Instead of that huge #8…went with the lighter #7c….got an edge on one 1×6 jointed, test with the filler strip for gaps. Mark both as to where they will meet…worked the second 1×6 straight…only worked on one edge, for now.

Got to where all three would sit still, without clamps or glue…more markings. One 1×6 stayed put, in the vise, a bead of glue was run along the freshly planed edge, the filler strip added ( by sliding it around, until it "stuck"), then a second bead was applied to the filler strip's edge, and the other 1×6 was slid around…The mess even just sat there, no clamps were needed to keep them there..but…
Image


I started with a clamp in the middle…then a clamp at each end…
Image


After going to the trouble of making sure one end was straight, a caul was clamped in place to keep it flat as well..this will be the top of the panel…trimming is being kept to as little as I can here….
Image


Far end, where a foot profile will get cut out, still needed a caul, to pull things flat..
Image


Swept the floor, and called it a day…the next day was a shopping day….pine 1×2s for webframes were picked up, and a pair of 1×12x 4' pine planks. They will be the center (unseen) dividers…
Shopping day…I stayed out of the shop…was doing errands all day.

Stay tuned….
 

Attachments

#8 ·
1st panel glued up

Just couldn't stay out of the shop, that day ( paid for it the next..OW!) so after supper, I went back to the shop..
Image


Instead of that huge #8…went with the lighter #7c….got an edge on one 1×6 jointed, test with the filler strip for gaps. Mark both as to where they will meet…worked the second 1×6 straight…only worked on one edge, for now.

Got to where all three would sit still, without clamps or glue…more markings. One 1×6 stayed put, in the vise, a bead of glue was run along the freshly planed edge, the filler strip added ( by sliding it around, until it "stuck"), then a second bead was applied to the filler strip's edge, and the other 1×6 was slid around…The mess even just sat there, no clamps were needed to keep them there..but…
Image


I started with a clamp in the middle…then a clamp at each end…
Image


After going to the trouble of making sure one end was straight, a caul was clamped in place to keep it flat as well..this will be the top of the panel…trimming is being kept to as little as I can here….
Image


Far end, where a foot profile will get cut out, still needed a caul, to pull things flat..
Image


Swept the floor, and called it a day…the next day was a shopping day….pine 1×2s for webframes were picked up, and a pair of 1×12x 4' pine planks. They will be the center (unseen) dividers…
Shopping day…I stayed out of the shop…was doing errands all day.

Stay tuned….
Nice!
 

Attachments

#10 ·
Panel #2 is in the clamps....

Ok, this morning, the computer was having "issues"....tried a few restarts…then a few scans….decided to head for the shop, until the dang thing is ready for work…..the computer, that is….
Image


Ok, in order to work on #2 panel..#1 had to get out of the way. Clamps came off…nothing creaked, nor cracked…good sign? Lowere the panel a bit and clamped it to the side of the bench. Jack and jointer went to work..goal was to joint the outside edges..
Image


These two seemed to be working well enough. A few final passes with the #7c..
Image


Flip the panel over, and repeat…..then stash this panel over on a scrap of pine that was sitting on the floor by the saw til….out of the way…
Image


Next..1×6 #3….was a bit rough to plane….we have ways..Millers Falls No.14, set a bit rough, to knock down the knot-filled high spots. Then the other two could take over….
Image


So that once the low spots were the same height as the high ones…edge was shiny all the way….gap checking?
Image


Had one spot in the middle….needed knocked down a bit. Once the filler liked the edge…marked these two as to where they will go together….then repeat for the fourth and last 1×6…then spread a bead of glue, and moosh the parts around….
Image


Just the glue.. nothing else holding these in place..but..
Image


Clamps and cauls again. Will let this sit until tomorrow…need to sweep the place, again..
Image


Didn't I just do this? Yesterday (shopping day) picked up a bug bomb….and "bombed" the shop….was getting tired of spiders, and their webs. Today? no bugs! Hope that will do the trick….
Once i can use the bench again, and get a "plan" drawn up….I can start on the webframes to connect these two panels, and hold the two center dividers in place….Maybe next week, I can start on two doors?

Stay tuned…
 

Attachments

#11 ·
Panel #2 is in the clamps....

Ok, this morning, the computer was having "issues"....tried a few restarts…then a few scans….decided to head for the shop, until the dang thing is ready for work…..the computer, that is….
Image


Ok, in order to work on #2 panel..#1 had to get out of the way. Clamps came off…nothing creaked, nor cracked…good sign? Lowere the panel a bit and clamped it to the side of the bench. Jack and jointer went to work..goal was to joint the outside edges..
Image


These two seemed to be working well enough. A few final passes with the #7c..
Image


Flip the panel over, and repeat…..then stash this panel over on a scrap of pine that was sitting on the floor by the saw til….out of the way…
Image


Next..1×6 #3….was a bit rough to plane….we have ways..Millers Falls No.14, set a bit rough, to knock down the knot-filled high spots. Then the other two could take over….
Image


So that once the low spots were the same height as the high ones…edge was shiny all the way….gap checking?
Image


Had one spot in the middle….needed knocked down a bit. Once the filler liked the edge…marked these two as to where they will go together….then repeat for the fourth and last 1×6…then spread a bead of glue, and moosh the parts around….
Image


Just the glue.. nothing else holding these in place..but..
Image


Clamps and cauls again. Will let this sit until tomorrow…need to sweep the place, again..
Image


Didn't I just do this? Yesterday (shopping day) picked up a bug bomb….and "bombed" the shop….was getting tired of spiders, and their webs. Today? no bugs! Hope that will do the trick….
Once i can use the bench again, and get a "plan" drawn up….I can start on the webframes to connect these two panels, and hold the two center dividers in place….Maybe next week, I can start on two doors?

Stay tuned…
Lookin' Good!
 

Attachments

#14 ·
Side panels are done

Panel #2 came out of the clamps today. Jointed one edge straight…then got the idea to clamp panel #1 to Panel #2
Image


And joint the edges til they matched…that was the plan….however..
Image


With the other sides even..had this much to remove…more than "Just a little off the top"...wasn't ready to push the No.7c THAT much…..got out an older jack plane, and roughed things down a bit..
Image


Just to get things close..
Image


For the other two planes to finish it up…
Image


Going to be one of THEM days. Then flipped both panel up onto the bench…goal was to trim one end square, and call them TOP…in theory…I could use the framing square to mark a line or two, then use a jig and the circular saw..
Image


Something wasn't right…saw was acting strange…cut was ragged….got to checking the lines

Image


Square is off, by about an 1/8"? Found this out, after the first foot profile was cut…and was laying out the matching cuts on the other panel….grrrrr..went back, with a better square, re -cut the ends. The #62 then plane the waves out of the ends.
Foot profile? Well, a quart can, a compass, and a square and a little freehand drawing..
Image


Retraced the marks on the other panel, and cut out the "excess" stuff. Stood both panels up, with the new feet on the floor….seemed to be a match…set them aside..
Image


And cleaned up a mess..all them shavings and sawdust got swept up…
With all the rain around here, lately….and the shop's habit of getting a creek across the floor, I clamped the two panels back together, and laid the "bundle" on the bench, for now..
Image


And used the #62 as a scrub plane? Center was a tad higher than the sides….decided to give this a try…
Now I can figure out the rest of the parts, and how to build them….might even draw up a Plan?
Stay tuned…( I think I won the argument about the paint thing…for now)
 

Attachments

#15 ·
Side panels are done

Panel #2 came out of the clamps today. Jointed one edge straight…then got the idea to clamp panel #1 to Panel #2
Image


And joint the edges til they matched…that was the plan….however..
Image


With the other sides even..had this much to remove…more than "Just a little off the top"...wasn't ready to push the No.7c THAT much…..got out an older jack plane, and roughed things down a bit..
Image


Just to get things close..
Image


For the other two planes to finish it up…
Image


Going to be one of THEM days. Then flipped both panel up onto the bench…goal was to trim one end square, and call them TOP…in theory…I could use the framing square to mark a line or two, then use a jig and the circular saw..
Image


Something wasn't right…saw was acting strange…cut was ragged….got to checking the lines

Image


Square is off, by about an 1/8"? Found this out, after the first foot profile was cut…and was laying out the matching cuts on the other panel….grrrrr..went back, with a better square, re -cut the ends. The #62 then plane the waves out of the ends.
Foot profile? Well, a quart can, a compass, and a square and a little freehand drawing..
Image


Retraced the marks on the other panel, and cut out the "excess" stuff. Stood both panels up, with the new feet on the floor….seemed to be a match…set them aside..
Image


And cleaned up a mess..all them shavings and sawdust got swept up…
With all the rain around here, lately….and the shop's habit of getting a creek across the floor, I clamped the two panels back together, and laid the "bundle" on the bench, for now..
Image


And used the #62 as a scrub plane? Center was a tad higher than the sides….decided to give this a try…
Now I can figure out the rest of the parts, and how to build them….might even draw up a Plan?
Stay tuned…( I think I won the argument about the paint thing…for now)
I like that foot profile.
 

Attachments

#18 ·
We have Plan, and one frame done

paper was used today….started in last night, needed measurements to start the frame building…
Image


Made a front view, to show where the parts were going to be…then, this morning the rest of the plan was drawn up
Image


This is the top frame, the bottom frame will get one more rail, for the center foot to attach to. Hauled the Pine 1×2s to the shop…and set up the smaller mitresaw..
Image


To cut four long stiles, and 9 rails..
Image


Then cut tenons on the rails..
Image


Had some scraps left over from all that cutting..
Image


Will make some cornerblocks from these…found the mortise jig…and had to adjust it, for the thickness of the parts..was still set up for 1" thick stuff. Then sit it in place on the bench…and a few tools..
Image


Visegrips to hold the part in place. Backsaw to help with the mortises on the ends. Those are open-ended..
Image


Saw at an angle, then chop out the waste with a chisel. On this frame, there are two mortises in the middle 24" apart..they get chopped the old fashioned way..
Image


Got all the mortises chopped, fitted to the tenons..
Image


Transferred the locations to the other stile, and chopped those mortises….Test fit..
Image


Ok…used the mitresaw to cut a pattern..from the scraps
Image


To where I could make a few of these corner blocks..
Image


Then used a Vintage drill, to drill a pair of mounting holes, so when I glue and clamp the frame together, I could glue and screw the corner blocks in place..only..
Image


There weren't any screws IN the shop….had to make a run to WallE World, and buy a few packs…
Ok, NOW the glue and clamps can be done..
Image


Usual luck…the rail at the far end..was upside down….had to flip it over, to get it to fit….tenon was longer on one end. Corner blocks were glued and screwed in place..
Image


My normal drill/driver won't fit between the stiles…but, this will..
Image


And, it has Impact to it! Drives the screws nice and tight…set this frame aside…didn't feel up to chopping 10 more mortises, was a bit tired. The other frame can wait, until Tuesday arrives.
Stay tuned..
 

Attachments

#19 ·
Bottom frame and the dividers

Monday..normally the shop is closed. However, sitting around the house doing nothing gets BORING…makes a great motivator to get something done. Too wet for yard work….might as well head to the shop..
Bottom frame needed built. I have a way of cutting mortises on the ends of a board..
I use the tenon to lay out for the mortise
Image


Then I use a backsaw at an angle, to saw as much as I can….even dragging the toe back out of the cut a few times
Image


Then a mortise chisel that matches the width of the mortise, digs a deep hole at the far end..
Image


Then lay the chisel down…bevel up…
Image


The goal here is to pop the waste up…
Image


And clean things out, until the tenon fits..
Image


Hey, one done, three others to do. Also had 6 regular mortises to chop. Again, laid out using the tenon that goes here..
Image


Chop a bit..
Image


And check the fit…
Image


Got one stile done, and fitted to the rails….
Image


Bottom frame gets an extra rail…to attach the center foot to…lay out the mortises for the other stile, and get those done..and fitted..
Image


Had to scrounge around, to find enough 1×2 scraps, to make 8 more corner blocks. Got those cut and drilled.

Set up the frame in the vise, and started spreading the glue around ( have gotten better at marking which part goes where, too ) and started add the clamps ( 4) and the corner blocks (8)

Image


Center rail does not get the blocks. Once the blocks were in place, I could move a clamp a bit..
Image


At least until the glue sets up. Set this mess aside, for now. 1×12s needed cut to length of 33-1/2"
Image


Got rid of the bad square, found one that was actually ..square! Checked the ends of the boards..only one end was even square? Started from there..marked out a line…and tried to cut off the bad stuff..
Image


Didn't see any "live" ones. Might save this for a shelf. Got both boards trimmed for length….however..

A 1×12 does NOT come in 14" widths. So, I had to cut a few 1×2s to 33-1/2" long, spread some more glue (getting low on that, too) and a few clamps….one divider done..
Image


Needed to scrounge up enough clamps for the second panel….glue had set up on the frame, used those clamps, and a few more that I found..
Image


These will wind up a bit wider than I need, but I can rip and plane them down to the size needed.
Image


So…have 2 side panels about ready, both the top and bottom frames ready, and the dividers in the clamps

Need to use either the #78, or the #45 to mill a rebate along the back edge of the side panels….to house the plywood backs. IF I can get the dividers cut for width..I can do a little assembly work? Then start milling parts for the face frames and the two doors…going to be a "fun" week…

Face frames and the doors will be out of Ash…panel IN the doors may be Oak. May do Shaker style panels?
Stay tuned…
 

Attachments

#20 ·
Bottom frame and the dividers

Monday..normally the shop is closed. However, sitting around the house doing nothing gets BORING…makes a great motivator to get something done. Too wet for yard work….might as well head to the shop..
Bottom frame needed built. I have a way of cutting mortises on the ends of a board..
I use the tenon to lay out for the mortise
Image


Then I use a backsaw at an angle, to saw as much as I can….even dragging the toe back out of the cut a few times
Image


Then a mortise chisel that matches the width of the mortise, digs a deep hole at the far end..
Image


Then lay the chisel down…bevel up…
Image


The goal here is to pop the waste up…
Image


And clean things out, until the tenon fits..
Image


Hey, one done, three others to do. Also had 6 regular mortises to chop. Again, laid out using the tenon that goes here..
Image


Chop a bit..
Image


And check the fit…
Image


Got one stile done, and fitted to the rails….
Image


Bottom frame gets an extra rail…to attach the center foot to…lay out the mortises for the other stile, and get those done..and fitted..
Image


Had to scrounge around, to find enough 1×2 scraps, to make 8 more corner blocks. Got those cut and drilled.

Set up the frame in the vise, and started spreading the glue around ( have gotten better at marking which part goes where, too ) and started add the clamps ( 4) and the corner blocks (8)

Image


Center rail does not get the blocks. Once the blocks were in place, I could move a clamp a bit..
Image


At least until the glue sets up. Set this mess aside, for now. 1×12s needed cut to length of 33-1/2"
Image


Got rid of the bad square, found one that was actually ..square! Checked the ends of the boards..only one end was even square? Started from there..marked out a line…and tried to cut off the bad stuff..
Image


Didn't see any "live" ones. Might save this for a shelf. Got both boards trimmed for length….however..

A 1×12 does NOT come in 14" widths. So, I had to cut a few 1×2s to 33-1/2" long, spread some more glue (getting low on that, too) and a few clamps….one divider done..
Image


Needed to scrounge up enough clamps for the second panel….glue had set up on the frame, used those clamps, and a few more that I found..
Image


These will wind up a bit wider than I need, but I can rip and plane them down to the size needed.
Image


So…have 2 side panels about ready, both the top and bottom frames ready, and the dividers in the clamps

Need to use either the #78, or the #45 to mill a rebate along the back edge of the side panels….to house the plywood backs. IF I can get the dividers cut for width..I can do a little assembly work? Then start milling parts for the face frames and the two doors…going to be a "fun" week…

Face frames and the doors will be out of Ash…panel IN the doors may be Oak. May do Shaker style panels?
Stay tuned…
That's going to be sturdy!
 

Attachments

#21 ·
Dividers are done, and installed

Had a morning road trip, and Lunch…did a bit of shopping for the shop..
Image


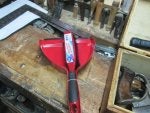
Hand broom and dust pan set, since the last set got broken…gets rough in the shop, somedays. hauled two boxes to the shop, along with the clean up tools, and the camera…took two trips..
Image


One box has the Stanley #45. That mallet? It is the red handled rawhide one I had been using lately. Taped up to keeps things clean. Handle for a better grip, head so it doesn't "peel" anymore.
The other box?
Image


Will be needing that Wards #78 later….once it gets set up. Got the divider panels out of the clamps, to see how much to rip from one edge..
Image


Hmmm, THAT much? Laid each on the bench, marked the cut line..used a Vintage saw to do the cuts..
Image


6" SKIL saw. Then needed to joint the edges straight, and remove the saw marks..
Image


Then laid the panels flat on the bench..
Image


Used these two planes to get things almost flat..
Image


The add-on strips were a hair different in thickness….what the first two planes couldn't do..
Image


Old Smoothie could. It has no camber to the iron. It is a Stanley No. 7c, type 9. and still working great..
Image


Made a mess on the floor..that I had to clean up..
Image


Got to use the new dust pan!. Laid a frame on the bench..
Image


Square to draw a center line, vintage drill to make a few holes…( had slid this off to the end of the board, avoids drilling the wrong part)...then another Vintage drill..
Image


Why change bits, when you can just change drills….this one has a countersink bit…Then, had to bring a cordless drill/driver to the shop, and install a few screws..no glue. Got one frame attached to both dividers…somehow.

Then hauled the mess off the bench, set it up to install the other frame…..then stood that assembly up..on it's end
Image


With it sitting on it's side, I could lay one of the end panels on it, to see which edge i could rebate, for the plywood backs..marked that, set the panel in the leg vise, and clamped the far end to the side of the bench…
Image


Set up the Wards (Stanley) No. 78 to cut a 1/4" deep rebate, about..5/8" wide, or so….Started peeling Ash..
Image


Learned a different grip ( no sore thumb!) and made a LOT of shavings..
Image


Rubbed things with a candle every few trips..( and hang on!) until I hit the depth stop..
Image


One done….and that would be it for the day…plane wise..even with the fan blowing full force, I was soaked.
Did a dry fit, to see how little I have gotten done..
Image


Sides are c clamped in place, for now….
Image


Need to get the other rebate done, and start cutting parts for the face frames…later see about some shelves, and a couple doors…and another jug of Gatorade…
Stay tuned..
 

Attachments

#22 ·
Dividers are done, and installed

Had a morning road trip, and Lunch…did a bit of shopping for the shop..
Image


Hand broom and dust pan set, since the last set got broken…gets rough in the shop, somedays. hauled two boxes to the shop, along with the clean up tools, and the camera…took two trips..
Image


One box has the Stanley #45. That mallet? It is the red handled rawhide one I had been using lately. Taped up to keeps things clean. Handle for a better grip, head so it doesn't "peel" anymore.
The other box?
Image


Will be needing that Wards #78 later….once it gets set up. Got the divider panels out of the clamps, to see how much to rip from one edge..
Image


Hmmm, THAT much? Laid each on the bench, marked the cut line..used a Vintage saw to do the cuts..
Image


6" SKIL saw. Then needed to joint the edges straight, and remove the saw marks..
Image


Then laid the panels flat on the bench..
Image


Used these two planes to get things almost flat..
Image


The add-on strips were a hair different in thickness….what the first two planes couldn't do..
Image


Old Smoothie could. It has no camber to the iron. It is a Stanley No. 7c, type 9. and still working great..
Image


Made a mess on the floor..that I had to clean up..
Image


Got to use the new dust pan!. Laid a frame on the bench..
Image


Square to draw a center line, vintage drill to make a few holes…( had slid this off to the end of the board, avoids drilling the wrong part)...then another Vintage drill..
Image


Why change bits, when you can just change drills….this one has a countersink bit…Then, had to bring a cordless drill/driver to the shop, and install a few screws..no glue. Got one frame attached to both dividers…somehow.

Then hauled the mess off the bench, set it up to install the other frame…..then stood that assembly up..on it's end
Image


With it sitting on it's side, I could lay one of the end panels on it, to see which edge i could rebate, for the plywood backs..marked that, set the panel in the leg vise, and clamped the far end to the side of the bench…
Image


Set up the Wards (Stanley) No. 78 to cut a 1/4" deep rebate, about..5/8" wide, or so….Started peeling Ash..
Image


Learned a different grip ( no sore thumb!) and made a LOT of shavings..
Image


Rubbed things with a candle every few trips..( and hang on!) until I hit the depth stop..
Image


One done….and that would be it for the day…plane wise..even with the fan blowing full force, I was soaked.
Did a dry fit, to see how little I have gotten done..
Image


Sides are c clamped in place, for now….
Image


Need to get the other rebate done, and start cutting parts for the face frames…later see about some shelves, and a couple doors…and another jug of Gatorade…
Stay tuned..
Bandit - just wanted you to know that even though many of us don't comment on your great blogs, I for one, enjoy reading them, and always learn something, even if I don't post a comment. Please keep the illustrated build blogs coming.

BTW - that drill and skil saw are the definition of "vintage".
 

Attachments

#26 ·
Face frames, a start is made

While waiting on this computer to wake up, and repair itself (never did….) decided to haul the rest of the Ash 1×6s on hand to the shop….
Image


Would have been nice to just glue these three up into the top of the case….like everything else this morning, there were "issues" going on.
Issue #1
Image


Issue #2..
Image


Kind of hard to glue up a panel with these involved. Third plank had a couple knots along one edge…
Well, I could cut these down into parts for a face frame….first I needed to clear the bench..
Image


Then set up a speed square to guide the saw cuts..circular saw was also having "issues" about following a line..
Image


Square one end, turn the plank around and cut the length needed…dropping those big knots onto the floor.
Ok, need some lay out tools..
Image


Had some straight lines, and a few curves to lay out…after finding the centers…also had to hunt around for a SHARP sabre saw blade…first two were too dull….they tried to burn their way along..

Clamp, cut, move..clamp, cut, move…until the center was reached. Rotate the board around, repeat the Clamp, cut, move routine…until the last of the scraps falls away…
Stand the plank, rather what is left of the plank, up..
Image


Hmm..not too hateful? needed this out of the way..so..
Image


This is about what the bottom of the case will look like….need to turn it around, as this is the back of the case..
Next plank with the large knot…..made a pair of 3/4" x 2" x 40" long rails. jointer plane to erase the saw marks, and get a decent straight edge…

Then the top rail…..plank was the one with the knot on the edge…rip cut was right down the center of the plank
Gave me a rail the was ~ 3/4" x 3" x 52-1/2" long. Rail was long enough I could use the bench's crochet..
Image


Just start the board into the "hook", and a few good whacks with a mallet at the other end..then tighten down the leg vise…
Image


Plane is an Ohio Tool Co. No. 0-7..
Image


Seemed to do a decent enough job ( I tend to rotate plane during a job…rather than wear just one out)
Image


Any difference between a "C" model and this smooth sole model? None I could tell…
Image


Even with the fan blowing on me, I was still soaked…set these four parts near where they will be going….needed a road trip, to buy a few more sticks of Ash. Had Lunch and chilled down for the day. Also, took a stack of flooring shorts along, and planed off the grooves on the backs, and the finish on the fronts…about 1/2 Oak, 1/2 cherry

May use those in the doors? Joints for the face frame? Maybe just plain old 1/2 laps…?
Got the computer back on line….somehow. TV and phones? meh, might be fixed, now. Blame it on Hurricane Flo? Ehhhh, could be..

Will see what the next episode will bring…stay tuned
 

Attachments

#27 ·
Face frames, a start is made

While waiting on this computer to wake up, and repair itself (never did….) decided to haul the rest of the Ash 1×6s on hand to the shop….
Image


Would have been nice to just glue these three up into the top of the case….like everything else this morning, there were "issues" going on.
Issue #1
Image


Issue #2..
Image


Kind of hard to glue up a panel with these involved. Third plank had a couple knots along one edge…
Well, I could cut these down into parts for a face frame….first I needed to clear the bench..
Image


Then set up a speed square to guide the saw cuts..circular saw was also having "issues" about following a line..
Image


Square one end, turn the plank around and cut the length needed…dropping those big knots onto the floor.
Ok, need some lay out tools..
Image


Had some straight lines, and a few curves to lay out…after finding the centers…also had to hunt around for a SHARP sabre saw blade…first two were too dull….they tried to burn their way along..

Clamp, cut, move..clamp, cut, move…until the center was reached. Rotate the board around, repeat the Clamp, cut, move routine…until the last of the scraps falls away…
Stand the plank, rather what is left of the plank, up..
Image


Hmm..not too hateful? needed this out of the way..so..
Image


This is about what the bottom of the case will look like….need to turn it around, as this is the back of the case..
Next plank with the large knot…..made a pair of 3/4" x 2" x 40" long rails. jointer plane to erase the saw marks, and get a decent straight edge…

Then the top rail…..plank was the one with the knot on the edge…rip cut was right down the center of the plank
Gave me a rail the was ~ 3/4" x 3" x 52-1/2" long. Rail was long enough I could use the bench's crochet..
Image


Just start the board into the "hook", and a few good whacks with a mallet at the other end..then tighten down the leg vise…
Image


Plane is an Ohio Tool Co. No. 0-7..
Image


Seemed to do a decent enough job ( I tend to rotate plane during a job…rather than wear just one out)
Image


Any difference between a "C" model and this smooth sole model? None I could tell…
Image


Even with the fan blowing on me, I was still soaked…set these four parts near where they will be going….needed a road trip, to buy a few more sticks of Ash. Had Lunch and chilled down for the day. Also, took a stack of flooring shorts along, and planed off the grooves on the backs, and the finish on the fronts…about 1/2 Oak, 1/2 cherry

May use those in the doors? Joints for the face frame? Maybe just plain old 1/2 laps…?
Got the computer back on line….somehow. TV and phones? meh, might be fixed, now. Blame it on Hurricane Flo? Ehhhh, could be..

Will see what the next episode will bring…stay tuned
I like that scallop detail
 

Attachments

#28 ·
A tale of three tasks to do

I set myself three jobs to do today…the second end panel needed a rebate made, to house the plywood back. Once that was done ( task #1) I could install both end panels onto the "mainframes", and get rid of the clamps holding things together. (Task #2) and finally, needed to build a pair of frames to use with a drawer, and install those (task#3)........Got the rebate milled..
Image


Unclamped the panel, set it in the leg vise, use the Wards (Stanley)#78 to plane the rebate….made a mess on the floor, too…
Image


All of this, from ONE rebate? OK, Task #1 is done….already soaked, and sore….not in the best of moods, anyway.

Task #2…involved attaching said panel to the frames….mainly 3 screws in the middle, between the corner blocks…drill a pilot hole, drive a screw, repeat. Had C clamps to hold things still….barely. Had to flip this mess over…and do the same for the bottom frame ( cussing level is about..Paris Island, Day #1)....Oh, and rotate this mess around, so I could work on the FRONT of the case….Crowded enough in the shop, without doing that…
Image


Oh, and set it so I could get past it…..Ok, Task #2 done…..Could not get to either mitre saw….something big was in the way. Went and dug out an old, folding mitre box..call GEM…
Image


Because for Task #3, I needed to cut a bunch of parts. Used both a Disston D-112…and my joinery Disston #4…
tenons were cut on the bandsaw,,, nothing real fancy..
Image


And, parts is parts. Mortises for the first frame were chopped, frame glued up, with 2 nails in each joint….set it aside, for now..
Image


had everything ready to go, to make the other frame..
Image


Decided it was time for a Gatorade Break….
After break, got the second frame done. Before I could add the kicker to it…I needed to drill a few holes, two on each end, and counter sink them…THEN I could install the kicker. Clamped the top rail of the face frame in place, needed to place the bottom edge of the kicker flush with the bottom edge of the rail…once that was set, a combo square was set for depth, and the frame was screwed in place..
Image


Hammer was used to "fine-tuned" the frame's location. Kicker is to keep a drawer from tipping down, when you pull it out a bit far. Had a blank for the drawer front….clamped it into place…
Image


This was actually the first frame made, of the two…..2" screws had run out, needed to counterbore the pilot holes on this frame. Blank allowed me to mark the bottom edge of the drawer, which will ride on this frame. Then I could remove the blank, use the square to carry the top lines across the panel…heavy lines, so I could see them.
Again, hammer to adjust where the frame was, got two screws on the right side installed…left side was not setting in the correct spot, nor stay there when I did move it there….grabbed a screw placed it in the pilot hole…one hand for the frame, one for the hammer..as soon as the frame was in the right spot, a tap from the hammer stuck the frame in place..then I could hit it with the impact driver.
Image


And that was Task 3..4 hours IN the shop. Must be getting slow. set tomorrow's tasks in place..
Image


Have to bring one Ash 1×6 x80" plank to the shop….have the rest of the faceframe parts to mill, and start the joinery on Might be an all day affair….
Stay tuned..
 

Attachments

#29 ·
A tale of three tasks to do

I set myself three jobs to do today…the second end panel needed a rebate made, to house the plywood back. Once that was done ( task #1) I could install both end panels onto the "mainframes", and get rid of the clamps holding things together. (Task #2) and finally, needed to build a pair of frames to use with a drawer, and install those (task#3)........Got the rebate milled..
Image


Unclamped the panel, set it in the leg vise, use the Wards (Stanley)#78 to plane the rebate….made a mess on the floor, too…
Image


All of this, from ONE rebate? OK, Task #1 is done….already soaked, and sore….not in the best of moods, anyway.

Task #2…involved attaching said panel to the frames….mainly 3 screws in the middle, between the corner blocks…drill a pilot hole, drive a screw, repeat. Had C clamps to hold things still….barely. Had to flip this mess over…and do the same for the bottom frame ( cussing level is about..Paris Island, Day #1)....Oh, and rotate this mess around, so I could work on the FRONT of the case….Crowded enough in the shop, without doing that…
Image


Oh, and set it so I could get past it…..Ok, Task #2 done…..Could not get to either mitre saw….something big was in the way. Went and dug out an old, folding mitre box..call GEM…
Image


Because for Task #3, I needed to cut a bunch of parts. Used both a Disston D-112…and my joinery Disston #4…
tenons were cut on the bandsaw,,, nothing real fancy..
Image


And, parts is parts. Mortises for the first frame were chopped, frame glued up, with 2 nails in each joint….set it aside, for now..
Image


had everything ready to go, to make the other frame..
Image


Decided it was time for a Gatorade Break….
After break, got the second frame done. Before I could add the kicker to it…I needed to drill a few holes, two on each end, and counter sink them…THEN I could install the kicker. Clamped the top rail of the face frame in place, needed to place the bottom edge of the kicker flush with the bottom edge of the rail…once that was set, a combo square was set for depth, and the frame was screwed in place..
Image


Hammer was used to "fine-tuned" the frame's location. Kicker is to keep a drawer from tipping down, when you pull it out a bit far. Had a blank for the drawer front….clamped it into place…
Image


This was actually the first frame made, of the two…..2" screws had run out, needed to counterbore the pilot holes on this frame. Blank allowed me to mark the bottom edge of the drawer, which will ride on this frame. Then I could remove the blank, use the square to carry the top lines across the panel…heavy lines, so I could see them.
Again, hammer to adjust where the frame was, got two screws on the right side installed…left side was not setting in the correct spot, nor stay there when I did move it there….grabbed a screw placed it in the pilot hole…one hand for the frame, one for the hammer..as soon as the frame was in the right spot, a tap from the hammer stuck the frame in place..then I could hit it with the impact driver.
Image


And that was Task 3..4 hours IN the shop. Must be getting slow. set tomorrow's tasks in place..
Image


Have to bring one Ash 1×6 x80" plank to the shop….have the rest of the faceframe parts to mill, and start the joinery on Might be an all day affair….
Stay tuned..
I'm still here, and hanging on till the finished project is done….Lots of joinery involved in this one…..Keep going, and I'll stay tuned in to see the final results…..!!
 

Attachments

#30 ·
Short day IN the shop

Had trouble getting any sleep the night before. Mostly in this computer chair….

Remember back in High School Industrial Arts Class, where you had to build certain wood joints to pass a test?
Half Lap…was suppose to be an easy one….lay things out, back saw to cut the waste away….easy as 1,2,3…right?

Hmmmm..One ( after the layouts)
Image


Need to remember to cut on the waste side of the lines..
Two..
Image


Same saw, just a rip cut, this time…and, IF things were done right..
Image


Three. You wind up like this. half the joint is done. Sometimes, you needed to angle a cut…
Image


Come in from each edge, and hope they meet in the middle…Got the four outside corners cut, and ready to be finetuned..
Image


Hauled on of the new 1×6 x 80" Ash planks to the shop…needed a "slab" about 39" long…crosscut that…got to looking it over….one edge was clear…the other edge was full of knots….needed two pieces ripped, both roughly 2" wide. While thinking of a way to clamp this board in place while the circular saw did it's thing…drilled a couple holes for screws into the edge with all the knots…once the two good strips from ripped, toss the knotty one into the "burn pile"....

usual wavy edges from the saw…clamped the two parts together..in the leg vise, and..
Image


Well, welll, there is indeed a use for a tool well, afterall! Used a few planes to joint the edges ..
Image


Jack plane to knock most of the high spots down a bit….then the No. 7c to joint the entire length….
And that was about it, for that day, was a bit tired.

Today was shopping day! Home Depot to order the fireplace insert…( delivery in 10 days?) and buy a 1×6 x 6' pine board. Got lucky…the board was almost defect free, no warps, and a few "pin knots".

Also needed to price some plywood ( ouch!)...Boss needed to go to Wall E World for a few things..decided I needed a new bottle of glue.

While I wait by the mailbox…I could ..build that drawer, install the middle two rails without the fixed shelf. Once the insert arrives, I can build and install that and the fixed shelf above it. I need the center rails, in order to start building the two doors. Might even glue up the top, and the shelves that go inside the door areas.

Not much going on today…needed a nap, to let the Single Brain Cell Sketch Up reboot, and come up with a Plan, again…
Stay tuned….going to be a LONG 10 days…
 

Attachments

#31 ·
Short day IN the shop

Had trouble getting any sleep the night before. Mostly in this computer chair….

Remember back in High School Industrial Arts Class, where you had to build certain wood joints to pass a test?
Half Lap…was suppose to be an easy one….lay things out, back saw to cut the waste away….easy as 1,2,3…right?

Hmmmm..One ( after the layouts)
Image


Need to remember to cut on the waste side of the lines..
Two..
Image


Same saw, just a rip cut, this time…and, IF things were done right..
Image


Three. You wind up like this. half the joint is done. Sometimes, you needed to angle a cut…
Image


Come in from each edge, and hope they meet in the middle…Got the four outside corners cut, and ready to be finetuned..
Image


Hauled on of the new 1×6 x 80" Ash planks to the shop…needed a "slab" about 39" long…crosscut that…got to looking it over….one edge was clear…the other edge was full of knots….needed two pieces ripped, both roughly 2" wide. While thinking of a way to clamp this board in place while the circular saw did it's thing…drilled a couple holes for screws into the edge with all the knots…once the two good strips from ripped, toss the knotty one into the "burn pile"....

usual wavy edges from the saw…clamped the two parts together..in the leg vise, and..
Image


Well, welll, there is indeed a use for a tool well, afterall! Used a few planes to joint the edges ..
Image


Jack plane to knock most of the high spots down a bit….then the No. 7c to joint the entire length….
And that was about it, for that day, was a bit tired.

Today was shopping day! Home Depot to order the fireplace insert…( delivery in 10 days?) and buy a 1×6 x 6' pine board. Got lucky…the board was almost defect free, no warps, and a few "pin knots".

Also needed to price some plywood ( ouch!)...Boss needed to go to Wall E World for a few things..decided I needed a new bottle of glue.

While I wait by the mailbox…I could ..build that drawer, install the middle two rails without the fixed shelf. Once the insert arrives, I can build and install that and the fixed shelf above it. I need the center rails, in order to start building the two doors. Might even glue up the top, and the shelves that go inside the door areas.

Not much going on today…needed a nap, to let the Single Brain Cell Sketch Up reboot, and come up with a Plan, again…
Stay tuned….going to be a LONG 10 days…
While the computer was trying to fix itself….I went to the shop, for a while…all four outside corners are tuned up

The middle two rails/stile/verticals? Anyway, one is almost done, get the other later. There is a fancy board just under the drawer..that has a curve profile….Curve was marked out and bandsawn tonight. May install that with a mortise and tenon joints..

We'll see how Sunday goes..
 

Attachments

#34 ·
Up date to the Project..

Couple hours here, a couple there….Left side of the frame needed tuned up…to match the right side..
Image


Got these joints fitting a little better…..
Image


Takes most of these tools, to fit the joints up….lot of flattening to do…
Image


The next trip to the shop..left side was tuned up. Both of the middle rails/stiles were also done…which left the curved center piece to do. Three nails, and a thin piece of plywood, mark out a fair curve…then cut that on the bandsaw
Image


I WAS going to do half laps on the ends, so..
Image


Make a bunch of cuts..
Image


Hammer to knock most of the waste free…
Image


Wide chisel and a couple other tools, to smooth things out….repeat on the other end…

Well, decided today, that I would use a dovetail instead…so..
Image


Mark out an angle…saw and chisel to form it up…on both ends. Grab one of the center Rails/stiles and mark where this curvy thing will go….use the tail as a pattern..
Image


More saw work…
Image


Found out, IF I make a bunch of cuts, the waste is easier to knock out…
Image


Usual suspects, to flatten the socket…test fit a few times, until the tail sits flush….repeat this for the other end..

Then, try to put all the frame parts together…
Image


Top rail has a slight upward curve to it….maybe tomorrow, with a lot of cussing, I can clamp just the face frame up, with a bunch of glue, of course? Going to take almost every clamp in the shop that doesn't use a pipe..

Later, after the forest of clamps come back off, I can drill a bunch of counter-bored pilot holes. and install the frame to the case? May use a bit of glue. Later, I can "plug" all those holes with some Ash plugs.

Need to get started on the drawer..
Image


Will see how I do with half blind dovetails….

Picked up the hinges, and a knob or three..
Image


Knobs will get a washer under them, to keep them from being pulled into the surface.
Image


Matching, surface mounted hinges…three per door.

Stay tuned…
 

Attachments

#35 ·
Up date to the Project..

Couple hours here, a couple there….Left side of the frame needed tuned up…to match the right side..
Image


Got these joints fitting a little better…..
Image


Takes most of these tools, to fit the joints up….lot of flattening to do…
Image


The next trip to the shop..left side was tuned up. Both of the middle rails/stiles were also done…which left the curved center piece to do. Three nails, and a thin piece of plywood, mark out a fair curve…then cut that on the bandsaw
Image


I WAS going to do half laps on the ends, so..
Image


Make a bunch of cuts..
Image


Hammer to knock most of the waste free…
Image


Wide chisel and a couple other tools, to smooth things out….repeat on the other end…

Well, decided today, that I would use a dovetail instead…so..
Image


Mark out an angle…saw and chisel to form it up…on both ends. Grab one of the center Rails/stiles and mark where this curvy thing will go….use the tail as a pattern..
Image


More saw work…
Image


Found out, IF I make a bunch of cuts, the waste is easier to knock out…
Image


Usual suspects, to flatten the socket…test fit a few times, until the tail sits flush….repeat this for the other end..

Then, try to put all the frame parts together…
Image


Top rail has a slight upward curve to it….maybe tomorrow, with a lot of cussing, I can clamp just the face frame up, with a bunch of glue, of course? Going to take almost every clamp in the shop that doesn't use a pipe..

Later, after the forest of clamps come back off, I can drill a bunch of counter-bored pilot holes. and install the frame to the case? May use a bit of glue. Later, I can "plug" all those holes with some Ash plugs.

Need to get started on the drawer..
Image


Will see how I do with half blind dovetails….

Picked up the hinges, and a knob or three..
Image


Knobs will get a washer under them, to keep them from being pulled into the surface.
Image


Matching, surface mounted hinges…three per door.

Stay tuned…
Like like that dovetail a lot better than the half lap.
 

Attachments

#36 ·
Late start, frame glue up

Waited until after lunch to start in on this…mess. Searched all through the house, and the shop…looking for c clamps of any sort….I think they may be related to pencils…both seem to ran away and hide. Managed to track down a pile of the critters..
Image


Even cut a few cauls….might need a couple?
Image


And made sure there was enough glue…hate to run out in the middle of things ( brand new bottle sitting off to the side, just in case…Ok..first item..the bottom rail…took a couple tries to get it into the vise..the way I needed it to be..
Image


Assembly will be from the bottom up…and I am working from the "inside" of the frame…seemed easier to clamp things…
Image


About halfway done….wasn't much cussing, either…that would soon change..
Image


Getting that top rail to fit was a royal PITA. Finally had to use a pipe clamp, and a couple f style clamps to push and pull things to where they would fit….Center two were the problem…..then pulled everything into as close to square as i could…and added a couple more clamps..
Image


All the while watching that big pile of clamps get lower, and lower, until..
Image


Looks like I need to shop for c clamps on the next rust hunt?

This episode was about the frame getting glued up…there was a second episode in the shop, today…
Stay tuned
 

Attachments

#37 ·
Late start, frame glue up

Waited until after lunch to start in on this…mess. Searched all through the house, and the shop…looking for c clamps of any sort….I think they may be related to pencils…both seem to ran away and hide. Managed to track down a pile of the critters..
Image


Even cut a few cauls….might need a couple?
Image


And made sure there was enough glue…hate to run out in the middle of things ( brand new bottle sitting off to the side, just in case…Ok..first item..the bottom rail…took a couple tries to get it into the vise..the way I needed it to be..
Image


Assembly will be from the bottom up…and I am working from the "inside" of the frame…seemed easier to clamp things…
Image


About halfway done….wasn't much cussing, either…that would soon change..
Image


Getting that top rail to fit was a royal PITA. Finally had to use a pipe clamp, and a couple f style clamps to push and pull things to where they would fit….Center two were the problem…..then pulled everything into as close to square as i could…and added a couple more clamps..
Image


All the while watching that big pile of clamps get lower, and lower, until..
Image


Looks like I need to shop for c clamps on the next rust hunt?

This episode was about the frame getting glued up…there was a second episode in the shop, today…
Stay tuned
bandit,

I'm still hanging in there, watching…..!! The project is shaping up….I'll continue to keep an eye on it until completed…...Stellar job…..!! I think you might need more clamps….!!!
 

Attachments

#38 ·
Making the top, part 1

Can't work at the bench, right now..so…I can cleaned of the top of the case, haul three planks to the shop…
Image


First two, I could carry in one trip…they are also the shortest of the three…60-61" Plank #3 was a bit longer..
Image


Needed to rip one of the planks of about 1-1/2" wide strip….
Image


There were two like this one. Could not reach my go-to saw…
Image


SKIL 6" saw….however, I do have another such Vintage saw..
Image


Craftsman 7-1/4" saw…with a Irwin rip blade…..one of these days, I'll get a good blade for it..
I couple use the case as a tall saw bench…
Image


Lots of places to set a clamp. Ripped the bad edge from one plane…then set up for a few crosscuts..
Image


That extra 20" is now gone…Reset the three planks. to get a decently straight edge on one end..
Image


Those be the cutoffs….the other end can be squared up, after the glue up.
The other rip was not done..was an issue in the width of the top, since I wanted a bit of overhang along the front.
Image


Plenty here? Have to remember, that face frame (3/4" thick) also sits here….If I rip the other knot off, that will amount to 1-1/2" loss in width…plus what I lose in jointing all the edges for a glue up..
Image


Gaposis? Need to joint these gaps away. This is as tight as that clamp can pull things together….we have work to do…..
I also had the blank for the drawer front marked for length…and crosscut it..
Image


Was a busy day, today. waiting on glue to cure overnight…then the forest of clamps can be removed…after that?
Stay tuned..
 

Attachments

#39 ·
Making the top, part 1

Can't work at the bench, right now..so…I can cleaned of the top of the case, haul three planks to the shop…
Image


First two, I could carry in one trip…they are also the shortest of the three…60-61" Plank #3 was a bit longer..
Image


Needed to rip one of the planks of about 1-1/2" wide strip….
Image


There were two like this one. Could not reach my go-to saw…
Image


SKIL 6" saw….however, I do have another such Vintage saw..
Image


Craftsman 7-1/4" saw…with a Irwin rip blade…..one of these days, I'll get a good blade for it..
I couple use the case as a tall saw bench…
Image


Lots of places to set a clamp. Ripped the bad edge from one plane…then set up for a few crosscuts..
Image


That extra 20" is now gone…Reset the three planks. to get a decently straight edge on one end..
Image


Those be the cutoffs….the other end can be squared up, after the glue up.
The other rip was not done..was an issue in the width of the top, since I wanted a bit of overhang along the front.
Image


Plenty here? Have to remember, that face frame (3/4" thick) also sits here….If I rip the other knot off, that will amount to 1-1/2" loss in width…plus what I lose in jointing all the edges for a glue up..
Image


Gaposis? Need to joint these gaps away. This is as tight as that clamp can pull things together….we have work to do…..
I also had the blank for the drawer front marked for length…and crosscut it..
Image


Was a busy day, today. waiting on glue to cure overnight…then the forest of clamps can be removed…after that?
Stay tuned..
bandit,

Still here watching the progress…It looks like you are making some good sawdust…..!! You have plenty of it everywhere…..!!
 

Attachments

#40 ·
Door parts

Had two work sessions in the shop, today….along with running errands for the Boss…..
First up….all those clamps had to be removed..slowly. last thing i wanted to hear was a "CRACK"...last clamp finally came off…Found out just how heavy this frame is! Managed to get it over to the case…and clamped it to one end…case is a hair out of square….
Image


Plan now is to screw one end into place where it is supposed to go….and work towards the other end….Found the brand new Forstner bit..
Image


Installed it in the drill. i can drill into the parts deep as needed…until I reach the spot on the shank where it narrows down. Bit is a 3/8". The plug cutter I use is also 3/8"...cuts a tapered plug in face grain. Much easier than doing dowels, no need for a special saw, and don't have to deal with end grain.
Had one blank for a stile for the doors…needed another 3 made.. Had a bit of "scrap" about the right length…and made a few rip cuts with that big Craftsman saw.
Image

Clamped all four blanks up..and took the Boss where she wanted to go…

Finally could sneak back to the shop…Those four blanks needed trimmed for length..
Image


Was able to save two of the cut-offs..the other two were a bit too "knotty". Length should be about right..the problem was in the wavy edges, and being tapered…wavy we can deal with..
Image


Jack plane to knock the higher spots down, the #7c to flatten the length….got to checking things…one end was 1/8" wider on all 4 blanks? Hmmm, time for Heft & Hubris…and a sore shoulder…
Image


Stanley #8…..I started down at the "high" end, and work my way back. Finally reach the other end…
Image


No taper. Needed some wide rails made..
Image


6, to be exact….these were ripped from a couple other "scraps"...and will be..
Image


A top rail for each door, a lock rail for each, and a bottom rail….building two doors. Since I didn't want to do glue-ups for the raised panels, needed 4 skinny rails made..
Image


Right after I took this picture, I got the other two rails made. Panels will be cut from other "scraps"
Image


Should get two raised panels out of this one….panels will set in 1/4" grooves…made with this old timer..
Image


Will use "Haunched" tenons to connect the rails to the mortises in the stiles. Shoulder cuts being done with this little saw..
Image


Cheek cuts on the bandsaw.
Depending on how much sleep I get, how much room I need, and how much time I get..might actually get something done, tomorrow?

Stay tuned…( anyone is welcome to stop by and help, BTW)
 

Attachments

#41 ·
Door parts

Had two work sessions in the shop, today….along with running errands for the Boss…..
First up….all those clamps had to be removed..slowly. last thing i wanted to hear was a "CRACK"...last clamp finally came off…Found out just how heavy this frame is! Managed to get it over to the case…and clamped it to one end…case is a hair out of square….
Image


Plan now is to screw one end into place where it is supposed to go….and work towards the other end….Found the brand new Forstner bit..
Image


Installed it in the drill. i can drill into the parts deep as needed…until I reach the spot on the shank where it narrows down. Bit is a 3/8". The plug cutter I use is also 3/8"...cuts a tapered plug in face grain. Much easier than doing dowels, no need for a special saw, and don't have to deal with end grain.
Had one blank for a stile for the doors…needed another 3 made.. Had a bit of "scrap" about the right length…and made a few rip cuts with that big Craftsman saw.
Image

Clamped all four blanks up..and took the Boss where she wanted to go…

Finally could sneak back to the shop…Those four blanks needed trimmed for length..
Image


Was able to save two of the cut-offs..the other two were a bit too "knotty". Length should be about right..the problem was in the wavy edges, and being tapered…wavy we can deal with..
Image


Jack plane to knock the higher spots down, the #7c to flatten the length….got to checking things…one end was 1/8" wider on all 4 blanks? Hmmm, time for Heft & Hubris…and a sore shoulder…
Image


Stanley #8…..I started down at the "high" end, and work my way back. Finally reach the other end…
Image


No taper. Needed some wide rails made..
Image


6, to be exact….these were ripped from a couple other "scraps"...and will be..
Image


A top rail for each door, a lock rail for each, and a bottom rail….building two doors. Since I didn't want to do glue-ups for the raised panels, needed 4 skinny rails made..
Image


Right after I took this picture, I got the other two rails made. Panels will be cut from other "scraps"
Image


Should get two raised panels out of this one….panels will set in 1/4" grooves…made with this old timer..
Image


Will use "Haunched" tenons to connect the rails to the mortises in the stiles. Shoulder cuts being done with this little saw..
Image


Cheek cuts on the bandsaw.
Depending on how much sleep I get, how much room I need, and how much time I get..might actually get something done, tomorrow?

Stay tuned…( anyone is welcome to stop by and help, BTW)
I don't think a day goes by that you don't get something done! I get tired just reading your posts!!
 

Attachments

#43 ·
a top gets glued up

Going to be a big one, too
Had the three blanks about the right size..edges needed some work, though..
Image


Plane is a Stanley No. 8….10 pounds..24" long…planks are 57-3/4" long. Far end is jammed into the bench's Crochet..there is barely enough room between the near end, and the washer behind me. One edge jointed, then another, check for gaps..
Image


Wider of these two will be the "front" edge of the top…had both edges to joint…made a lot of this sort of stuff..
Image


While doing the third plank, that had a curve to the edge ( large knot causing that, from the other edge) needed a shorter jointer, to bring the high ends down a bit..
Image


Stanley No. 6c, Type 10….quite a bit lighter than the #8. Then finish the full length with the #8…..
Moved the third plank to another vise, spread some glue, and set the middle blank into the glue bead, slide around a bit until it "stuck" in place. Added a log caul on each end..extra hands. more glue and the third plank in place..add a few more clamps…..had ti tip the assembly up at one end….clamp was a bit long..
Image


Due to the size of my shop…this is about the easiest way to glue up a large panel…..added a couple extra clamps to the cauls on the ends, to pull them into flat..
Image


Never know when a few scraps will come in handy…this panel is HUGE..
Image


Almost shuts the shop down. I can work on the case a bit, as long as I don't NEED the bench….can't even put me toys away..
Image


Let alone sweep the messy floor..
Image


Friday, once the Doctor visit is done, Heart Monitor checked…I can do a bit of work on the case, BEFORE this Aircraft Carrier Deck lands on it. May need a bit of help..Ash is a tad heavy. need a long cord for the drills, pilot holes and counter-bores need drilled, screws installed….maybe even plugs made….

Fire Place Insert ( electric) is supposed to be delivered today…..way my luck goes…right when I am sitting in the Doctor's Office.

Stay tuned…
 

Attachments

#44 ·
a top gets glued up

Going to be a big one, too
Had the three blanks about the right size..edges needed some work, though..
Image


Plane is a Stanley No. 8….10 pounds..24" long…planks are 57-3/4" long. Far end is jammed into the bench's Crochet..there is barely enough room between the near end, and the washer behind me. One edge jointed, then another, check for gaps..
Image


Wider of these two will be the "front" edge of the top…had both edges to joint…made a lot of this sort of stuff..
Image


While doing the third plank, that had a curve to the edge ( large knot causing that, from the other edge) needed a shorter jointer, to bring the high ends down a bit..
Image


Stanley No. 6c, Type 10….quite a bit lighter than the #8. Then finish the full length with the #8…..
Moved the third plank to another vise, spread some glue, and set the middle blank into the glue bead, slide around a bit until it "stuck" in place. Added a log caul on each end..extra hands. more glue and the third plank in place..add a few more clamps…..had ti tip the assembly up at one end….clamp was a bit long..
Image


Due to the size of my shop…this is about the easiest way to glue up a large panel…..added a couple extra clamps to the cauls on the ends, to pull them into flat..
Image


Never know when a few scraps will come in handy…this panel is HUGE..
Image


Almost shuts the shop down. I can work on the case a bit, as long as I don't NEED the bench….can't even put me toys away..
Image


Let alone sweep the messy floor..
Image


Friday, once the Doctor visit is done, Heart Monitor checked…I can do a bit of work on the case, BEFORE this Aircraft Carrier Deck lands on it. May need a bit of help..Ash is a tad heavy. need a long cord for the drills, pilot holes and counter-bores need drilled, screws installed….maybe even plugs made….

Fire Place Insert ( electric) is supposed to be delivered today…..way my luck goes…right when I am sitting in the Doctor's Office.

Stay tuned…
Hope it fits up the basement stairs (don't ask how I know about this) ;^)
 

Attachments

#45 ·
A bit of assembly, and other weird stuff

A "Smart Phone" goes stupid…Computer goes on a brain fart trip ( computer LSD??) Order and PAY for a single heater insert, and two show up at the house? Doctor's office visit….once one of THOSE days…..

There was a bit of woodworking done as well, though. Took a couple trips to the shop, to get set up, and do a bit of assembly…..Couple drills needed to go downstairs, a E-Cord reel needed to go along with them. And the Camera..

Cord reel, because that slab of Ash was in the way of the power strip…
Image


At least I could hang the plugs from the clamps, on the end of the slab. had a pair of drills set up, rather than spend all day changing two bits back and forth, I just changed drills…
Image


The all metal one has a 3/8" Forstner bit, the other has a bit for pilot holes. I drill the counter-bores first, easier to set the pilot drill afterwards. There is also a drill set up to drive the screws in tight..
Image


Called a Hammerhead. Has a bit of impact drive to the driver. I also used a few clamps and sticks…
Image


To push or pull parts into alignment, or..
Image


To hold things tightly together, until a screw can take over the job. I worked mainly from right to left, and from the top down to about the middle….
Image


had to pull the case out a ways, in order to get my wide body close to the work. Got most of the holes done, screws driven ( and only one screw went off-course)...but, old knees do NOT do "Kneel" any more, and the back doesn't like to bend like it used to…so, IF I can't go to the Mountain…
Image


The Mountain will just have to come up to me….finall got all the screws done..whew. There was something missing in the shop, though..
Image


Hmmm? Well, at least I can sweep up a bit..
Image


Found all the clamps piled up on the bench, or set back in their spots….
Image


Ah…we have a Flight Deck? I was also test fitting the drawer front ( maybe Monday, I can build the drawer?)
Took a few tries to get this slab to sit where I wanted it…almost had a large knot front and center, that got changed quickly. Made sure the top's slight bow was facing the right direction…..then "tacked it down" with a few screws. The pilot hole drill had already made a bunch of slotted holes in the top frame. Hammerhead to drive a few screws, for now.
Image


The Bookcase this is replacing has rounded corners. Got tired of finding a sharp corner with my elbows, anyway.
Also needed the big square, as the ends will need trimmed square..
Image


As for the fancy plane? It likes to do tear-outs too much. Will use the No. 7c to flatten the flight deck.
Image


May work on that, today…doubt IF this will scoot around too much…weighs more than me!

After I finally get all the clamps and other toys off the bench, and since I have the frame parts for the doors about ready…may see about getting the doors done?
Stay tuned….
 

Attachments

#46 ·
A "normal" Saturday in the shop?

Twas a time, long ago..when I could put in 8-12 hour days in the shop on a Saturday. methinks those days are behind me…..now it seems 4 hours at a stretch is pushing it…6 hours and I have to rest a day. Oh well, here we go

Flattened the top a bit. Worked my way "down"..from a No. 8 jointer plane….through the No. 7c…to..
Image


This little guy. A No. 3c…to clean up places the other big guys missed….or tore out. Once that was done…
Image


Those lines on this end had to go….a green B&D Sabre saw made this cut, then a sander smoothed out the saw marks..
Image


Nice? Need to mill the other end, when I can fit this fat body down there to do it. There is also a "shop rule" it seems…ANY level space in a shop, will simply fill up with tools and other items. Take a good look, now…
Next, in today's follies….one door…simple as that, right? First, I needed to make sure all the stiles would fit, that the taper thing was gotten rid of, and all four are the SAME size..
Image


Then the fun begins…Was going to get one door today…picked out two stiles. Each stile needed a groove milled along one edge. trick was find which edge had the fewest knots….no knots would have been nice..
Image


Something like this? Used an older plane this time around..
Image


Those are the shavings it makes. Had trouble holding the stile in place, wound up c clamping the far end…plane almost up to it, turn the part around, re-clamp, and finish the groove….plane is a bit hard to keep on track, has no depth stop…and is a bit long….somehow, I got two stiles all groovy, and clamped them into their new home..
Image


easy part is done…now the real fun can begin…I used those two clamped up stiles, to find out how long the rails need to be…counting the 3/4" tenon ( 1/4" groove + 1/2" tenon into a mortise) then cut the three wide rails to length..
Image


And make sure the ends were square..
Image


So far, so good…the three also need jointed, to make sure they are the same width, and not wavy edged..
Image


That No. 3c was just about the right size. Figured I could mill a groove along one edge with the old plough plane..
Did not go well. Plane was longer than the part!. Got out the Stanley 45, and set it up for the "plough work" and added a c clamp..
Image


After each rail had it's groove milled. ..I also cut the tenons….first a shoulder cut was made..
Image


Reset the depth stops on the mitre box…and cut all four lines…but, this saw does not do cheek cuts, the bandsaw does that. After trying to freehand a cut….decided a jig was needed, to hold the rail vertical while using the bandsaw to make the cuts. Jig was centered on the rail, so I could do all four cuts…
Image


A c clamp and an old Handyman try square….worked great. After each rail was done, it got stashed with the stiles.
Image


Middle rail has 2 grooves, top and bottom get just one…..There are two skinny rails to do….and fight…was unable to c clamp them into the jig….1-1/4" leaves no space for the 45's fence AND the clamps….freehand to hold the first skinny rail…rail hops off the bench..third time it went somewhere UNDER the bench…the 45 also "hopped" out..
Image


This is from the front edges of the skates…at least it wasn't that 1/4" cutter…might have been a tad messy…got to the point that all the shavings ( so far) and other stuff were just swept up and out of the way..
Image


All the while muttering about a "FirePit"...runaway part then shows up, like magic…finished it up, not freehanded, I added a pair of screws along the edge of the jig, so their head clamped the part to the jig…the skinny rails get two grooves. Stashed the Mr. Christian Rail..
Image


And managed to groove and tenon the other without too much trouble…went to stash it away…guess which one fell out, causing the rest to fall to the floor….
Ok..used one rail, to figure out the length of the panels…minus the 1/2" parts of the tenons…cut four panels from some of the scrap 1×6s…
Image


Got these all the same size. Will keep an eye on the grain patterns..
Image


These are 1/4 sawn Ash, BTW. maybe arrange these to look like one board? All these will be raised panels…and may get a rebate around the inside edges…to center them in the frame's thickness.

About that point, hand was hurting, legs were cramping….time to call it a day…4 hours worth.
Will see what the next day brings…Stay tuned..
 

Attachments

#47 ·
A "normal" Saturday in the shop?

Twas a time, long ago..when I could put in 8-12 hour days in the shop on a Saturday. methinks those days are behind me…..now it seems 4 hours at a stretch is pushing it…6 hours and I have to rest a day. Oh well, here we go

Flattened the top a bit. Worked my way "down"..from a No. 8 jointer plane….through the No. 7c…to..
Image


This little guy. A No. 3c…to clean up places the other big guys missed….or tore out. Once that was done…
Image


Those lines on this end had to go….a green B&D Sabre saw made this cut, then a sander smoothed out the saw marks..
Image


Nice? Need to mill the other end, when I can fit this fat body down there to do it. There is also a "shop rule" it seems…ANY level space in a shop, will simply fill up with tools and other items. Take a good look, now…
Next, in today's follies….one door…simple as that, right? First, I needed to make sure all the stiles would fit, that the taper thing was gotten rid of, and all four are the SAME size..
Image


Then the fun begins…Was going to get one door today…picked out two stiles. Each stile needed a groove milled along one edge. trick was find which edge had the fewest knots….no knots would have been nice..
Image


Something like this? Used an older plane this time around..
Image


Those are the shavings it makes. Had trouble holding the stile in place, wound up c clamping the far end…plane almost up to it, turn the part around, re-clamp, and finish the groove….plane is a bit hard to keep on track, has no depth stop…and is a bit long….somehow, I got two stiles all groovy, and clamped them into their new home..
Image


easy part is done…now the real fun can begin…I used those two clamped up stiles, to find out how long the rails need to be…counting the 3/4" tenon ( 1/4" groove + 1/2" tenon into a mortise) then cut the three wide rails to length..
Image


And make sure the ends were square..
Image


So far, so good…the three also need jointed, to make sure they are the same width, and not wavy edged..
Image


That No. 3c was just about the right size. Figured I could mill a groove along one edge with the old plough plane..
Did not go well. Plane was longer than the part!. Got out the Stanley 45, and set it up for the "plough work" and added a c clamp..
Image


After each rail had it's groove milled. ..I also cut the tenons….first a shoulder cut was made..
Image


Reset the depth stops on the mitre box…and cut all four lines…but, this saw does not do cheek cuts, the bandsaw does that. After trying to freehand a cut….decided a jig was needed, to hold the rail vertical while using the bandsaw to make the cuts. Jig was centered on the rail, so I could do all four cuts…
Image


A c clamp and an old Handyman try square….worked great. After each rail was done, it got stashed with the stiles.
Image


Middle rail has 2 grooves, top and bottom get just one…..There are two skinny rails to do….and fight…was unable to c clamp them into the jig….1-1/4" leaves no space for the 45's fence AND the clamps….freehand to hold the first skinny rail…rail hops off the bench..third time it went somewhere UNDER the bench…the 45 also "hopped" out..
Image


This is from the front edges of the skates…at least it wasn't that 1/4" cutter…might have been a tad messy…got to the point that all the shavings ( so far) and other stuff were just swept up and out of the way..
Image


All the while muttering about a "FirePit"...runaway part then shows up, like magic…finished it up, not freehanded, I added a pair of screws along the edge of the jig, so their head clamped the part to the jig…the skinny rails get two grooves. Stashed the Mr. Christian Rail..
Image


And managed to groove and tenon the other without too much trouble…went to stash it away…guess which one fell out, causing the rest to fall to the floor….
Ok..used one rail, to figure out the length of the panels…minus the 1/2" parts of the tenons…cut four panels from some of the scrap 1×6s…
Image


Got these all the same size. Will keep an eye on the grain patterns..
Image


These are 1/4 sawn Ash, BTW. maybe arrange these to look like one board? All these will be raised panels…and may get a rebate around the inside edges…to center them in the frame's thickness.

About that point, hand was hurting, legs were cramping….time to call it a day…4 hours worth.
Will see what the next day brings…Stay tuned..
Looks like a fruitful few hours though.

Sure KWYM about horizontal spaces in a shop. They are like junk magnets, where the &^^4 did all this (^*%% come from?
 

Attachments

#48 ·
A "normal" Saturday in the shop?

Twas a time, long ago..when I could put in 8-12 hour days in the shop on a Saturday. methinks those days are behind me…..now it seems 4 hours at a stretch is pushing it…6 hours and I have to rest a day. Oh well, here we go

Flattened the top a bit. Worked my way "down"..from a No. 8 jointer plane….through the No. 7c…to..
Image


This little guy. A No. 3c…to clean up places the other big guys missed….or tore out. Once that was done…
Image


Those lines on this end had to go….a green B&D Sabre saw made this cut, then a sander smoothed out the saw marks..
Image


Nice? Need to mill the other end, when I can fit this fat body down there to do it. There is also a "shop rule" it seems…ANY level space in a shop, will simply fill up with tools and other items. Take a good look, now…
Next, in today's follies….one door…simple as that, right? First, I needed to make sure all the stiles would fit, that the taper thing was gotten rid of, and all four are the SAME size..
Image


Then the fun begins…Was going to get one door today…picked out two stiles. Each stile needed a groove milled along one edge. trick was find which edge had the fewest knots….no knots would have been nice..
Image


Something like this? Used an older plane this time around..
Image


Those are the shavings it makes. Had trouble holding the stile in place, wound up c clamping the far end…plane almost up to it, turn the part around, re-clamp, and finish the groove….plane is a bit hard to keep on track, has no depth stop…and is a bit long….somehow, I got two stiles all groovy, and clamped them into their new home..
Image


easy part is done…now the real fun can begin…I used those two clamped up stiles, to find out how long the rails need to be…counting the 3/4" tenon ( 1/4" groove + 1/2" tenon into a mortise) then cut the three wide rails to length..
Image


And make sure the ends were square..
Image


So far, so good…the three also need jointed, to make sure they are the same width, and not wavy edged..
Image


That No. 3c was just about the right size. Figured I could mill a groove along one edge with the old plough plane..
Did not go well. Plane was longer than the part!. Got out the Stanley 45, and set it up for the "plough work" and added a c clamp..
Image


After each rail had it's groove milled. ..I also cut the tenons….first a shoulder cut was made..
Image


Reset the depth stops on the mitre box…and cut all four lines…but, this saw does not do cheek cuts, the bandsaw does that. After trying to freehand a cut….decided a jig was needed, to hold the rail vertical while using the bandsaw to make the cuts. Jig was centered on the rail, so I could do all four cuts…
Image


A c clamp and an old Handyman try square….worked great. After each rail was done, it got stashed with the stiles.
Image


Middle rail has 2 grooves, top and bottom get just one…..There are two skinny rails to do….and fight…was unable to c clamp them into the jig….1-1/4" leaves no space for the 45's fence AND the clamps….freehand to hold the first skinny rail…rail hops off the bench..third time it went somewhere UNDER the bench…the 45 also "hopped" out..
Image


This is from the front edges of the skates…at least it wasn't that 1/4" cutter…might have been a tad messy…got to the point that all the shavings ( so far) and other stuff were just swept up and out of the way..
Image


All the while muttering about a "FirePit"...runaway part then shows up, like magic…finished it up, not freehanded, I added a pair of screws along the edge of the jig, so their head clamped the part to the jig…the skinny rails get two grooves. Stashed the Mr. Christian Rail..
Image


And managed to groove and tenon the other without too much trouble…went to stash it away…guess which one fell out, causing the rest to fall to the floor….
Ok..used one rail, to figure out the length of the panels…minus the 1/2" parts of the tenons…cut four panels from some of the scrap 1×6s…
Image


Got these all the same size. Will keep an eye on the grain patterns..
Image


These are 1/4 sawn Ash, BTW. maybe arrange these to look like one board? All these will be raised panels…and may get a rebate around the inside edges…to center them in the frame's thickness.

About that point, hand was hurting, legs were cramping….time to call it a day…4 hours worth.
Will see what the next day brings…Stay tuned..
Looking mighty good, bandit…..I'm still hanging with you till you get 'er built….Stellar job…..Keep it going….!!
 

Attachments

#49 ·
Tenons and mortises, and a short day

Was still sore from the day before. Tenons were done, at least on the rails for this door…hope the other door is easier….
Needed to notch the top and board rails's tenons a bit. Called a Haunched Tenon.
Image


Since the stiles have that groove, the little "tab" will fill that, and still leave a bit of a tenon…
Next, get set up to chop a few mortises….need a jig..
Image


Just three pieces of scrap pine….Spaced for a slip fit..
Image


Mallet to bang the part into place, chisel to chop. Later, I used a couple other chisels, mainly to clean things out
Image


First one was a tad loose….bad bandsaw cut the other day,,,tenon was off-set a hair…adjusted that,,
Image


Needed to do the two ends first, find the center point between them, and add the middle wide rail..
Image


Then find the center point between the middle rail, and the end rails…and chop the mortises…
Image


5 mortises done. Set the other stile in place, check for square, and then I can do more layouts..

Back said I had done enough for one day….chopping was done standing up….not the best way, for me.

Tuesday, I can get the other 5 mortises done, and start on raising the panels, maybe?
Stay tuned..
 

Attachments

#50 ·
More mortises, and a few panels

Another day closer to this thing being …..done.
Image


Laid the second stile against the first one, square to mark where the matching mortises will be…bad sign, that is not a shadow in there. I made a curved chisel last year, to help clean the bottoms of mortises,,,,today, it chose to snap the first 1/8" off….grrrrrr.
Got the next one done, without breaking anything else..
Image


Got the middle one done, turned things around, and chopped the last two…dry fit, then set this aside out of the way
Image


Made a jig, to raise a few panels…
Image


Jig was rebuilt a few times, too. Goal was for it to hold a panel still, long enough to plane a bevel
Image


First was the end grain sides…then the long grain sides…When all the show side edges were beveled, flip the panel over, and get a few more planes out…
Image


Mainly the Wards (Stanley ) #78….and the Auburn #181….needed a rebate around all the edges, on the back side
Image


Big woody to clean up after the 78. Used the other planes to fine tuned the beveled edges….did a dry fit..
Image


Then grab the next panel from the stack. Bevel and rebates….then yet another dry fit..
Image


two down, two to go…
Image


Got tired of walking in this stuff…swept the floor….decided to stop for the day..
There seems to be an un-written Law of the Shop:
Image


Any expanse of flat surface will soon fill up with…..stuff.

Later this evening, was told to bring up a load of towels from the dryer….about an hour later, brought the towels upstairs…..Seems a third panel has been raised, and dry fitted. Forgot to take the camera along, didn't need it to do the towels…along with the load of clothes IN the washer getting tossed into the dryer, and started up.

Somehow, the Heart Monitor came loose, and fell out of my shirt….and onto the bench…yet, time to quit.
I did a bit of "prep" on the last panel….make it easier tomorrow to get it raised…and MAYBE a glue up?

Stay tuned….
 

Attachments

#51 ·
More mortises, and a few panels

Another day closer to this thing being …..done.
Image


Laid the second stile against the first one, square to mark where the matching mortises will be…bad sign, that is not a shadow in there. I made a curved chisel last year, to help clean the bottoms of mortises,,,,today, it chose to snap the first 1/8" off….grrrrrr.
Got the next one done, without breaking anything else..
Image


Got the middle one done, turned things around, and chopped the last two…dry fit, then set this aside out of the way
Image


Made a jig, to raise a few panels…
Image


Jig was rebuilt a few times, too. Goal was for it to hold a panel still, long enough to plane a bevel
Image


First was the end grain sides…then the long grain sides…When all the show side edges were beveled, flip the panel over, and get a few more planes out…
Image


Mainly the Wards (Stanley ) #78….and the Auburn #181….needed a rebate around all the edges, on the back side
Image


Big woody to clean up after the 78. Used the other planes to fine tuned the beveled edges….did a dry fit..
Image


Then grab the next panel from the stack. Bevel and rebates….then yet another dry fit..
Image


two down, two to go…
Image


Got tired of walking in this stuff…swept the floor….decided to stop for the day..
There seems to be an un-written Law of the Shop:
Image


Any expanse of flat surface will soon fill up with…..stuff.

Later this evening, was told to bring up a load of towels from the dryer….about an hour later, brought the towels upstairs…..Seems a third panel has been raised, and dry fitted. Forgot to take the camera along, didn't need it to do the towels…along with the load of clothes IN the washer getting tossed into the dryer, and started up.

Somehow, the Heart Monitor came loose, and fell out of my shirt….and onto the bench…yet, time to quit.
I did a bit of "prep" on the last panel….make it easier tomorrow to get it raised…and MAYBE a glue up?

Stay tuned….
I am enjoying this build blog. Sometimes it seems like I spend as much time cleaning up as I do making something.
Gene from down the road in Springfield
 

Attachments

#54 ·
Panels are done, glue up made, next?

There are two things that making a raised panel with hand planes produces…...lots of sweat, and..
Image


This is about average for one panel….heart monitor was having trouble staying stuck to me.

Managed to get the last of the panels made, and fitted….then spread some glue around..
Image


While this in not going to be a new workbench….I can get some use out of it. Frees up space on the bench..
Image


Hmmm…in theory? Rather than do 1/2 blind dovetails on the drawer front, decided to see IF there was enough 1×6 Ash still around..I had enough to build a door….but, what about doing the 14" long sides of the drawer? Then through dovetails could be done, and look way better than Pine?

Scrounged around a bit, last night…..Figured up what I needed cut, and where. I could get one drawer side and one raised panel out of one plank…and get rid of an ugly knot..
Image


Being a bit late at night, didn't want to wake up the house with the circular saw's noise…tried out a different kind of saw…
Image


Called a frame saw. 9ppi, crosscut, Maple frame. I am a little out of practice, being used to all things "Disston"
Image


I am able to follow a straight line..barely
Image


But it's the verticals where the problem is….might be the saw's blade, might be the saw's operator?
Image


Well, since I do have a plane to plane end grain..
Image


Was doing great! Until I noticed one of these two had slipped down…so, I had to trim the scooter a bit, to match the shot one…we have ways..
Image


I also jointed the edges, so the two side pieces matched each other….one had a taper going on.
Image


So…doing all this cutting & trimming, I have two drawer sides ready…and a pair of panel blanks.
Image


Which I stashed with the rest of the door parts….there will be enough to build the other door. One of the pieces of Ash did not get used..
Image


May yet rip the "good" off of this one, and burn the left overs…along with this too short, all knot thing..
Image


Firepit fodder. Today's efforts will involve these little items..
Image


Once the door is out of the forest of clamps, edges jointed, edges squared up…may just install the hinges (3) and hang the door. VIX bit may be a bit too big…the other style one should be about right. Dividers to help lay out dovetails…
That be the plan for today…anyone is more than welcome to show up, and help out..
Stay tuned…..
 

Attachments

#55 ·
Panels are done, glue up made, next?

There are two things that making a raised panel with hand planes produces…...lots of sweat, and..
Image


This is about average for one panel….heart monitor was having trouble staying stuck to me.

Managed to get the last of the panels made, and fitted….then spread some glue around..
Image


While this in not going to be a new workbench….I can get some use out of it. Frees up space on the bench..
Image


Hmmm…in theory? Rather than do 1/2 blind dovetails on the drawer front, decided to see IF there was enough 1×6 Ash still around..I had enough to build a door….but, what about doing the 14" long sides of the drawer? Then through dovetails could be done, and look way better than Pine?

Scrounged around a bit, last night…..Figured up what I needed cut, and where. I could get one drawer side and one raised panel out of one plank…and get rid of an ugly knot..
Image


Being a bit late at night, didn't want to wake up the house with the circular saw's noise…tried out a different kind of saw…
Image


Called a frame saw. 9ppi, crosscut, Maple frame. I am a little out of practice, being used to all things "Disston"
Image


I am able to follow a straight line..barely
Image


But it's the verticals where the problem is….might be the saw's blade, might be the saw's operator?
Image


Well, since I do have a plane to plane end grain..
Image


Was doing great! Until I noticed one of these two had slipped down…so, I had to trim the scooter a bit, to match the shot one…we have ways..
Image


I also jointed the edges, so the two side pieces matched each other….one had a taper going on.
Image


So…doing all this cutting & trimming, I have two drawer sides ready…and a pair of panel blanks.
Image


Which I stashed with the rest of the door parts….there will be enough to build the other door. One of the pieces of Ash did not get used..
Image


May yet rip the "good" off of this one, and burn the left overs…along with this too short, all knot thing..
Image


Firepit fodder. Today's efforts will involve these little items..
Image


Once the door is out of the forest of clamps, edges jointed, edges squared up…may just install the hinges (3) and hang the door. VIX bit may be a bit too big…the other style one should be about right. Dividers to help lay out dovetails…
That be the plan for today…anyone is more than welcome to show up, and help out..
Stay tuned…..
Really coming along!

I'd love to see your process for using dividers to layout dovetails.
 

Attachments

#58 ·
Door hung, drawer started..

Well, spent 3 hours of shop time yesterday. Seems to be about average amount of time I can spend in the shop at a stretch. Long time ago, an 8-12 hour stertch was being done. Them days are long gone.

Anyway, the door glue up came out of the clamps yesterday…needed a bit of trimming to fit..
Image


Both edges had a slight bow to them…Stanley #6c flattened that out. one end was a bit out of square, trimmed that , as well. Hinges…was having issues with the cordless drill batteries….VIX bit went into a corded drill..needed something to drive the screws with..
Image


Works..at least as far as drive the screws in. Moved these things and the door over to the case, and installed a few more screws….once that top screw was in, things went a lot better…until the bottom screw …too old to bend down that far with the brace-driver. Used a plain old phillips wood handled screwdriver.
Image


Added a second corded drill, and a 6" sweep brace to the pile of tools…corded drill to drill a hole for the knob install, brace had a pilot drill a tad bigger than the VIX bit's…helps to start the screws. There WAS a hole for the knob already in place….just wound up too close to an edge. drilled a new hole more centered right next to the other hole..as I was using a washer as part of the knob..
Image


The washer then covers up the "extra" hole. Door is installed, will need sanded and a latch of some kind.

Part two of the Thursday Follies involved the drawer….The blank for the front needed a bit of work, one edge was still rough sawn….Jumbo Jack was used this time around..
Image


Then face planed both sides to see which looked the best..
Image


Ok. Then flipped this over, into a jig, and got "Groovy"
Image


Thought I'd add the groove before the dovetail stuff got started….wasn't the best idea…laid out some toys..
Image


Chisel was more to set a size. Sliding bevel to mark the pins. square to set other sizes..
Image


Pins laid out….need a saw..
Image


Should work. saw the lines, use a few chisels to remove the waste
Image


Use these pins to lay out the tails, and saw inside the lines, on the waste side ( and a few extra cuts doesn't hurt)
Image


More chisel work to remove the waste, then a dry fit..
Image


Took this over to the case, and see IF it still fits..
Image


Ok, so far. Bring things back to the bench, and repeat. Was having issues with that riveting hammer, it was mistaking my knuckles for wood….like the handles on the chisels? Fired that hammer, and went with a rawhide one…and never got hit again..
Image


Other end of the front is done….used that to mark out the other drawer side's tails….then promptly forgot which was waste….opps, at least it was just one cut. Corrected myself, made the rest where they needed to be…another dry fit. Then stashed this mess into the case..
Image


Need to add grooves to the drawer sides for the drawer bottom to sit in. need a dado to house the drawer back, and cut the back to size…and add the knob. Need to build the fixed shelf that goes below this drawer, and above the electric fireplace insert. Have to leave a bit of space between that shelf, and the vent on the top of the heater ( air intake only), may get fancy with that shelf, as it will be seen…

Then, maybe start on door #2? Hope it will go a bit easier than door #1…..left front corner of the top needs it curve done. maybe run a router around on some edges?
Behind both doors, there are supposed to be two fixed shelves. Pine shelves, Ash front edge? Just sits on a cleat.
At this rate, may have this done by "Beggar's Night"? We'll see

Stay tuned…
 

Attachments

#59 ·
Door hung, drawer started..

Well, spent 3 hours of shop time yesterday. Seems to be about average amount of time I can spend in the shop at a stretch. Long time ago, an 8-12 hour stertch was being done. Them days are long gone.

Anyway, the door glue up came out of the clamps yesterday…needed a bit of trimming to fit..
Image


Both edges had a slight bow to them…Stanley #6c flattened that out. one end was a bit out of square, trimmed that , as well. Hinges…was having issues with the cordless drill batteries….VIX bit went into a corded drill..needed something to drive the screws with..
Image


Works..at least as far as drive the screws in. Moved these things and the door over to the case, and installed a few more screws….once that top screw was in, things went a lot better…until the bottom screw …too old to bend down that far with the brace-driver. Used a plain old phillips wood handled screwdriver.
Image


Added a second corded drill, and a 6" sweep brace to the pile of tools…corded drill to drill a hole for the knob install, brace had a pilot drill a tad bigger than the VIX bit's…helps to start the screws. There WAS a hole for the knob already in place….just wound up too close to an edge. drilled a new hole more centered right next to the other hole..as I was using a washer as part of the knob..
Image


The washer then covers up the "extra" hole. Door is installed, will need sanded and a latch of some kind.

Part two of the Thursday Follies involved the drawer….The blank for the front needed a bit of work, one edge was still rough sawn….Jumbo Jack was used this time around..
Image


Then face planed both sides to see which looked the best..
Image


Ok. Then flipped this over, into a jig, and got "Groovy"
Image


Thought I'd add the groove before the dovetail stuff got started….wasn't the best idea…laid out some toys..
Image


Chisel was more to set a size. Sliding bevel to mark the pins. square to set other sizes..
Image


Pins laid out….need a saw..
Image


Should work. saw the lines, use a few chisels to remove the waste
Image


Use these pins to lay out the tails, and saw inside the lines, on the waste side ( and a few extra cuts doesn't hurt)
Image


More chisel work to remove the waste, then a dry fit..
Image


Took this over to the case, and see IF it still fits..
Image


Ok, so far. Bring things back to the bench, and repeat. Was having issues with that riveting hammer, it was mistaking my knuckles for wood….like the handles on the chisels? Fired that hammer, and went with a rawhide one…and never got hit again..
Image


Other end of the front is done….used that to mark out the other drawer side's tails….then promptly forgot which was waste….opps, at least it was just one cut. Corrected myself, made the rest where they needed to be…another dry fit. Then stashed this mess into the case..
Image


Need to add grooves to the drawer sides for the drawer bottom to sit in. need a dado to house the drawer back, and cut the back to size…and add the knob. Need to build the fixed shelf that goes below this drawer, and above the electric fireplace insert. Have to leave a bit of space between that shelf, and the vent on the top of the heater ( air intake only), may get fancy with that shelf, as it will be seen…

Then, maybe start on door #2? Hope it will go a bit easier than door #1…..left front corner of the top needs it curve done. maybe run a router around on some edges?
Behind both doors, there are supposed to be two fixed shelves. Pine shelves, Ash front edge? Just sits on a cleat.
At this rate, may have this done by "Beggar's Night"? We'll see

Stay tuned…
Dang - that is only 3 hours of work, and hand tool work at that. I spent most of the afternoon in the shop and have a couple of little pieces of wood with some slots cut in them and a stack of mistakes.
 

Attachments

#62 ·
Drawer get glued up..

Ok, yesterday's shop time was split up a bit…..first half was grooves and dados…second half was drawer assembly..

One of the elements to this project involve this little heater insert..
Image


Giving it a test drive. Electric Fireplace insert…Just like the "Prototype"
Image


Those "Drawers" were fakes…
Image


So, design was changed a bit. case grew another 6" in height, and 4" in length…keeping the 16" in depth. The fake drawers got combined into a single drawer. Keeping the two shelves inside both doors, except mine will be fixed in place. The shelf above the heater will stay. Need enough room under that shelf, for air flow to the heater…more on that after a bit. So…grooves and dado..

First off, the drawer's sides needed flattened out a bit…
.
Image
...
I do one side at a time, to keep them where they go in the drawer…don't want to groove the outside of a drawer..
Image


Then move the side around a bit, clamp it in place, and use the 45 to make the grooves…the set the first side back with the drawer front, and do the same with the second side….but, it stays at the bench, after the grooves.
Dados. Could have reset the 45 for dado….would have taken longer than doing just two dados. Lay out the location..use the mitre saw to saw the walls of the dado to depth.
Image


Then three toys were used..er…tools…
Image


The hammer, that Japanese Mortise Chisel, and the dado plane. Chisel to hog out the waste, plane to level and smooth things up..
Image


Didn't really use those nickers, since the sides were already cut.
After both dados were done, took a break…then after supper, hauled two boards to the shop. That was just all I was going to do….was. one thing led to another….fought with the one board..to cut it to length and get rid of part of the Tongue & Groove edges…the tongue part…board is to be the front of the fixed shelf above the heater.
Image


Longest of the 7 flooring scraps. Bandsaw hated this stuff..
Image


Will need a new blade for it. Sat this aside…the other board was the 1×6 x 6'....needed enough to make the back of the drawer….Disston D-100 was the saw, this time. Then hand planed a slight bevel on each end. The drawer sides needed three holes drilled and counter sunk. for the screws to attach the sides to the back.

I also cut the plywood bottom panel to size…then, spread a lot of glue around, add the screws to the back, and add three clamps across the front…..slid the plywood into place, check the drawer for square,,adjust a bit, and drive a few screws to secure the bottom to the back. I also took the time to marke a center point on the drawer front, for the knob, and even installed it. but, where to set this mess, in case I need the bench?
Image


Works for me.

Clamps came off this morning….was having issues with BP Meds…..decided to call it a day…I did haul a handful of hardware to the shop. That was about it. May try tomorrow to install some fixed shelves? We'll see, need to clean up that drawer, to make it presentable for polite company..

Stay tuned…
 

Attachments

#63 ·
Drawer get glued up..

Ok, yesterday's shop time was split up a bit…..first half was grooves and dados…second half was drawer assembly..

One of the elements to this project involve this little heater insert..
Image


Giving it a test drive. Electric Fireplace insert…Just like the "Prototype"
Image


Those "Drawers" were fakes…
Image


So, design was changed a bit. case grew another 6" in height, and 4" in length…keeping the 16" in depth. The fake drawers got combined into a single drawer. Keeping the two shelves inside both doors, except mine will be fixed in place. The shelf above the heater will stay. Need enough room under that shelf, for air flow to the heater…more on that after a bit. So…grooves and dado..

First off, the drawer's sides needed flattened out a bit…
.
Image
...
I do one side at a time, to keep them where they go in the drawer…don't want to groove the outside of a drawer..
Image


Then move the side around a bit, clamp it in place, and use the 45 to make the grooves…the set the first side back with the drawer front, and do the same with the second side….but, it stays at the bench, after the grooves.
Dados. Could have reset the 45 for dado….would have taken longer than doing just two dados. Lay out the location..use the mitre saw to saw the walls of the dado to depth.
Image


Then three toys were used..er…tools…
Image


The hammer, that Japanese Mortise Chisel, and the dado plane. Chisel to hog out the waste, plane to level and smooth things up..
Image


Didn't really use those nickers, since the sides were already cut.
After both dados were done, took a break…then after supper, hauled two boards to the shop. That was just all I was going to do….was. one thing led to another….fought with the one board..to cut it to length and get rid of part of the Tongue & Groove edges…the tongue part…board is to be the front of the fixed shelf above the heater.
Image


Longest of the 7 flooring scraps. Bandsaw hated this stuff..
Image


Will need a new blade for it. Sat this aside…the other board was the 1×6 x 6'....needed enough to make the back of the drawer….Disston D-100 was the saw, this time. Then hand planed a slight bevel on each end. The drawer sides needed three holes drilled and counter sunk. for the screws to attach the sides to the back.

I also cut the plywood bottom panel to size…then, spread a lot of glue around, add the screws to the back, and add three clamps across the front…..slid the plywood into place, check the drawer for square,,adjust a bit, and drive a few screws to secure the bottom to the back. I also took the time to marke a center point on the drawer front, for the knob, and even installed it. but, where to set this mess, in case I need the bench?
Image


Works for me.

Clamps came off this morning….was having issues with BP Meds…..decided to call it a day…I did haul a handful of hardware to the shop. That was about it. May try tomorrow to install some fixed shelves? We'll see, need to clean up that drawer, to make it presentable for polite company..

Stay tuned…
That's gonna look sharp with that insert installed.
 

Attachments

#64 ·
Sanding, milling, roasting..

Ok…shelf is in..
Image


That missing piece on the drawer's front is replaced….a back, of sorts, was added behind the drawer..
Image


Open area below that is fore cables and cords to come through, from there on down is for air flow to the heater.

Last night, after the Big Parade downtown, did a bit of sanding…cleaned up the drawer's dovetails and the repaired corner..
Image


May add a bead around the drawer..will see after this is upstairs.

Far end of the top was cut to square, and a curve to match the other corner..
Image


Top was sanded down, with 80 grit, for now…used this…
Image


To edge all the way around the top..
Image


Decided to make enough plugs, to fill all the counter-bored holes…that WAS the plan…bit is from Veritas
Image


Supposed to cut a tapered 3/8" diameter plug in face grain…..worked great in Pine, however..
Image


About halfway into the cut, it would try to stall, and then just burn it's way along…had a few break off in the cutter.
Image


It is running in a 5 speed drill press, set in "5th gear"....tried down in 4th….just stalled on contact, grrrrrr
Image


Decided to go with what Ii managed to get milled up….bit had broke three out….Hammer and a block of wood to tap the plugs in place, a dab of glue around the narrow end. Used the thumb and index finger to line up the grain direction, screwdriver to pop each plug from the scrap piece.
Image


Got a bunch of those holes plugged…will need to "'bake" another dozen plugs….
Image


A little fuzzy….may do the plugs today, add cleats for some more shelves….might even start on the door.
Monday, or no Monday, I want to get this thing DONE.

Stay tuned
 

Attachments

#65 ·
Sanding, milling, roasting..

Ok…shelf is in..
Image


That missing piece on the drawer's front is replaced….a back, of sorts, was added behind the drawer..
Image


Open area below that is fore cables and cords to come through, from there on down is for air flow to the heater.

Last night, after the Big Parade downtown, did a bit of sanding…cleaned up the drawer's dovetails and the repaired corner..
Image


May add a bead around the drawer..will see after this is upstairs.

Far end of the top was cut to square, and a curve to match the other corner..
Image


Top was sanded down, with 80 grit, for now…used this…
Image


To edge all the way around the top..
Image


Decided to make enough plugs, to fill all the counter-bored holes…that WAS the plan…bit is from Veritas
Image


Supposed to cut a tapered 3/8" diameter plug in face grain…..worked great in Pine, however..
Image


About halfway into the cut, it would try to stall, and then just burn it's way along…had a few break off in the cutter.
Image


It is running in a 5 speed drill press, set in "5th gear"....tried down in 4th….just stalled on contact, grrrrrr
Image


Decided to go with what Ii managed to get milled up….bit had broke three out….Hammer and a block of wood to tap the plugs in place, a dab of glue around the narrow end. Used the thumb and index finger to line up the grain direction, screwdriver to pop each plug from the scrap piece.
Image


Got a bunch of those holes plugged…will need to "'bake" another dozen plugs….
Image


A little fuzzy….may do the plugs today, add cleats for some more shelves….might even start on the door.
Monday, or no Monday, I want to get this thing DONE.

Stay tuned
I've never had great luck with plug cutters. Seems like the cutter gets 2/3 of the way into the wood OK but the last bit it burns and if you bottom it out to get the tapered end the plug snaps off in the cutter and you have to chisel it out. I've switched to using dowel rod and a dowel plate if the plugs are longer than 3/8".
 

Attachments