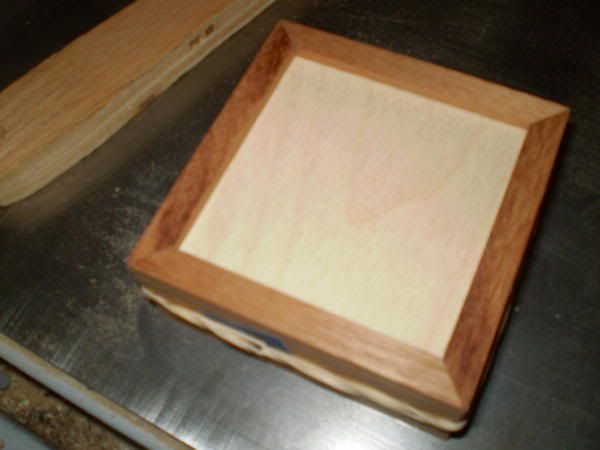
LumberJocks Woodworking Forum banner
61K views 150 replies 53 participants last post by  Betsy  
#1 ·
What to do, what to do

OK you guys know by now that I am having to limit my woodworking to small hand tool stuff, if that. That's going to drive me nuts! I've thought that I would start doing some of my needle work with the idea of incorporating them into boxes, or other woodworking projects in the future when I'm feeling better. Tonight, being Friday, I thought it would be as good time as any to bring out the thread and material and get started. Then….. I went past my little bedroom shop and realized this is going to be harder than I thought. I can't just close the door because that's the bedroom with the cats' favorite "peering out on the world" window. I think the cats own more of this house than the bank does, and certainly more than I do!

I'm not sure exactly what I am going to do. But I thought I'd start this little blog to keep at least my head into the woodworking world. I thought I would just put some general musings and thoughts and maybe some good tips or two that I find along the way of web surfing.

So while I may get the thread and needle moving I'm planning to pepper you with stuff that I learn by reading books and surfing the net. Perhaps I can help with that one tip that makes your project go a little easier. Nothing earth shattering I'm sure, but it will keep me in the woodworking universe. So get ready Lumberjocks--
 
#6 ·
Fixing small opps....

OK-- so here's my first tip. I was reminded of this little tip when I saw a similar little "defect" on my bed rail.

So let's suppose, just to humor me, that you have been commissioned to build a new royal throne for Queen Elizabeth. And not only that, but you've been given the grand honor and immense responsibility to build this new throne out of the last remaining piece of Transalvanian Ugbuga wood. This is a very rare wood indeed. Can't screw this up, no can go to big box store to get more---no can go to Rockler or Woodcraft for more either. Soooo no mistakes-- OK???
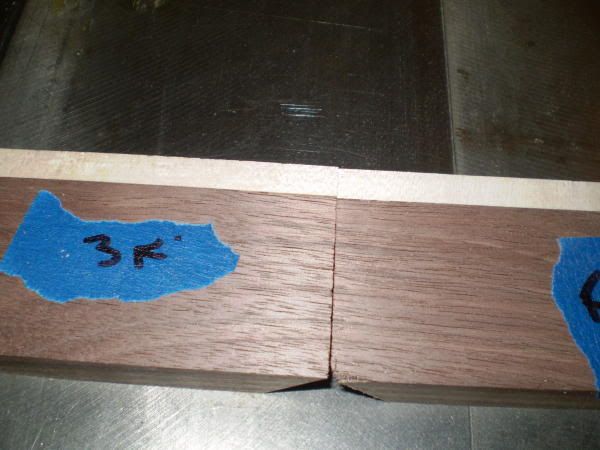
You are moving along so well, the Queen is going to be pleased. You are ready to apply your finish and YIKES-- right in the middle of the center--you know the piece the Royal Head will be resting on as she ponders the wonders of all those people who adore her and will never have the money she has--there's a stray sliver. Oh the horror of it. You have to find a way to repair the sliver because you can't take it off or you'll have a large divet that the Royal head will not appreciate. But to complicate matters this sliver is too small to get glue under it to fix it. What to do, what to do.
OK - getting bored with my rambling yet???? Sorry-- it's my only entertainment.
Well we've all have had this happen-- probably not with that rare Ugbuga wood.

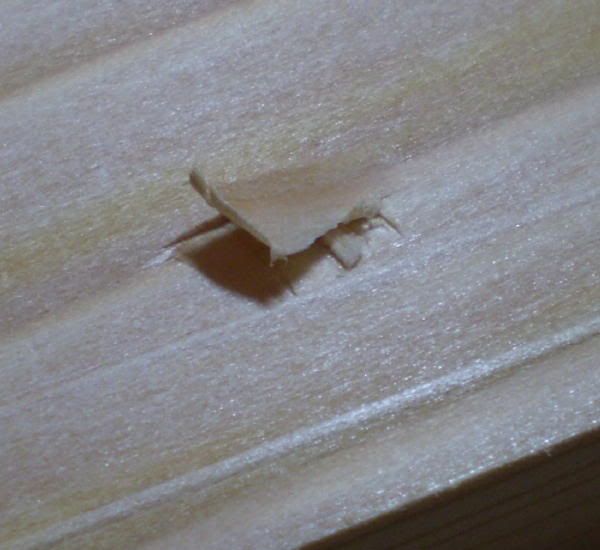
You've got a sliver something like this.

Photobucket

It's pretty small - yet large enough that you can't take it out. Now how to fix it. The biggest problem with little slivers is how to get glue under the sliver without lifting it up so far that you take the chance of breaking it off.

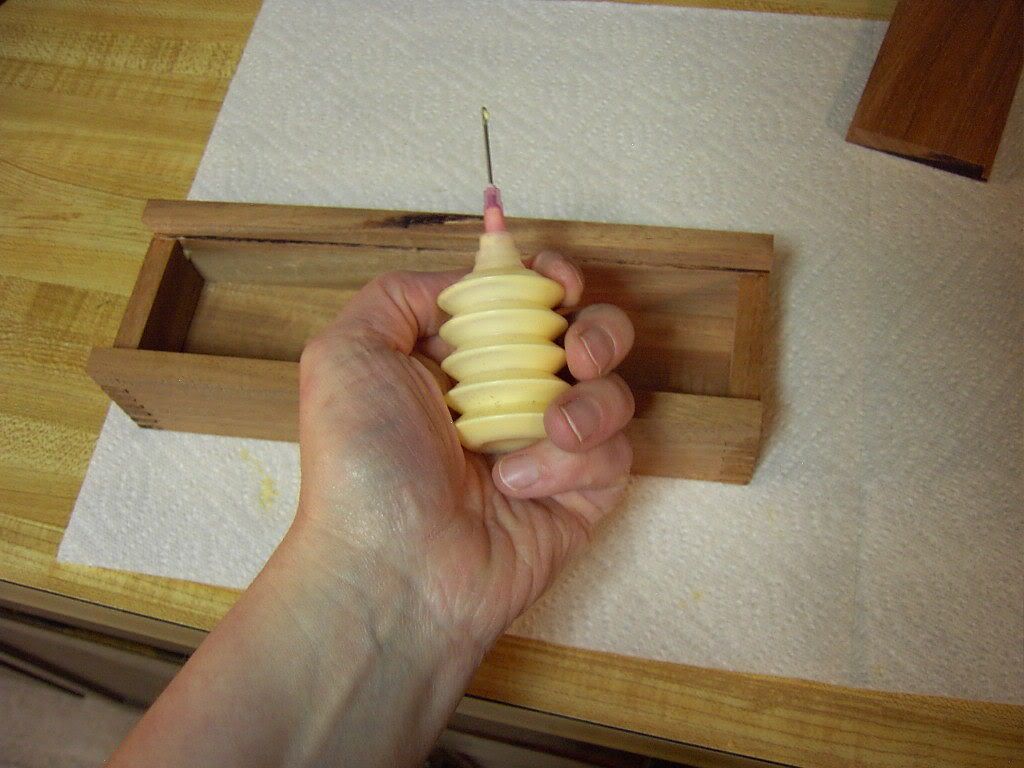
Getting the glue bottle's tip under it is next to impossible. You could use these little squeeze bottles
Photobucket

to put some under it, but it's still a bit messy. Using your finger to try to jab some glue under it is also too messy to be practical.

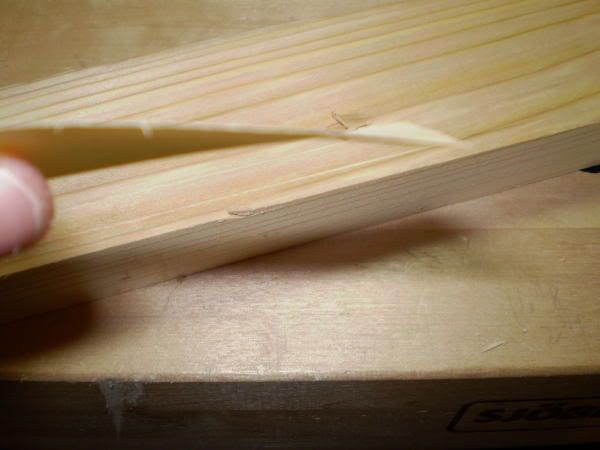
What you need is another sliver! I have used very thin paper, such as a store receipt, but sometimes that's not stiff enough. So one of the best things that I've used is a small, very thin, piece of an offcut. Something like this.

Photobucket

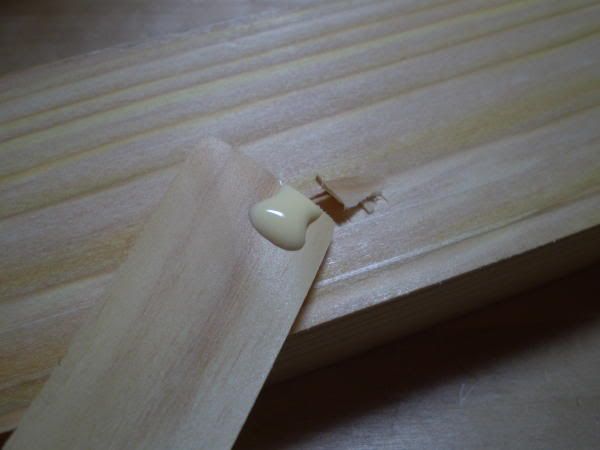
Apply a little dab of glue onto the end.

Photobucket

Slide it under the sliver, getting a good coating under the sliver.

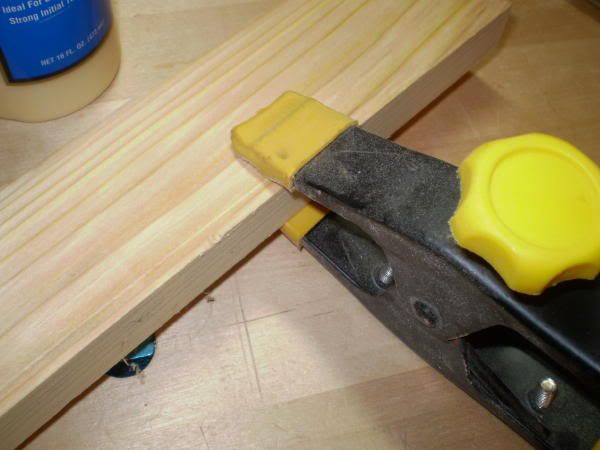
Then clamp.

Photobucket

Let dry - sand and finish the project.

So I hope this helps you save a piece of very important wood someday. And when it does, please remember me--- :)
 
#19 ·
Sand paper and cheapskates

So there I am in my little bedroom shop pondering the future and what projects I'd like to build when I'm feeling better. Hummmmm should clean up this mess. Once cleaned maybe it'll stay that way - until I start working again anyway.

So here I am cleaning up, picking up tiny pieces of wood, shavings, etc. Underneath it all is this miserable looking piece of sandpaper.

Here's my tip for the day. No matter what brand/type of sandpaper you use-- don't push it. In other words when you use up a piece of paper, throw it away. Don't overwork yourself by trying to stretch the paper just a little bit further. The only thing you are stretching is your project time. The grit on sandpaper only lasts so long, when its gone, its gone. The paper backing is simply not going to do the job. Don't be cheap just get out another piece of paper. You'll get your project done faster and probably better because you won't get frustrated with the lack of progress in your sanding stage.

It's like in baseball-when you try to stretch that single into a double, 90% of the time you get caught. Don't get caught - get a new piece of paper.

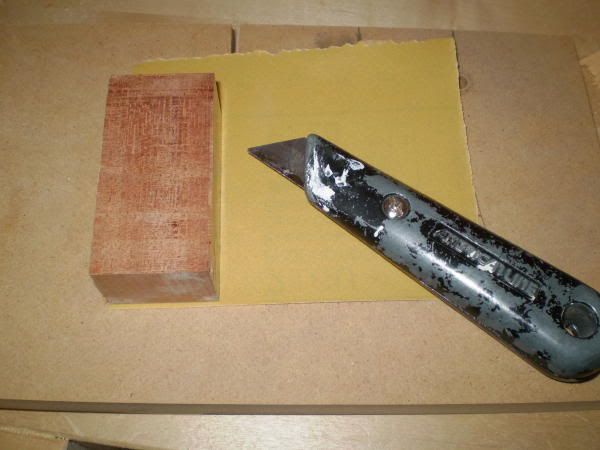
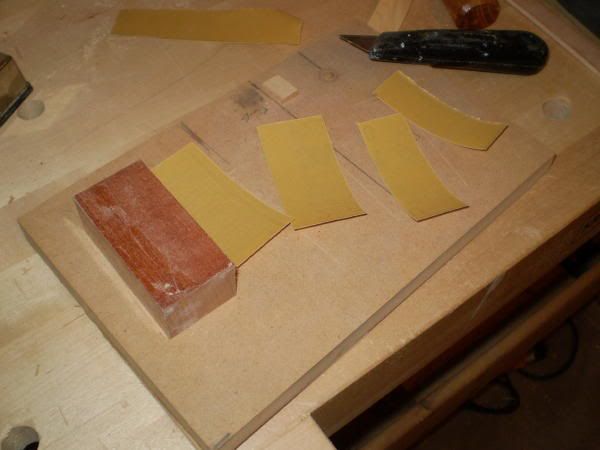
With that said, you can stretch your paper dollars by doing a few little things. First - one thing we all do is wrap paper around a block to do flat surfaces and sometimes different shaped blocks to do contours, etc. This leads to the problem that you only use about 1/3 of your paper, then you get all these little pieces with nothing to use them on.

Photobucket

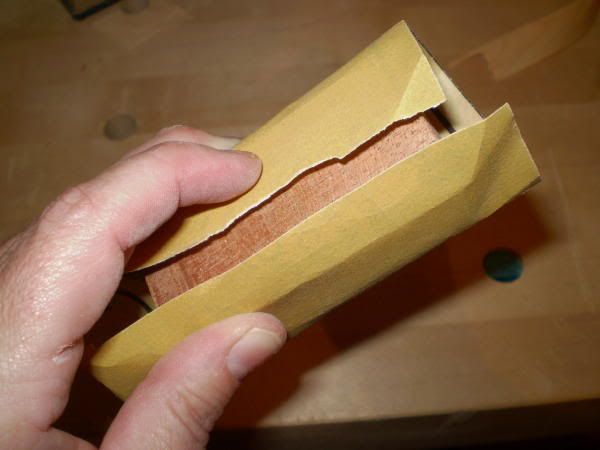
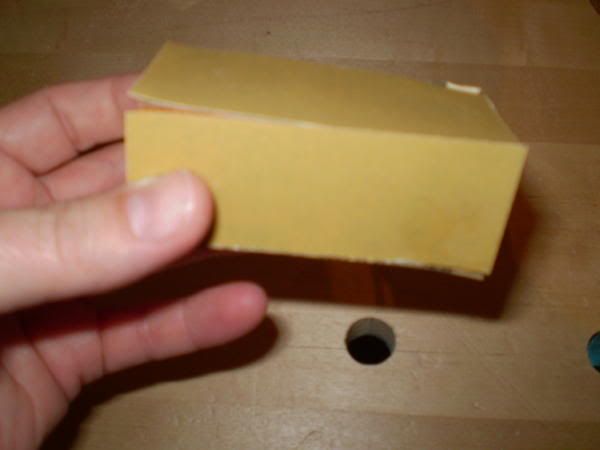
One way that I've started to use to sand with is to take that same piece of paper and the same block of wood and make it into a four sided block. I end up using more of the paper and I don't wrestle with it staying on the block.

Photobucket

Photobucket

Use spray adhesive and apply to each side of your block and you now have a 4-sided sanding block. Double sided tape would also work but the spray is cheaper, although it does smell.

Photobucket

Let the adhesive dry for a few minutes before you start sanding. Once the paper is used up you can throw the whole block away or peel off the paper and re-use your block. I generally throw the whole thing away since it was scrap anyway.

I've also have heard that you can re-use grit 80 for 100, 100 for 150 etc as you grind down the grit. I think that's just trying to stretch your dollars a bit to far. Then you are also taking time to decide if that one piece is good as which grit,,, not worth it to me.

So guys and gals there's my little nugget for the day.
 
#20 ·
some cool ideas there! i agree with you about stretching sandpaper. after most projects i get rid of my ROS pads that are used. i find sanding easier starting with a new piece of paper for each job. not like do a picture frame and throw it away. i still use that for say another picture frame but on bigger projects after using that grit it goes off to the side in case i need it again and after that its gone.
 
#24 ·
Plywood thoughts

sitting here thinking of things that I was taught when I first started woodworking took me to plywood. We all seem to use a lot of it when we first start out. So here are some of my thoughts and tips for those who are new to using ply for their projects.

1) It's important to recognize which face is the best face. Sometimes this is difficult to decide depending on the sheet you pick. In this instance you need to decide which is the one you want facing out and mark it clearly so you don't spend time deciding over and over. Other times it's very easy to decide.

2) Once you know the best face you can decide how you plan to cut it.

2A) If you are using a circular saw-- put the best face down.
2B) if you are going to use a table saw - put the best face up.

The difference is in the way the blade turns. On a table saw the blade exits the board going down therefore any chipping, in theory, will be on the bad face.
With a circular saw the blade exits on the up cut - therefore the chips will occur on the top of the board.

3) Mask the cut line with tape. Tape can keep the fibers of the veneer from chipping. I use the blue painters tape, but a cheaper alternative is the clear packing tape.

3A) make sure the tape is securely on the board. If not, there is a potential that the tape can get pulled off and into the blade making quite a mess.

4) Instead of tape, you can score the ply with either a knife or there are special scoring sets that you can buy. I find a good utility knife will do the job.

4a) you can also score the ply with the saw blade itself. Set the blade just barely over the top of the throat plate. Just barely. You want to take off just a smidge of the veneer. The issue I find with this is that you are having to run the board through the saw twice, which creates twice the room for error.

5) a full sheet of ply can be heavy-- get help or cut it down to more manageable sizes before doing your final sizing.

6) Thin 1/4" ply can become a missile very quickly. This is because it's very flexible and if you are not careful to keep it flat on the table the saw blade can pick it up and toss it back at you. I generally set my blade a little higher on the thinner ply than I would normally. I am actually more inclined to cut 1/4" down to smaller sizes with a jig saw before final cutting on the table, I'm more likely to have better control.

Well that's all I can think of off the top of my head. I'm sure others will have more tips, and they are welcome to post them here.

Thanks for reading.
 
#25 ·
thanks for all that advice betsy! i agree with you greatly on deciding which face. on my printer cabinet i initially cut the dado in the good side (opps) so i had to cut two more pieces but luckily i was able to save those pieces and reuse them so i didn't have to get more plywood!
 
#31 ·
Measuring thoughts

Tonight's tip runs along to something we all do, no matter if we are hand tools nuts, power tools maniacs or a combination of both. We measure, mark and cut. How we do that is important. One of the most important things in measuring, marking and cutting is consistency. Lack of consistency can lead to multiplication of errors along the way.

If you learn nothing else, and you should something else, learn this--use the same measuring tool throughout your project. When you are rough cutting this is not such a big deal. But when you get to the "this is where I want it to be" cutting, if you start with one ruler and end with a different, the chances are good that you will have different sized pieces. To check this-go to your shop and pick up two or three tapes, rulers, etc. and compare them side by side, chances are they are different. This difference goes to quality of what you buy. Rules with painted-on numbers are generally going to be less accurate than stamped numbers. A $2 tape will be less accurate, generally, than a $20 tape.

While we are on tapes, you know that little metal tip - you know the one-its the one that moves in an out and you are convinced that can't be right. Well think again. The tip is supposed to move, the movement helps to compensate for the thickness of the tip itself.

The tip is designed to pull out away from the tape for outside measurements and in toward the tape for inside measurements - such as the inside of a case.

The inherent problem with the tip on these tapes is that they get loose over time. Generally because we are abusing our tapes. Would you do that???? Me neither. The more they loosen the less accurate your measurements. If you use that loose-tipped tape to measure an opening and then use a tight-tipped tape to measure your stock-- you are going to be unhappy with the result.

To compensate for the loose-tip/tight-tipped issue I was taught to start my measurements at the one inch line then add an inch to whatever I finish with. I don't know about you, but I hate that tip. I always have a hard time remembering to add an inch. It's not a hard concept, but sometimes it can be a hard concept to put into practice. Additionally, sometimes you have to stretch the tape beyond your arm's length, then what? How do you keep that tape at the one inch line and still stretch yourself to the point you need to measure to? You can do what I do with the steel rule (keep reading) :) It's still not my favorite way to measure anything.

Think about this to, if that tip were not there you could not hook it on the end of a board and keep it there while you are stretching it out to make a measurement.

I prefer to have a longer steel rule for most of the larger jobs. This accomplishes a couple of things. First, I'm not wrestling with a tape - keeping it hooked on the end of the board, while stretching it and then marking my line. Secondly, I don't have to flatten the curved tape to get an accurate measurement. The steel rule is always flat.

Now you say, but I like that hook because a steel rule can slip off the end or slide in on the board and then I'm off again. I solve this generally by using a small clamp to hold the steel rule in place. Takes about 10 seconds to clamp it and I'm assured that the rule will not move. Yep you can do this with the steel tape when you want to use the "start at the one inch line."

Now that you have the measuring worked out--how about the marking your measurements?

I can't run out of tips,,,, so that's tomorrow!

Thanks for reading. As always, your additional tips and suggestions are welcomed to be posted here. I'm doing this blog for fun and to keep my mind in the game while I'm healing up. So anything you can do to aide and abet my endeavors is always welcomed.

Oh - I also welcome controversy-- if you don't agree with me, please say so. Really. :)
 
#46 ·
Marking and cutting

OK - this is probably going to be very simplistic at best for most, if not all, of you. But I'm really trying to keep my head in the woodworking game.

I'm thankful for the support my fellow LJ's have been giving me by reading and responding to my blogs.

So onto today's "tip." As we all know making/marking a line to use as a guide to cut your board to final length is quite important. If you don't mark the piece, you have no idea or are just guessing where to cut.

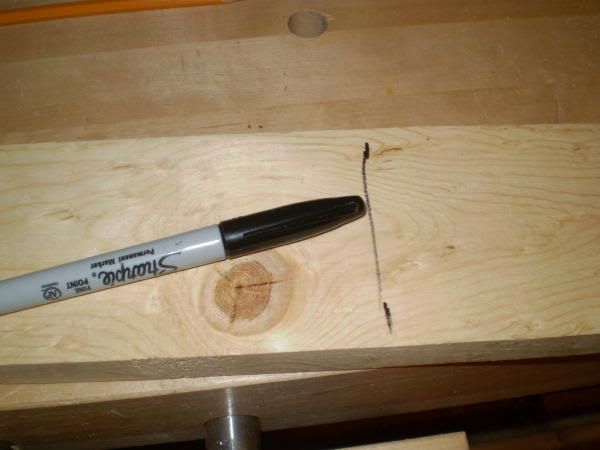
I use a Sharpie to mark out my rough cuts. Some folks use chalk. But I don't like chalk just because it's messy and reminds me of Mrs. Walker and her obsessive compulsive need to have a student every morning and every afternoon to clean her chalk erasers. Soooo I have a deep seated aversion to chalk. :)-- Actually while the Mrs. Walker story is true, I just don't use chalk. The Sharpie is just more convenient for me.

Photobucket

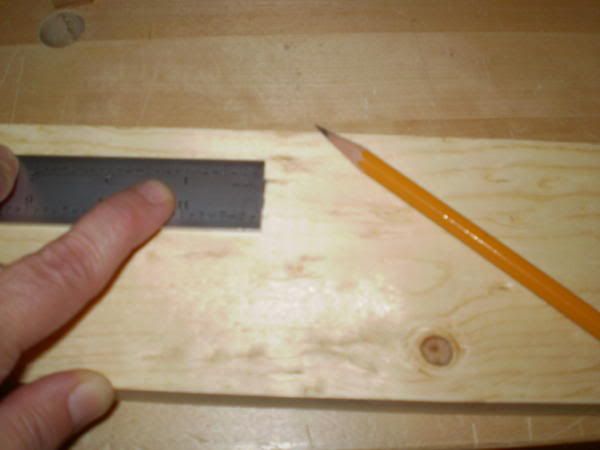
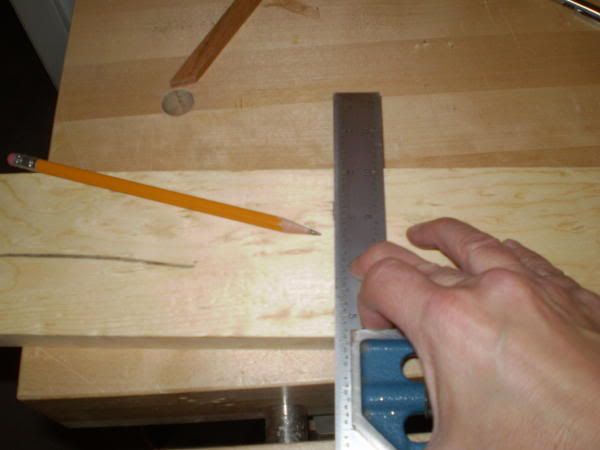
For my actual cut line I like two methods. A plain pencil line. I make a mark at the end of the square (or at the mark I'm using with a tape).

Photobucket

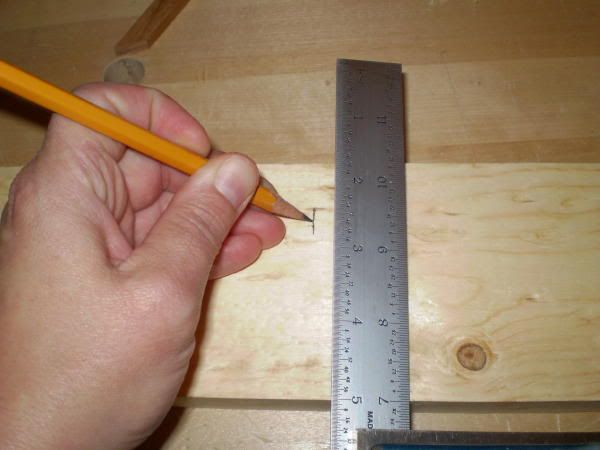
Then I flip the square around and place my pencil tip onto the line.

Photobucket

Then I slide my square up to the pencil and make my mark.

Photobucket

Photobucket

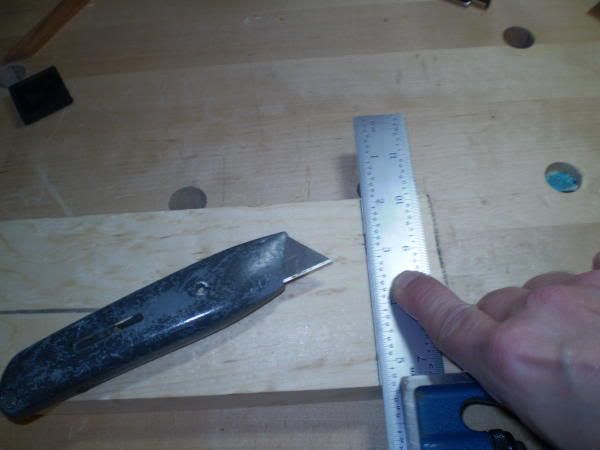
Another method is to use a marking knife.

Photobucket

A utility knife, like what I used here - is ok-- but a marking knife is a better option. I just could not find my marking knife to do this little tip blog.

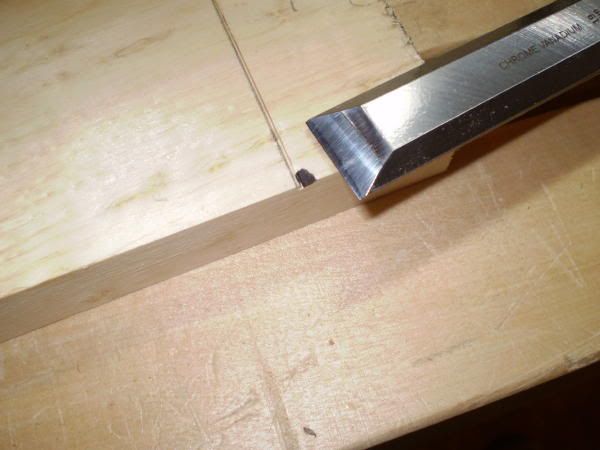
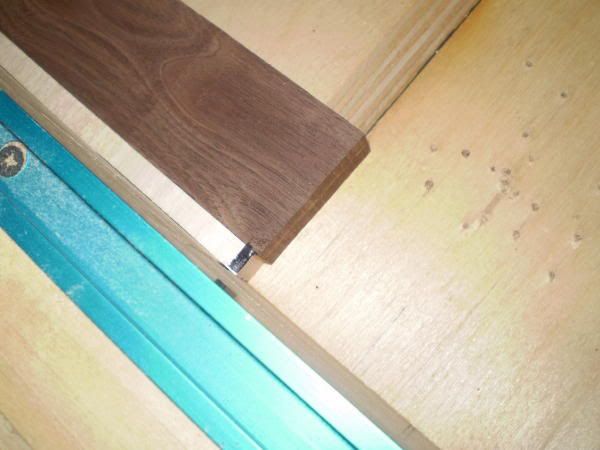
When I use a marking knife to score a line I like to use this little tip I learned in a class. Because the scored line is essentially a "knife wall" you can use a chisel to make a "trough" to place your saw blade into before you cut.

I had to blacken out the chip for it to show up in the picture.

Photobucket

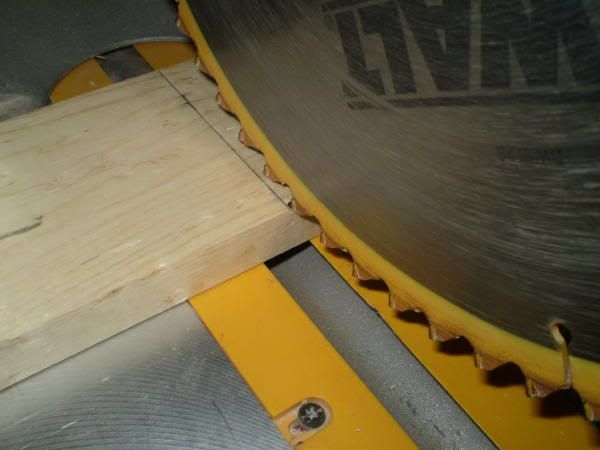
You can now use this chipped out portion to slide into the tooth of the blade and you'll get a perfect cut every time.

Photobucket

Now onto the argument about cutting on the line, on the left of the line or to the right of the line. Take the pencil line or leave it. We woodworkers sure have a lot of questions. Well here is the definitive answer (ain't I humble??) I take the line-- almost. I like to leave just a hair of the line.

OK - that's all I can muster today. I hope it's not to simplistic and maybe just a scooch helpful to someone.

Good health and happy sawdust making to you.
 
#47 ·
Thanks, Betsy!

I never knew about the chisel trick!

Tips, Pictures, Demonstrations and Typing- all left handed. Ahh! a woman of so many talents. :>)

Lew
 
#62 ·
The lowly butt joint

In my continuing effort to show that woodworking can be simple and easy I present my next "tip."

I appreciate your looking/reading and your comments/input.

The butt joint is probably one of the most degraded and misunderstood joint in woodworking, yet it is the easiest to make. It can also be a very strong joint if done properly and used in the right application.

A butt joint generally is one board's edge placed against another's face.

Photobucket

Photobucket

A butt joint needs a mechanical fastener, such as a nail or screw (generally in conjunction with glue) to work.

One thing that I always found when I taught beginning woodworking was that people made deciding how to decide how to determine where to insert the fasteners for the joint an adventure. It was surprising how many people take the long road when the short lane was the easiest to take. They measure on the front side where the board is, then they flip the board over and mark that measurement on the outside then add the thickness to know where to drill a pilot hole. This creates a lot of room for error and frustration.

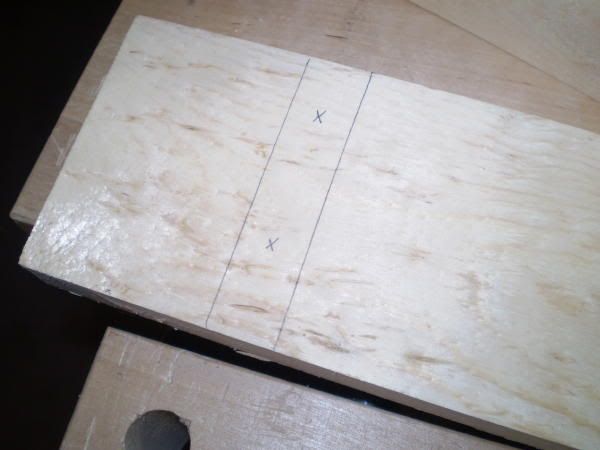
The easiest way to determine where to put your fasteners is to do all the marking from the inside.

Make sure your board/shelf if square to the face board.

Photobucket

Then mark both sides of the board's outline.

Photobucket

you can then mark the location where you want the fasteners to be placed.

Photobucket

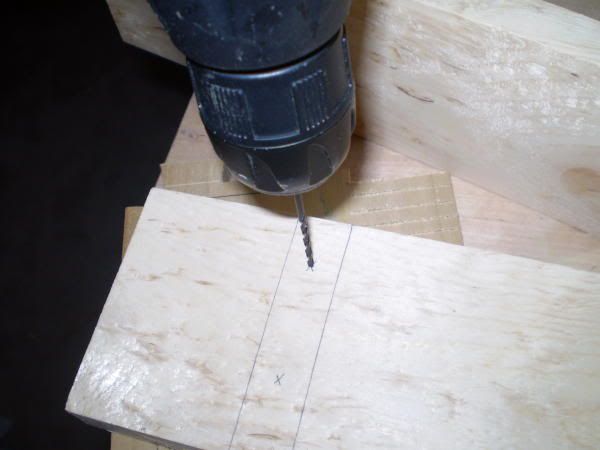
You can then drill the holes from the inside. Make sure you use a backer board to keep from having some splitting on the outside/face of your board.

Photobucket

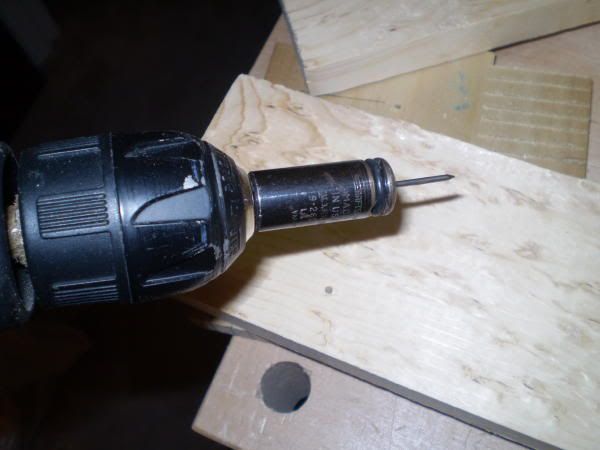
If I am going to use nails to fasten my boards - I like to use a nail spinner. The spinner, with the appropriate nail inserted, essentially drills the nail into your board. Generally using the spinner makes it so that you do not have to drill a pilot hole for the nail.

Photobucket

The spinner can be purchased from Lee Valley. I've never seen one at the box stores, but then I've not looked recently for one becuase I only need one!

If you are going to use screws to fasten your board you MUST drill a pilot hole or you risk splitting your wood. There are bits that countersink and drill the pilot hole at the same time.

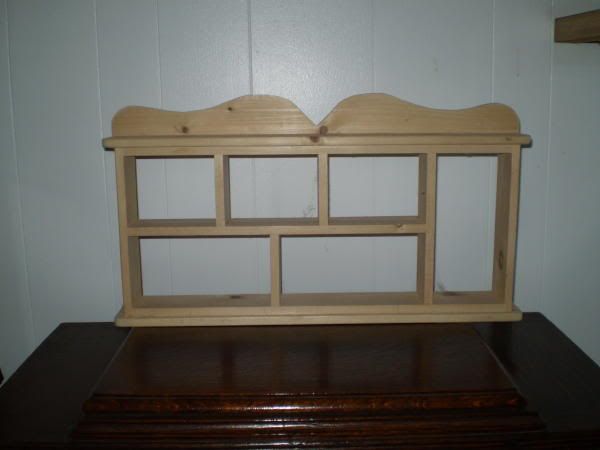
The butt joint is definitely a good joint if done properly. This shelf was done with all butt joints and nails.

Photobucket

Some day soon (yeah right) I might put a finish on it.

Other alternatives for fasteners besides nails and screws are dowels and biscuits. I'm not set up to show those though.

Butt joints can be made stronger by using shallow dado's to fit then in or using a cleat to sit them on. I would not consider using a butt joint with only glue-- it always should have a mechanical fastener of some sort. This joint, used in the right application is a very versatile joint to use. It should not be overlooked or frowned upon. It can hold a good amount of weight depending on the thickness/length of the board.

So that's my tip for the day. I hope it's not been to simplistic and that it helps someone along their woodworking journey.

I appreciate all your encouragement!
 
#63 ·
Betsy, I can hardly wait for my fellow LJ's to start making jokes about your BUTTTT joints. I would never do that.. Nice work ma'am and thanks for the tips. I agree that if weight loading is not an issue, butt joints are fine. The nice thing about using a small rabbett is that it hides minor imperfections in the endgrain cuts. Thanks for sharing your work with us Betsy
 
#70 ·
Hand planes and their many uses

So I've been sitting here thinking and thinking and thinking about woodworking. An amazing hobby to be sure and certainly a great way to make a living if you so chose. But honestly, it's the pits as far as a hobby when you find yourself sidelined and unable to use your tools. They just sit there mocking you, calling your name, making noise to get your attention and yet to no avail. You can't use them. Well at least I can't - not just now. Come this Fall though, watch out--- there won't be a bit of wood safe from my reach.

Until then though - what to do, what to do. Can't let those tools sit idle-after all you must protect your tools from rust and the best way to do that would be to use them. So I've come up with some ways to use my favorite plane.

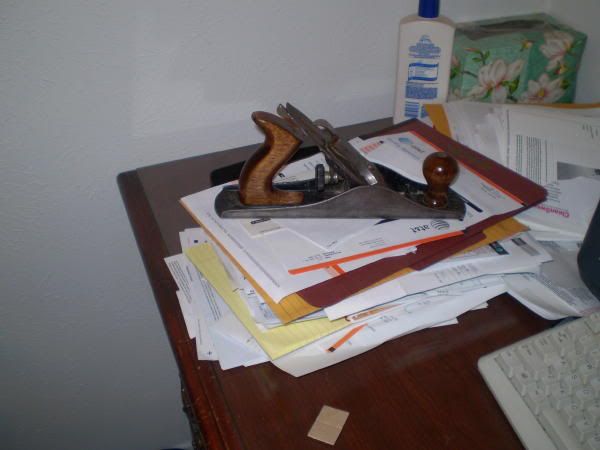
So the first--pretty easy-a paperweight for all those bills that you keep around for no particular reason after they've been paid.

Photobucket

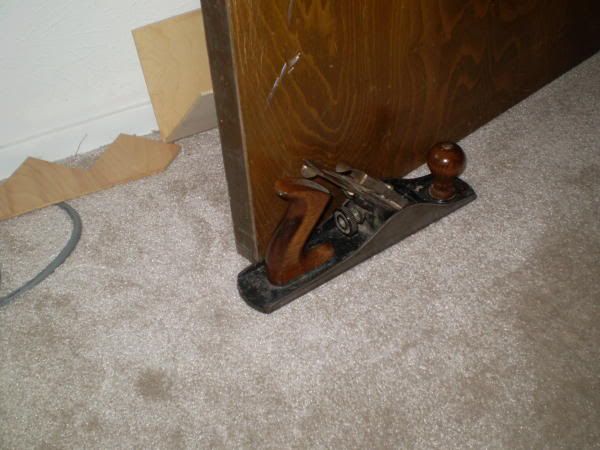
And who needs a pretty cloth covered brick when you have a plane for a doorstop.

Photobucket

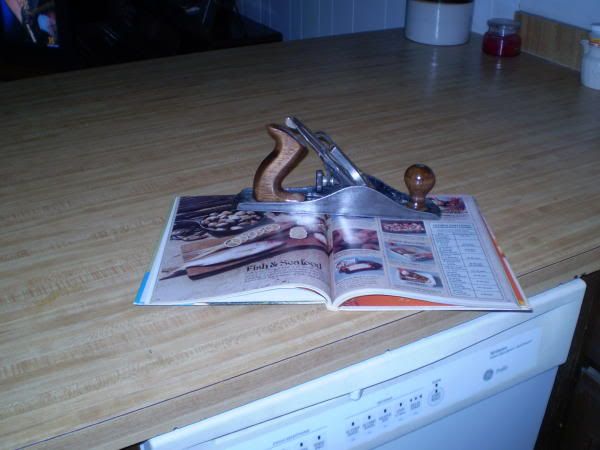
Of course, who can't relate to trying to keep a book open on the table while you use it as a reference. Hence - the book keeper opener.

Photobucket

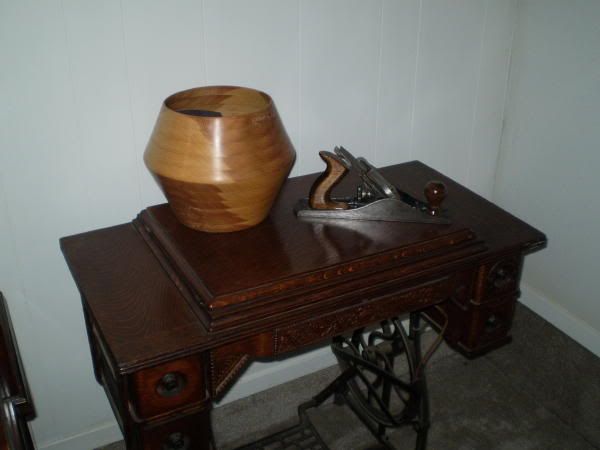
Then, naturally, there's the purely decorative uses.

Photobucket

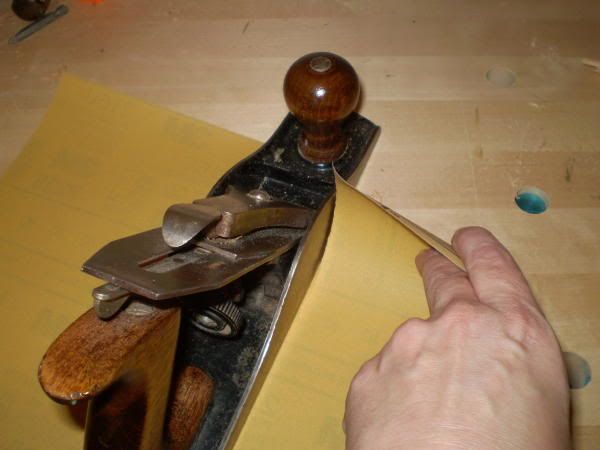
ohhhh - here's a woodworking application--- a sandpaper cutter!

Photobucket

Photobucket

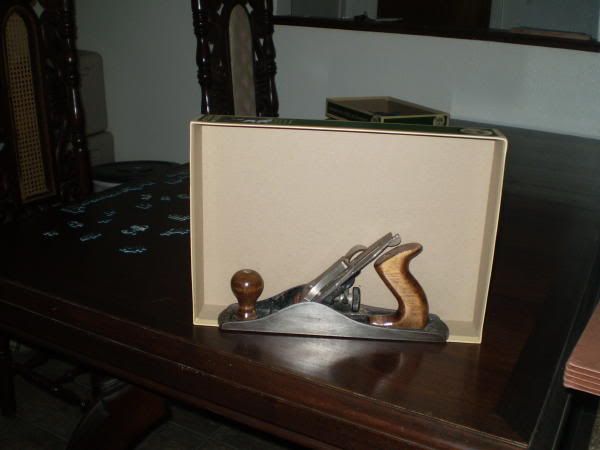
One of my best ways to use this plane is as a prop to keep the lid of my jigsaw puzzle upright while I spend countless hours trying to figure out the latest jigsaw puzzle.

Photobucket

Then, last, but most certainly not least, use it to keep the other tools you aren't using company on the shelf.

Photobucket

Yep fellow LJ's I'm feeling a bit sorry for myself. Trying to stay upbeat while I wait for my surgery and the healing time to take place. It's going to be a long summer.

So what other alternative uses for this plane can you come up with? Entertain me!
 
#71 ·
LOL… That's hilarious….

I'd put it on the endtable and put the remote on the front, sitting on the Iron….

Maybe under the "clip" for the lever cap you could put a photo… lol….
 
#86 ·
My mind set and woodworking

Some say my mind is set-- in other words - I'm stubborn. So say they.

I prefer to think I have a mind set. In other words - I think a certain way about certain things.

Safety is one of those things that I have a mind set about and my mind is set on. I've been thinking about this today as I sit here, yet another day on the couch, unable to go to the shop and do what I would prefer to do. I've been thinking that maybe if I just do this little something or other I can still work in the shop and make dust. Then that little voice comes out and tells me no no no no NO - you'll get hurt! And that voice is right.

I try to think safety when I go into my shop and one of the first things I have always told myself is not to work tired or when I'm not feeling well. And while I could probably do a little something with hand tools, I know that I'm not supposed to be doing any pushing or pulling or vibrating moves. That kind of limits even hand tools.

Accidents happen, by definition, an accident is an unintended occurrence or unintended outcome. No one goes into the shop with the intent of hurting ourselves.

The one thing that not everyone thinks about is to intend to go into the shop and come out the same way you went in. In other words, you have to think about those fingers in order to keep them attached to those hands. You don't intend to get hurt, but you have to intend to not get hurt.

We've all been working and wondered where that red paint came from. You get nicked or scraped without even feeling it. It happens. The goal though is to be sure that any injury can be handled with a little antiseptic and a band aide. Your greatest worry should be how to get that red paint out of that nice piece of wood not how to pay the medical bills from a trip to the hospital.

So while I sit here feeling sorry for myself because I can't work in the shop, I take heart in knowing a little safety now will mean that I will have two hands, ten fingers, two ears and two eyes still attached and working when I'm ready to get back at it.

Guys-- try to think about what it would be like for you to not be able to do something you love to do because today you did not keep safety in mind and something went terribly wrong. Let me tell you you won't like it. Not every injury is the result of negligence, but a safety mind set leads to less accidents and less second guessing about what went wrong.
Let's be safe out there (or in my case sitting here on my old, cat hair-covered, uncomfortable couch feeling sorry for myself and lecturing you!). :)
 
#87 ·
Well said. When I a, tired and want to go into the garage I think twice and then end up taking a nap then heading in. In the past months I have been gathering tool and setting them up. Building another work bench to assemble projects on. Building some jigs and so on. I always try to think about safety before I even enter the garage. Today like others I did all my walk through about what tools I would be using today. One tool I don't give much thought to is this old as the hills Electric Drill. I love it. I didn't do all my thinking about safety today until. Hehe, Ok Well some of you don't have to think about it. I was driving some screws into the bench cabinet I started yesterday. To apply a little more preassure I got close to it but not a dangerous close until. yep Until I realized I didn't tie the beard up as I usually do. The drill grabbed it and the beard choked the drill to a stop as it started to pull. Scared the living crap outta me I tell ya. My beard is near 14 inches long now. So I reverse the drill get my beard back and proceed to be even more stupid and get it caught again. This time I thought it was going to pull the roots out. I say an ouch or two and thought how stupid can I be.

Well I am just glad it is as long as it is our it could have been bad. I had two choice's as the beard pulkled my face close to the drill. Pull away or not. Luckly I have a thick beard. My hair is always in a pony tail when I am in the garage or anywhere else this time of year.

Sorry to have such a long winded response Betsy. When I saw your post on safety which I try to always make my Number One Priority, the beard incident came to mind.

Happy Happy Sunday folks!
 
#94 ·
A thought on the basics

Not long ago I asked for some ideas to blog about to keep my head in the game while I wait for my recovery to be complete-- you guys really came through. As you know I've been working on (and exposing my lack of knowledge and ability) on blogging about Sketchup. Will keep that up for sure - I am learning. However, I need to go back and work on some of the other ideas you gave me to give myself a break from Sketchup and keep myself sane. Trying to figure out the program is harder than I thought!
Anyway - one of the ideas you all gave me to blog about was starting with the basics-of course, I have no illusions that I can cover all there is to cover--ha! there's just to much out there. But I try. :)

I've covered measuring, etc. in http://lumberjocks.com/jocks/Betsy/blog/5126

and marking and cutting, etc. here - http://lumberjocks.com/jocks/Betsy/blog/5162

But I was trying to think of what I did to really learn to do what I do manage to get done. For those of you who are starting out and just getting your sawdust careers started-- don't start too big with the idea of making a period replica chippendale hoogjiggie thing. There's very few who can start with a masterpiece and pull it off.

How I started to learn woodworking was starting with books that now look hokey to me now, but at the time they helped a lot. You've seen them - building furniture with 2Ă—4's-- those are some good books-they get you the basics. They all start with safety, then materials, then hardware and then some great projects using 2Ă—4's and 3/4" material. Everything can be purchased at the box stores and generally can be built with very basic tools and can be done quickly.

So while not great shakes-that's my tip for the day.
 
#95 ·
Betsy I think what you just wrote is so very important. We all started at the bottom, (at least everyone I know did) and sometimes I believe it never hurts any of us to go back to "our" beginning. Like safety for instance. I don't think any one here is above that. Besides I have never seen anyone start at the top and work their way down!
PEACE!!!
Allison
Thanks for the post!
 
#98 ·
Making miter corners

In response to Woodworkinaspirations' forum entry about making miter corners - I thought I'd take a stab at explaining how I make my corners. http://lumberjocks.com/topics/4967

The caveat on this is that my saw blade really, really needs cleaned and sharpened and my sled needs a new fence-- all this to admit that I have some tear out on the corners. But with that said, this should help aspirations to see ONE method to do box corners.

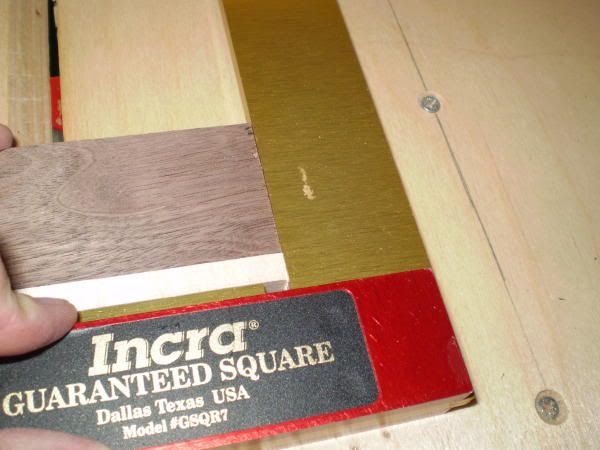
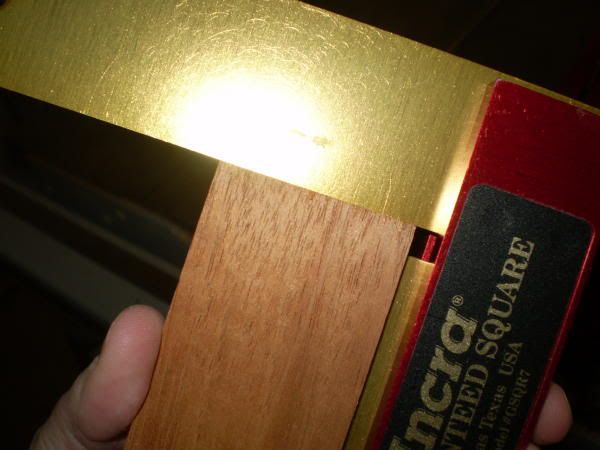
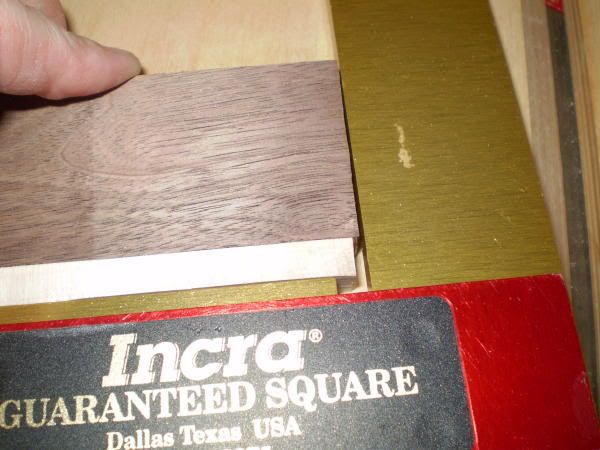
So for me I start by cuting my pieces a hair long (1/64 or less) of the final length. To do this - I make sure my blade is set at 90 degrees. I have an electronic gauge - but prefer my Incra square.

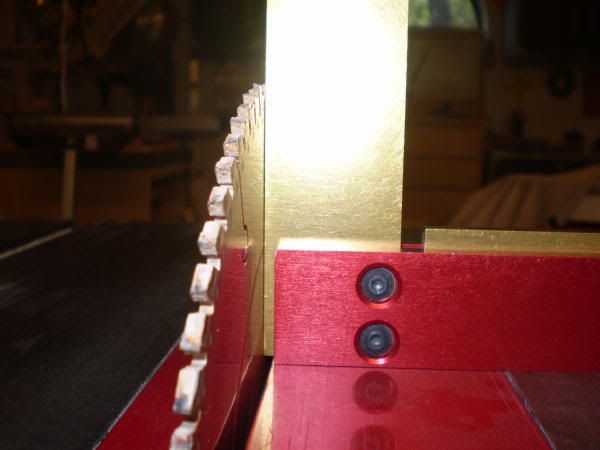
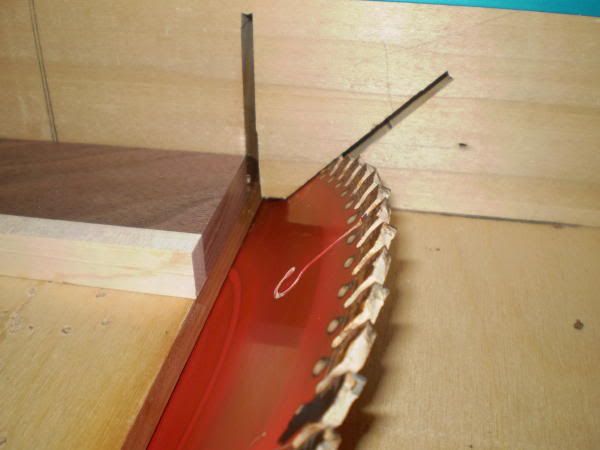
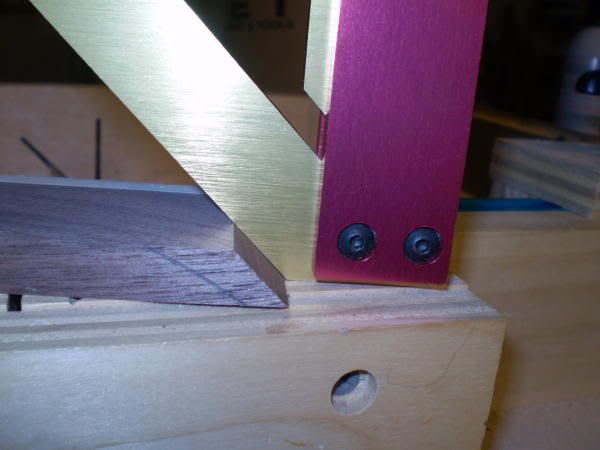
Photobucket

Be sure to set the square between the teeth of the blade. It should be sitting against the body of the blade. If it sets on the teeth you will not get a good set up.

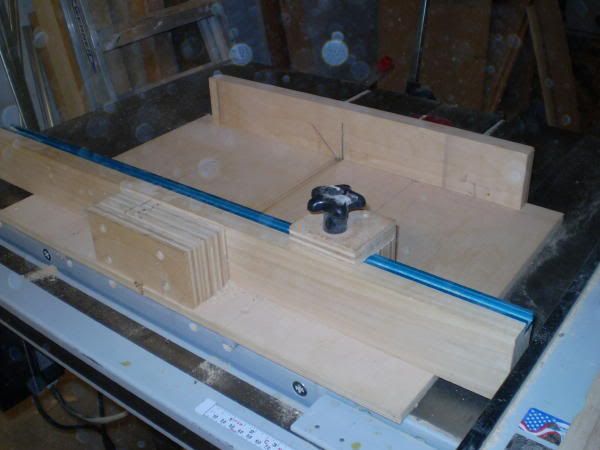
Next I set up my table saw sled. This is a good basic sled and has served me well. But it is time to make a new fence for it.

Photobucket

Next I square one end of my work piece. You can see here it is not even close to square.

Photobucket

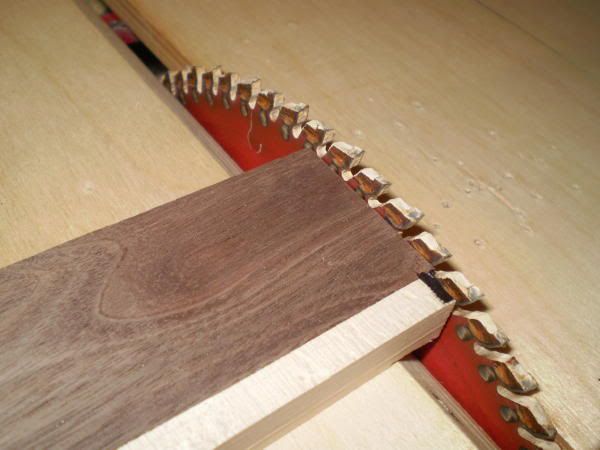
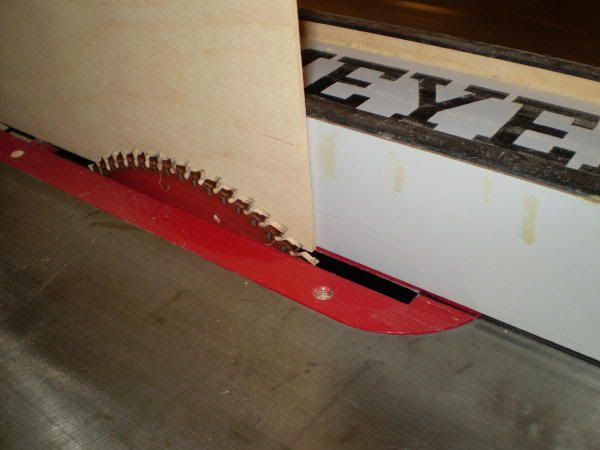
I set my saw blade so that the gullet of the blade is above my work piece. There is argument for having the blade all the way up, having it set just a tiny bit above the board and every where in between. I prefer to have just the gullet above the board.

Photobucket

I cut off just enough of the end to make it square.

Photobucket

Photobucket

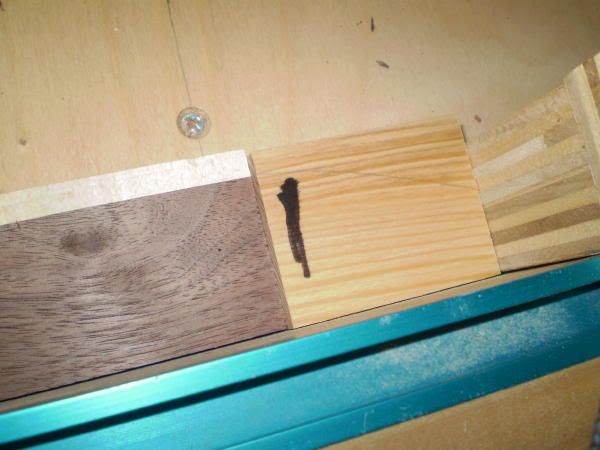
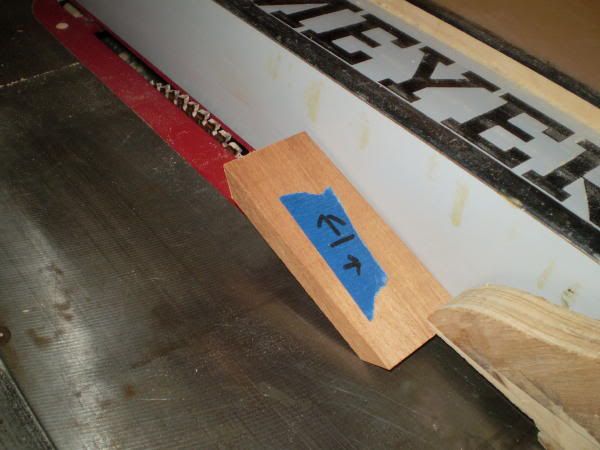
I skipped taking a picture here - but I set my stop block to the length of my first side and made a cut. Then i used a second block to cut the short side. This second block simply makes it so I do not have to move my stop block once I remove it I can then cut my second long side without having to remeasure.

I put a black mark on the block to make it easier to see.

Photobucket

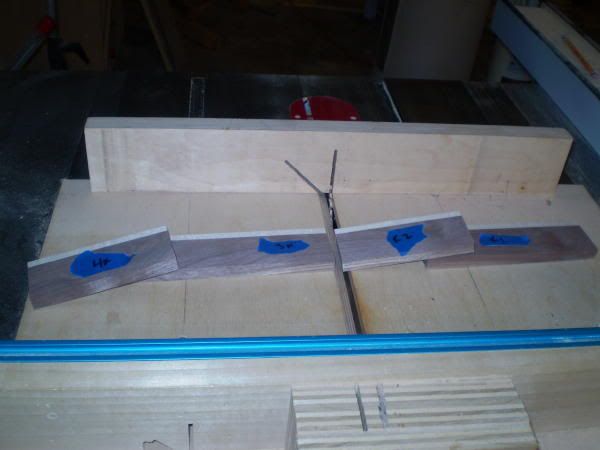
I use this method as an easy way to to keep the grain flowing. So I cut one long, one short, one long and then one short side. This makes the grain wrap around the three of the four corners.

Photobucket

It is also a good idea to mark the pieces as you cut them. You are a better man than me if you never get your pieces mixed up. Marking them simply saves time and frustrations.

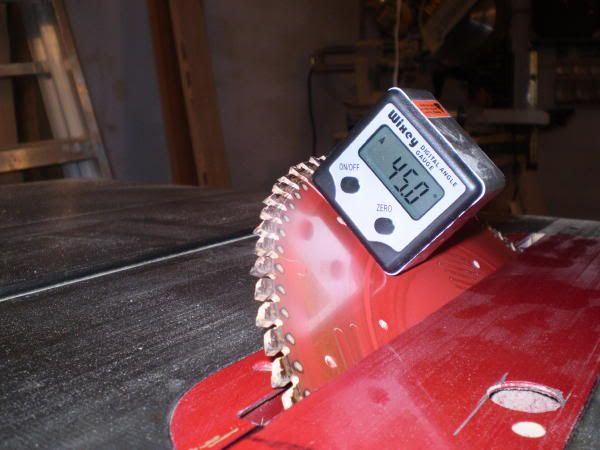
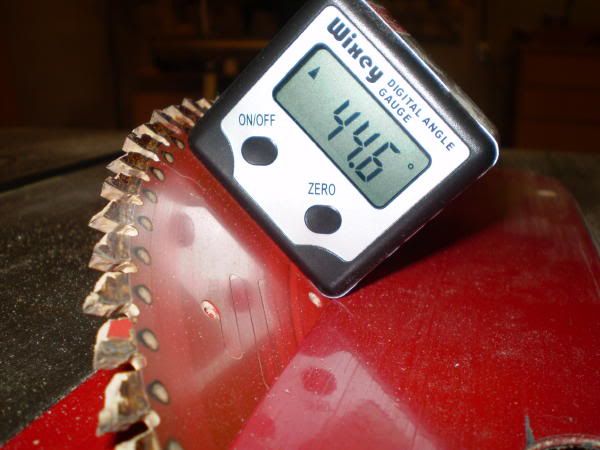
Now that I have two sides and two ends the same lengths I move onto the miter cuts. I set my blade to 45 degrees - for this I do use my electronic gauge.

Photobucket

The next few pictures are from the back of the saw for clarity. You can see that my sled has both a 90 and 45 degree saw kerf.

Photobucket

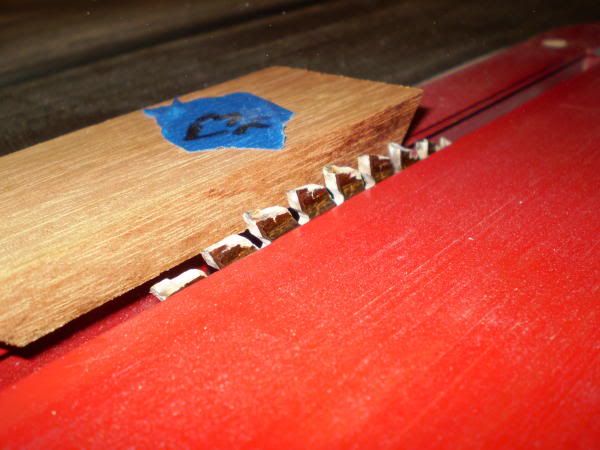
You'll have to move your stop block over so that the very edge of the work piece is setting at the inside edge of the miter kerf. Once run through your cut should be exactly 45. Remember that your inside face goes onto the table. You should be able to see the outside face. You can see my little bit of tear out on the corner.

Photobucket

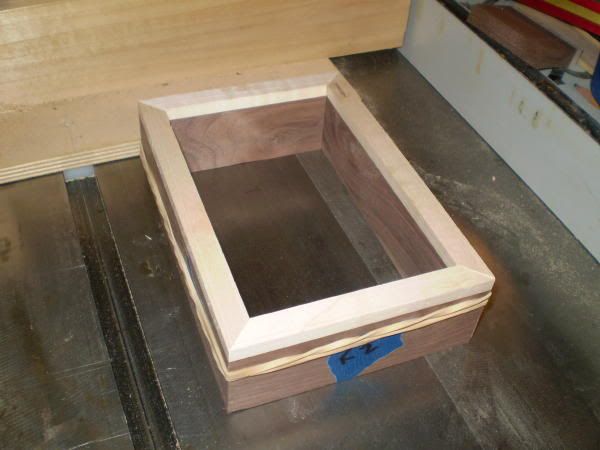
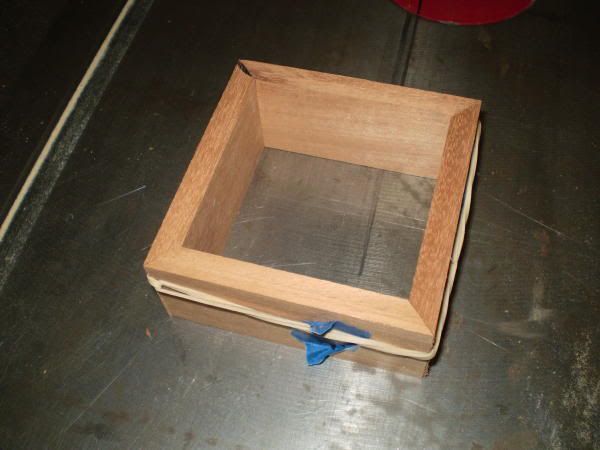
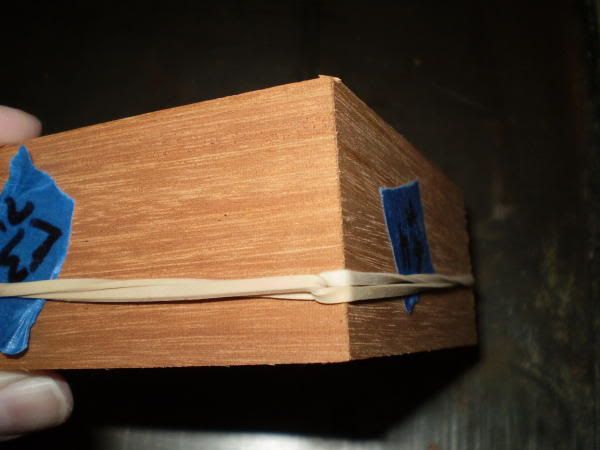
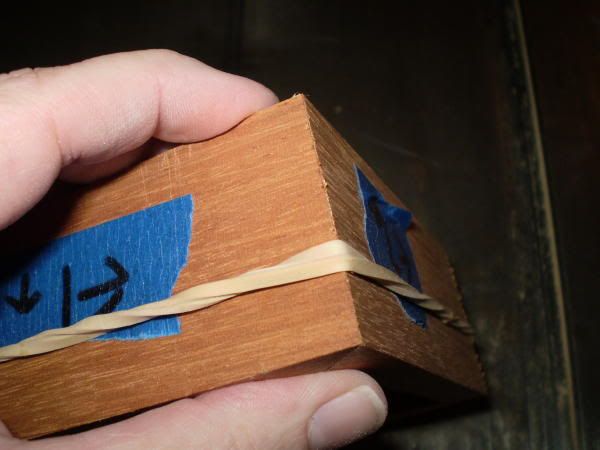
Cut the rest of your corners and this is what you should come up with. I'm holding the box closed with rubber bands.

Photobucket

Photobucket

I like to use the tape as a clamp system to gluing up my boxes, but for very small boxes you can't beat rubber bands.

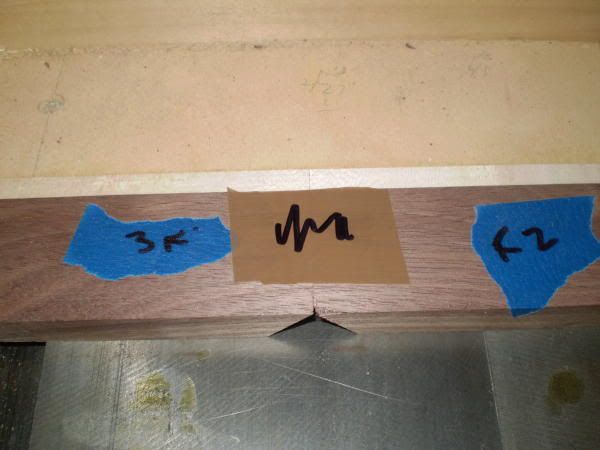
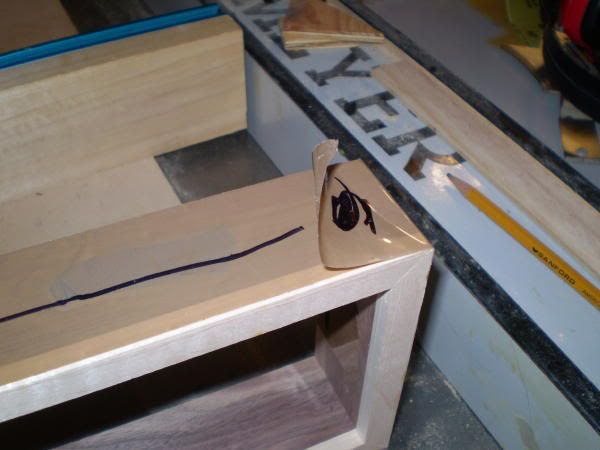
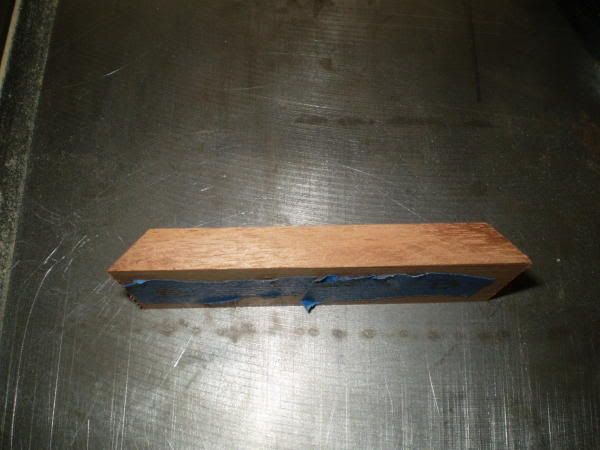
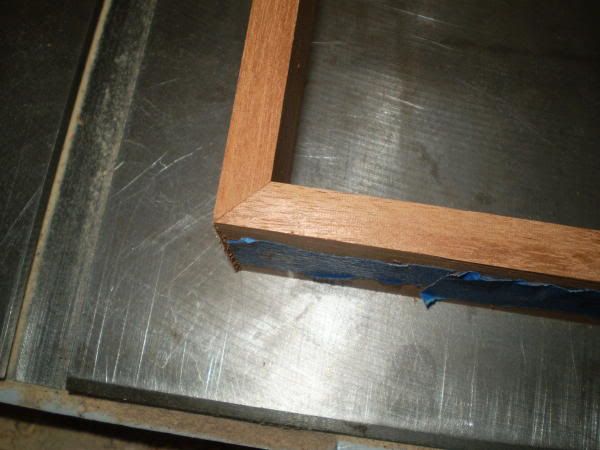
to use the tape method - line up your pieces (outside face up) in the order they should be in. I use a small piece of tape at each joint to keep the pieces together without having to worry that my pieces will move during the next step. I put a squiggly mark on the "joint" tape to show it's position. The trick is to get the pieces to be solidly together.

Photobucket

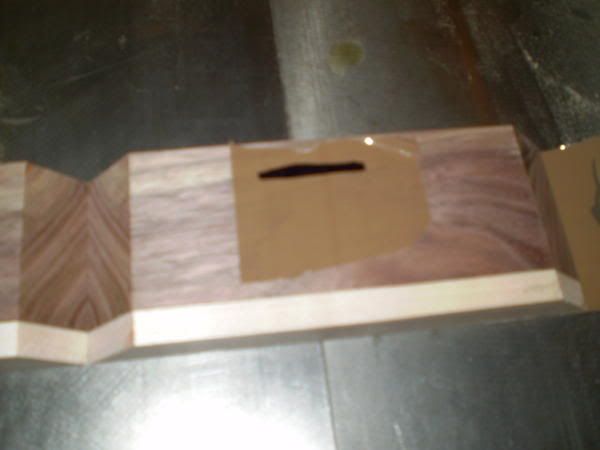
I next run a piece of tape the length of the four combined pieces. I also leave about 1-3 inches at the end (the length depends on the size of the box I'm making).You can see the little tab at the end-- I made a big black mark to make it easier to see.

Photobucket

Next, flip the taped up four pieces over. Now lets pretend that I took the time to make my bottom dado, which I did not. I placed a piece of tape at the bottom and drew a line where the bottom dado would go if I were so inclined.

Photobucket

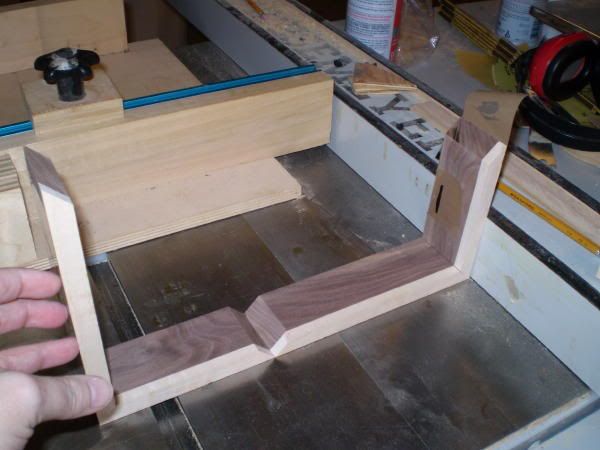
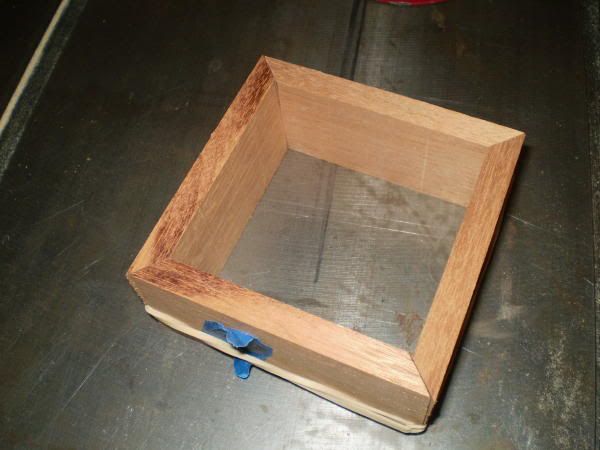
Next I just roll up the sides into a box.

Photobucket

Photobucket

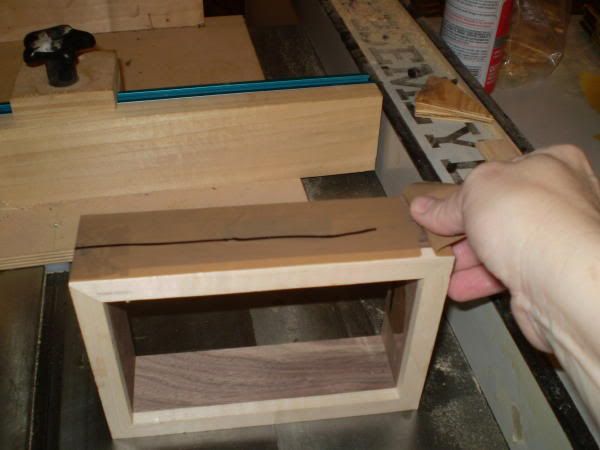
Use the tab that hung over the end of the pieces to lock the box together.

Photobucket

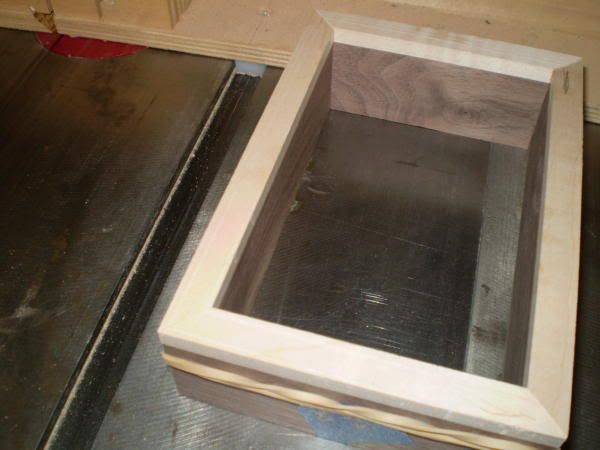
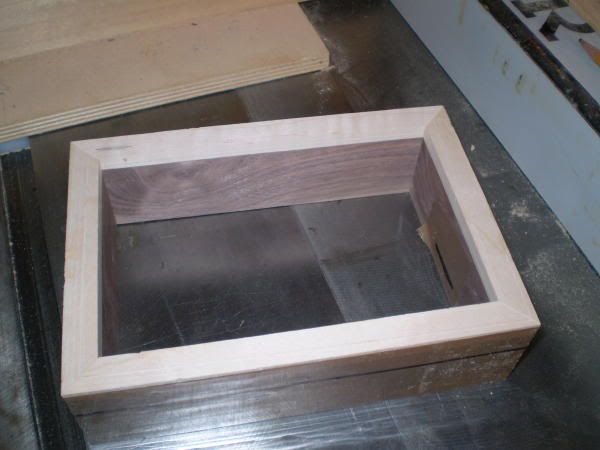
And there you have it. A box without a top or bottom. But all the corners are nice and neat.

Photobucket

Hope that helps. As always any comments, suggestions or ideas are welcomed.
 
#111 ·
Making a box tutorial

Oldfolks - aka - John asked me about making a table saw sled for his new saw and if I could do a tutorial on how to make a sled like the one I have. Unfortunately, I'm not quite physically able for such a big project yet. However, I told him that I would show him how to make a great box using his miter gauge and just some scraps from his shop. So this blog is for John and I hope it will help him learn to make boxes and will help others to see that you do not need all those fancy gadgets that look so pretty in the magazines. The fancy things can certainly make your task easier - however, if you take your time and do a good job setting up your tools you can make great things, not just boxes, with the simplest tools.

This is one way but certainly not the only way to complete this process - so here we go.

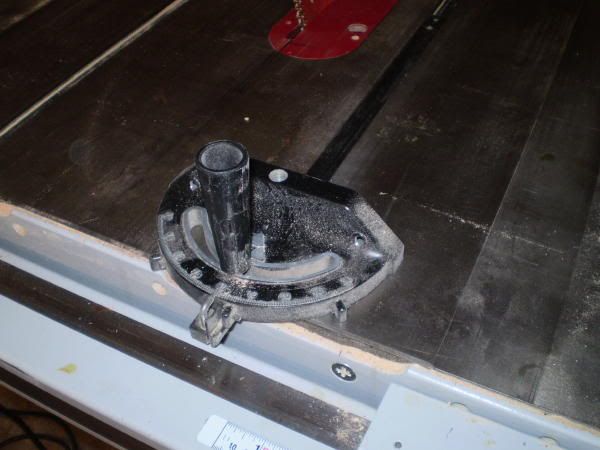
John wants to be able to use his miter gauge as a "sled" to push materials through his blade.

Photobucket

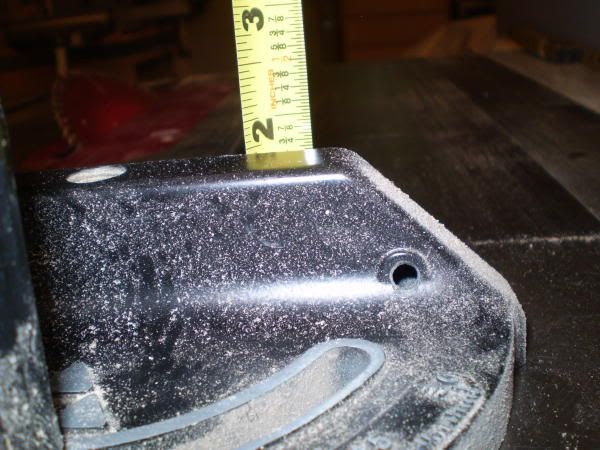
As you can see one of the problems with a miter gauge that comes standard with most saws is that it is small - it has a relatively narrow face and the height is lacking. Mine gauge is less than 2" high.

Photobucket

The gauge's lack of "face" material necessitates making a larger face to back up your material. However, adding the extra face/fence is made difficult because of the location of the screw holes that you would use to attach the fence.

Photobucket

All these things are easily overcome. I'll get to that in a future entry. But for now I want to just do a little bit to show that you don't need expensive set up tools to get the job done.

First off is the lowly big box store combination square. You can pick up a cheap combo square for about $8 or so. They are not always the best for precision work because they are notoriously "unsquare." However, that does not mean that cheap is not workable or usable. So lets look at just one I have in my drawer. I have a gazillion of these things so I picked one at random.

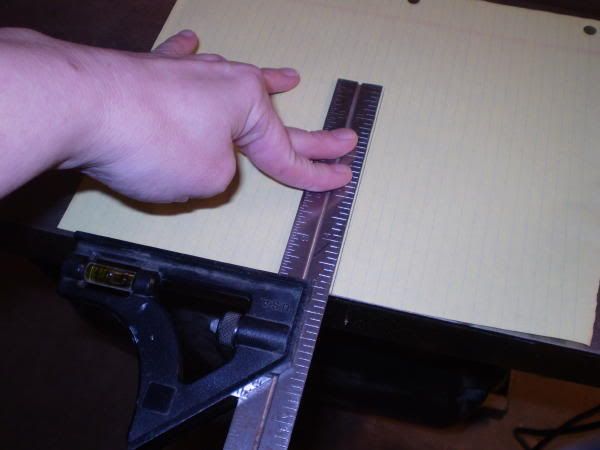
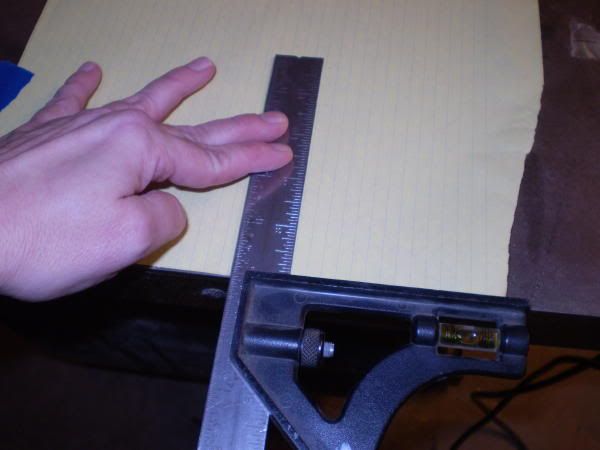
The check your square-that is to see if it's square-- place a piece of paper at the edge of the bench or the saw and draw a line.

Photobucket

Then flip the square over and draw another line.

Photobucket

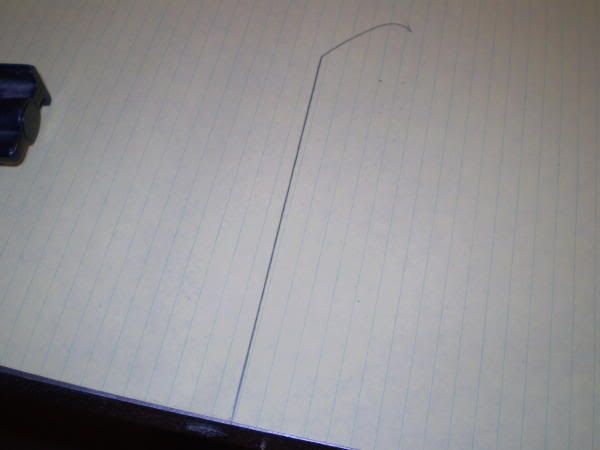
If the square is square-- you should have one line - one on top of the other.

Photobucket

My cheapo square that has been sitting in my drawer having stuff thrown on top of it and being abused in general is pretty much dead on square. I then used my good Incra square to compare it to the cheap square.
It looks pretty good.

Photobucket

In my opinion the problem with these cheap squares is the mechanism used to hold the blade in the head of the square. if the little screw/spring system does not hold the blade tight - just give it up as a bad job.

As an aside, there is no shame going to a box store or Woodcraft or Rockler with a pencil and a piece of paper and testing a square before your buy it. I have done just that several times. It's infinitely better to test something like this at the store rather than buying it, getting it home and finding out it's no good. It's one of the few things you can test before buying.

The way I see it though, the strength of most of these cheapo squares is the head. As you can see here - the 45 and 90 of the cheapo compares well with my more expensive Incra square. It's not perfect, but pretty close. You can see a tiny gap, but close.

Photobucket

Photobucket

These cheap heads can be used to accurately set up your table saw blade. Here I have moved my blade out of square.

Photobucket

I can then adjust my blade to 45 using my cheap square head.

Photobucket

As you can see, using my Wixie gauge that the cheap square head came pretty darn close to exactly 45 degrees.

Photobucket

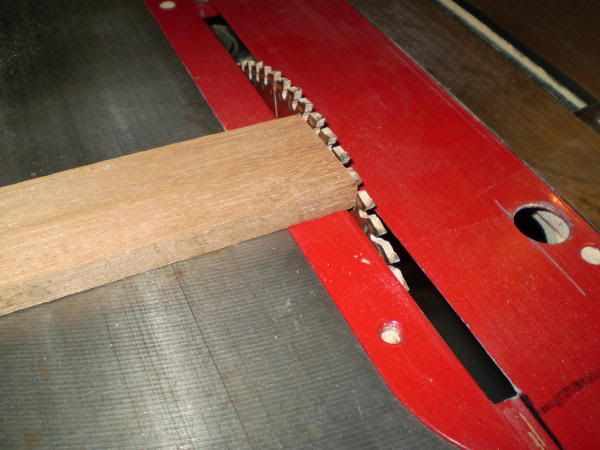
I grabbed a pieces of scrap ply and ran it through the blade using my miter gauge.

Photobucket

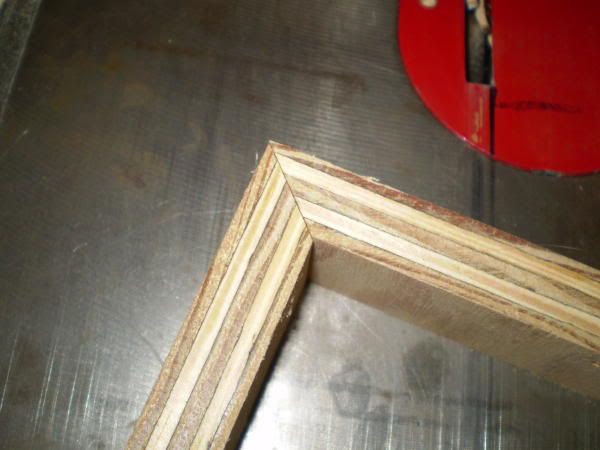
Flipping the two pieces up on edge and making a corner - you can see this set up did a good job.

Photobucket

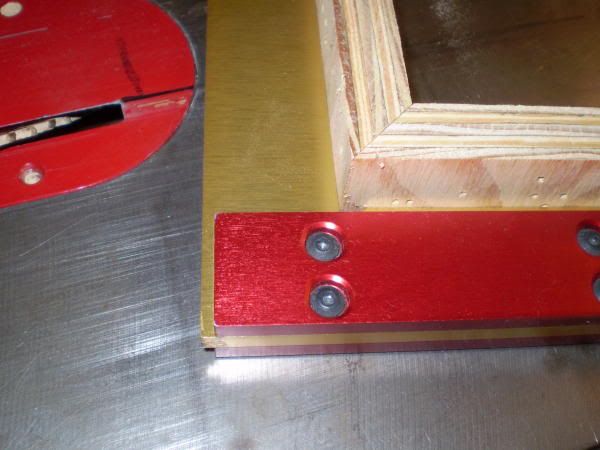
The corner looks very good with my Incra square.

Photobucket

If you do not have anything to gauge the 45 with - say other than the gauge on the saw itself. Take heart-- just set it to 45 per the saw's gauge and make some test cuts. When you get a good corner, you are probably good to go. I'd probably cut 4 corners out of scrap to test my setting before cutting into my project piece. So you can set your saw without a square - the square just makes it easier. I'll try to demonstrate this another time. It's perfectly doable.

That's it for tonight. Next will be making the fence/face for the miter gauge and getting it ready for making accurate cuts.

As always your comments, suggestions or questions are always welcome.
 
#117 ·
Making a box continued

So I left off having made a test cut on piece of scrap. Now it's time to move onto actually setting up a "fence" on the miter gauge to make a box.

Setting the blade to just above the height of my material.

Photobucket

The next few shots are from the back of the saw just for clarity.

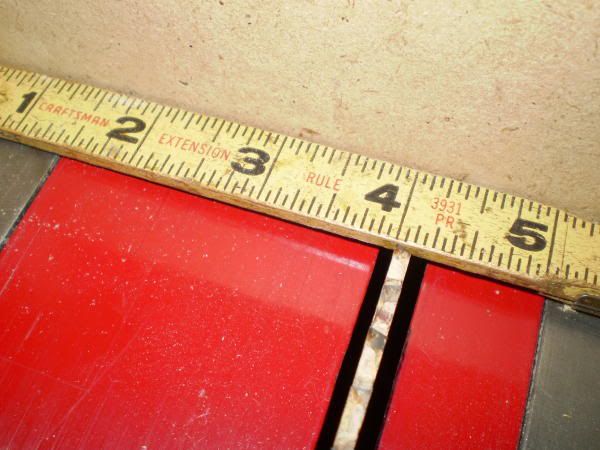
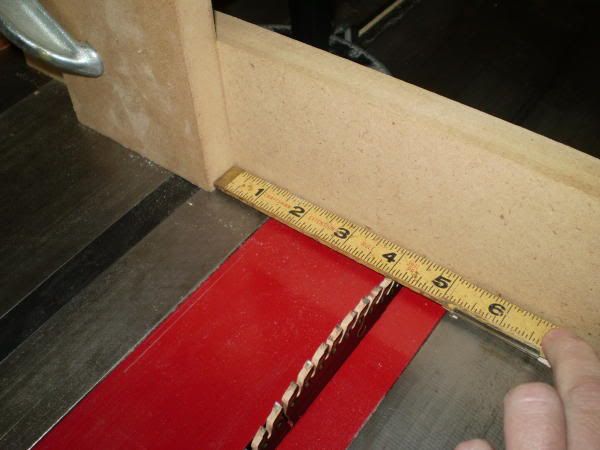
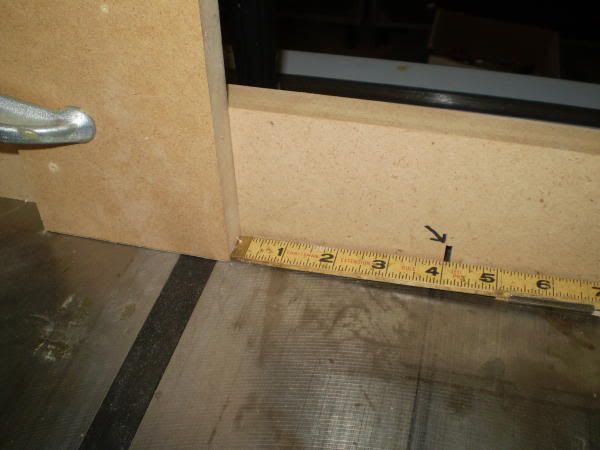
A word or two about measuring - measure from the inside of the tooth toward the saw fence. You have to take into account the "set" of the blade's teeth. I tried to get a picture of the "set" but did not come out so good. I'm sure someone else can do a better job explaining this - but essentially - the "set" is the way the teeth are positioned on the body of the blade. Take a close look at your blade and you'll probably notice that one tooth leans toward one side then the next tooth leans towards the other. The distance between both teeth makes the total width of the kerf. The importance of this when measuring is that you want to measure from the tooth that leans towards the fence - not the one that leans away from the fence.

I'm shooting for a 4" side.

Photobucket

You can see that the 4 on my ruler sits right at the inside of the tooth.

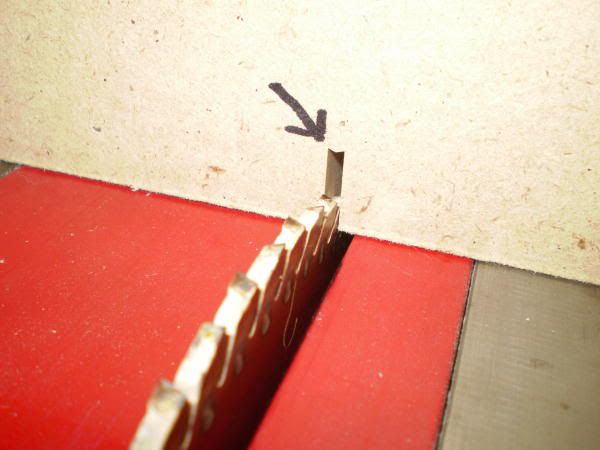
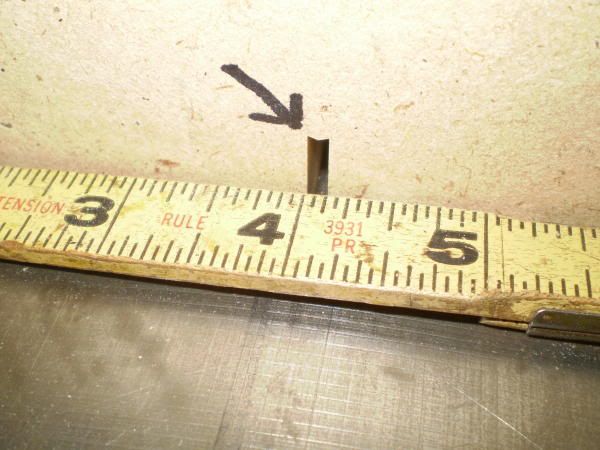
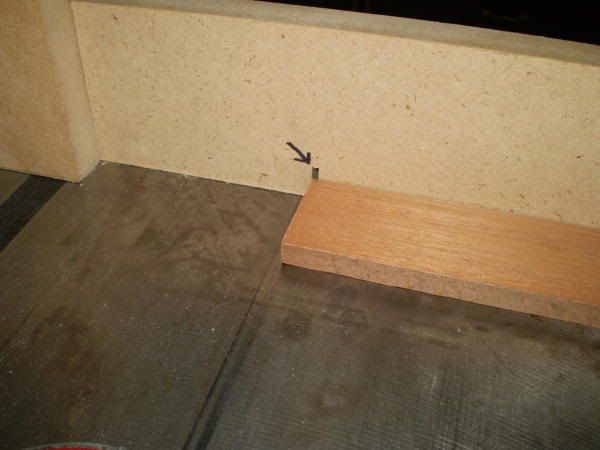
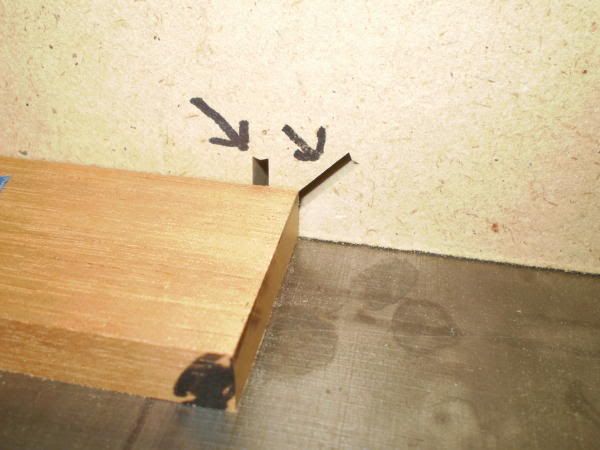
Now here's a little trick. When you are using a fence on your miter gauge or even a table saw sled, you don't have to measure from the blade to the stop block. Instead - measure from the inside of the saw kerf on the fence. You can see here that I made an initial cut into the fence. The arrow is where you want to set the ruler from.

Photobucket

Photobucket

Next is clamping a stop block onto the fence and using the ruler to position the block 4" from the blade or the kerf - which ever you like best..

Photobucket

Photobucket

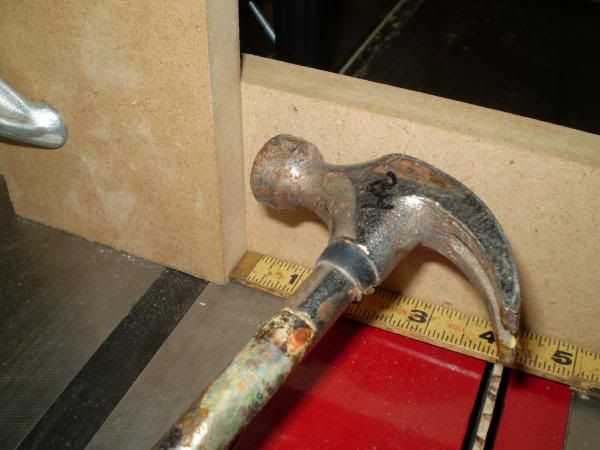
As I said, I'm shooting for a 4" inside. But this is not metal work where you have to have precision to .0001". I can measure very well - but I don't get a gray hair if I'm going for 4" and end up with 3 63/64" or even 3 60/64". If your project does not have to fit into something else - don't stress such small measurements. You have to decide how precise you want to be. Now with that said - say that I set my stop block at 3.75 instead of four or I just wanted to move the block over a tiny bit. I don't unclamp my stop block - I loosen it just a tiny bit - then I use my girly girl little persuasion tool to tap the block over - then tighten the clamp back down.

Photobucket

OK - so now my stop block is set at 4" are pretty close thereabouts. Next I want to square up on end of my material. You don't need to cut off very much - just enough to square it up.

Photobucket

Photobucket

If you don't start with square stock - you won't end up with a square box-how's that for some advise!!! :)

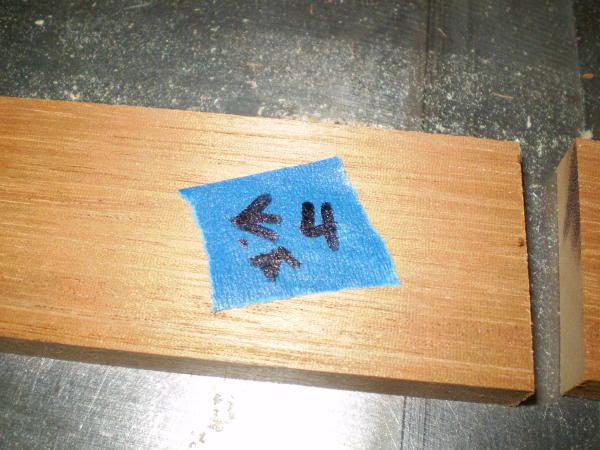
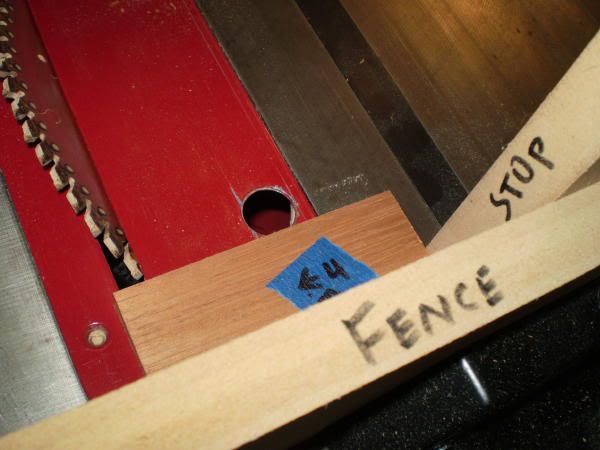
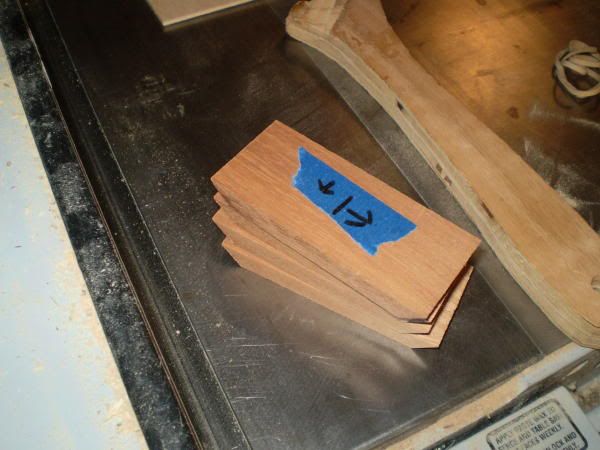
So next slide your square end up against the stop block and you are ready to make the first cut. I cut all 4 of miy sides the same length - I'm going to use this as a paper clip box for my desk at work. I like to mark all my pieces with the number of the side and I also put an arrow that shows which edge is up.

Photobucket

Now that they are all cut square it's time to cut the miter - so you need to reset your blade to 45 degrees.

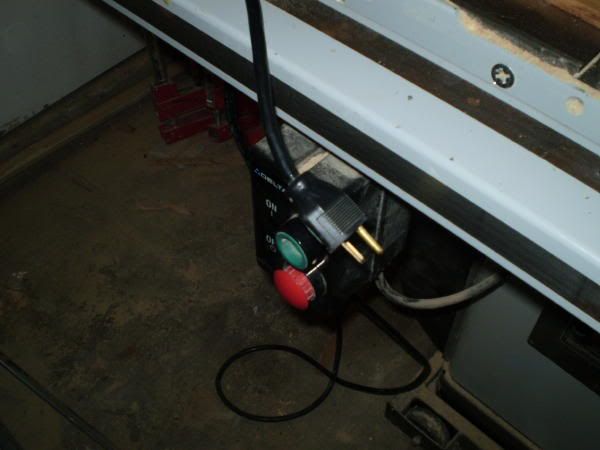
Here's my safety talk for the day-whenever I change my blade settings - or anytime my hands are going be near the blade for set up - I unplug the saw. No sense taking any chances.

Photobucket

After I set the blade to 45 I run it through my fence to give me a 45 kerf to set my stop block with. You can see from the next picture where to set the piece.

Photobucket

This next shot shows an area of concern. See how close the stop is to blade?

Photobucket

You need a way to hold the wood down against the table as it passes through the blade. You could be tempted to do this …

Photobucket

BUT DON'T! It's not safe. First off - your hand is to close to the blade, secondly your body is unbalanced. It's safer to use a second clamp to to hold down the work piece. Here is a shot from the front of the saw and from the back.

Photobucket

Photobucket

Once set up run your piece through the blade. Completely through the blade - don't stop until the board is past the back of the blade.

Photobucket

The next picture is not very good - but the cut should give you a knife's edge for a nice crisp corner.

Photobucket

Someone asked me how to cut one side then the other side - how to move the piece after the first cut.

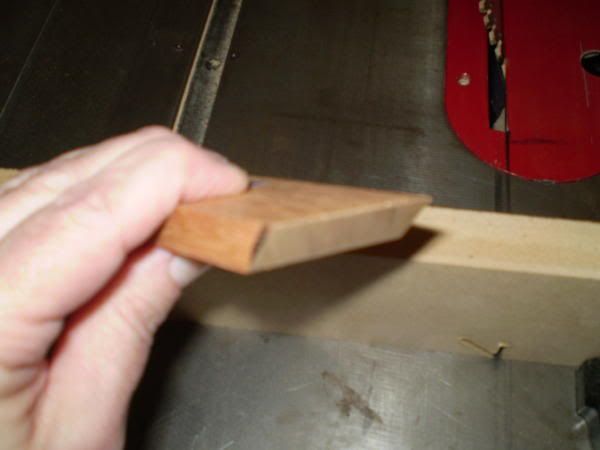
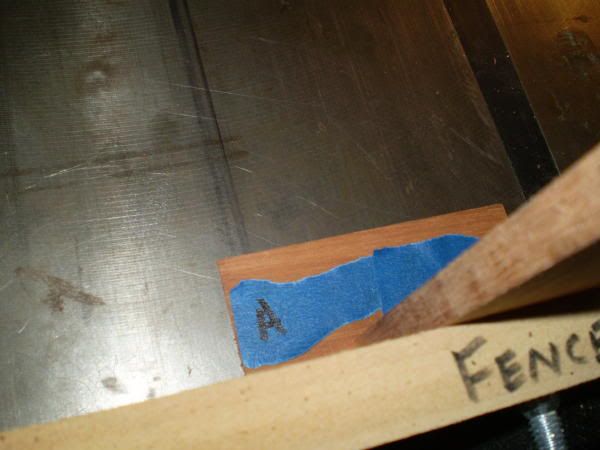
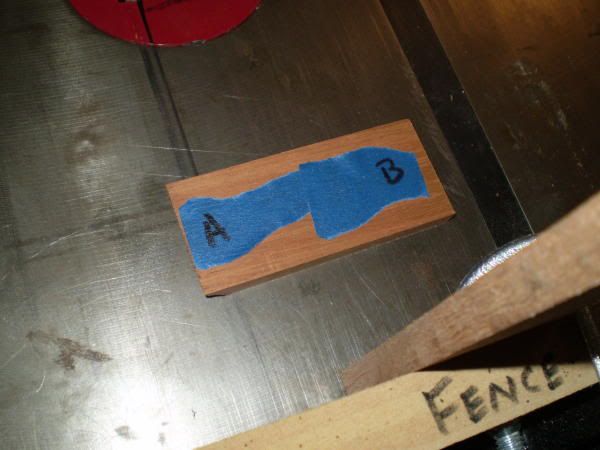
I've marked the piece with an "A" and a "B". I cut the first side.

Photobucket

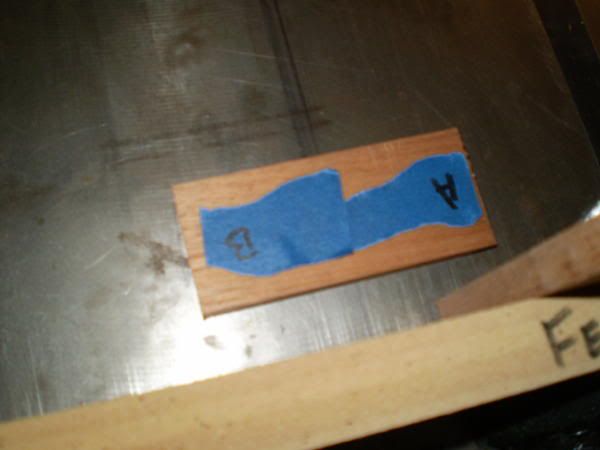
Then slide the board out and twist it to the left.

Photobucket

You can see that once twisted - the "B" is upside down. I have not lifted the board off the table - just turned it.

Photobucket

After the second cut - this is what you should have.

Photobucket

First test corner.

Photobucket

Here are the sides held together with rubber bands - top & bottom shots.

Photobucket

Photobucket

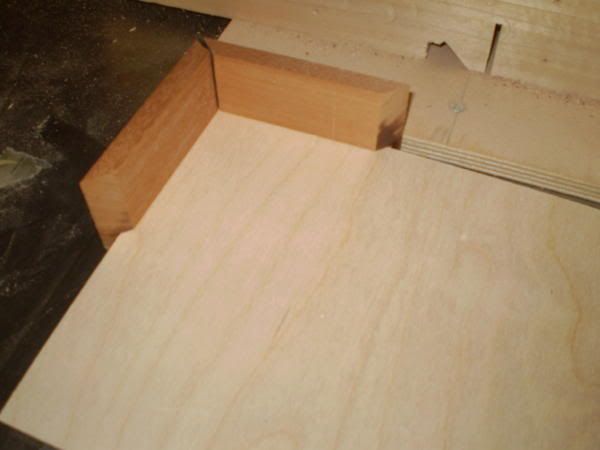
This corner is what you want to end up with.

Photobucket

Photobucket

If your corner does not turn out so well - there are ways to fix it. I'll try to cover that another time.

One last little point - look at the saw kerf in this picture.
Photobucket

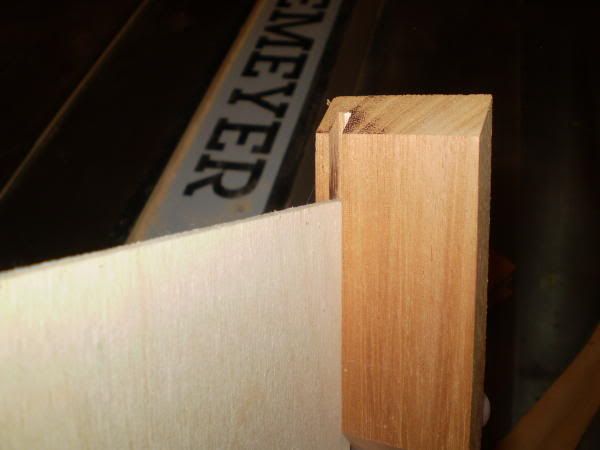
See how it makes a little "v" at the top? That's not a bad thing for a complete through cut - but when it comes to making the key cuts in the corners later in the process - you'll have to make some adjustments for that "V." If you don't have a flat top blade, there are ways around it.

As always, comments, questions and suggestions welcome. This is only one way to get a box made. There are many, many others. I hope this helps answer a few questions I've received.
 
#118 ·
I don't know what the boo boo is but that is a great tutorial.

A couple of guesses.
Your forgot to plug the saw back in.
You forgot to cut the dado for the bottom of the box.

GO BUCKS!! BEAT MICHIGAN STATE!!!
 
#121 ·
Making a box tutorial continued - left out something

As anyone who has tried to write a detailed blog knows, you can't think of it all. Seems I missed an important part of setting up your miter gauge to get a good miter corner.

Someone IM'd me and said he was having trouble getting a good corner. The trouble may be that the miter gauge is not set corectly. The gauge has to be set 90 degrees to the blade.

1) use a square and make sure your blade is set at 90 degrees.
2) move your gauge/fence up toward the blade.
3) lay a square against the blade and the fence.
4) adjust the miter gauge as necessary. It should sit 90 degrees to the blade.

If your miter gauge/fence is not set at 90 - it won't ever matter whether you reset the blade perfectly to 45 for the perfect cut. Long and short - the fence needs to be 90 and the blade needs to be 45 to make the best miter corner.

Take heart - it can be annoying having to get all these angles right. But it can be done. The miter gauges that come with the saws are not the best - they are really an afterthought. If nothing else, struggling setting up the miter gauge to cut angles should inspire you to make a table sled.

Hopefully this helps.
 
#123 ·
Box making tutorial continued - doing the bottom

Time to put the bottom in the box. On a typical box project, I cut the bottom groove before I cut the mitered ends. The reason for this is just safety and ease of pushing through the blade. You can see here that the chance exists to pop the piece off the table - it the miter were not there, that chance would be eliminated. This picture is exaggerated as it's hard to make the piece do the flip at the same time as taking the picture.

Photobucket

The box material I'm using is small enough to use a 1/8" bottom panel. I like to have my groove set the thickness of the bottom panel from the bottom of the piece. Maybe a scooch more, but not much. I don't measure this distance. I use the bottom panel itself to set my fence.

Photobucket

I set my height to just shy of 1/2 the thickness of the material.

Photobucket

When I get ready to cut, I make sure my pieces are stackied so that the bottom edge is in the right position when I pick it up.

Photobucket

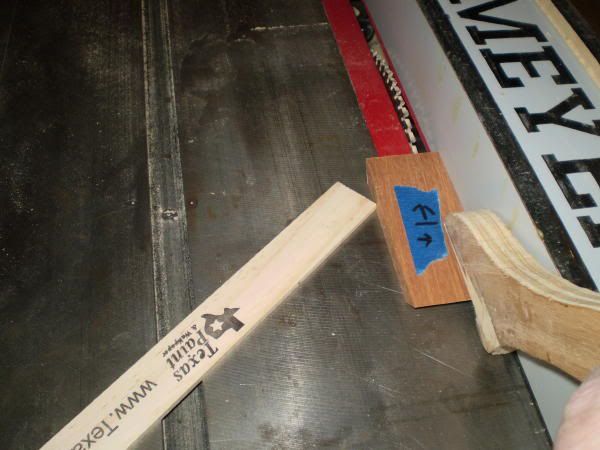
Using a push stick is a must as is a "featherboard." I'm using a paint stick as a feather board here. Some would cringe at this as they'd prefer to use a featherboard that is secured to the top in one fashion or another. But the fellow LJ who asked me to do this blog has little funds and limited materials - I wanted to show him you could do what he wants to do with very little. With that said - safety is paramount - so if you do not feel comfortable with this type of featherboard - you shouldn't try it.

Photobucket

My bottom material is 1/8" and my blade is 1/8" So in theory I should be able to make one pass over the blade and have a good slot to place the bottom. But as you can see - this is not necessarily true.

Photobucket

To overcome this - simply move your fence over a tiny bit, not much. You don't want your bottom too tight - nor too loose. I moved my fence over about a 1/32nd.
Photobucket

So now to cut the bottom to size. There are numerous ways to do this. You can simply put two sides together and slip in your bottom material and make tick marks on where to cut.

Photobucket

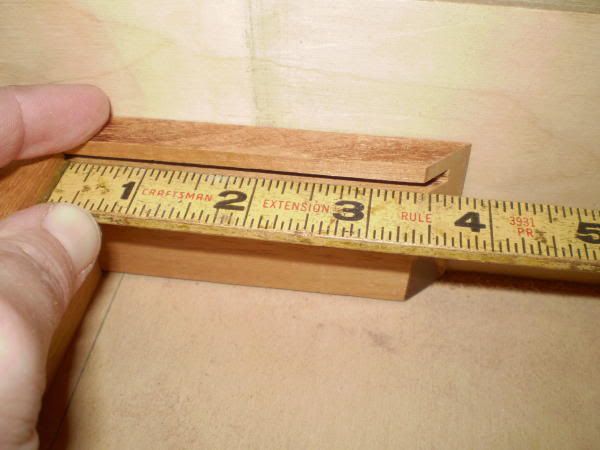
Or you can put two sides together and measure. Here I've inserted the rule into the groove.

Photobucket

This is not precise measuring - I tend to sneak up on the final size. Takes a little longer - but I've got lots of time. You can see here that I've over shot my mark a little. My corners don't come together.

Photobucket

I snipped a little off two edges and now my corners meet nicely.

Photobucket

Next is simply gluing up. I'll repost the pictures here - but previous blog entries tell how I do this.

Photobucket

Photobucket

Photobucket

Photobucket

Photobucket

Photobucket

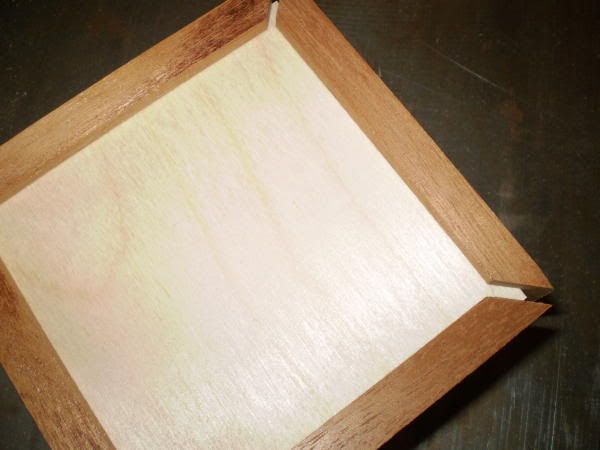
Of course, you want to put your bottom in before you close up the box!

As always - any comments welcome. This is only one way to do the job. Hope it helps.
 
#127 ·
Keeping track of that pesky little part and a little sanding tip

Sometimes I have to remind myself just how much common sense goes into making my woodworking enjoyable and less tedious.

As most of you know I'm making a small cabinet for a friend's Wii/TV set up. Well, I'm going to finally use that set of CMT rasied panel cutters. That, of course, requires a 1/2" collett for my router table. The bits and the router table were quite easy to find (once you clear away the dust). That pesky 1/2" collet, however, was not. In fact, I spent the better part of an hour looking for the little thing. I very seldom use it, but when I do, it's always the same thing - where is it? Where did I lay it down last time? So now, I've come up with a very simple, common sense solution that many of you probably already use. I used a bit of string and tied it into a loop, then ran the loop through the center of the collett - then ran the other end of the loop through the loop under the collett - tightened it and hung it on the s-hook I use to keep my other table tools handy. Problem solved.

Photobucket

Now onto that little sanding thing I finally figured out. I have to clean up all the parts for the door frames, panels, drawer front and base pieces. I've got them milled to thickness and am ready to cut to final width/length. But since I'm still not quite up to smoothing every piece with a hand plane (getting there though!) I need to use my sander. The thought of sanding all those small pieces to get out mill marks was daunting. Then it hit me, sand all the big pieces before you cut them into little pieces! GENIUS I KNOW! I know I'll have to do a little finish work on the sanding once the parts are cut to size and routed, but it's a lot less now that I've already sanded them through 150 grit. This is the pile I'm working with. Some very pretty cherry.

Photobucket

Well that's all the immense wisdom I can impart to my web friends tonight. I wish someone had told me all this a long time ago!!!
 
#135 ·
Tearing it down to put it together... just a musing

This is just a little rambling on my part - trying to make a little sense of something I stumbled onto that has helped me a bit in my woodworking adventure.

Recently, I've been reading lots and lots of "feel good" books and books on how to lift your own spirits and those warm fuzzy books and articles to help a person get a grip on things. After my accident, I allowed everything to turn very negative and blah in life. So I decided to turn that around and just inundate myself with positive, uplifting and bright things. Whether you believe in that sort of thing helping or not, is not important. All I can tell you it has helped me 100% turn myself around and get back on the path of feeling good, being good and being fully alive. It's gotten me back to exercising, losing the excess tonnage I put on, I'm not on any medications, my diet is healthy again, I smile more, I'm more helpful to others around me, my job is going so much better, I'm having the time of my life with friends and family, etc. etc. - you get the picture.

One little thing in all that has really given me a different look on my woodworking was a question on how you look at things - that question was - "what do you really see?" When I look at a set of plans I see the lines, the measurements, etc. I don't see the little things among all those lines, etc. I've found that if I study the plans in depth step by step its a whole lot easier than just looking and seeing it. Now let me explain the "in depth" part.

Sitting there at your computer - pick up any object on your table, anything at all. Now put your computer aside and pull out a piece of paper and a pencil/pen. Study that object and start writing down everything you notice/see about that object.

For example-- I just picked up my TV remote and this is what I see:

1) it's rectangular
2) it's gray on the front
3) it's black on the back
4) it's skinny - 1.5"
5) it has 4 colors of buttons
6) it has round buttons
7) it has square buttons
8) it has rectangular buttons
9) it has numbers on the buttons
10) it has lettering on the buttons
11) it has lettering on the body
12) it has little arrows on the body
13) it has little rectangles on the body
14) its has words on the body
15) It has a Westinghouse symbol on the body
16) the Westinghouse symbol is round with a "W" in the circle
17) it has 54 letters on the body
18) it has 10 numbers on the body
19) it has a battery compartment
20) it has two double A batteries inside
21) It has two little stub feet on the back

on and on, I could probably come up with 10+ other things to list. Do you see where I'm going? If you are starting out on a new project, one you've never done before, and if you can tear each step, and each diagram apart piece by piece and really see it for it's essential simplicity - you can make anything you want! Everything that looks complicated really isn't if you can break it down into very small parts.

Now understanding your project plans in this depth--is one thing-carrying them out is another. But there should be no reason that you can't carry out anything that you've studied this in depth. You just have to break down each step of the physical doing in the same way you broke down the studying. I think it will really slow down the process - but I also think that you'll learn more, enjoy the process more and most assuredly enjoy the finished project more.

I've been doing this on a couple of projects that I'm working on now - one in the shop and one out-- and it's helping me to really see and understand what I'm doing.

Just my rambling - but I hope this gives you something to ponder.

As always, thoughts and comments welcome.
 
#136 ·
Betsy that makes so much sense that it's scary. Seems like that approach to life would make all that we do seem easier and we would end up with better results. I plan on adopted your philosophy and see what happens.

Happy to hear that you are on the mend and life is back to normal.
 
#144 ·
Pattern routing and using carpet tape

Well - it's been six months or so since I've been able to work in the shop. So I thought I would start with a project that I am very familiar with and knew I'd could do and be successful. Alas--another set of Adirondack chairs. I need a new set anyway.

So I'm getting all my stuff together and remembering that the last time I made the chairs I had some trouble with my tape not always holding all the way through a pattern cut. You know how it works, you put on several strips of tape, line up your work pieces, press down on it hard, pick it up and shake it making sure it's good and stuck. Then you start routing and you realize that things are not quite right - the tape slipped!

Anyway I know this will not help everyone in every project, but I thought I'd share anyway.

My chair templates already have the holes drilled for the dowel pegs so that gave me an idea. I still use the tape, but I add a bit of a back up. It dawned on me that I could screw my template to the work piece using a "washer" of sorts by attaching the washer through the already drilled template holes. This is what I did.

Photobucket

This is how I used them.

Photobucket

I used two "washer" per template since I figured if my tape slipped - one washer may just act as a pivot point and still mess up my piece.

After I router, I removed the washers then used my template to drill my peg holes, then removed the tape. It adds an extra step, but it gave me a little bit of confidence knowing my template would not slip and I had no problem.

I can't use this technique for every job - but for this particular job it worked great. Hope this gives someone else some idea for their projects.