How To Apply Hardwood Edging To Sheet Goods
![Image]()
Shelving, drawer fronts, utility cabinet tops. These are typical items that get built with plywood or other sheet goods such as melamine. The convenience of using sheet goods is great, but one downside is that quite often one or more of the edges must be covered. In this post I explain the process that I follow to apply hardwood edging to sheet goods. In this case I am covering the edges of melamine drawer fronts with poplar.
This video shows me going through the process described here. Also, see my related video on flush trimming faceframes to cabinet sides.
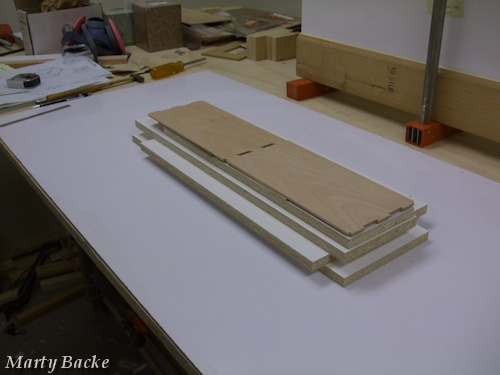
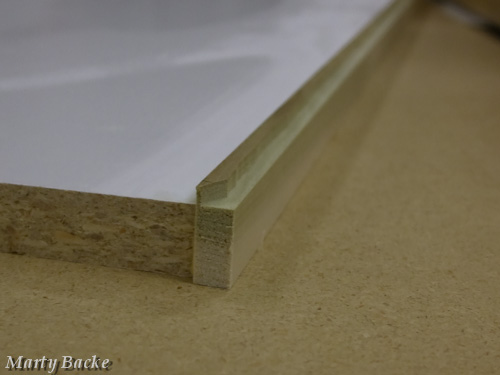
Whichever type of edging that you chose, dimension it to be approximately 1/4 inch thicker than the thickness of the sheet goods that you are using. My drawer fronts are made from 1/2 inch melamine, so I sliced off 1/4 inch pieces from 3/4 inch thick poplar stock.
You want the edging to be thicker than the sheet goods so that after the edging is applied it can be flush trimmed to the surface of the sheet goods. It would be near impossible to align edging that is the same thickness as the sheet goods.
Glue-Up Preparation - thinking not allowed
I always do a dry run of my glue-up, regardless of the apparent simplicity of the items to be glued. I don't want to be in the middle of the glue-up to find out that the clamp I was depending on was broken, or couldn't be found. And often you don't realize all of the cauls, clamps, jigs, etc. that will be needed until you actually do the glue-up (or dry run).
After the glue leaves the bottle the time is counting down, and that's not the time to be thinking about solutions to problems that might arise. So I try and simplify the process so that all I have to do is spread the glue and crank the clamp.
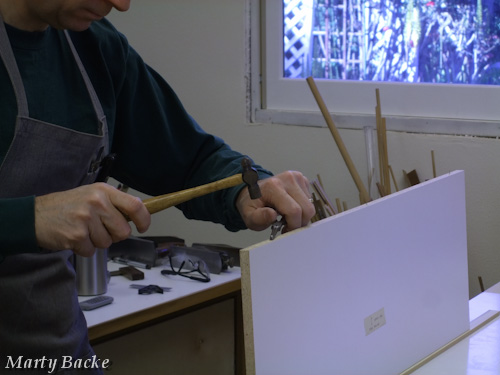
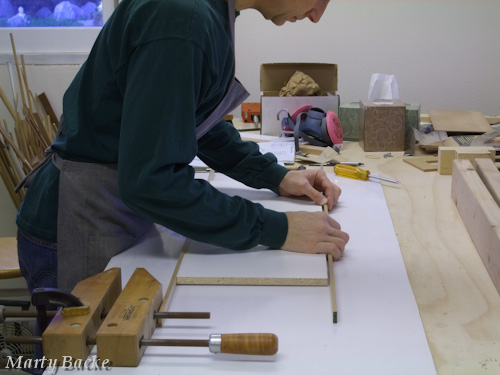
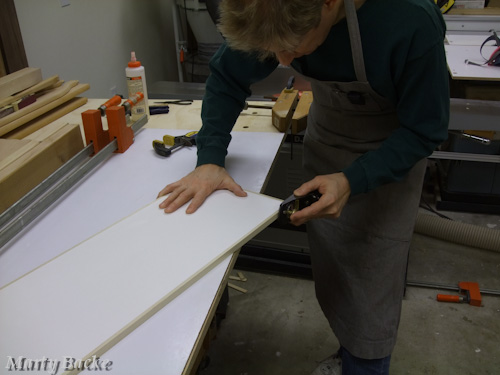
In this case, I need to be assured that the edging is overhanging both sides of the drawer front. If I were to just apply the glue and manually position the edging so that ~1/8 inch overhangs on both sides, that positioning would last for about 5 seconds. We know how slippery wood gets once the glue is applied.
I place a couple pieces of 1/8 inch thick spacer material on my table and then lay the drawer front on top. Then when I place the edging against the melamine there is a ~1/8 inch overhang on the top and bottom. But now I need a way to maintain this spacing as I manipulate the panel during the glue-up. What I do is nail three very small brads into each edge of the melamine.
![Image]()
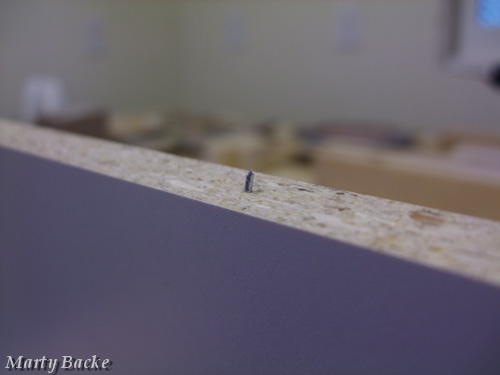
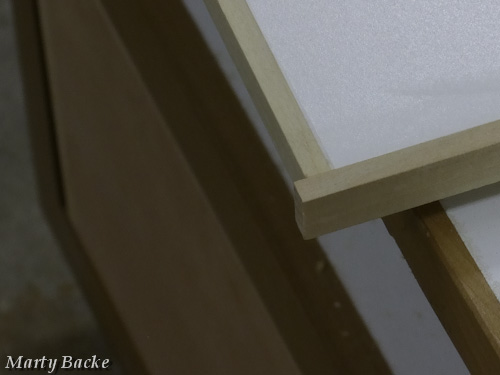
Using a heavy duty wire cutter I clip the heads off each nail, leaving ~1/8 inch protruding from the melamine.
![Image]()
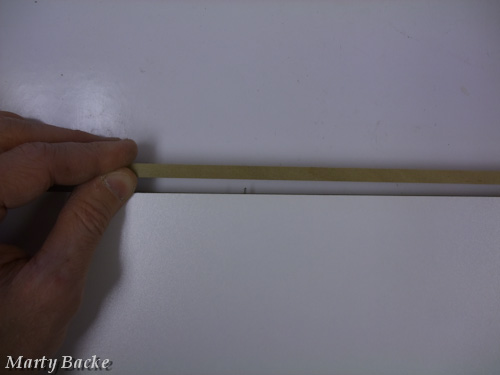
I then press the edging into the brads thereby registering it just where I want it to be (1/8 inch above and below the panel).
![Image]()
![Image]()
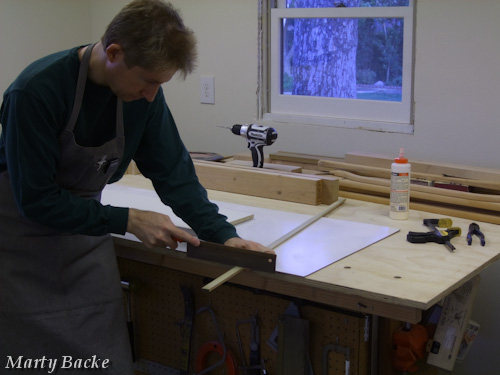
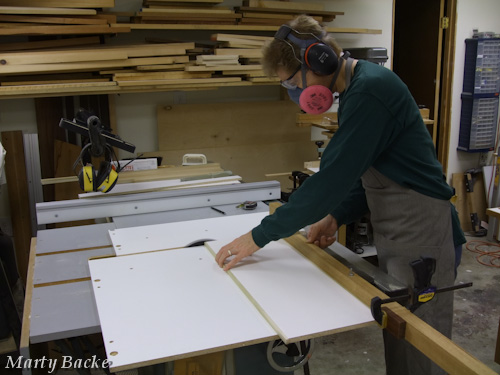
After aligning both pieces of the edging, I mark their length and cut them to size. In this case I used a hand saw because I didn't want to fill the shop with unnecessary sawdust, and it's soothing to do so.
![Image]()
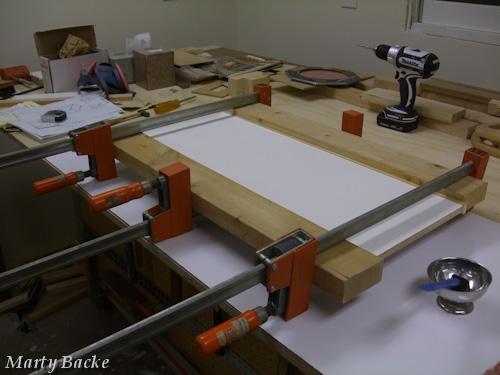
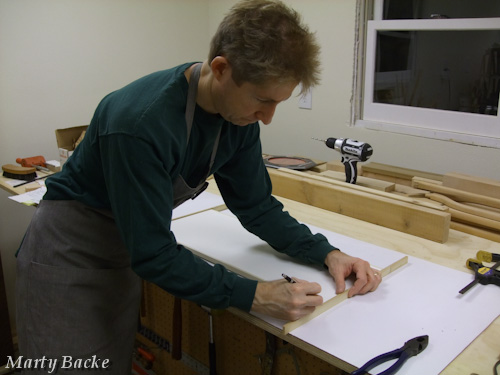
During my dry run I realized that I needed to raise the panel so that it would be centered within the cauls. I did this by stacking some scrap on the bench. This stack became my calibrated stack for all of the subsequent panels.
![Image]()
The glue is applied and the clamps are doing their thing. This will sit for about an hour before I move to the router table.
![Image]()
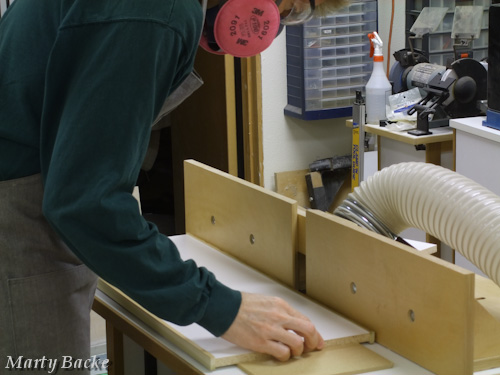
Flush Trimming at the Router Table
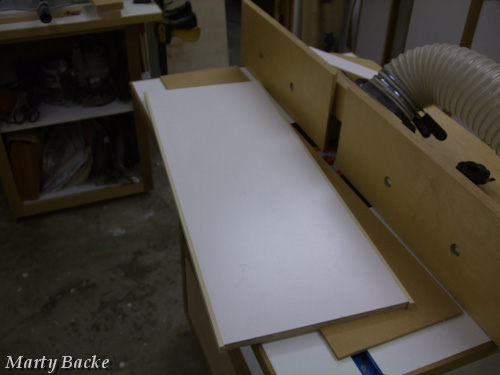
I cut a piece of 1/4 inch MDF that is narrow enough to allow the panel to slide over it - the MDF rides between the edging that is glued to the panel.
![Image]()
A mortising bit (not a straight bit) is installed in the router and its height is set ever so slightly below the surface of the melamine. Then the router table fence is adjusted to prevent the bit from touching the melamine - insurance in case some instability in the various materials allows the bit to enter the plane of the melamine surface. With the fence set properly the worst that can happen is a small dip in the edging. The melamine surface can never be disturbed.
Hopefully these pictures capture what I've written above. It's also discussed in the video.
![Image]()
![Image]()
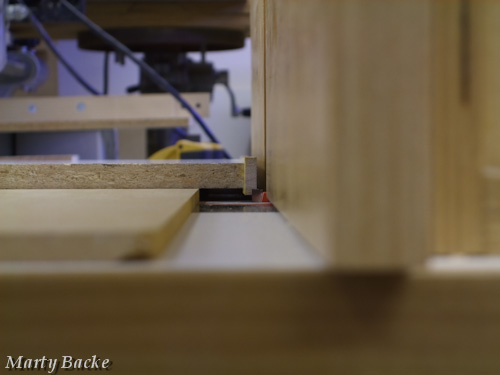
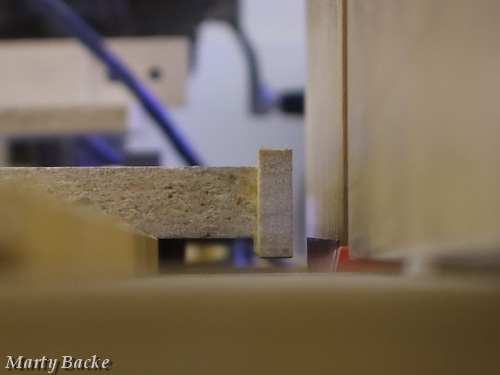
Before flush trimming the edging, I run each edge (four times for these two pieces of edging) across the router bit using a climb cut. This substantially reduces any chance of tear out, and is safe to do (in my opinion) when such small amounts of material is being removed with such a large panel. There's zero sensation of the panel wanting to be pulled from my hands.
![Image]()
Here you can see the edging after the climb cut.
![Image]()
After all four surfaces of the two edgings are flush trimmed, I take the panel to my table saw and cut them to final length (minus the width of the two edgings that will be applied - 1/2 inch in this case).
This guarantees that the edges of the melamine and end grain of the applied edging are perfectly flush. The last two pieces can then be glued to the panel following the same process used for the first two pieces.
![Image]()
Here I'm applying the edging to the ends of the panel, and gluing them in place.
![Image]()
![Image]()
After these pieces dry I flush trim them at the router table just as I did with the first two pieces. Then it's just a matter of sawing off the ends of the edging and planing them smooth.
![Image]()
![Image]()
![Image]()
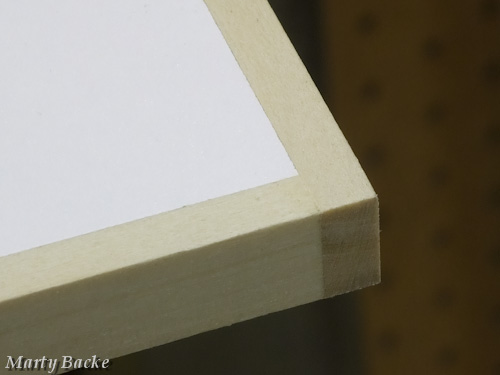
And here is the final result. Perfectly flush edging with no damage to the melamine. I'll do some light sanding and then apply my finish.
![Image]()

Shelving, drawer fronts, utility cabinet tops. These are typical items that get built with plywood or other sheet goods such as melamine. The convenience of using sheet goods is great, but one downside is that quite often one or more of the edges must be covered. In this post I explain the process that I follow to apply hardwood edging to sheet goods. In this case I am covering the edges of melamine drawer fronts with poplar.
This video shows me going through the process described here. Also, see my related video on flush trimming faceframes to cabinet sides.
Whichever type of edging that you chose, dimension it to be approximately 1/4 inch thicker than the thickness of the sheet goods that you are using. My drawer fronts are made from 1/2 inch melamine, so I sliced off 1/4 inch pieces from 3/4 inch thick poplar stock.
You want the edging to be thicker than the sheet goods so that after the edging is applied it can be flush trimmed to the surface of the sheet goods. It would be near impossible to align edging that is the same thickness as the sheet goods.
Glue-Up Preparation - thinking not allowed
I always do a dry run of my glue-up, regardless of the apparent simplicity of the items to be glued. I don't want to be in the middle of the glue-up to find out that the clamp I was depending on was broken, or couldn't be found. And often you don't realize all of the cauls, clamps, jigs, etc. that will be needed until you actually do the glue-up (or dry run).
After the glue leaves the bottle the time is counting down, and that's not the time to be thinking about solutions to problems that might arise. So I try and simplify the process so that all I have to do is spread the glue and crank the clamp.
In this case, I need to be assured that the edging is overhanging both sides of the drawer front. If I were to just apply the glue and manually position the edging so that ~1/8 inch overhangs on both sides, that positioning would last for about 5 seconds. We know how slippery wood gets once the glue is applied.
I place a couple pieces of 1/8 inch thick spacer material on my table and then lay the drawer front on top. Then when I place the edging against the melamine there is a ~1/8 inch overhang on the top and bottom. But now I need a way to maintain this spacing as I manipulate the panel during the glue-up. What I do is nail three very small brads into each edge of the melamine.
Using a heavy duty wire cutter I clip the heads off each nail, leaving ~1/8 inch protruding from the melamine.
I then press the edging into the brads thereby registering it just where I want it to be (1/8 inch above and below the panel).
After aligning both pieces of the edging, I mark their length and cut them to size. In this case I used a hand saw because I didn't want to fill the shop with unnecessary sawdust, and it's soothing to do so.
During my dry run I realized that I needed to raise the panel so that it would be centered within the cauls. I did this by stacking some scrap on the bench. This stack became my calibrated stack for all of the subsequent panels.
The glue is applied and the clamps are doing their thing. This will sit for about an hour before I move to the router table.
Flush Trimming at the Router Table
I cut a piece of 1/4 inch MDF that is narrow enough to allow the panel to slide over it - the MDF rides between the edging that is glued to the panel.
A mortising bit (not a straight bit) is installed in the router and its height is set ever so slightly below the surface of the melamine. Then the router table fence is adjusted to prevent the bit from touching the melamine - insurance in case some instability in the various materials allows the bit to enter the plane of the melamine surface. With the fence set properly the worst that can happen is a small dip in the edging. The melamine surface can never be disturbed.
Hopefully these pictures capture what I've written above. It's also discussed in the video.
Before flush trimming the edging, I run each edge (four times for these two pieces of edging) across the router bit using a climb cut. This substantially reduces any chance of tear out, and is safe to do (in my opinion) when such small amounts of material is being removed with such a large panel. There's zero sensation of the panel wanting to be pulled from my hands.
Here you can see the edging after the climb cut.
After all four surfaces of the two edgings are flush trimmed, I take the panel to my table saw and cut them to final length (minus the width of the two edgings that will be applied - 1/2 inch in this case).
This guarantees that the edges of the melamine and end grain of the applied edging are perfectly flush. The last two pieces can then be glued to the panel following the same process used for the first two pieces.
Here I'm applying the edging to the ends of the panel, and gluing them in place.

After these pieces dry I flush trim them at the router table just as I did with the first two pieces. Then it's just a matter of sawing off the ends of the edging and planing them smooth.

And here is the final result. Perfectly flush edging with no damage to the melamine. I'll do some light sanding and then apply my finish.