Getting on Target
During the 2015 Plane and Spokeshave Swap, I built a couple of what came to be called Transitional Infill Shooting Planes.

A few people asked for a blog, but there weren't enough pics to really document the build, so it wasn't done. Well, after completing a few other projects, I decided to build one more and will try to do a detailed enough blog that someone else could follow along and build their own shooting plane.
Lets get started.
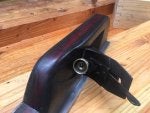
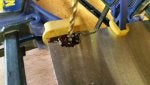
Gathering materials. First thing is to find a donor transitional plane. These can usually be found very inexpensively where the wood is shot, but the iron parts are salvageable. From this, you will need the frog assembly, frog screws, iron assembly and lever cap.
![Image]()
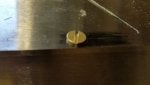
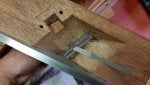
For those that don't know, the irons on a transitional are the same as iron bodied planes, but the cap iron has the adjustment hole up higher. If you have a frog, but no iron assembly, you can modify the cap iron from an iron plane by making a second adjustment hole. You'll know the extra hole is there, but it'll be covered by the lever cap when in use.
Any width or brand of iron & frog can work for this build, as long as it uses a screw for the lever cap to provide tension. (There are some out there that have a cross pin and screw cap. That style will not work for this kind of build.) On the first two planes, one had a 2-3/8 Stanley and the other a 2-1/4 Sargent. This build is being done with a 2in wide set from a Union.
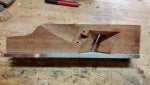
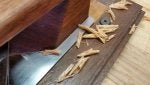
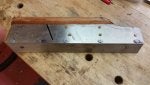
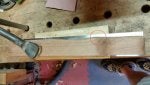
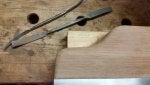
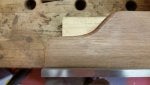
Next part needed will be the infill wood. For this build, I'm using a piece of jatoba. The blank needs to start out at least 1-1/2 inches wider than the iron (so 3-1/2 wide for a 2inch iron, 4 inches wide for a 2-3/8 iron) by 1-3/4 thick and a bit longer than the finished piece. This plane will end up about 15 inches long, so I'll start with a rough blank that is at least 18 inches. If you want a fancier look, or just don't have a big enough single piece, feel free to do a laminated blank. Both of the original planes were laminated blanks. The stiffer and heavier the wood, the better off you will be in the end, but any stable hardwood will work.
Next, there are the fasteners. The list for this build is:
Qty 5 - 10-24×1/2 steel phillips flat head machine screws
Qty 5 - 10-24×1/2 solid brass slotted flat head machine screws
Qty 5 - #10×1-1/2 steel phillips flat head wood screws
Qty 5 - #10×1-1/2 solid brass slotted flat head wood screws
Qty 10 - #8×1 steel phillips flat head wood screws
Qty 10 - #8×1 solid brass slotted flat head wood screws
Qty 2 - #10×1-1/4 slotted round head wood screws (these are for attaching the frog. If you can salvage the screws from the donor transitional, that is probably best, otherwise you'll need to get others)
You'll quickly notice the duplicates in different materials. That is because you want solid brass for the final assembly, but do not want to use the softer metal when doing preliminary work-that is what the steel fasteners are for. Also, make sure to get slotted solid brass, not just brass plated, for the final assembly work. The heads will be ground off and brass plated would look silly. Additionally, the slotted heads are not cut as deep as a phillips. If you try to use brass phillips screws, it's not possible to grind them all the way down to get rid of the dimple.
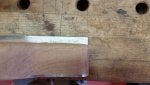
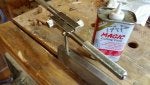
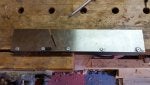
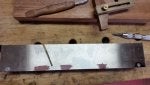
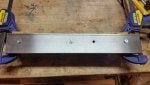
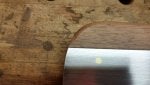
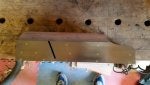
For the metal, I used precision ground O1 steel. The precision ground costs a bit more than basic flat stock, but is totally worth the extra cost for the time savings and more accurate product. I purchased from Enco, but there are other sellers out there if you prefer to use them.
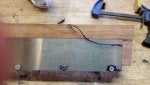
The base is 3/8 thick by 2 inches wide. The side plate is 1/8 thick and needs to be ~1/2 inch wider than the iron and frog. So for this build, 2-1/2 inches. If using a 2-3/8 set, you'll want 3 inch wide steel. The steel comes in 18in long pieces, so just about the right size. If you are going to build additional planes, buying the 36in long pieces will save quite a bit.
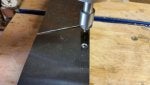
Do yourself a favor and when ordering the metal, order the taps you'll need for the machine screws and a tap extractor, as well. The taps carried by the industrial suppliers are far better quality than those you can find at your local big box or hardware store. The tap extractor will quickly pay for itself when (not if) you break off a tap. Doesn't seem to matter how careful you are, a tap will break at the worst possible time. I like to start with a plug tap and finish off with a bottoming tap.
Note:
If you absolutely do not want to do the metal work, because of fear, lack of tools or time, a perfectly usable all wood shooting plane can be built with the same form and ideas by following the first part of the blog and gluing on a wooden base plate in place of the 3/8 steel. You'd want to use a very strong and hard wood (lignum vitae would be ideal, but there are other species that would work well, too) and would lose the advantages the steel brings, such as added mass and wear resistance (end grain is murderously hard on wooden soles) but would cut construction time down to just a few hours and still have a good tool for occasional use.
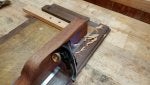
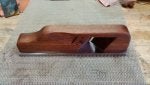
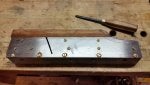
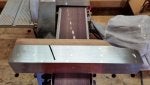
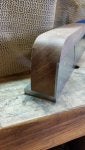
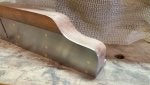
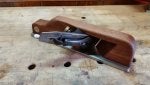
OK, if you've made it this far without falling asleep, then congrats, you're well on your way to building one of these:
![Image]()
Oh, yeah. I've got a Sketchup file that shows the basic construction. If you are interested in a copy, drop me a PM.
Next installment: Shooting off your mouth
During the 2015 Plane and Spokeshave Swap, I built a couple of what came to be called Transitional Infill Shooting Planes.
A few people asked for a blog, but there weren't enough pics to really document the build, so it wasn't done. Well, after completing a few other projects, I decided to build one more and will try to do a detailed enough blog that someone else could follow along and build their own shooting plane.
Lets get started.
Gathering materials. First thing is to find a donor transitional plane. These can usually be found very inexpensively where the wood is shot, but the iron parts are salvageable. From this, you will need the frog assembly, frog screws, iron assembly and lever cap.
For those that don't know, the irons on a transitional are the same as iron bodied planes, but the cap iron has the adjustment hole up higher. If you have a frog, but no iron assembly, you can modify the cap iron from an iron plane by making a second adjustment hole. You'll know the extra hole is there, but it'll be covered by the lever cap when in use.
Any width or brand of iron & frog can work for this build, as long as it uses a screw for the lever cap to provide tension. (There are some out there that have a cross pin and screw cap. That style will not work for this kind of build.) On the first two planes, one had a 2-3/8 Stanley and the other a 2-1/4 Sargent. This build is being done with a 2in wide set from a Union.
Next part needed will be the infill wood. For this build, I'm using a piece of jatoba. The blank needs to start out at least 1-1/2 inches wider than the iron (so 3-1/2 wide for a 2inch iron, 4 inches wide for a 2-3/8 iron) by 1-3/4 thick and a bit longer than the finished piece. This plane will end up about 15 inches long, so I'll start with a rough blank that is at least 18 inches. If you want a fancier look, or just don't have a big enough single piece, feel free to do a laminated blank. Both of the original planes were laminated blanks. The stiffer and heavier the wood, the better off you will be in the end, but any stable hardwood will work.
Next, there are the fasteners. The list for this build is:
Qty 5 - 10-24×1/2 steel phillips flat head machine screws
Qty 5 - 10-24×1/2 solid brass slotted flat head machine screws
Qty 5 - #10×1-1/2 steel phillips flat head wood screws
Qty 5 - #10×1-1/2 solid brass slotted flat head wood screws
Qty 10 - #8×1 steel phillips flat head wood screws
Qty 10 - #8×1 solid brass slotted flat head wood screws
Qty 2 - #10×1-1/4 slotted round head wood screws (these are for attaching the frog. If you can salvage the screws from the donor transitional, that is probably best, otherwise you'll need to get others)
You'll quickly notice the duplicates in different materials. That is because you want solid brass for the final assembly, but do not want to use the softer metal when doing preliminary work-that is what the steel fasteners are for. Also, make sure to get slotted solid brass, not just brass plated, for the final assembly work. The heads will be ground off and brass plated would look silly. Additionally, the slotted heads are not cut as deep as a phillips. If you try to use brass phillips screws, it's not possible to grind them all the way down to get rid of the dimple.
For the metal, I used precision ground O1 steel. The precision ground costs a bit more than basic flat stock, but is totally worth the extra cost for the time savings and more accurate product. I purchased from Enco, but there are other sellers out there if you prefer to use them.
The base is 3/8 thick by 2 inches wide. The side plate is 1/8 thick and needs to be ~1/2 inch wider than the iron and frog. So for this build, 2-1/2 inches. If using a 2-3/8 set, you'll want 3 inch wide steel. The steel comes in 18in long pieces, so just about the right size. If you are going to build additional planes, buying the 36in long pieces will save quite a bit.
Do yourself a favor and when ordering the metal, order the taps you'll need for the machine screws and a tap extractor, as well. The taps carried by the industrial suppliers are far better quality than those you can find at your local big box or hardware store. The tap extractor will quickly pay for itself when (not if) you break off a tap. Doesn't seem to matter how careful you are, a tap will break at the worst possible time. I like to start with a plug tap and finish off with a bottoming tap.
Note:
If you absolutely do not want to do the metal work, because of fear, lack of tools or time, a perfectly usable all wood shooting plane can be built with the same form and ideas by following the first part of the blog and gluing on a wooden base plate in place of the 3/8 steel. You'd want to use a very strong and hard wood (lignum vitae would be ideal, but there are other species that would work well, too) and would lose the advantages the steel brings, such as added mass and wear resistance (end grain is murderously hard on wooden soles) but would cut construction time down to just a few hours and still have a good tool for occasional use.
OK, if you've made it this far without falling asleep, then congrats, you're well on your way to building one of these:
Oh, yeah. I've got a Sketchup file that shows the basic construction. If you are interested in a copy, drop me a PM.
Next installment: Shooting off your mouth


")