LumberJocks Woodworking Forum banner

On Repairing a Broken Plane Tote. Can it be done perfectly/seamlessly ? Tell me how.

15K views 15 replies 9 participants last post by  donwilwol  
#1 · (Edited by Moderator)
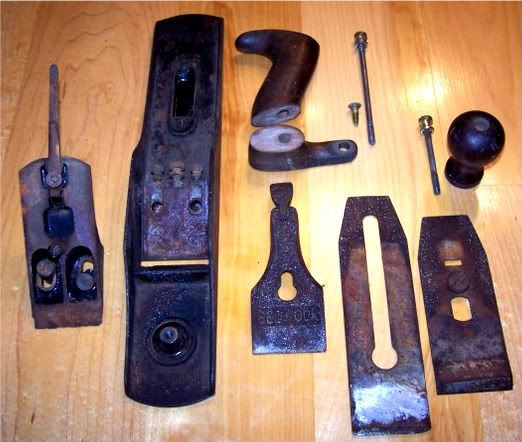
I finally have a tote that is broken cleanly in half.

Image


I want to repair it so that I can't tell it was ever broken… and hopefully so well that it will never break again (or not even fool with it at all). Is this too much to ask ?

Have any of you repaired a tote that well ? Please share your success and expertise.
 

Attachments

#2 · (Edited by Moderator)
Easy, bro. CA glue or epoxy, clamp, sand down, shellac, wax, done. You'll never know it happened.

Ask Dan. I seem to remember him posting some invisible repairs.

Some wood, a drillpress, a Shinto rasp, and some sandpaper…you can make your own very quickly.

Ask Philip Marcou about this one…his look perfect, not surprisingly.
 
#4 · (Edited by Moderator)
A clean break can be repaired so that you have to look hard to find it….I've never managed to get one fixed where I couldn't tell at all. I just use plain ole yellow wood glue and a clamp, sand it, and shellac it.

Image

Image
 
#6 ·
Looks like a very clean break. You shouldn't have any problem fixing that one. Clean the gluing surfaces with mineral spirits or cleaner of choice and make sure its nice and clean. Often a lot of gunk will build up in the cracks I will use wire brush/tooth brush to make sure I get all that out.

I have only used regular wood glue to fix mine and its worked just fine.

To clamp it all you have to do is screw it back onto the plane and tighten the screw. Easy as that. I have seen guys use clamps and jigs and IMO thats a waist of time. The clamping pressure of just screwing it back on the plane is more then enough. Once it drys take it off and sand really well.

Here is one of my fixes. Broke in the same spot yours did..
Image


Image


I think my fix here is about as good as you can get. Only a slight crack visible when looking close. I use the plane often and the tote is very solid and I even forgot it was broken until you posted this. I don't even notice the crack when I am using it.
 

Attachments

#7 ·
I've tried a couple different ways. I blogged about it once. Its like any wood repair. If its a clean break and you can clamp it straight, its as close to invisable as you can get. I've also had some not so clean. I even had one re-break. I took it back apart, wire brushed it (it was pretty dirty, thus the break) and re-glued. Its held ever since.
 
#9 · (Edited by Moderator)
David; Sorry, it can't be done. Send the whole stinkin' works to me and forget this ever happened… :)

But seriously…

The secret is in the clamp up. Don W (link is above!) shows how he created a curved block that matched up with the top curve of the tote to get it parallel with it's base. Then it could be clamped up in a face vise. Another picture shows a threaded rod through the tote and tightened up the glued joint to cure that way. Even pressure was the key to both.

Good Luck!
 
#10 ·
I have an old Stanley 4C that was my dad's. It's tote is broken just like your's, and the others shown here, but he apparently tried to fix it with resin or hyde glue at some point. I got it about 10 years after he passed away, and would like to restore it as well. Is the old glue a big problem? Can it just be carved or scraped out? I have to make a totally new knob because the old one is missing.

I realize that mine is not a BedRock, it's a just a common Stanley/Bailey, but I'd like to fix it because it was dad's and I don't have many of his old tools. A couple planes, and saws, a hand cranked grinder is about it.
 
#11 ·
The original stanley rosewood totes will take a sanding very well. You shouldn't have any trouble scraping off glue. There's nothing common about your Dad's Stanley; I'd do anything and everything to keep it serving your family in the shop.
 
#13 ·
I'll echo the rexmill site, loaded with info and pics, when I repaired the no.2 I used epoxy- but alas, as usual in my ww adventure I must have made a mistake and it re broke yesterday! But, if you have worked with epoxy before, then go for the epoxy :)
I may just duck tape mine lmao jk!
 
#14 ·
I finished the tote repair. It was successful.

Image


So here's what I did. I sanded by hand the exterior. I barely touched the faces of the break to the disk sander to get a straight plane on each. I applied SP10 to one side (pretty heavy so a bit would ooze out), then accelerator to the other side. I attached them aligned and pushed together as hard as I am able for 30 seconds. Done. Since I had the ooze around the "seam" and it did not come in contact with accelerator, I quickly sanded with 220 vertically all the way around the horizontal seam. I was making dust and dragging it into the small amount of CA ooze and it was mixing and dragging into the crack and filling with color from the solids. Kind of like burnishing, but with sandpaper and CA. I can repeat this process if needed, but I think it will be very hard to detect once finished.

Four coats of Deft spray…

Image


It's a keeper.
 

Attachments