Building Legs, Cutting Mortises
Well after taking second place at the Portland Woodworking Show with the last project, a cherry trundle bed, it was time to start the next project.
![Image]()
-
-
-
-
-
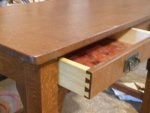
The current project is a small library desk for my son's room. He helped in the design phase, choosing corbels over spindles for the sides of the desk. We also have a special white oak board with a bullet lodged in it. Caden decided he wanted to incorporate it into the desk.
![Image]()
-
-
-
-
-
I am fortunate to have a stack of 400 b.f. of white oak to choose my stock from. My first task is to glue up some leg blanks. The finished legs are 2-1/2" square, so I glue up two sets of 3 planks.
![Image]()
-
-
-
-
-
Then I resaw some strips, and plane them to 1/4" thick. They will be used to veneer the legs.
![Image]()
-
-
-
-
-
I rip the planks into two blanks, and plane them down to 2-5/16" wide. Then I use clamping cauls to distribute the pressure as I veneer the blanks. Once dry, I trim the veneers with a flush trimming bit at the router table.
![Image]()
-
-
-
-
-
This is what the legs look like in their rough state. I batch plane the four legs down to 2-1/2" square, which leaves a thin 3/32" veneer. Do the math with me… 2-5/16" + 3/32" +3/32" = 2-1/2"
![Image]()
-
-
-
-
-
Once planed the jointline seems to disappear.
I did all of the planing by hand with an old Stanley plane.
Just kidding. I didn't do that.
![Image]()
-
-
-
-
-
Four legs complete, with quartersawn figure on all sides.
![Image]()
-
-
-
-
-
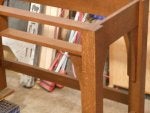
Then I mortised the legs to receive the stretchers.
![Image]()
-
-
-
-
-
Next up I will make the stretchers. Hopefully I can plane the board with the bullet without wrecking by planer knives! Maybe I'll pull out the old hand plane for that.
Well after taking second place at the Portland Woodworking Show with the last project, a cherry trundle bed, it was time to start the next project.
-
-
-
-
-
The current project is a small library desk for my son's room. He helped in the design phase, choosing corbels over spindles for the sides of the desk. We also have a special white oak board with a bullet lodged in it. Caden decided he wanted to incorporate it into the desk.
-
-
-
-
-
I am fortunate to have a stack of 400 b.f. of white oak to choose my stock from. My first task is to glue up some leg blanks. The finished legs are 2-1/2" square, so I glue up two sets of 3 planks.
-
-
-
-
-
Then I resaw some strips, and plane them to 1/4" thick. They will be used to veneer the legs.
-
-
-
-
-
I rip the planks into two blanks, and plane them down to 2-5/16" wide. Then I use clamping cauls to distribute the pressure as I veneer the blanks. Once dry, I trim the veneers with a flush trimming bit at the router table.
-
-
-
-
-
This is what the legs look like in their rough state. I batch plane the four legs down to 2-1/2" square, which leaves a thin 3/32" veneer. Do the math with me… 2-5/16" + 3/32" +3/32" = 2-1/2"
-
-
-
-
-
Once planed the jointline seems to disappear.
I did all of the planing by hand with an old Stanley plane.
Just kidding. I didn't do that.
-
-
-
-
-
Four legs complete, with quartersawn figure on all sides.
-
-
-
-
-
Then I mortised the legs to receive the stretchers.
-
-
-
-
-
Next up I will make the stretchers. Hopefully I can plane the board with the bullet without wrecking by planer knives! Maybe I'll pull out the old hand plane for that.


")