LumberJocks Woodworking Forum banner

Work Bench Build

80K views 127 replies 32 participants last post by  helluvawreck  
#1 ·
The Beginnings, where I come from, and where I'm going.

A Workbench… I figured it was about time I make one. I've been working with hand tools primarily for almost a year now, and my "workbenches" has had many forms. My primary work horse was the work mate. Now, this works, but is far from ideal.

Image


Image


Image


And so it goes on. I've also used a few other arrangements as well.
Parallel jaw clamps, clamped to a folding table, clamped to a porch support beam. This actually worked surprisingly well, until there was any sort of side pressure… then the end would start to dance around

Image


Image


Image


I've also used a sitting bench with a single clamp as a planning stop.

Image


Image


Ok, I think you've got the point. I've made do for some time now, in various different ways. I feel it's now time to get a real bench to work on. Thus begins the journey.

Here's the basic design. I will also add a leg vise, and an end vise
Image


That is all I've got for this one. I will have an update for some more progress in the coming days.
Thanks for checking it out!
 
#11 ·
Thanks everyone. I very much look forward to having a "real" bench to work on.
-

BHog, Not entirely oak, but mostly. I have an 8' piece of 1.5"x3.5" hard maple I picked up for $20 a few months ago, that I intend to use for the end caps, and back piece for the tool tray. I'm not sure what I'll do about the tool tray bottom yet, either. I was thinking about 1/4" plywood to keep the cost/thickness down, but I may T&G 1/2" boards instead…
-

Scott, I have watched that show several times (it's actually two episodes), and that's where I first saw this bench style. He did use rising dovetails, but I'm not sure if I'm confident enough to try that yet… I don't have a good tenon saw, so I'm going to try to keep things a little more simplistic. I do, however, intend to do "rising tenons" so to speak. So as to have the grain running full length of the tenon on the bench top, but again, I guess we'll see… I don't have a drill press, so it's not like drilling perfect 90 degree angles will be any easier than not :)
 
#13 ·
I like it a lot! Big shocker there. The splayed leg club is growing!

What is your reasoning for not having the End Caps extend all the way to the front? Also, if you stay with that idea there is an opportunity to dovetail the front too, just a thought.

I would go with wither poplar or pine for the well bottom, one wide board. Plywood will work well too but not as easy to work with hand tools.

This bench is going to be Great! I'll be watching eagerly.
 
#17 ·
Thanks Mauricio. I think I've said it before, but I was quite excited when I saw your bench build blog, after having watched the Woodwright episodes a few times :)

The reasoning for that was primarily because I don't know lol I haven't completely decided on that part yet, I'm pretty sure I'll have enough hard maple to do it, so I might, but I guess part of the reason was because I was originally going to try to leave the tool tray removable, but I'm not sure I'm going to stick with that, since a wagon and/or end vise would be an issue that way.
 
#18 ·
Glad to be of inspiration.
You can make it removable you just need to bolt on the end caps. And its a pain because I usually strip a bolt whenever I put it on or take it off.

Since your bench is on the short side it might make sense for you to use a face vise on the end, that will give you more clamping capacity.
 
#20 ·
I am fairly sure I'm going to go with a leg vise, eventually (might depend on the available cash when it comes to that) but as for the other end, I hadn't completely committed yet. I had been throwing the idea around of using a shoulder vise screw for a wagon, as that would be less space, but be a little more complicated to install. I'd also looked at those inset vises from LV too, really simple to install, but also not very cheap. That's something I'm going to have to figure out before I get too far… been reading Schwarz's workbench book, and studying up on all the different vises. What I want is a wagon, but I need to figure out if that's feasible from a practicality stand point.

-
Jason, I think if we're "buddies" then you will get notified, but as far as subscribing to a specific blog, I have no idea.
 
#21 ·
Good looking and a lot of work! A labor of love!
Are you going to post the plans in our plan posts so that other can use it?

I like the clamping method mainly because I used to do it that way too in my basement back in Illinois. My dad saw me do this and bought me a Zyliss vise.
Vise
But that was back in 1972 and they didn't cost that much!

A lot of people laugh at this vise, as I did at first, but it is very useful! You can make a vise as long in length as needed!
 
#23 ·
More Plans, Top Slab, and Starting Legs

So, as promised (though maybe a bit later than I had hoped)...

Here's another image of the plans I've got set forth. This still isn't 100% set in stone yet, and probably won't be, until I cut the joinery in the top for the legs. Thumb is a link to the larger version


Right, with that out of the way, two things were certain. The size of the slab/top, and the length/geometry of the legs. So I have at least started that much.

Cleaning up the face edge of the slab with my #4 1/2. It was a 12/4 slab of red oak that was 4' long and a little over 9" wide. It was planed to 2.75" thick when I got it.
Image


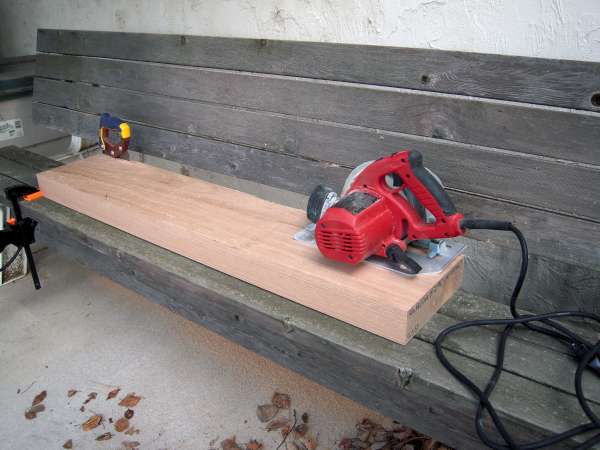
Then, I took to cutting the top to width. When I got it, it was around 9.5" wide on one side, and 9.75" on the other. So I used a straight edge guide and made 3 passes with the circular saw, lowering it more each time.
Image


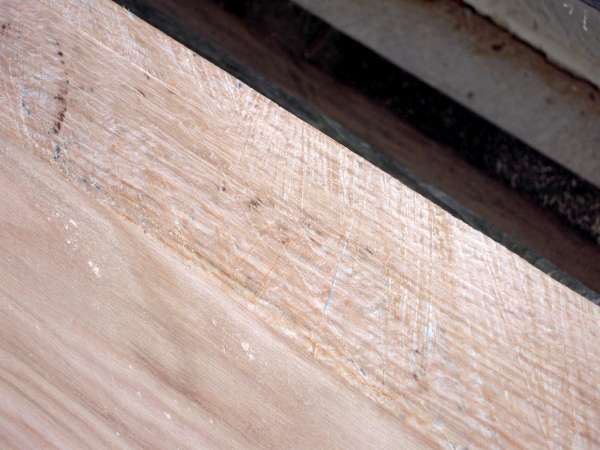
The problem I ran into, however, was that with the straight edge guide, the motor bottomed out on it before it was able to cut all the way through. Even with out the straight edge guide, I would have been a little shy of making it all the way through. With the guide, I was about 1" shallow.
Image


So… I gave myself a bit of a work out…
Image


Image


Cleaned that up with the #7 followed by the #5 1/2 as the smoother. I must say, I really liked the #5 1/2 for this…
Image


-----

I also started on the legs as well. The legs were cut from oak 2×4's and a 2×6 for front left leg, which I wanted wider for the leg vise.
Image


I had taped over the joints to protect my clamps from the squeeze out, but that left a mess on the leg…
Image


So with a combination of #75 for cleaning off most of the thick glue, a #7 to make it flat, and the #5 1/2 again to smooth it out, I took care of that problem…
Image


These are the two front legs
Image


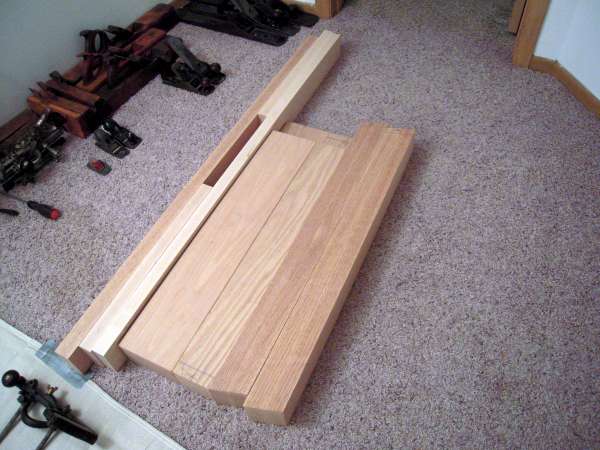
Now, this is where the picture taking takes a bit of a bad turn… Here I also have glued up the back two legs, cut the end caps, tool well back piece, and the front apron, and cut the legs to size. I skipped a few steps as far as pictures are concerned, but I'm sure we've all seen a miter saw in action :)

The Maple is for the end caps, and tool tray back, and the oak on the left is the front section, that will go in the notch of the legs.

Image


This fuzzy cellphone picture shows about what the top will look like (though it will obviously all be flush.
Image


The back legs are cut to 75 degrees. After I cut one end, I decided it didn't look quite large enough, so I had to second guess myself, and re-measure. Good thing I did. Both the back legs were about 1" too short. You can see some of the lines that I didn't cut (thankfully) in this picture as well.
Image


--

That is all I've got for now, thanks for checking it out!
 

Attachments

#24 ·
More Plans, Top Slab, and Starting Legs

So, as promised (though maybe a bit later than I had hoped)...

Here's another image of the plans I've got set forth. This still isn't 100% set in stone yet, and probably won't be, until I cut the joinery in the top for the legs. Thumb is a link to the larger version


Right, with that out of the way, two things were certain. The size of the slab/top, and the length/geometry of the legs. So I have at least started that much.

Cleaning up the face edge of the slab with my #4 1/2. It was a 12/4 slab of red oak that was 4' long and a little over 9" wide. It was planed to 2.75" thick when I got it.
Image


Then, I took to cutting the top to width. When I got it, it was around 9.5" wide on one side, and 9.75" on the other. So I used a straight edge guide and made 3 passes with the circular saw, lowering it more each time.
Image


The problem I ran into, however, was that with the straight edge guide, the motor bottomed out on it before it was able to cut all the way through. Even with out the straight edge guide, I would have been a little shy of making it all the way through. With the guide, I was about 1" shallow.
Image


So… I gave myself a bit of a work out…
Image


Image


Cleaned that up with the #7 followed by the #5 1/2 as the smoother. I must say, I really liked the #5 1/2 for this…
Image


-----

I also started on the legs as well. The legs were cut from oak 2×4's and a 2×6 for front left leg, which I wanted wider for the leg vise.
Image


I had taped over the joints to protect my clamps from the squeeze out, but that left a mess on the leg…
Image


So with a combination of #75 for cleaning off most of the thick glue, a #7 to make it flat, and the #5 1/2 again to smooth it out, I took care of that problem…
Image


These are the two front legs
Image


Now, this is where the picture taking takes a bit of a bad turn… Here I also have glued up the back two legs, cut the end caps, tool well back piece, and the front apron, and cut the legs to size. I skipped a few steps as far as pictures are concerned, but I'm sure we've all seen a miter saw in action :)

The Maple is for the end caps, and tool tray back, and the oak on the left is the front section, that will go in the notch of the legs.

Image


This fuzzy cellphone picture shows about what the top will look like (though it will obviously all be flush.
Image


The back legs are cut to 75 degrees. After I cut one end, I decided it didn't look quite large enough, so I had to second guess myself, and re-measure. Good thing I did. Both the back legs were about 1" too short. You can see some of the lines that I didn't cut (thankfully) in this picture as well.
Image


--

That is all I've got for now, thanks for checking it out!
Looks like fun Mos.
 

Attachments

#48 ·
Tenons on Legs, Mortises in Slab, and bottom board cut out

I was reviewing the number of hours of PTO that I had built up, and realized that I had quite a bit to use up before the end of the year… So I took 2 days off earlier this week, and more or less dedicated them to working on my bench.

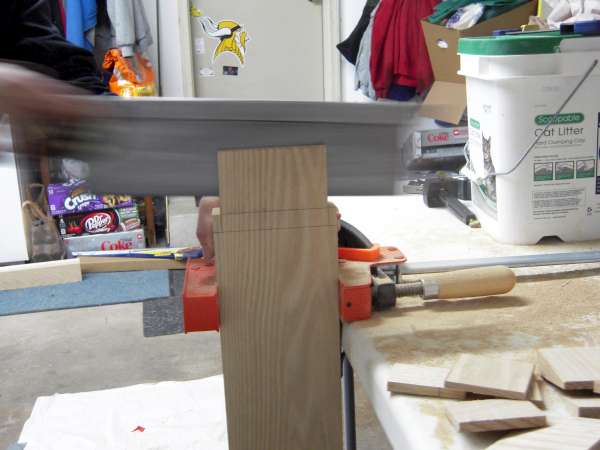
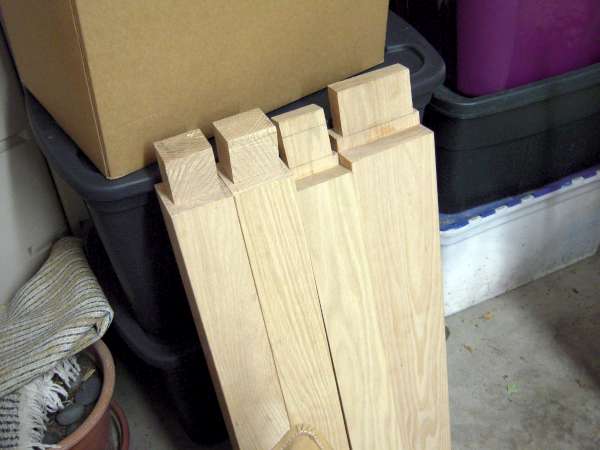
I decided to go with angled tenons on the back legs, because the mortises would be easier to cut, and there's still quite a bit of straight grain left in them anyway. The first one, I started by trying to use the bandsaw that my parents have in their basement. It did not work very well. It just didn't seem powerful enough, and I had to go really quite slow. I grew tired of that and so abandoned that idea pretty quickly. I resorted to cutting them by hand, which worked significantly better.

Image


Image


-

For the second angled tenon, I hadn't started trying to cut that one on the band saw, so I didn't have an existing kerf to put the tenon saw in. So… I improvised. I clamped a cut off from the other tenon onto the other leg, so I'd have something to bear against while starting the cut. This was useful because otherwise I'd have to start a cut on the corner of the leg. Not very much fun.

Image


Image


Image


-

Then I turned my attention to the front legs. These were pretty standard tenons.

Image


Image


-

And here they are all standing in a row (bum bum bum.. big ones small ones SOME AS BIG AS YOUR HEAD!)

Image


-

Again, this is where I get more into what I'm doing than taking pictures… I used my corded drill with a forstner bit to remove most of the waste in the mortise on the back mortise, and cut to depth on the ends then chiseled out the waste on the front mortise.

Image


-

Here we have one side done :)

Image


Image


-

Then I did the same treatment on the other side, doing marginally better with pictures.

Image


-

For this one, I switched to the bit and brace. I liked that way a lot more… I felt I had better control, though it left more waste to chop out. That's alright though, as I remembered to bring my mortise chisels this time…

Image


Image


Image


-

Then I did the front notch like before. Again foregoing the picture taking. But I was proud of this fit. Keep in mind this is a notch in the top, and not a through tenon. So all the weight is supported on a 2.75" thick section, and is held in place by the fit from the sides alone.

Image


-

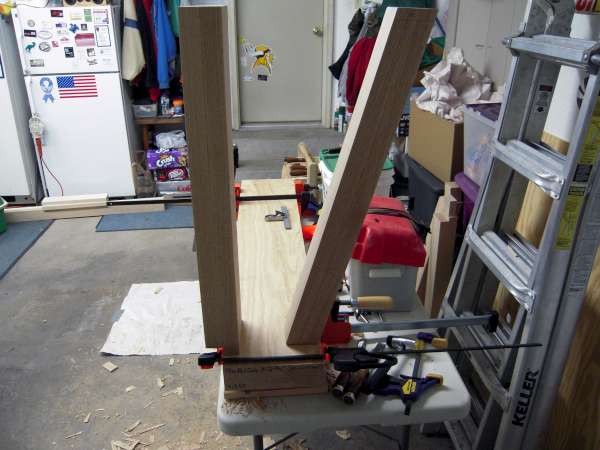
So with all 4 mortises done, it was time to clamp it all up and see what we had.

Image


Image


-

Starting to take shape nicely.

In my design, I have a 3.5" front apron (2×4 of Red Oak) and the top slab is only 2.75" thick. So I am going to be adding a 3/4" piece of red oak to the bottom to get the thickness the same as the apron. The other reason for this was to gain a little more depth for the tool tray bottom.

I cut notches for where the legs were going to be

Image


Image


Image


-

And that's where I left it after 2 days of working on it.

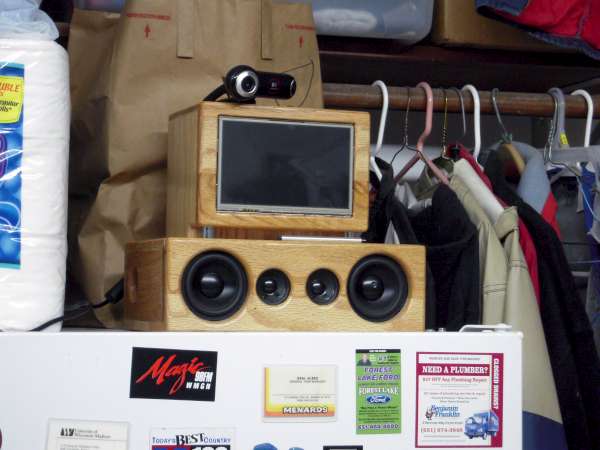
The only other thing I've got is I had my music box set up for some tunes, and some time lapse.
Image


Images are on 1-minute intervals. First part is Monday, and when the camera angle changes is when Tuesday starts.

As always, thanks for following along :)
 
#69 ·
Leg stretchers, Tool well frame, Top glued, and Wagon vise made

Was looking back and realized I am way behind in the blog vs actual progress…

So, I guess I'll just jump right in with the pictures.

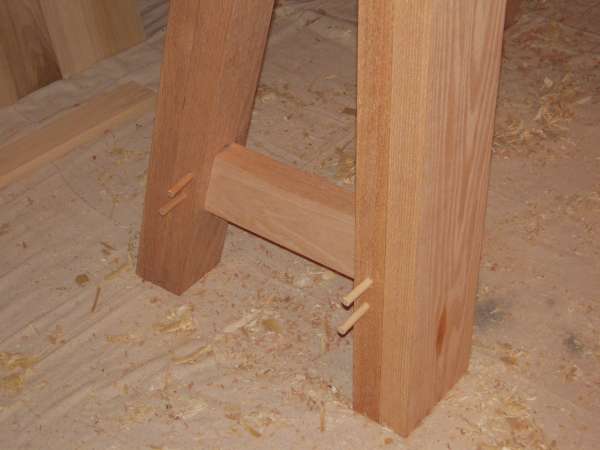
First, I bored, chiseled, and cut the mortise and tenon joints for the stretchers from front leg to back leg.

Not sure why my camera was having such issues with color.

Image


Image


Image


Image


Then I bored and pegged them. Pegs are left long so I can still remove them more easily until I glue them in place.

Image


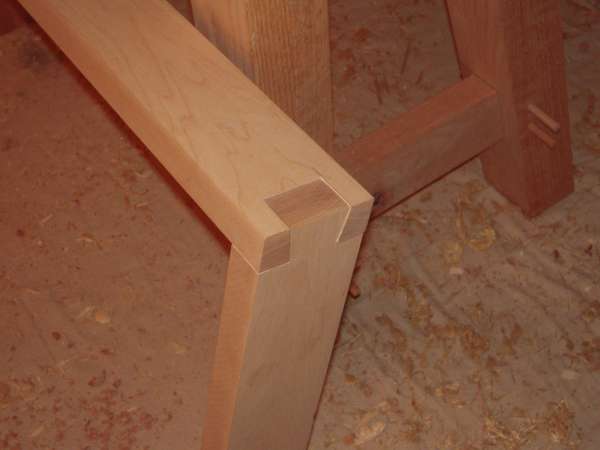
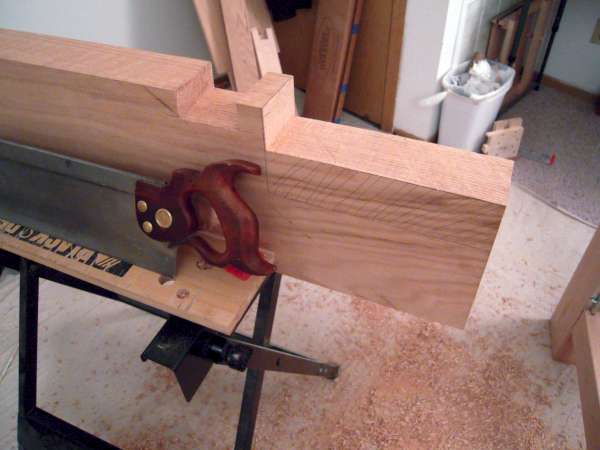
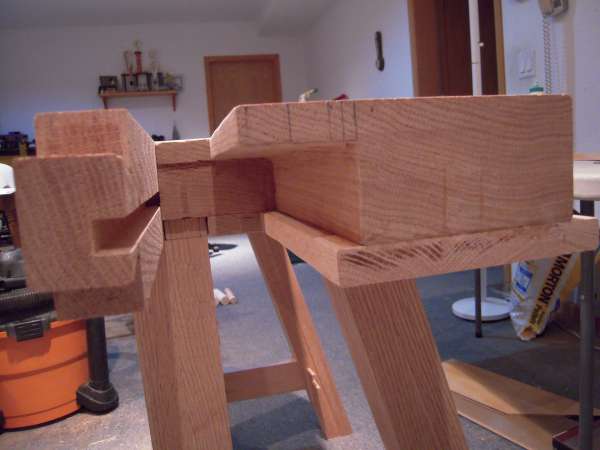
Then I cut dovetails for the tool well frame, endcaps, and front apron piece.

Image


Image


Image


Image


After that, I marked out the area that I'd be removing for the wagon vise in the top slab.

Image


And cut out a good chunk of the waste by saw.

Image


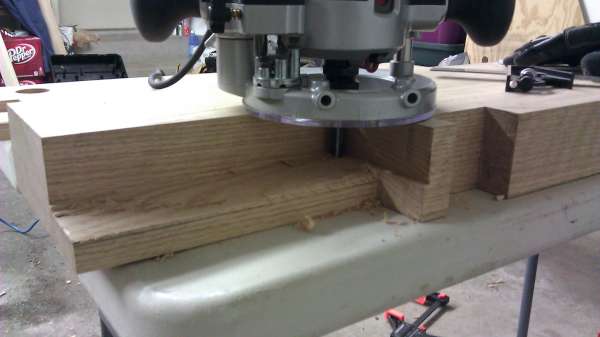
Pictures got a little sparse at this point, as I forgot my camera at my apartment when I went to the parents' place for a day. But I used the router and some straight edge guides with a bearing guided bit to hog out a lot of the waste.

Image


And a little bit of #78 action and some chiseling to get rid of the rest that the router bit couldn't reach

Image


Image


Then it was to the basement to glue the front apron on

Image


That concluded Saturday. So on Sunday I glued the bottom piece on to the benchtop

Image


Image


I had also routed out a groove for one side of the wagon vise block

Image


Then glued together some scraps to make the wagon block

Image


Clamped the post drill to the back side of the bench to drill the hole in the wagon block to be threaded

Image


And then tapped it with the wood tap and die set I bought

Image


And with the "test" screw

Image


Now we're up to date. Tonight I made the actual screw for the wagon vise. Used the threader, and now cutting it to length

Image


And then putting the groove in it for the garter plate

Image


And cutting the end square

Image


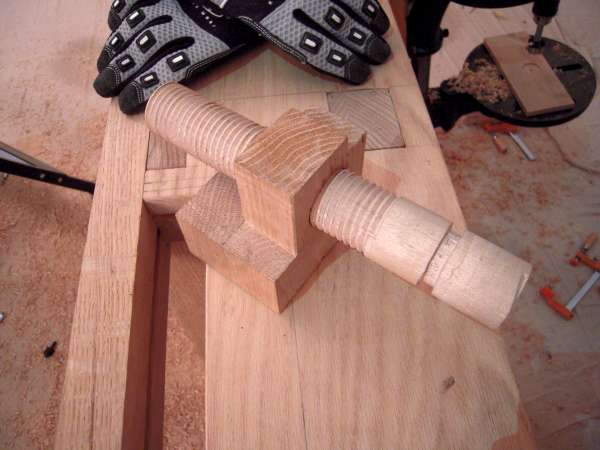
And cutting a square hole in a 2" piece of maple dowel I got from Mauricio for the hub

Image


Glued and pegged the screw threads and hub together

Image


And test fit it with the wagon block. Fits perfect

Image


That's all I've got for now. I'm all caught up again :)

Thanks for checking it out
 
#91 ·
Wagon Vise completed, endcaps bolted on, and top flattened.

Relatively quick turn around. This weekend was a busy one.

First thing I worked on after getting the screw and hub assembled for the wagon vise, was getting the endcaps drilled and bolted on the bench

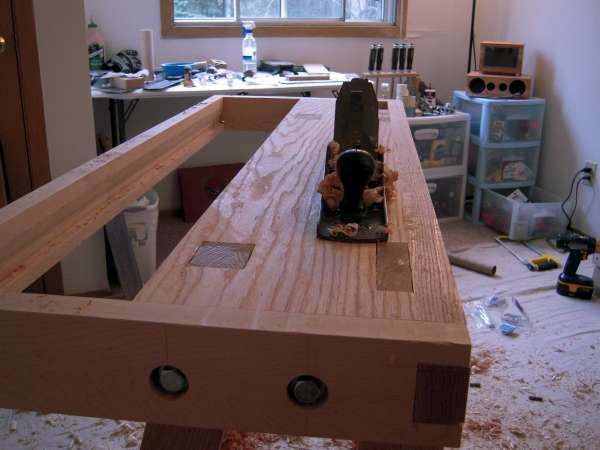
1/2" bolts, counterbored into the endcaps
Image


with a nut and washer on the underside.
Image


Single 4" bolt on the wagon vise end due to width restrictions, and and double bolt on the leg vise end. Double bolt because I couldn't get the 4 1/2" bolt back too far due to the leg tenon being there, so I ended up using a 3" bolt on the back. I decided on this because I didn't like the pivot point being so far forward when I'm going to be having a tool well hanging off of it.

Image


With that done, I decided I'd flatten the top a little bit. Jack, Jointer, and Smoother (using my #5 1/2)

Image


Image


Image


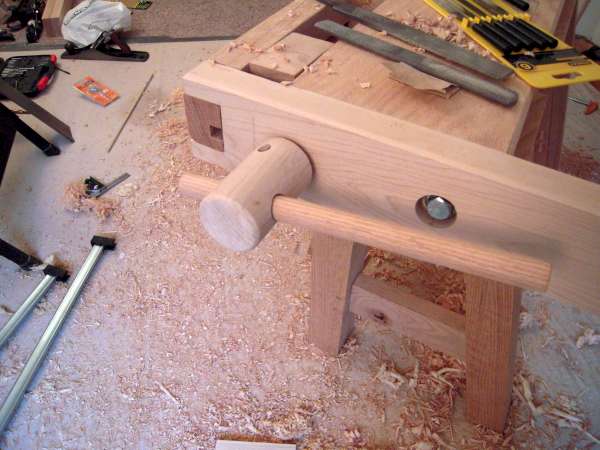
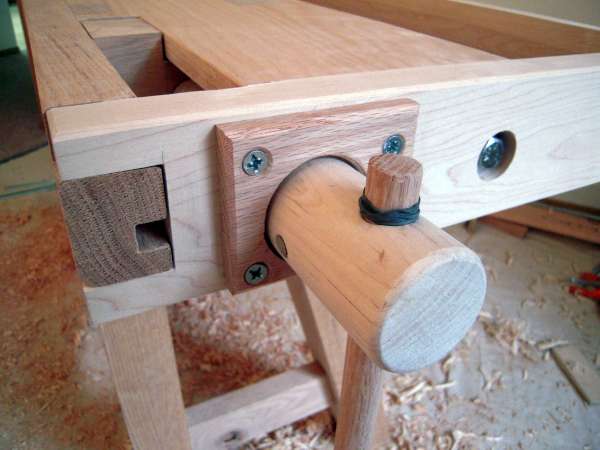
With that done, I turned my attention back to the wagon vise. I had drilled the hole for the handle, and was going to wait until I could use my powered miter saw to cut the hub to length. Somewhere along the line I decided "What the heck, let's go for it". So I decided to give it a shot by hand first. I think it actually went better than I was expecting. I'm glad I did :)

Image


Image


Then I made the garter plate for it. I made it out of 1/2" oak. I used a 2 1/8" forstner bit about 1/4" deep to come up around the hub a bit, and a 1 1/4" to go the rest of the way through. Then I cut it in half with my handsaw. Drilled, and countersunk, and chamfered the edges.

Image


Image


I drilled 2 of the dog holes last night, which means the wagon is now functional :)

Image


Image


Image


Image


Tonight I drilled the rest of the dog holes. They're all 4" apart, and there's 5" of travel with the wagon vise.

Image


I also took a video of the wagon vise in operation. I was actually relatively surprised at how well it worked. Most of the noise is the handle rattling in the hub.