Getting moldy
I've had this one in mind for a while and since the current crisis is giving me some slack time at work, I figured I'd just go for it.
A teardrop fiddle is a violin, but shaped more like a teardrop than an hourglass. I'm making this up as I go, so hang on for the ride!
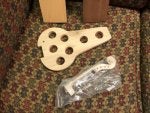
Tonight I made the mold for the body. I used a scrap of 3/4 inch plywood. The mould is used to hold the end blocks and to shape the thin strips of wood that are called ribs. I cut most of everything else I needed in my shop and will bring the whole thing to work. Providing the current unpleasantness doesn't keep me away from work, where my tools for this live, I should have it done in a few weeks.
The mold, wood for the plates, and a violin neck that I had laying around.
![Image]()
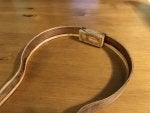
I created the shape by tracing one of my violins, preserving the width at the waist and tapering it to the neck.
![Image]()
I've had this one in mind for a while and since the current crisis is giving me some slack time at work, I figured I'd just go for it.
A teardrop fiddle is a violin, but shaped more like a teardrop than an hourglass. I'm making this up as I go, so hang on for the ride!
Tonight I made the mold for the body. I used a scrap of 3/4 inch plywood. The mould is used to hold the end blocks and to shape the thin strips of wood that are called ribs. I cut most of everything else I needed in my shop and will bring the whole thing to work. Providing the current unpleasantness doesn't keep me away from work, where my tools for this live, I should have it done in a few weeks.
The mold, wood for the plates, and a violin neck that I had laying around.
I created the shape by tracing one of my violins, preserving the width at the waist and tapering it to the neck.