LumberJocks Woodworking Forum banner

Japanese chisel question?

4.8K views 17 replies 12 participants last post by  jwoodcraft  
#1 · (Edited by Moderator)
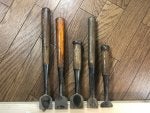
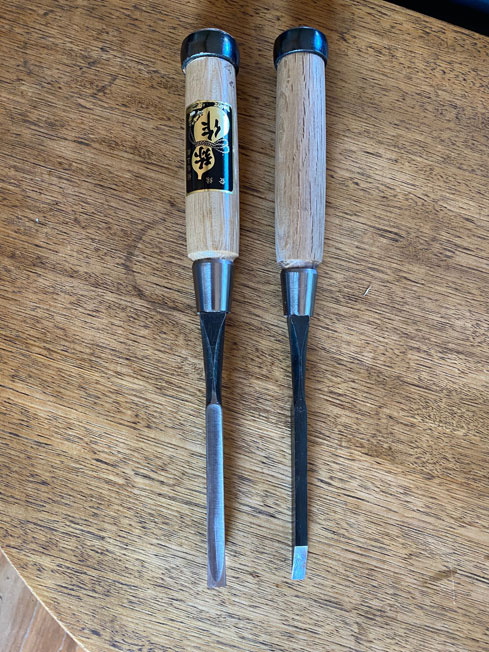
I had a few minutes in the shop and decided to put an edge on it. I have no idea where I bought it but either Ebay or Ed's tool store. I just always have wanted one. Anyway the back looks like the chisel on the right here.
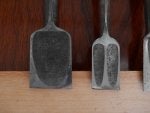
As I naturally started by flattening the back I started to wonder what happens when I remove enough material from the bevel side to encroach into the back concave bevel? Are chisels of this style toast when the back bevel is reached?
 
#2 ·
I've considered that question since I bought some carving tools in Kyoto. The straight edge tools have the concave groove on the back that comes within 1/4" of the edge. It might be possible to flatten the back to the depth of the groove, but that would affect the side bevels too. At best you might salvage and thinner, narrower chisel.

It could also be a clue as to how far you can count on the hardening or tempering process to remain consistent. The Lee Valley page states the Japanese chisels are hand-forged, laminated steel. If so, the quality may not be consistent over the full length of the blade. I don't think the Japanese carving tools I have are laminated. The backside groove may be just an "impersonation" of a Japanese chisel.
 
#3 ·
Just need to remove some more from the back.
Notice the hollow doesn't go straight down it gradually gets smaller.
A good Japanese chisels will have plenty of hard steel above the hollow.
Some of my Japanese chisels only have a small flat area between the edge and the hollow.
Good Luck
 
#4 · (Edited by Moderator)
Its too hard for me to explain it in a single post as I have read probably 10 books on the subject and watched countless videos. The best vids are in Japanese. But basically, Japanese chisels and plane blades have a very hard steel forge welded to a softer steel. The ura makes it easier to flatten what is needed, and thus easier to sharpen. To keep this going as you sharpen further down you do what is called "hammering out" or "tapping out" to push the metal down carefully. This is probably the best video (in English at least)to explain it to you in the shortest amount of time. Pro tip: start with a cheap amazon chisel or plane, like Kakuri:
 
#5 · (Edited by Moderator)
How about some pictures of used chisels from Japan to answer the question?
(borrowed from Evilbay listings)

Image


Image


Image


Lots of examples in this Evilbay chisel set:
https://www.ebay.com/itm/175364457667

Answer is no.
As you sharpen the edge, you also flatten the back which keeps a straight edge on back.
The hollow keeps getting smaller. Only need 1/8" or less of flat steel on back edge.
:)
 

Attachments

#6 ·
How about some pictures of used chisels from Japan to answer the question?
(borrowed from Evilbay listings)

Image


Image


Image


Lots of examples in this Evilbay chisel set:
https://www.ebay.com/itm/175364457667

Answer is no.
As you sharpen the edge, you also flatten the back which keeps a straight edge on back.
The hollow keeps getting smaller. Only need 1/8" or less of flat steel on back edge.
:)

- CaptainKlutz
Ahh, I didn't think of this because I am used to fattening the back once and forgetting about it. I guess I will need to do some additional flattening to the back from time to time.
 

Attachments

#7 ·
Ahh, I didn t think of this because I am used to fattening the back once and forgetting about it. I guess I will need to do some additional flattening to the back from time to time.

- controlfreak
Just be careful how you do it as some of those pics are exactly what NOT to do!
 
#8 ·
Ahh, I didn t think of this because I am used to fattening the back once and forgetting about it. I guess I will need to do some additional flattening to the back from time to time.

- controlfreak

Just be careful how you do it as some of those pics are exactly what NOT to do!

- SMP
This was my first thought. To keep the hollow, you would need to angle your back flattening a little to retain the cutting edge thickness… A delicate balance, but man, my Japanese chisels are so hard, it would take a lot of sharpening to get rid of the hollows.

I use mine constantly, but don't end up sharpening them all that often… They hold their edges longer than many of my western chisels.
 
#9 ·
Eventually you will use it up I think. What CK shows is true to some extent, repeated flattening of the back will cause the hollow to receed away from the business end. But at some point you will reach it. At that point, you could grind it out but I suspect that the chisels are forged and hardened with the expectation that once you reach that point, the chisel is spent.
 
#11 · (Edited by Moderator)
I seriously doubt that very few here will ever need to worry about wearing our a good Japanese chisel:)

- Andre
The reason I posted the link to how to tap out the edge is because if doen incorrectly, you wear away the ura, which causes 2 problems.

1. You are wearing away the high carbon harder steel, making it thinner, easier to crack etc.

2. As it gets completely flat like some of the pics on the ebay old chisels, those are much harder to sharpen as you now have to flatten a big section of the hard steel vs just the 1/8" or so when done correctly.

So yeah even if the average person may not burn through the length, they are just makjng it harder to sharpen and possibly making it to where the thin steel cracks or delaminates from the softer steel.
 
#12 · (Edited by Moderator)
As others have said, the cutting edge steel on Japanese chisels is so hard you don't have tpo worry about sharpening past the ura (the hollow on the back) in your lifetime, unless you are doing some very aggressive and probably unnecessary sharpening. When you sharpen the bevel, take the simple step of flipping the blade over on your last sharpening grit and giving the back a few passes on the stone as if you were flattening it; no need to grind on it, just a few light passes with your fine stone should do the trick. If you ever do approach the ura, before you dig into the extensive research about "tapping out," you can restore enough of the ura to last you for a while by simply repeating the above step on coarser grit stones. If you are a journeyman or master furniture builder and use these chisels for many hours every day, these simple steps will be inadequate. But if you are a hobbiest or weekend warrior like most of us, these suggestions should keep your chisels in good working order for many years.
 
#13 ·
I have used Japanese chisels for 25 years. The traditional way to sharpen is to hone the flat bevel face by hand - no hollow grind, no secondary bevel … just a flat primary bevel honed (in my case) to 13000 grit. Oire Nomi (bench chisels with 30 degree bevels, and slicks (paring chisels) at 25 degrees.

Once the bevel face is honed, lap the back of the blade on the finishing stone. This will do two things: 1. it will remove the wire edge, and 2. it will remove a smidgeon of the hollow, moving it a little back from the edge of the bevel. That is how you keep the hollow under control.

Kiyohisa slicks …

Image


Kiyohisa oire nomi …

Image


Koyamaichi …

Image


Fujikawa mortice chisels …

Image


Regards from Perth

Derek
 
#15 ·
Thanks, I guess they are spent by the time you reach the hollow. This doesn't sound like a problem in my lifetime. Probably shouldn't use them to open paint cans too.
If you look on ebay, there are lots of chisels sharpened down to nubs. I have a small batch being shipped currently with one that has about 3/4" of the bade left, so it has a good 1 1/2" of the ura (hollow) gone. While you may not sharpen enough to have to deal, your conclusion doesn't fit the discussion above. Personally, I've done the tapping out process on plane blades, but rarely on chisels.

Enjoy your chisel...
 
#16 ·
I was buying some stuff from a guy at the flea market and he gave me an old Buck that had seen betters days. (yeah, freeeee). With some work, It lives once again. It is still "a work in progress" and needs a lot of sharpening time..
Image

Image

Image