DIY Cyclone Dust Collector
Inspired by Jeff's (Jcoulam) homemade cyclone dust collector, I decided to make one just like his. This blog is written to show how I built it.
![Image]()
At a local home center, I purchased one 8"x24 metal duct, a 5-ft 2" PVC pipe, a 2" PVC elbow, and two 2" couplers for about $18.
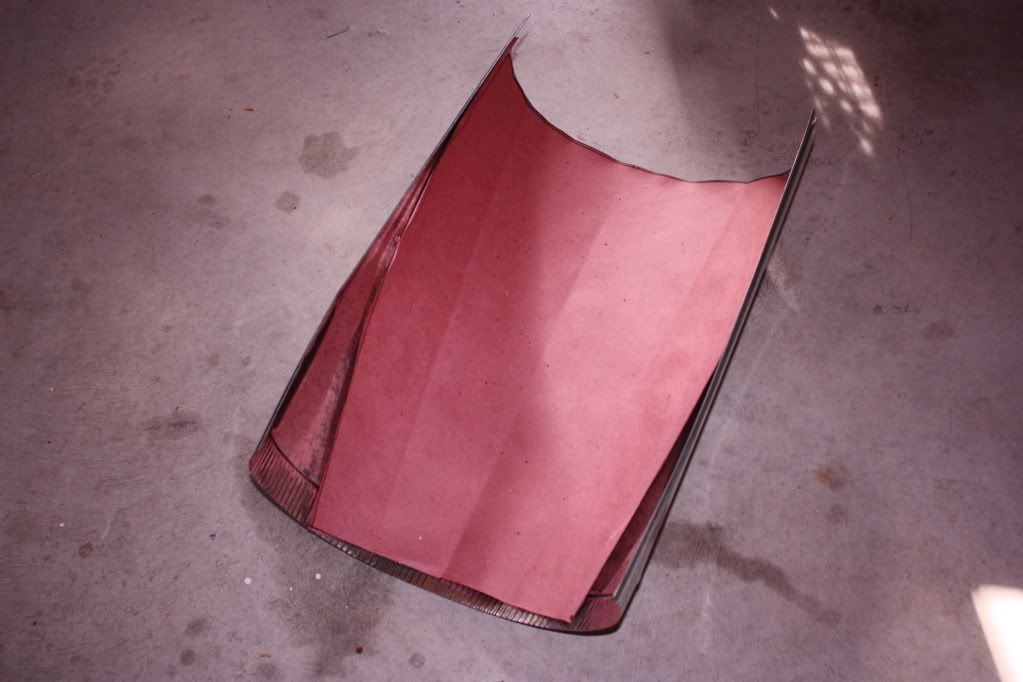
The first step is to make the cone. I tried to twist the metal sheet into a cone but just couldn't make it look right and managed to get a small cut in my hand in the process. Ouch! In trying to think of a better way to make the cone, it dawn on me why not make a paper pattern of the cone first. This is how my wife makes all her clothes, from paper patterns.
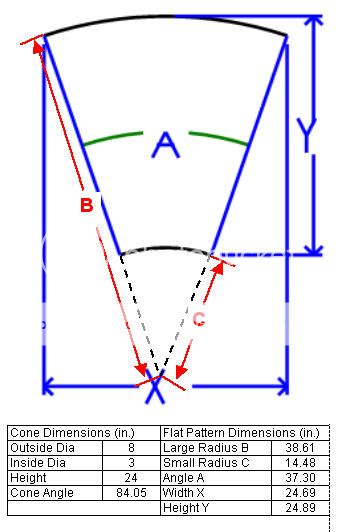
To draw the paper pattern, I used a rectangular sheet of paper about 26"x24", the same size as the metal duct. I drew a center line on the paper. I measured the circumference of a 8" dia circle and transfered the measurement to the top of the paper. Keeping it symmetrical from the center line on the paper. I then measured the circumference of the adapter and transferred that to the bottom of the paper. I drew a line connecting the top measuring mark to the bottom on each side. After cutting out the unwanted parts, the shape of the pattern should look like a fan. After some trial and error, I finally got the curvatures of the top and the bottom right so the cone would be flat on top and bottom. The final paper pattern gave me a cone with about 7 3/4" circle at the top and 3 3/4" at the bottom. I want a larger hole at the bottom to make sure all the chips would fall into the bucket. The bottom of the cone will be inserted into a 4" adapter.
![Image]()
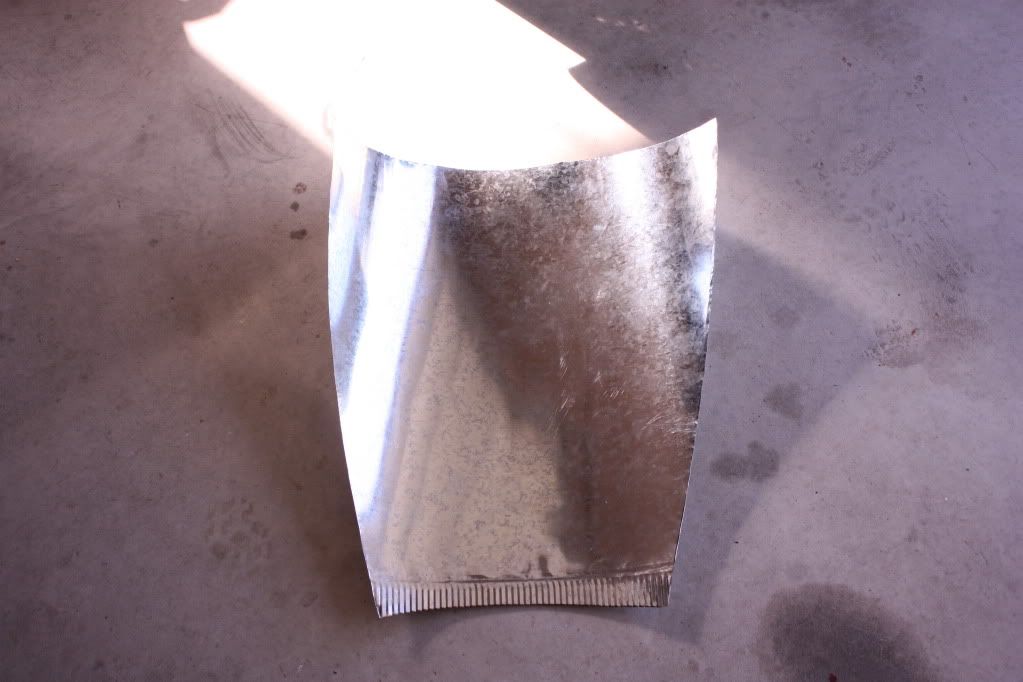
I then traced the pattern onto the sheet metal and cut it out.
![Image]()
This is the final look of the sheet metal
![Image]()
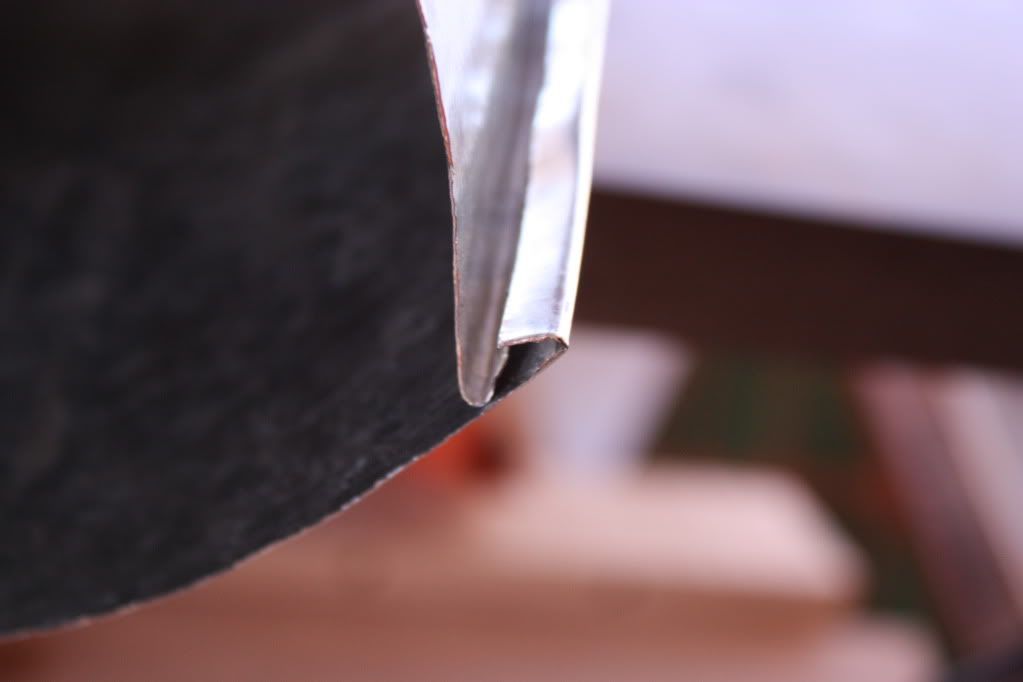
I put a lip of about 1/4" at each edge so they could hook together.
![Image]()
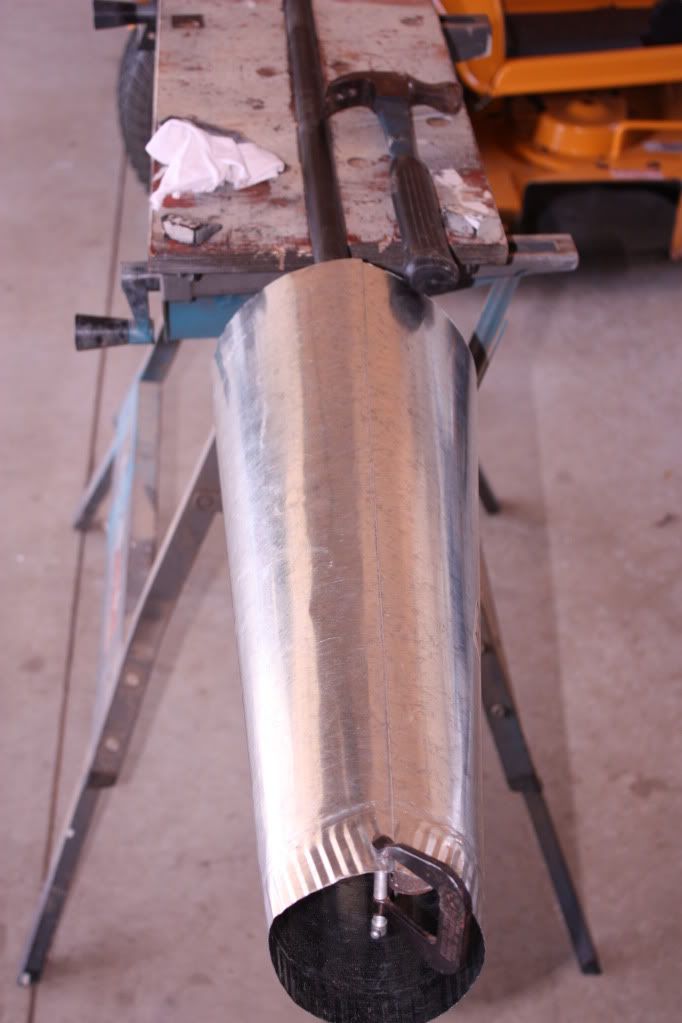
Clamping a metal pipe into a vice bench, I used a hammer to flatten the hooked seam.
![Image]()
I soldered the seam with a propane torch.
![Image]()
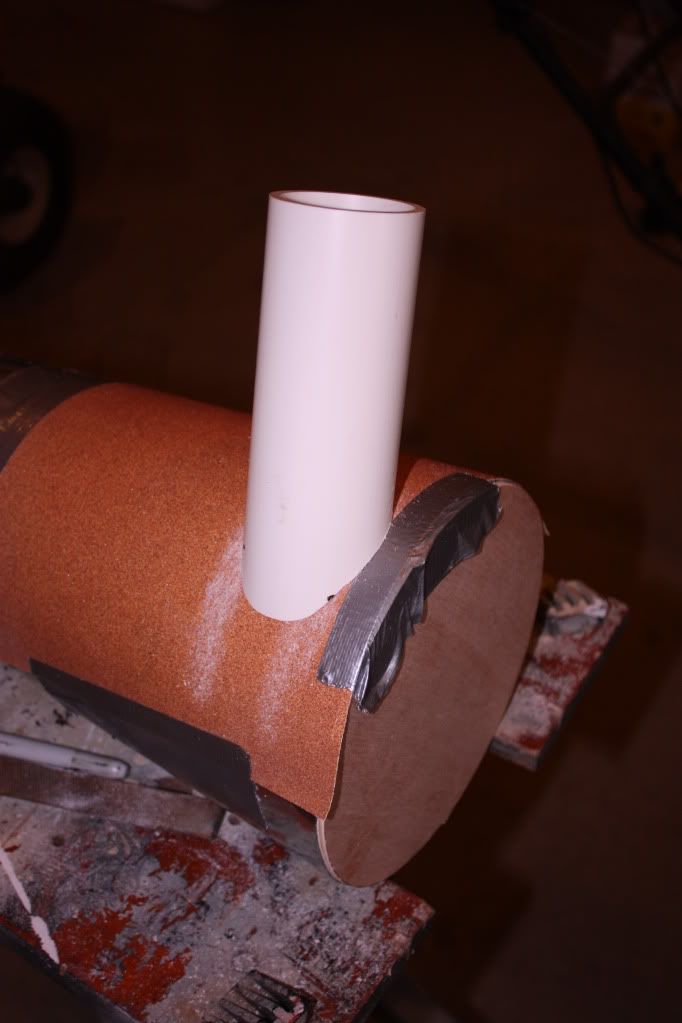
With the cone shape and dimension finalized I made and fitted the circular top out of 3/4" plywood. I made two of these circles, the other one to anchor the cone to the bucket. I then used the bandsaw and rough cut the inlet tube following the contour of the cone at the top. Taping a piece of sandpaper to the top of the cone, I sanded the inlet tube to its final contour.
![Image]()
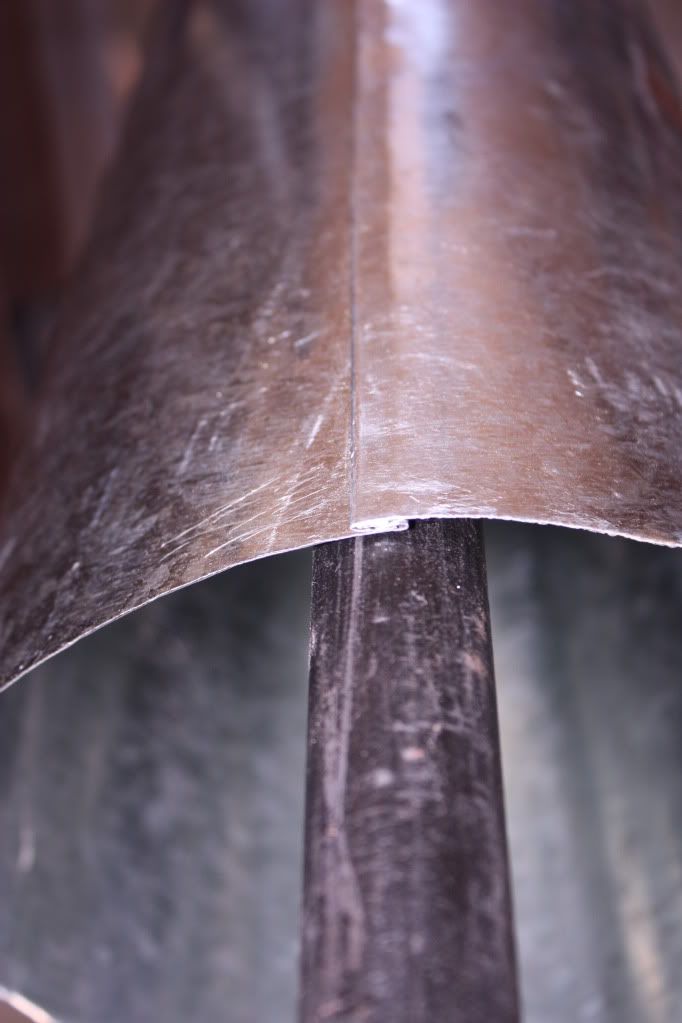
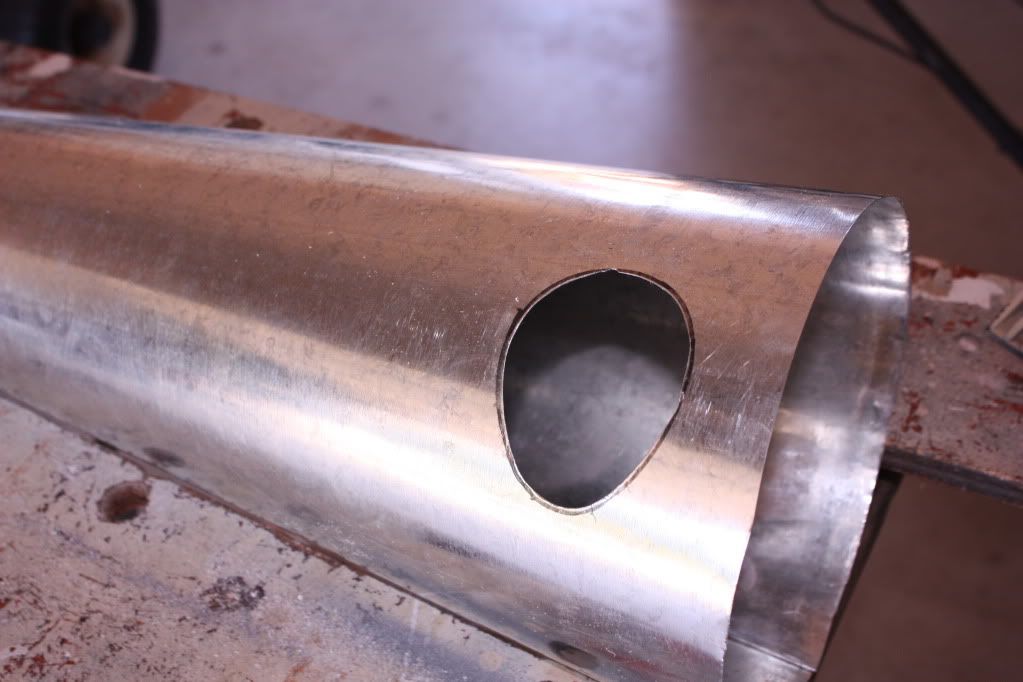
I traced the contour of the inlet tube onto the cone and cut out an opening. the top of the opening was about an inch below the top.
![Image]()
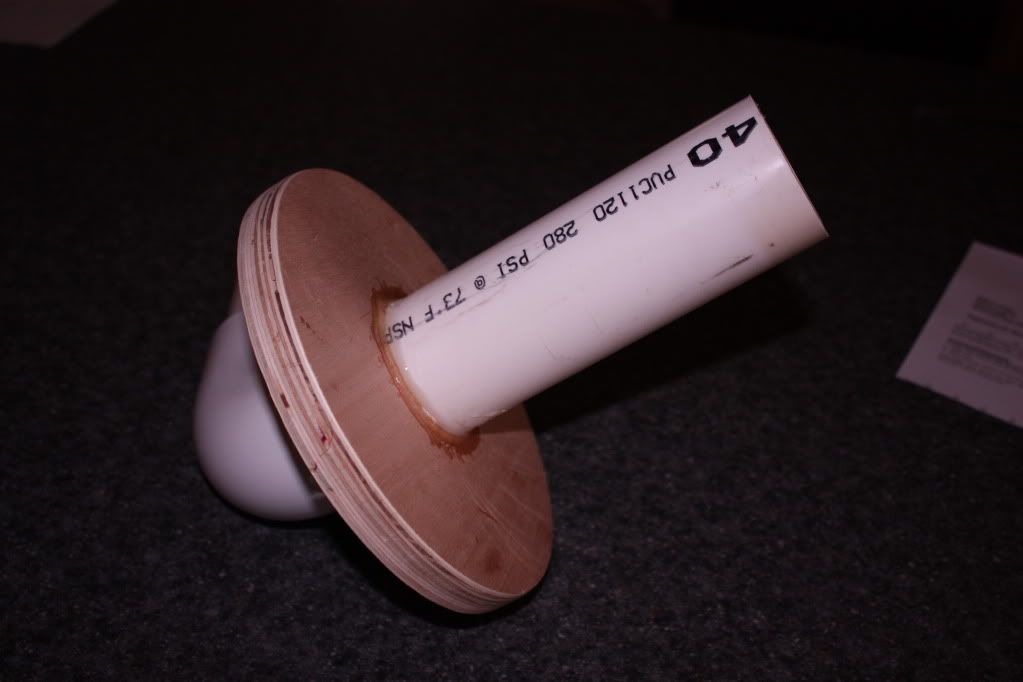
The inlet tube was inserted into the opening and protruded about 1/8" into the cone. This gave some extra surface area for the epoxy glue to grab on.
![Image]()
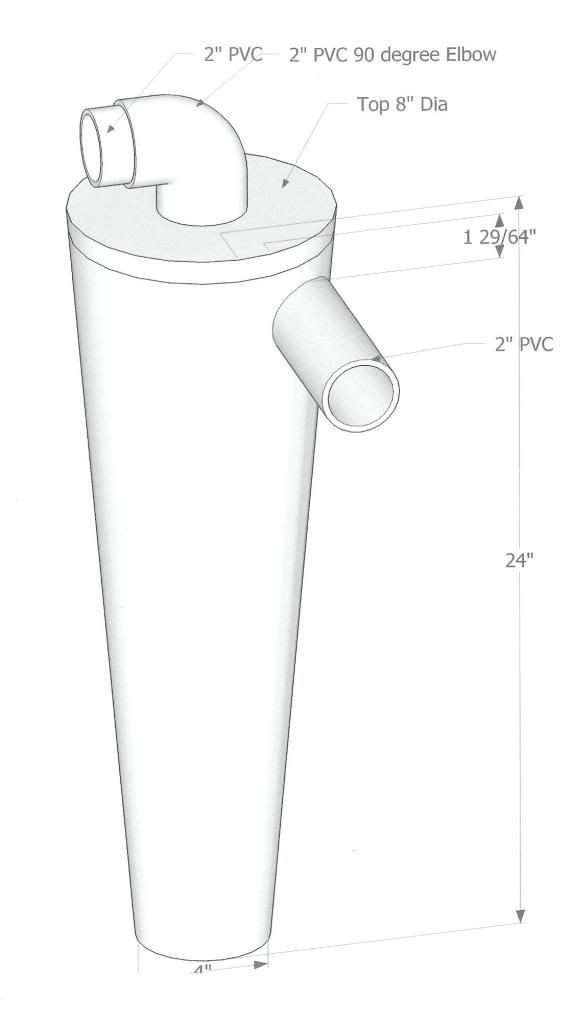
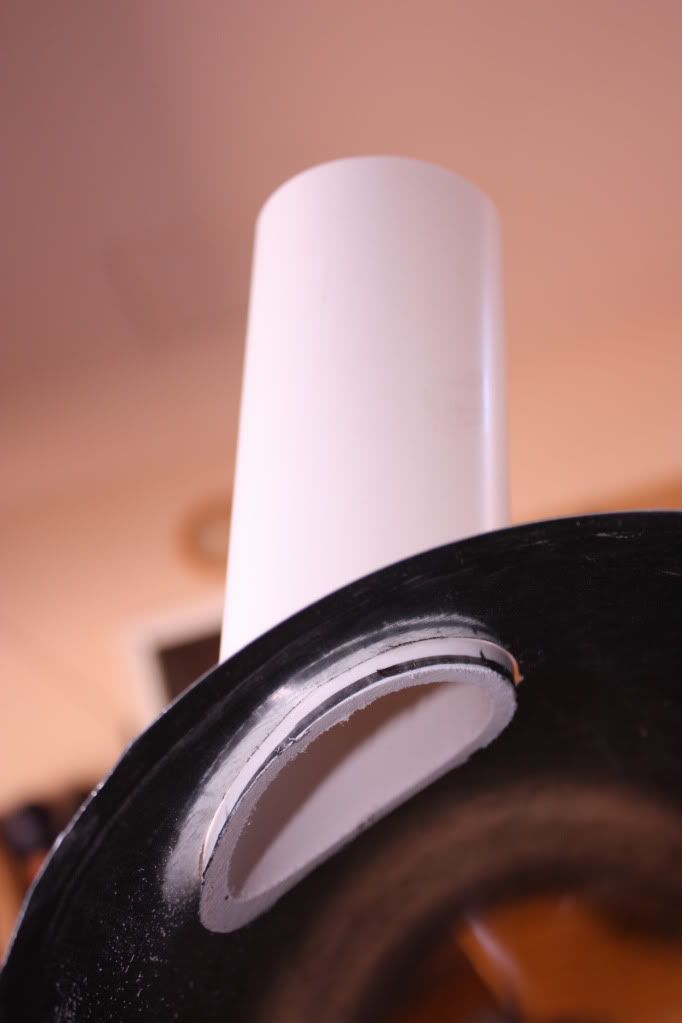
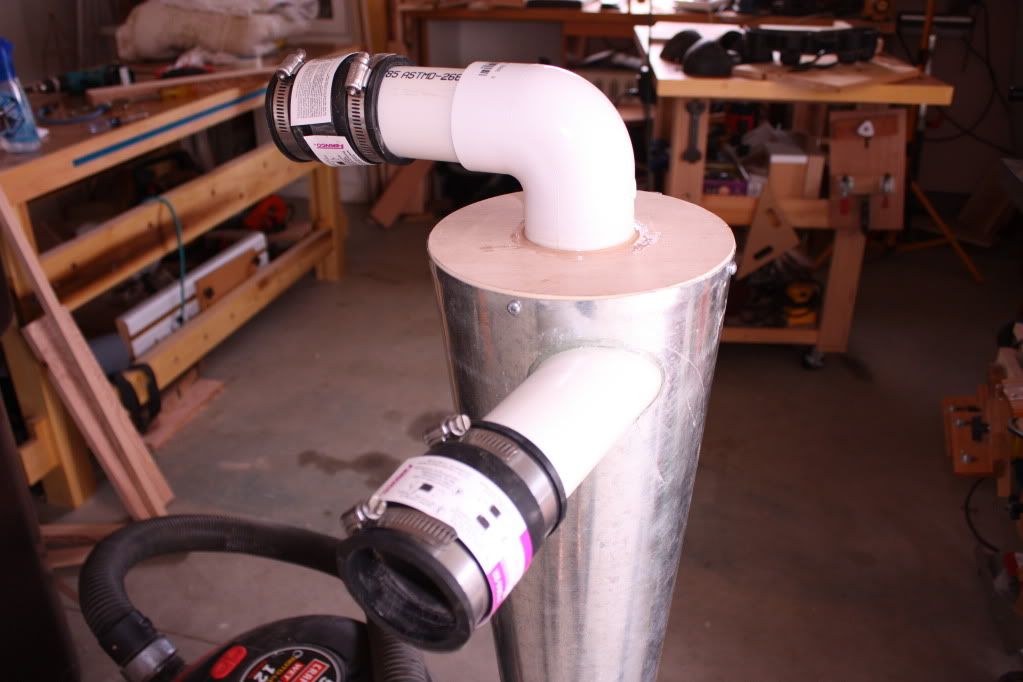
A 2 3/8" hole was made in the top for the outlet tube. The outlet tube extended about 6 1/2" into the cone and 1 1/2" outside the cone for the 90 degree elbow. 2-part 5 min epoxy was used to attached the outlet tube to the top. 4 screws were used to secure the top to the cone. The fit was so good so I decided not to use any sealant.
![Image]()
![Image]()
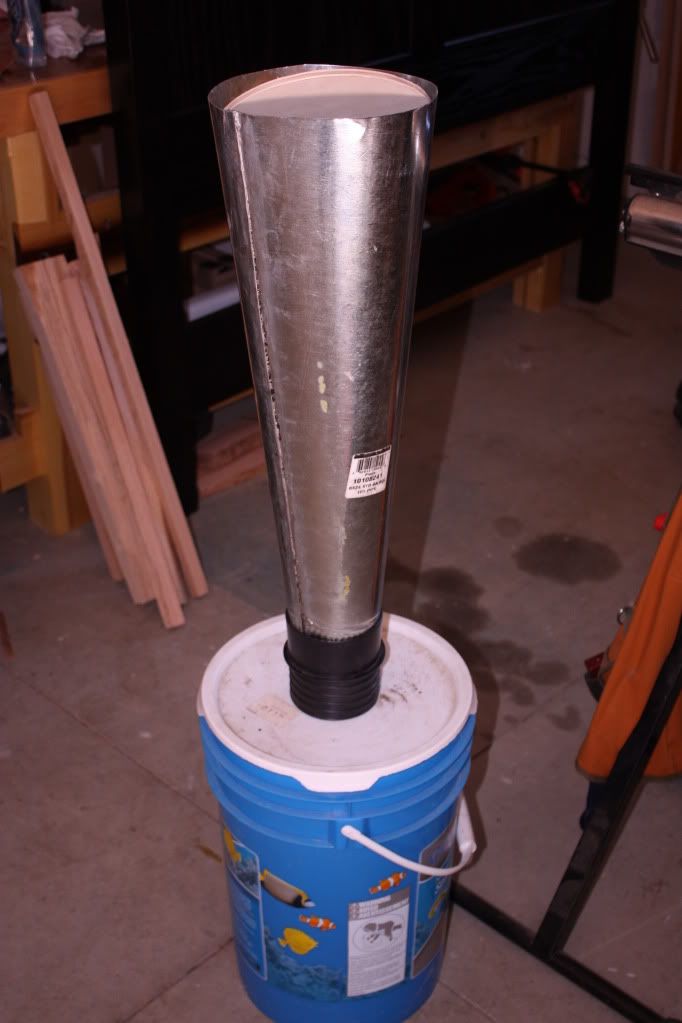
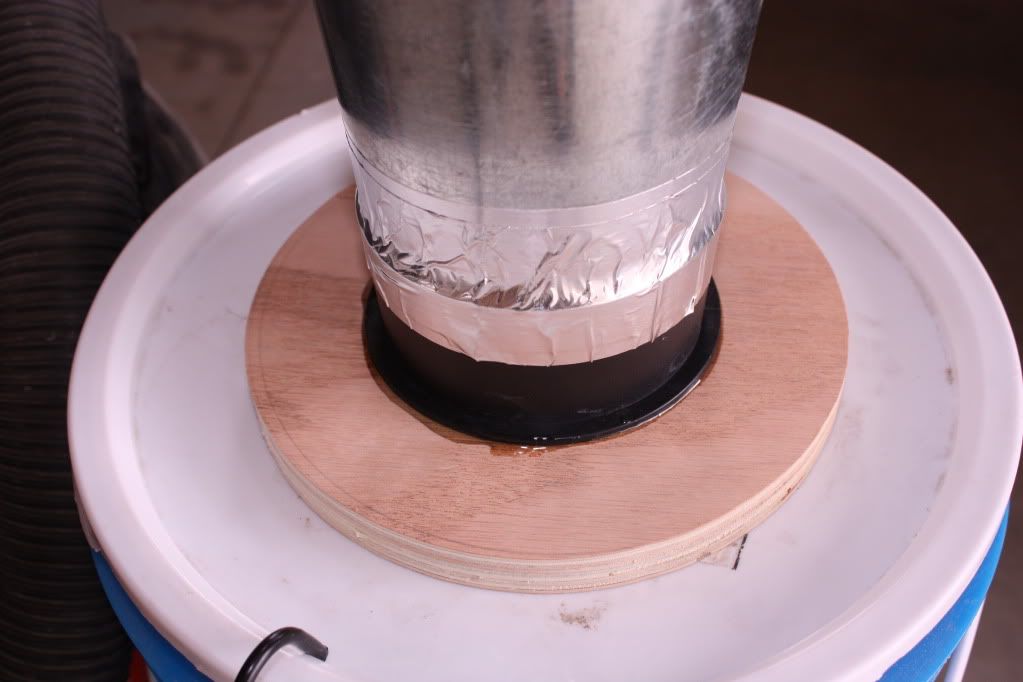
To anchor the bottom of the cone to the bucket, I cut a hole in the plywood circle at the same radius as the adapter. A same size hole was also cut into the lid of the bucket. 4 screws were used to attach the wood circle to the lid of the bucket. I then used metallic duct tape to seal the cone to the adapter.
![Image]()
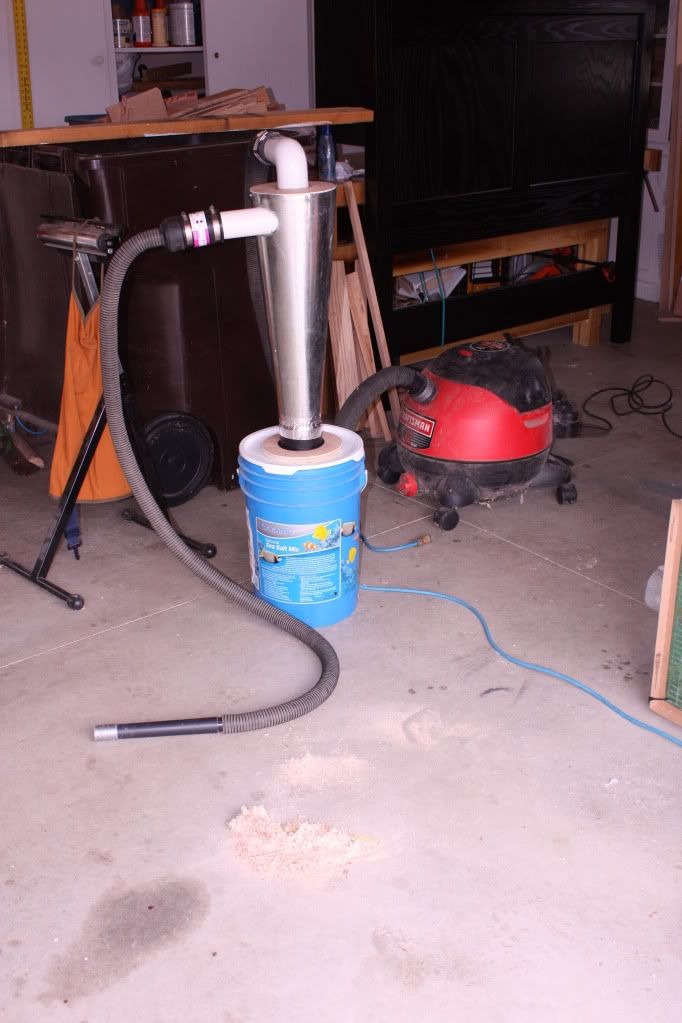
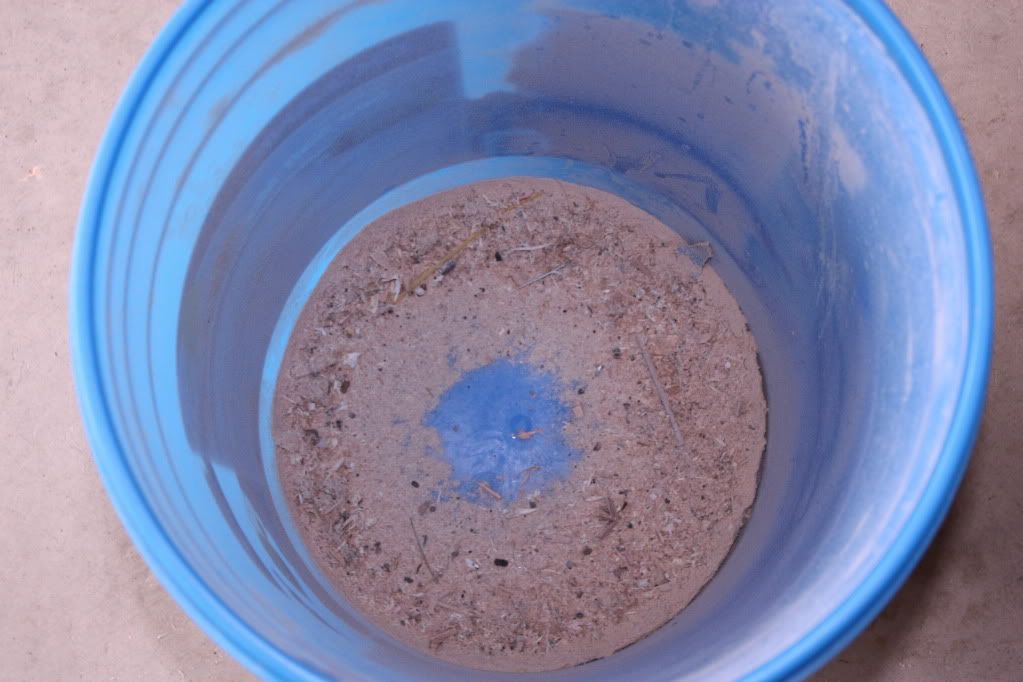
To test my cyclone dust collector, I vacuumed a small amount of saw dust off the floor and they were all collected in the bucket. Suction was very strong and the bucket did not collapse … a successful outcome.
![Image]()
![Image]()
PS: In order to make this whole system truly mobile, this is my upgrade of the mobile dust collection system.
![Image]()
Inspired by Jeff's (Jcoulam) homemade cyclone dust collector, I decided to make one just like his. This blog is written to show how I built it.
At a local home center, I purchased one 8"x24 metal duct, a 5-ft 2" PVC pipe, a 2" PVC elbow, and two 2" couplers for about $18.
The first step is to make the cone. I tried to twist the metal sheet into a cone but just couldn't make it look right and managed to get a small cut in my hand in the process. Ouch! In trying to think of a better way to make the cone, it dawn on me why not make a paper pattern of the cone first. This is how my wife makes all her clothes, from paper patterns.
To draw the paper pattern, I used a rectangular sheet of paper about 26"x24", the same size as the metal duct. I drew a center line on the paper. I measured the circumference of a 8" dia circle and transfered the measurement to the top of the paper. Keeping it symmetrical from the center line on the paper. I then measured the circumference of the adapter and transferred that to the bottom of the paper. I drew a line connecting the top measuring mark to the bottom on each side. After cutting out the unwanted parts, the shape of the pattern should look like a fan. After some trial and error, I finally got the curvatures of the top and the bottom right so the cone would be flat on top and bottom. The final paper pattern gave me a cone with about 7 3/4" circle at the top and 3 3/4" at the bottom. I want a larger hole at the bottom to make sure all the chips would fall into the bucket. The bottom of the cone will be inserted into a 4" adapter.
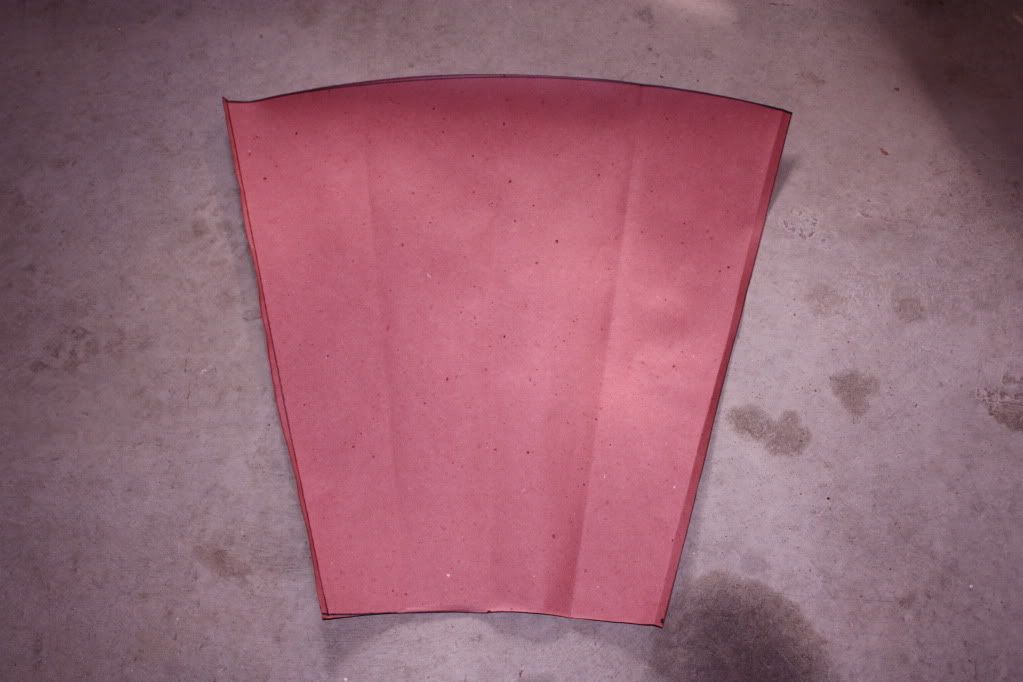
I then traced the pattern onto the sheet metal and cut it out.
This is the final look of the sheet metal
I put a lip of about 1/4" at each edge so they could hook together.
Clamping a metal pipe into a vice bench, I used a hammer to flatten the hooked seam.
I soldered the seam with a propane torch.
With the cone shape and dimension finalized I made and fitted the circular top out of 3/4" plywood. I made two of these circles, the other one to anchor the cone to the bucket. I then used the bandsaw and rough cut the inlet tube following the contour of the cone at the top. Taping a piece of sandpaper to the top of the cone, I sanded the inlet tube to its final contour.
I traced the contour of the inlet tube onto the cone and cut out an opening. the top of the opening was about an inch below the top.
The inlet tube was inserted into the opening and protruded about 1/8" into the cone. This gave some extra surface area for the epoxy glue to grab on.
A 2 3/8" hole was made in the top for the outlet tube. The outlet tube extended about 6 1/2" into the cone and 1 1/2" outside the cone for the 90 degree elbow. 2-part 5 min epoxy was used to attached the outlet tube to the top. 4 screws were used to secure the top to the cone. The fit was so good so I decided not to use any sealant.
To anchor the bottom of the cone to the bucket, I cut a hole in the plywood circle at the same radius as the adapter. A same size hole was also cut into the lid of the bucket. 4 screws were used to attach the wood circle to the lid of the bucket. I then used metallic duct tape to seal the cone to the adapter.
To test my cyclone dust collector, I vacuumed a small amount of saw dust off the floor and they were all collected in the bucket. Suction was very strong and the bucket did not collapse … a successful outcome.
PS: In order to make this whole system truly mobile, this is my upgrade of the mobile dust collection system.

")