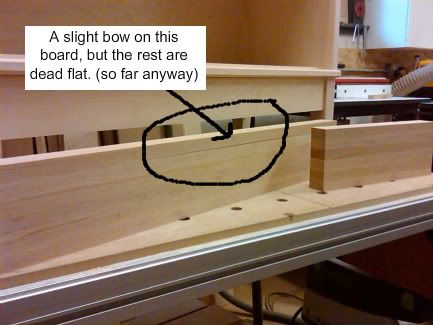
LumberJocks Woodworking Forum banner
66K views 59 replies 19 participants last post by  Beginningwoodworker  
#1 ·
Maple Barister

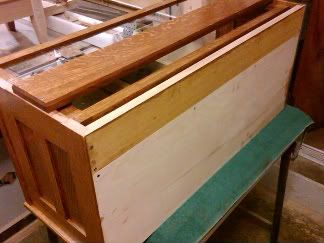
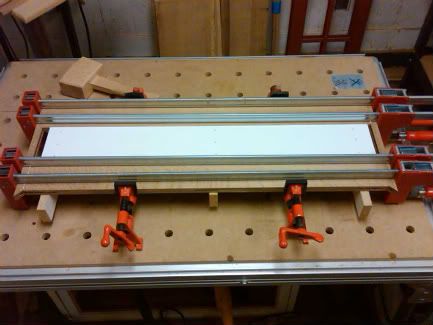
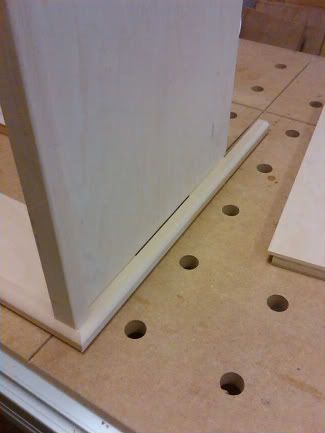
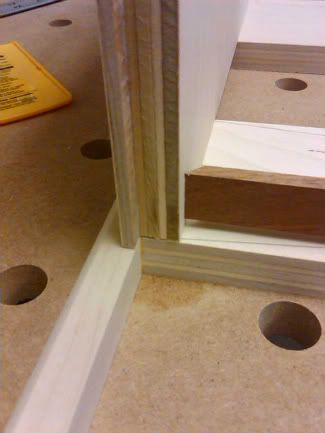
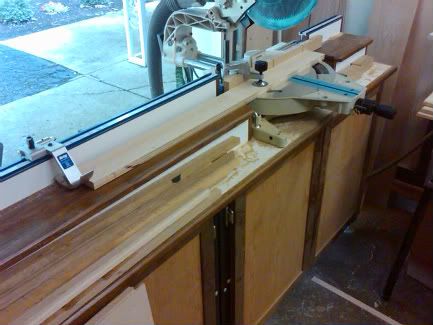
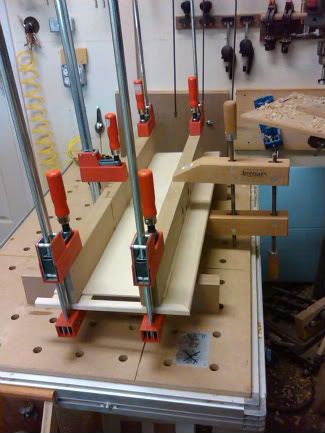
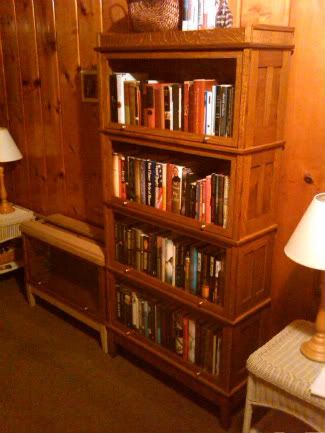
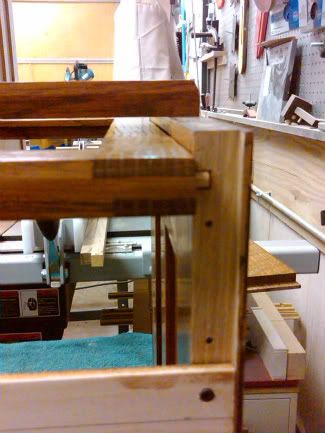
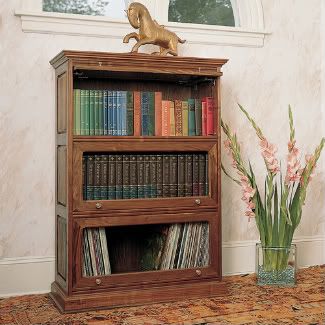
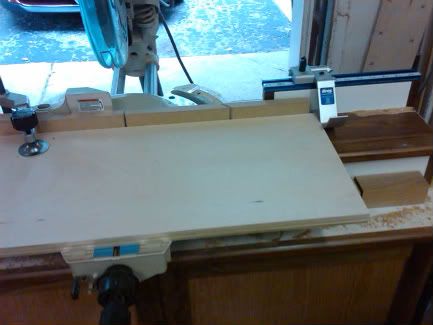
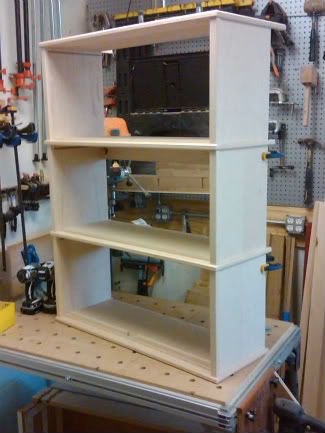
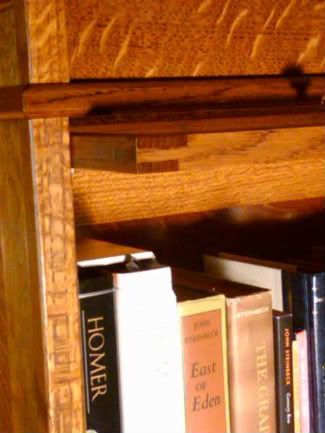
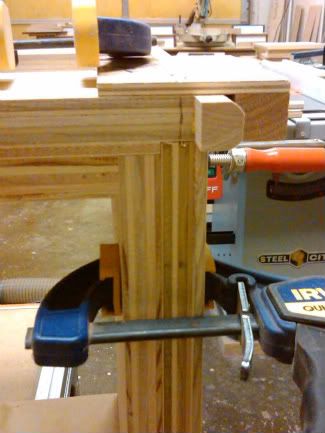
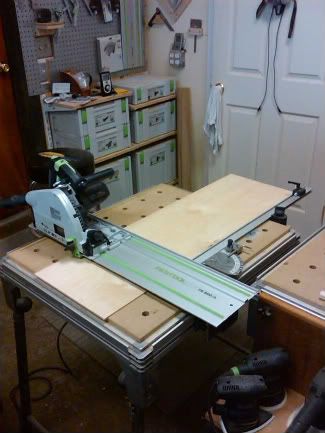
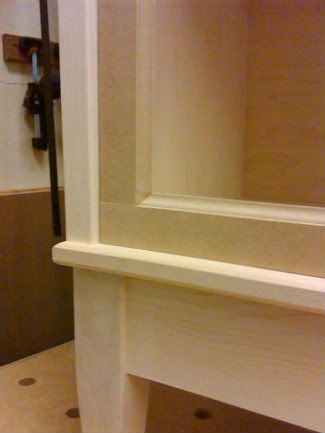
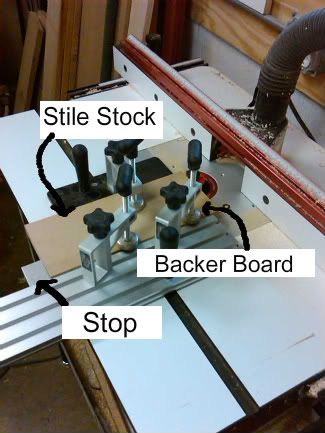
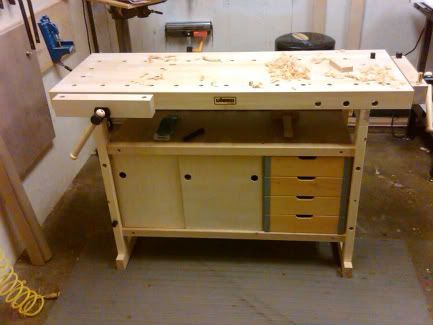
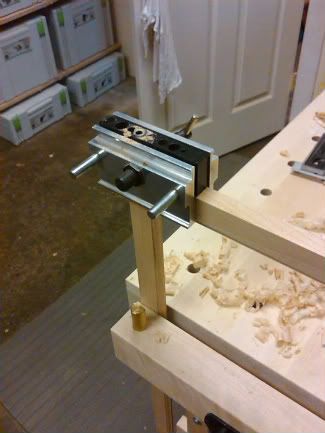
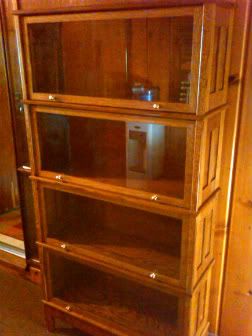
Here is the completed quartersawn solid white oak barrister with frame and panel sides that I recently completed. (Terrible pic, taken in a narrow hallway with bad light!)

Image


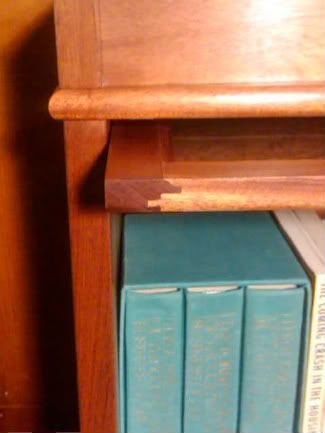
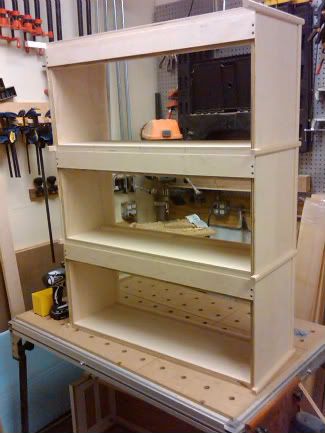
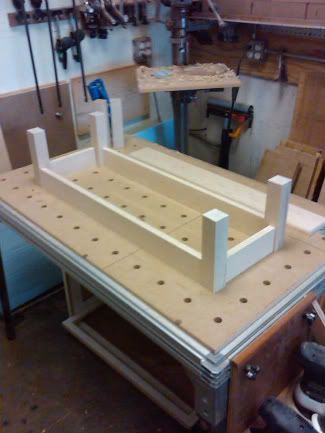
I have completed 5 out of the 7 total that I plan to build in this style. I will return to building the remaining two after I complete the Maple Plywood ones that I'm blogging about now. I have decided to put these on hold to build the maple ones for my sister as a Christmas present. When I finish her maple bookcase I will continue to blog during the process of completing my remaining barristers to complete my set. (22 boxes total in 6 stacks)

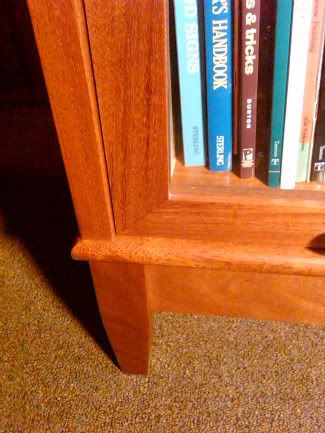
The maple barristers for my sister will differ from my solid oak ones in the following ways:

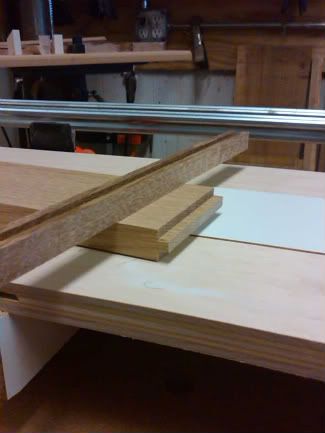
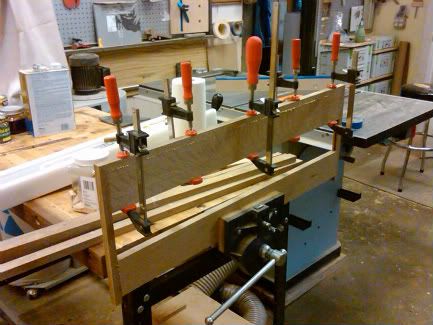
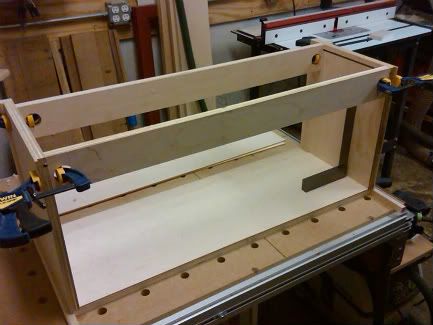
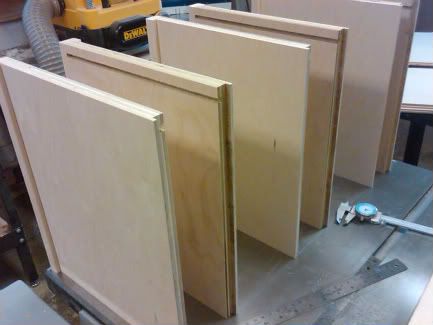
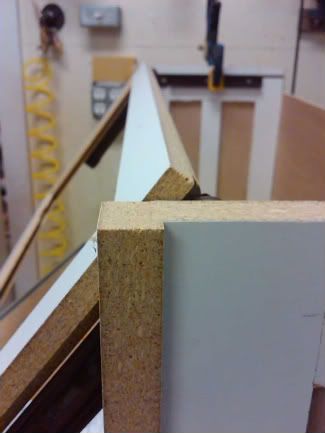
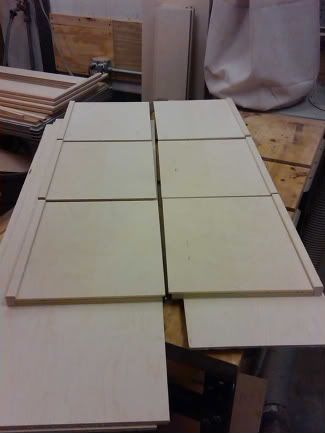
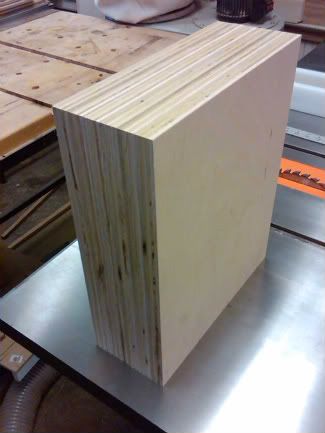
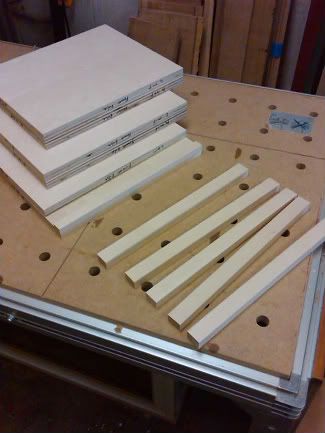
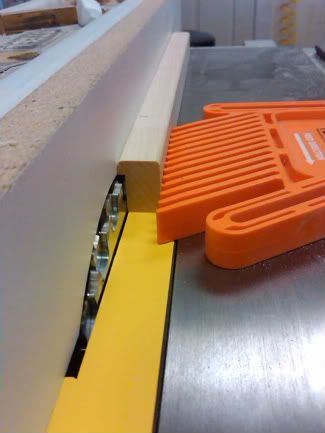
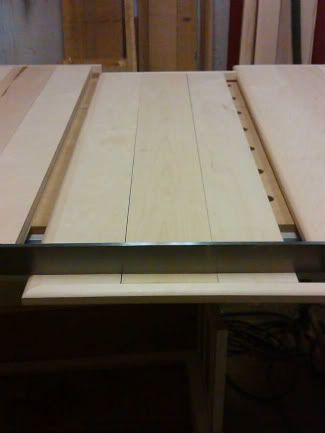
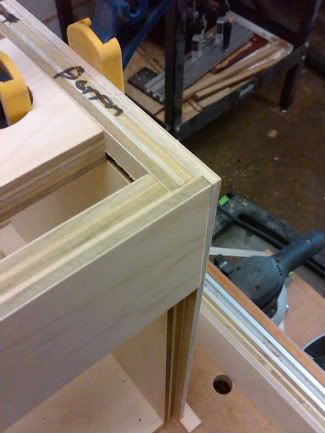
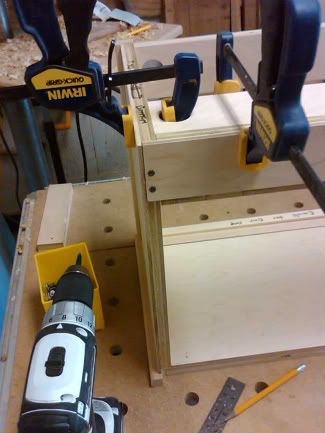
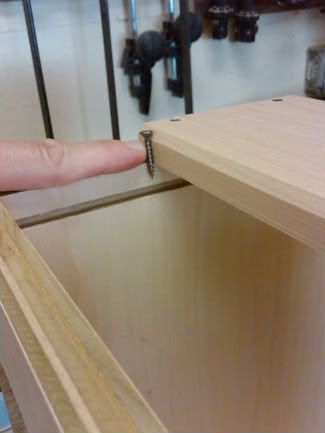
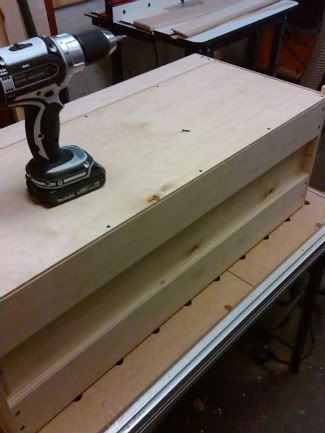
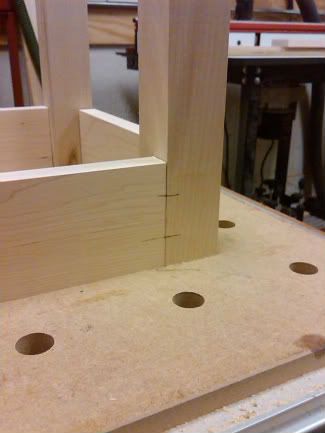
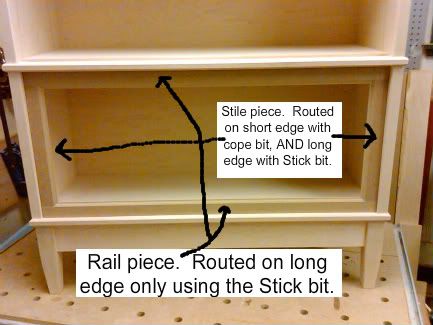
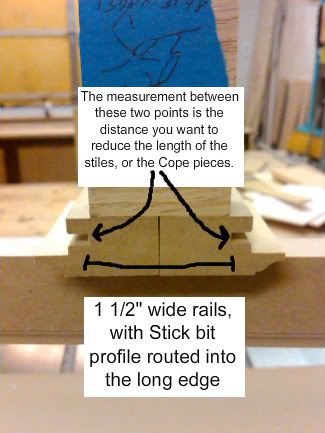
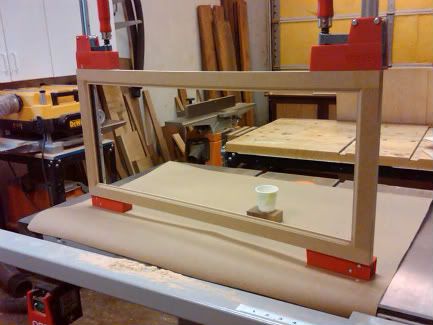
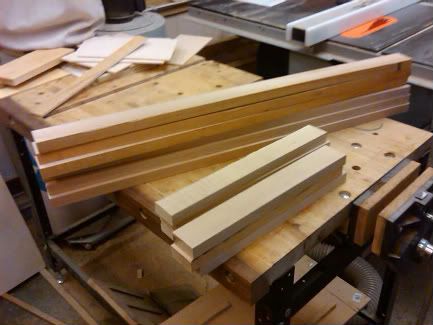
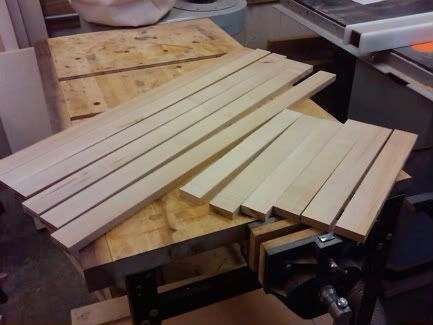
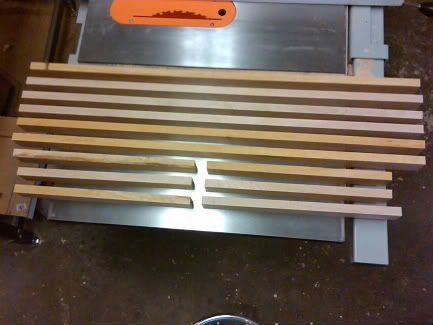
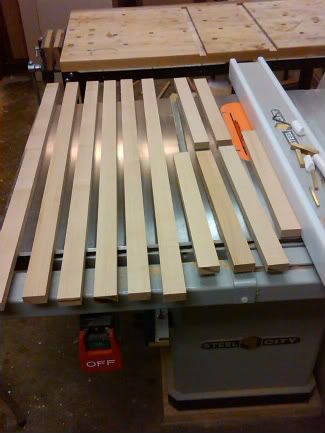
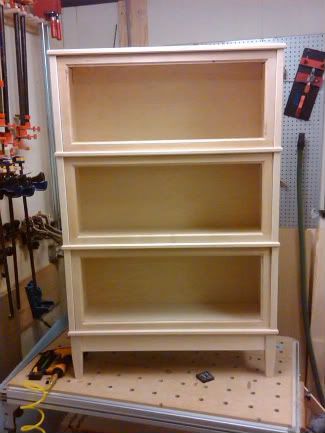
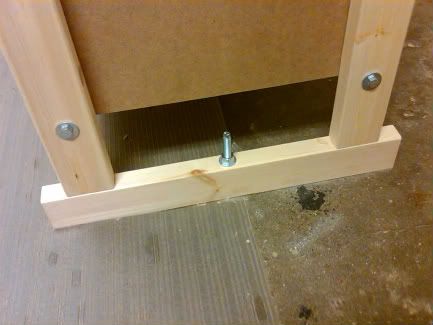
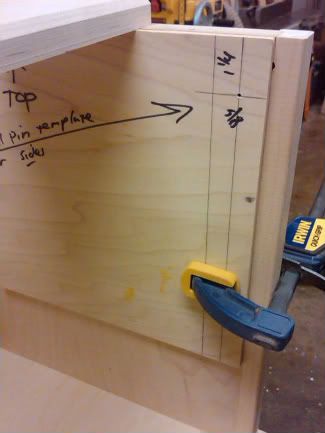
1. They will be mostly constructed with cabinet grade maple plywood as opposed to solid wood. (This will change a lot of the joinery used among other things that I will highlight.)

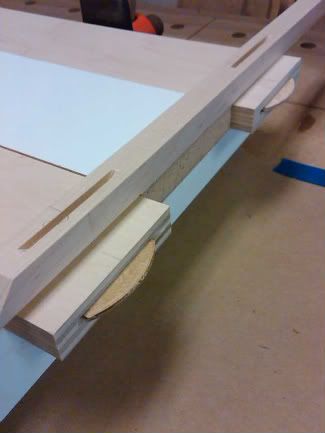
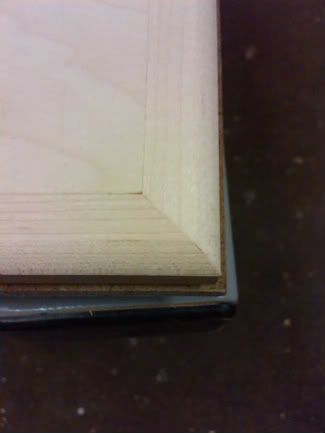
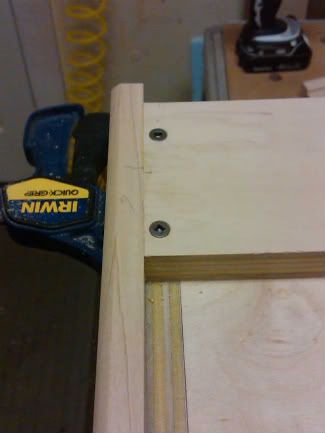
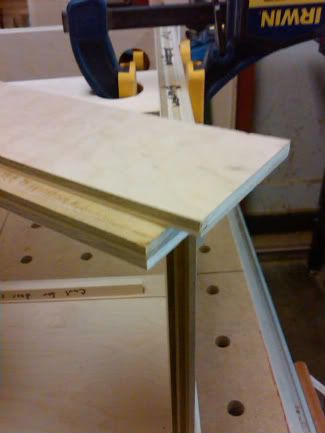
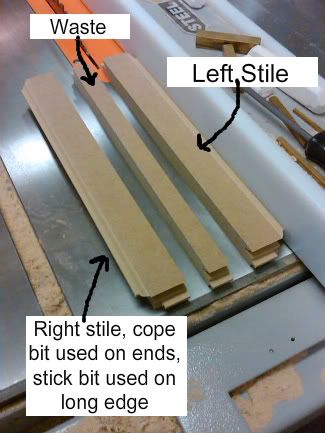
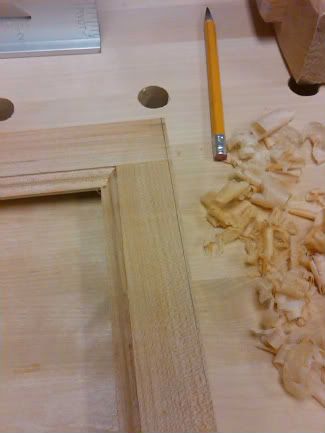
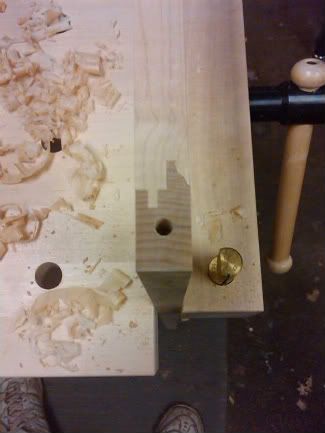
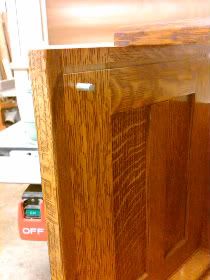
2. The sides will not be frame and panel like the solid oak barristers, they will instead be just plain maple ply wood.

Image


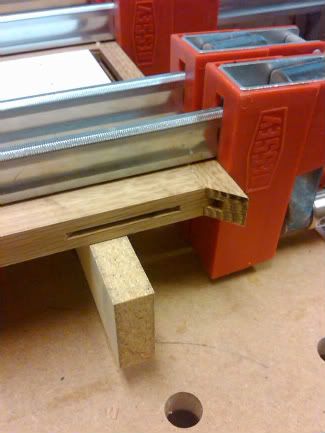
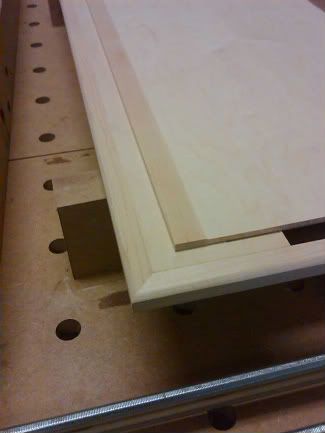
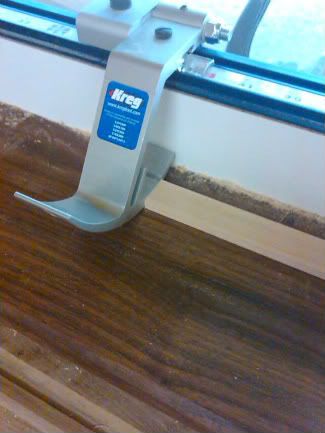
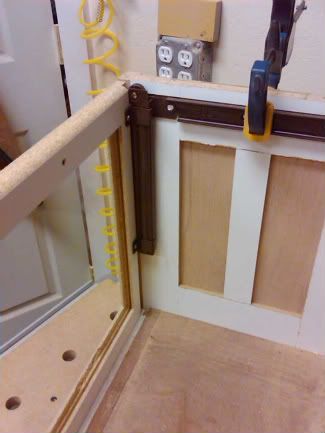
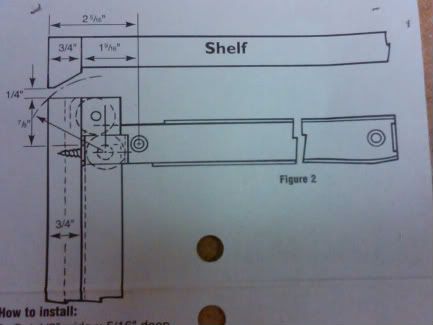
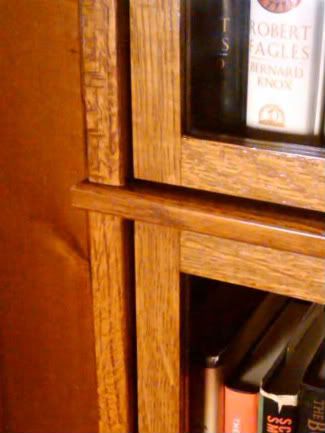
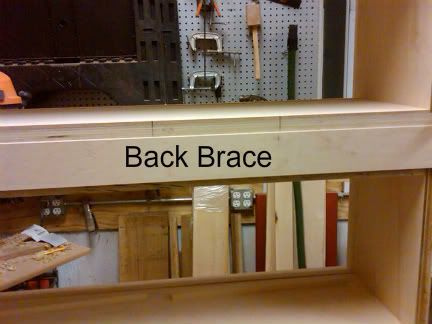
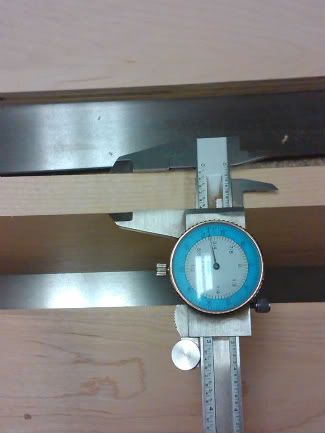
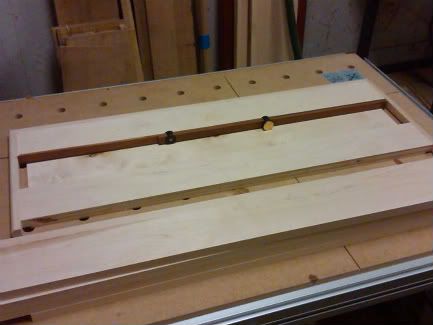
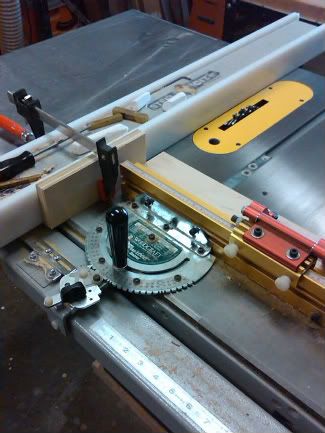
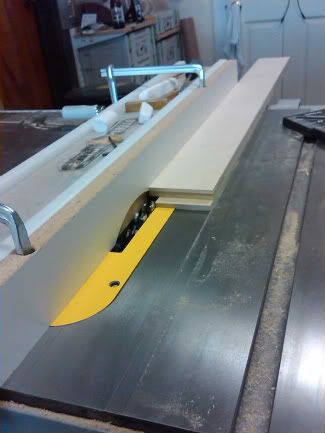
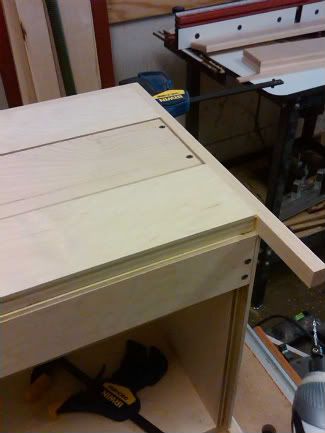
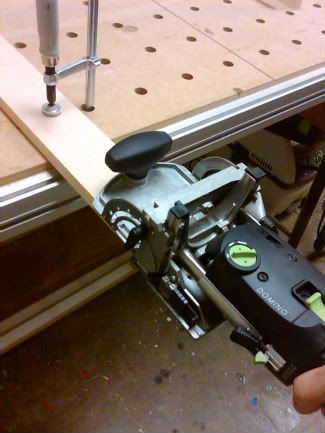
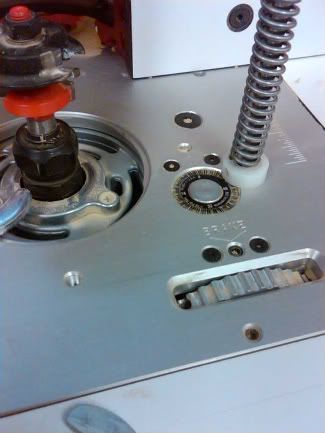
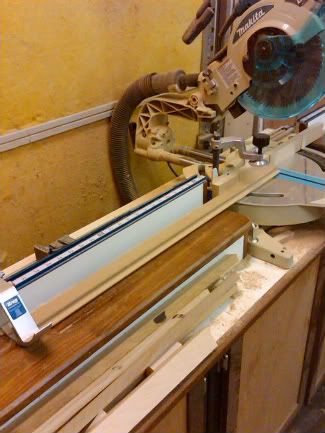
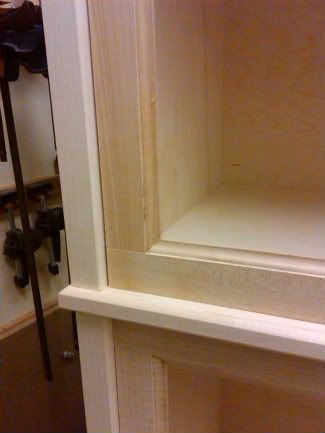
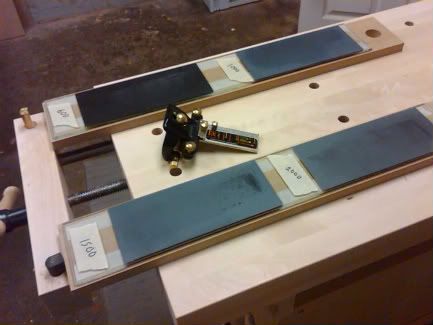
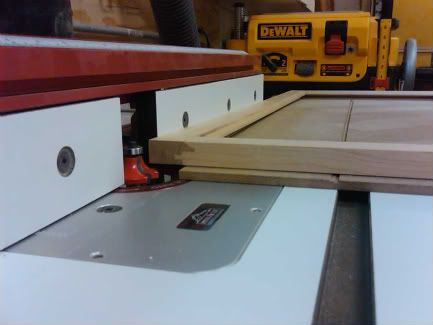
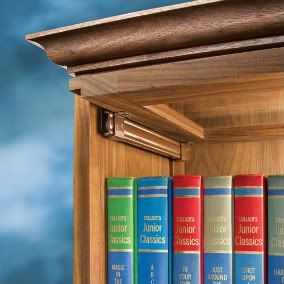
3. I'm not very happy with the way the doors operate on the sets I've already made, so I'm going to try to use Rockler's barrister slides.

Image


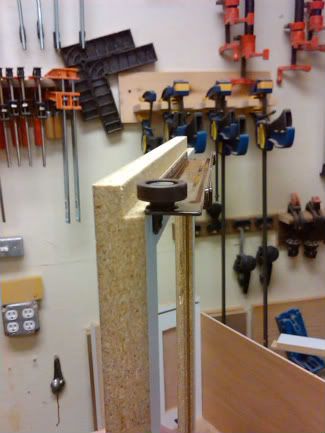
4. I want to include a veneer birds eye maple top to this set. I'll probably use an MDF core. I have never done any veneering so this will be a learn as I go thing!

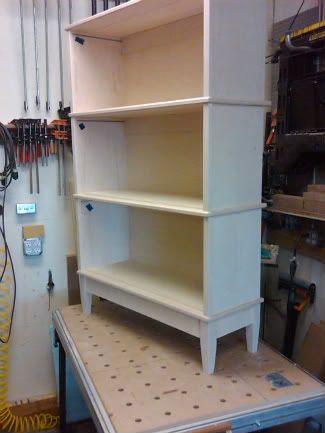
5. This will only be a 3 high stack so that the birds eye maple top will be more visible.

To download a set of plans go to: http://plansnow.com/bstbookcase.html

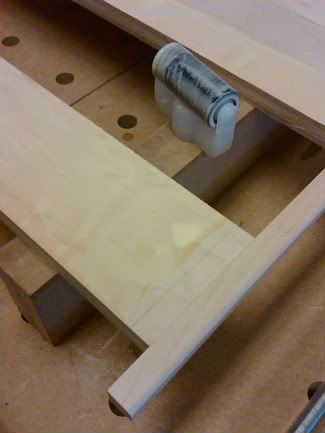
My next post will begin the construction of the boxes.
 
#4 ·
That's really cool! I've got to learn that software!

I could be tempted to make an entire hobby out of designing furniture on sketchup and save thousands on tools and machines! :) Not quite…but it does seem like it would be a lot of fun.

Thanks for sharing.
 
#6 ·
Begining with the base

I begin by building pretty simple bases. They're designed so that boxes are able to stack on top of each other. The slat on the top fits into the bottom of the box.

Image


Image


I start with 2'x4" pieces of plywood. (I always have the 4Ă—8 sheets cut down at my dealers.) I use my Festool track saw to achieve a straight and true edge before moving to the table saw. (This gets rid of any course, splintered, and possibly not straight, edge from the panel saw at the dealers.)

Image


Once I have a straight and clean edge on the 2Ă—4 panel I cut the slats to the proper width on the table saw. Although solid wood edging will later be applied to these slats I don't run them across the jointer. I find that with plywood this tends to do more harm than good. A good quality, sharp blade with a properly tuned table saw gives me a clean enough edge to attach the edging. Once the 8 slats are cut to the proper width, I use my miter saw with a flip stop set to the correct length to insure that each piece is exactly the same size. This is very important because if they are not all exactly the same size it will not only cause the assembly to be out of square but will also make fitting the miters on the edging a nightmare!

Next I cut the solid wood strips for the edging. These are thin strips that are likely to bend or twist. You could just start with a wide board and cut off the 5/8" strips, but I've found that this tends to make them act up a little bit. I start with 4/4 rough stock cut into 2" wide strips. I then flatten one face on the jointer, then I run them through the thickness planer to the exact thickness of the plywood. (I tried in the past to oversize them and then trim them down using a router or a hand plane without much success, it seems to work better for me to just get them to the exact same thickness as the ply) After they are the correct thickness I joint both long edges, then I set the table saw fence to the 5/8 width. I put one of the jointed edges against the fence and make the rip, then rotate the board around to the other jointed edge and rip the other 5/8 strip. This seems to be the best way to keep the pieces straight. I also use quartersawn or straight grained plain sawn boards to help reduce bowing and twisting. (Also, this process gives you one clean jointed edge on a 5/8Ă—23/32 thin strip that I would not want to try running across a jointer! Apply this clean jointed edge facing in towards the plywood to achieve a nice seam)

The plans call for these pieces to be applied with a stub tenon, which I do when I'm building with solid wood but with the ply I use biscuits.

Image


Image


I cut right and left miters on the edging and leave them over-sized and hanging out in back. (The plans call for cutting these to size but I've leaned its better to leave them long. More on this latter) Its pretty tricky to glue up these pieces while keeping everything lined up and square, with the exact proper space in the middle to receive the top slats. To make this a lot easier, take a moment to construct a simple scrap wood jig with a spacer nailed to slats to elevate it a bit to help with the clamp alignment. This also keeps the piece elevated and keeps glue squeeze out from gluing the piece to your bench.

Image


Image


Once this assembly dries apply the front piece of edging, cut it slightly over sized and then "sneak up" on a perfect fit by trimming on the table saw or using a shooting board with a hand plane to get the edging to fit just perfect between the two miters. Using biscuits on this front piece helps a great deal with the alignment.

Image


Image


On the next post I will route the edges and apply the 1/4 plywood bottom on the bases as well as a small 1/4 solid edging strip that acts as a door stop, as well as hiding the plywood edge.
 
#10 ·
Finishing up the bases

A 1/4 inch piece of plywood is glued over the slats on the base to give the bottom of the boxes a smoother look. (otherwise you would see the 3 piece slat system.) The 1/4 solid wood strip provides not only a way to hide the plywood edge, but it also functions as a door stop.

Image


If you follow the plans to get the size for the bottom piece you will come up short! This is because the thickness of the ply is not exactly 3/4. This will make the bottom approx. 1/8 short because you will be 1/16 short on each side. This would cause the sides to not be far enough apart and would cause an ugly gap to appear on the sides. (See pic below.)

Image


To get everything lined up perfect do not use a measurement, instead, line everything up the way it should be and use an adjustable story stick to get the correct size. The stick can then be taken to the miter saw and the stop set with it. This will insure the exact right size.

Image


Image


Image


It is very important to not move your miter saw stop for awhile! Keep it set right where it is, this way it will insure that the other pieces that need to be this exact size: The solid wood trim strip, and the scrap piece that helps with getting the box square as well as helping with the position of the top slat.

At this stage I take a scrap piece of plywood and rip it to around 3" wide. (make 2) Then take it to the miter saw and cut it to the exact length of the bottom piece using the unmoved stop. Drill 2 large holes in each end of these to pieces so that a clamp can be placed into them. (see pic.)

Image


Image


These scrap pieces will go a long way later in helping you keep the box square and figuring out the placement of the top slat latter on. I can't stress enough how important it is in this project to have everything square, lined up, and the exact right size. If anything is off it will show when you start stacking boxes! You don't want the leaning tower of pisa, or the trim pieces from box to box not to line up. So batch cut pieces and use your stops.

Image


After getting the correct length for the bottom piece, cut it to size. Note that this piece dictates the placement of the sides because the sides butt up against it, so make sure they are perfectly square. I know I'm showing the sides completed and I haven't blogged about them yet, but be patient, they're coming up next! Although the plans don't have you build them yet, its nice to have them handy when your cutting and placing the bottom piece. I use the sides to get everything lined up and perfect, then I make a few random pencil marks on the edges of the ply and the base to line it up for the glue up.

Before making your pencil marks make sure both sides and the bottom are positioned exactly like the pic below.

Image


The glue up is pretty straight forward, I use a caul made of MDF to help apply pressure evenly. You will want to pencil around the piece so you know the boundaries of where to put the glue on the base.

Image


Image


To make the small strips that act as the door stop and the trim piece for the plywood start with a milled up piece of 3/4 stock and rip off 1/4 inch strips. I'm not real careful making these strips exactly 1/4 because I run them through the thickness planner anyway to get the right size.

Image


Image


The plans call for these strips to be applied now but I think its best to wait until the sides are attached that way you can prevent them from drifting ever so slightly one way or the other and messing up the alignment of the sides. (PVA glue will often drift a little while setting up.)

Don't forget to use the stop you have not moved on your miter saw to get these strips to the exact right size.

Image


A small detail I should have covered at the beginning is the finished edge that is put on the edge trim piece. This is done on the router table. I use a bit that does both sides at once with one pass. I apply a scrap piece of 1/4 inch mdf with double sized tape as a "shuttle board" to prevent the piece from catching or hanging up as you run it across the cutter. (Before doing this, the work piece would often catch a little bit because of the opening in the middle. The shuttle prevents this.) Note: This is done before the application of the 1/4 plywood, I should have started this blog entry with this step.

Image


Run the two ends across the cutter first, then the long front edge. (This will avoid tear-out)

My next post will cover the construction of the sides. Thanks to all of you who have taken the time to send me an encouraging message to let me know that you're intrested!

Image


I recently added some books to the one stack that I've got completed. Notice the start of the stack next to it, I will finish this set after I complete this Maple set for my sister. My other passion is books, and I have quite a collection that calls for 22 boxes total! So stay tuned I have a lot of work ahead of me!

Image


This small room is actually the narrow breezeway that connects the house to the shop. The plan is to line both long walls with the barristers. This will make my shop and my library very close to each other, which will be a joy for me to have these two areas that I love so much, so close and convenient to each other!
 
#12 ·
Allow me to introduce myself...

I thought I would take a time out from the tutorial and introduce myself and provide some information on my background and experience.

Image


My interest in building things and tools started around the age of 11. My grandpa was always puttering around in the garage messing with tools etc. and I was often out there with him. Also, a guy in our neighborhood had a Shopsmith and was always working on a project. I use to hang out in his garage for hours and bug the hell out of him!

One day a friend and I took a wood Pepsi crate, and his grandmother's picnic table bench, and made a go cart. From then on I was hooked on building things! (Grandma wasn't very happy about the bench!)

Image


When I got to high school I took the two years of wood shop that was offered, and then for two more years went to the shop during study halls. The only pic that I have from these high school projects is this mahogany cradle that I made for my mom. (About a year ago I built her a much nicer one, I'll have to add a pic of it soon.)

Image


I also graduated from a 2 year trade school that was mostly trim carpentry with a little bit of cabinet making.

After school I got a job in a cabinet shop as an apprentice for around 2 years but I later got out of it mostly because a better job came along that offered more money and better benefits.

Over the years I've been involved with the craft at various levels. Just a few years ago I finally went full bore and built a reasonably equipped heated and air conditioned shop.

After messing around with various projects for awhile I decided to focus in on building bookcases. This has turned out to be a good fit because my other passion is books. I have hundreds of books that were piled into gimcrack Sauder termite barf, throwaway furniture, so I thought why not combine the two interests and build my books a respectable home.

Image


So, I tell people that I'm like the guy that bought a $20,000 bass boat to save money on fish! I could have easily bought some very, very, very, nice bookcases with the money that I've put into the shop, but where's the fun in that?

I decided to specialize and learn about barristers because they are modular in design and thus allow me to expand them as I continue to buy more and more books. My current goal is to build enough to house my current collection, I estimate this number to be around 22 barrister boxes.

I'm currently taking time out to build a three tier maple set of barristers for my sister, when this is complete I will return to building mine. I plan to keep the blog going through the entire process.

I hope you will check in from time to time and just say hello, I really enjoy reading your comments and suggestions so please keep them coming!

Post Script:

I almost didn't share this next pic because frankly its pretty embarrassing! What the heck was I thinking with the tinsel?!? Check out the erector set motor on top of the tin can driving the "propeller" on the back! The piece of old carpet for the seat is a nice touch of luxury though.

Image
 
#13 ·
Craig, Wonderful story, thanks for sharing it. I bet your grandfather wasn't as upset about the bench as you might think. Woodworking as a hobby can be difficult to justify as a cost saver compared to buying, but I agree building and tool shopping are sure a lot more fun. If you consider the quality of furniture sold in stores perhaps there is a payoff not to mention the "my husband built this" or "my dad made this for me" factor. All very rewarding and worth the cost.
 
#15 ·
Rockler's Barrister Slides

I was going to use Rockler's Barrister slides because as I mentioned before I'm not very happy with the current set up for how the doors work using the plansnow solution of groves and pins.

Image


This solution works alright once you get use to it and it is pretty simple and cost effective, but I was really hopeful that I could get the Rockler hardware to work because it looked like it would have made for a smoother operation.

Image


http://www.rockler.com/product.cfm?page=18058&filter=barristers
Item:25724 Cost: $22.49 per pair

I decided to try these slides on the prototype that I made from particleboard and scrap a while back to see if I could make them work.

Image


Unfortunately these slides simply will not work with my project due to their design.

They require a rabbit on the edges of the doors and since the rails and styles for my doors are so narrow, (which I like them this way) and because of the bridle joint that joins them, I just don't think that structurally its a good idea. (This particleboard prototype is not a bridle but look above at the first pic on this post and it shows the bridle joint that I'm using.)

Image


These slides are clearly designed specifically for Rocker's barrister plans that they sell. Not a bad looking set, but they are not modular, and you cant put multiple units side by side because of the way the tops and the bases are designed.

Image


The way their plans get around the problem with the slides is shown below:

Image


When the doors operate, they need to rise above the top of the cabinet almost 3/4". This will not work because my current design just doesn't have the space to spare. The only way I could do it would be to dish out the bottom of the barrister above about a 1/2 inch then leave a 1/4 gap at the top. I don't want to do this.

Image


So, no luck on the Rockler slides. If anyone out there has a solution, or knows of some other hardware option, I'd sure like to hear from you!

Next post will show the construction of the sides. Thanks for reading!
 
#20 ·
Rockler's Barrister Slides

I was going to use Rockler's Barrister slides because as I mentioned before I'm not very happy with the current set up for how the doors work using the plansnow solution of groves and pins.

Image


This solution works alright once you get use to it and it is pretty simple and cost effective, but I was really hopeful that I could get the Rockler hardware to work because it looked like it would have made for a smoother operation.

Image


http://www.rockler.com/product.cfm?page=18058&filter=barristers
Item:25724 Cost: $22.49 per pair

I decided to try these slides on the prototype that I made from particleboard and scrap a while back to see if I could make them work.

Image


Unfortunately these slides simply will not work with my project due to their design.

They require a rabbit on the edges of the doors and since the rails and styles for my doors are so narrow, (which I like them this way) and because of the bridle joint that joins them, I just don't think that structurally its a good idea. (This particleboard prototype is not a bridle but look above at the first pic on this post and it shows the bridle joint that I'm using.)

Image


These slides are clearly designed specifically for Rocker's barrister plans that they sell. Not a bad looking set, but they are not modular, and you cant put multiple units side by side because of the way the tops and the bases are designed.

Image


The way their plans get around the problem with the slides is shown below:

Image


When the doors operate, they need to rise above the top of the cabinet almost 3/4". This will not work because my current design just doesn't have the space to spare. The only way I could do it would be to dish out the bottom of the barrister above about a 1/2 inch then leave a 1/4 gap at the top. I don't want to do this.

Image


So, no luck on the Rockler slides. If anyone out there has a solution, or knows of some other hardware option, I'd sure like to hear from you!

Next post will show the construction of the sides. Thanks for reading!
 
#24 ·
Building the sides

Hey readers, my apologies for that last post being published twice.

This post will show the construction of the sides:

Image


Because the maple ply that I bought is not a rotary-sliced veneer but a Pivot slice, it appears as if its glued up boards, each one being around 6". So a 24" inch wide piece looks like 4 boards glued up. To make this work to my advantage, I laid out the pieces and used the track saw to make the first cut in a way that would make my sides look like the same two 5 1/2 inch wide boards glued together from the top to the bottom. In this way the grain pattern will match perfectly from the bottom barrister to the top. After getting a good clean edge from the track saw cut, I set my table saw fence to rip them to the final width. In this way I'm able to make sure they are all exactly the same size. The Festool saw could make both cuts but it would be hard to get them all the exact same size. You just cant beat the table saw for this kind of work! I use the track saw mostly for getting a good straight edge to start with.

Image


After cutting the pieces to the proper width, I set up my miter saw, using the stop to the right of the blade to cut the sides to the finished length. As always with this project these cuts must be dead on square or else you will have gaps in the stack or a leaning stack. Also like before, don't move that stop because you'll want to use it to cut the 1" wide trim pieces that get attached to the front edge of the sides.

Image


After all the pieces are cut, line them up on a perfectly flat surface and verify that they are all exactly the same size.

Image


Next, I cut the 1" wide by 3/4 thick edge strips that get attached to the front edge of each side.

Image


I used biscuits to attach these. A small 1/8 rabbit is applied to these strips, I put the biscuit slots in before I cut this rabbit so that I would have a good edge to plunge into. This of course causes the biscuit slot to be 1/8 of an inch to shallow, so I adjusted the biscuit joiner to go a little deeper.

Image


I used a dado stack in the table saw to make the rabbit. Also note that the edges of these pieces have been rounded over 1/8 on the router table. The blade height is the plywood thickness.

Image


Next I use a dado stack again to cut the rabbit in the back of the sides, and to make the groove for the door. The 1/4" hole for the pin that goes in the side should also be drilled now. (I neglected to remember this important step, so I'll have to do it now that I've already got the trim attached. This shouldn't mess me up too much, but it would have been better to do it before!)

Image


Next is the glue up. I really like how the Festool MFT allows you to come up with some pretty cool ways to facilitate clamping.

Image


My next post will deal with the building of the top slat and the back stiffener. I will also start some assembly.

Image


Thanks for reading and please keep the comments coming!
 
#29 ·
A Door Dilemma

Building will resume on the maple barristers this weekend and I should post on the progress sometime Sunday afternoon, but I've been thinking this week about how I should approach the doors.

I have three potential joinery options that I've decided to consider, they each have their own strengths and weaknesses. I'd like to show them here and summarize what I see as their pros and cons, and I'd value any feedback or suggestions from you as well. So let me here from you.

I've used each of these options before on different barrister sets so I have pics of each.

Option 1: Cope and Stick

Image


Image


Cope and Stick pros:

Aesthetically this one is my first choice, I just think it looks the nicest. I also like how the glass is held in with a rubber spline that makes replacement, if necessary, very easy. I like the way the joinery looks when viewed from its edge, and I also dropped almost $200 on the router bit set and would like to get as much use out of it as possible!

Cope and Stick cons:

Its a weak joint, with not a whole lot of glue surface area, and a tiny, almost worthless tenon. In order to increase the surface area for the glue, I think its wise and necessary to increase the width of the rails and stiles a bit, (which I don't really want to do because I like the look of the thin rails and stiles that the bridle joint makes possible). I want these doors to last for generations, and I'm just not certain that this joint is up to the challenge. I'd like to hear your thoughts. Is modern PVA glue more than strong enough to handle this joint for a very long time?

Option 2: Miter (reinforced with a domino or a spline)

Image


Miter pros:

A clean continuous look, and very easy to make.

Miter cons:

The weakest of the three choices, (despite what a recent FWW article recently stated) and it also has the very real possibility of the miter joint opening up worse than the others as it ages, and causing a very noticeable gap. It also has no interest at all when viewed from its edge since there is no joinery to see. This one also needs the widest rail and stile to make room for the diagonal domino loose tenon. (A spline would work, but the pin that needs to go into the side of the door would be right where the spline is.)

Option 3: The Bridle joint.

Image


Image


Bridle Pros:

The largest surface area for the glue of the three, probably the strongest, longest lasting choice. It has a nice edge view, and allows for the thinnest rails and stiles.

Bridle Cons:

Very plain and uninteresting when viewed straight on. Uses quarter round strips tacked in to hold the glass in, making replacement if necessary, a pain in the butt.

So, I value your wisdom and comments on this matter! Is anything I stated incorrect? Please send me your comments and suggestions!
 
#30 ·
My opinion is to dump the miter joint right off. It doesn't fit the style, and the torsion of opening the case from the bottom rail might open the joint up.

Cope and stick, by far the most beautiful joint. My antique cases are built like this, with the exception that the rails extend across the opening and the styles are set into it. (opposite joint to the pic shown) This hides the joint when the door is open. This joint looks the most professional to me, I'd love to make some cases with this joint.

Bridle joint. This is how I'll probably do mine because I don't have the router bits and am probably too cheap to buy them. It IS more of a utility grade look, but I'm fine with that.

To me, door thickness is not important, it has little effect on the look of the case, as long as the door feels solid and not too heavy.
 
#34 ·
Starting assembly

I decided to use solid maple for the top slat on each barrister box.

So what I'll have is the two plywood slats with the solid wood edging that form the base, with a solid piece of Maple in the middle.

Image


I'm doing this because I'm a little concerned that the plywood shelves could start to sag a little bit over the years. There is the solid 5/8 edging that would help, plus the rear slat rests on top of the rear brace. Both of these elements would help a lot, but just to be extra sure I decided to go solid maple with the top slat.

This pic shows how when assembled, the rear slat is supported by the back brace.

Image


So to start, I mill up the solid maple for the slat to the exact thickness of the plywood using my jointer to flatten one face of a 4/4 board and then running it through the planner to get it to the proper thickness.

Image


I placed a straight edge across the pieces and made sure that the solid maple slat was just a fraction thinner than the ply, I did this because it could cause a serious problem if the center slat was slightly thicker, because this would cause stress on the 1/4 ply that covers the base, it would also cause the sides to not sit flush. By making it slightly thinner I can allow it to act as an additional support to help with the load if needed, and if not, it will not cause any problems.

Image


To get the slat to fit perfect in its space I use my adjustable stick to set the stop on the miter saw. (I use measurements as little as possible as you will see. I think its always better to cut to size.)

Image


I did cut this piece about a 1/16 short to allow for seasonal wood movement and to make fitting the stacks together easier. (Be careful here though you want as little slop as possible or else your vertical trim pieces on the front will be out of alignment.)

A slight diagonal edge is also applied to make it easier to fit the pieces together. I use a coping sled with a backer board to do the short ends.

Image


This is the first time I've worked with solid maple and I'm really enjoying it! It's very hard and dense but it machines beautifully.

Image


To attach the sides the base I have a square plywood box that I use to clamp the pieces together to get them lined up for the screws.

Image


This allows me to get everything lined up perfect before I drill the holes for the screws.

Image


I like using screws because this allows me to build and assemble the entire project before sanding and finishing, then when its complete, I simply disassemble, sand, and finish, then re-assemble. This makes the finishing not only easier, but also improves its quality.

Image


Let me take just a moment to talk about the screws. One of the things I enjoy most about woodworking is using high quality tools and materials. I like what Krenov said, "I don't love working-its working well that I love." When I work with the highest quality tools and materials I feel like I'm "working well". Believe it or not, for me this even applies to something as mundane as the screws! If you have never tried McFeely's square drive screws, (www.mcfeelys.com) I challenge you to try them on your next project, I promise you will never go back to the cheep big box store screws. I know it sounds nuts, and my wife even makes fun of me when my McFeely's Screw Catalog comes in the mail because she can't believe such a thing as a screw catalog even exists! But if working well makes you enjoy the craft more, I encourage you to work well in even the smallest detail, even the screws!

Next I cut the back brace to size and cut the rabbits into the ends that fit into the sides. I also make a rabbit across the bottom that will hold the 1/4 plywood back in place. The plans call for this piece to only be 1 1/2" wide, but by increasing it to 3" wide you can save some money on plywood because instead of needing 14" pieces you will only need 11" pieces. This allows you to get 2 out of each 2'x4' piece. The plans also call for just a 1/8 slot in the edge of this piece, then they have you put a small rabbit into the edge of the ply that fits into the grove. I prefer my way, it seems more solid and secure.

Image


Image


Image


Image


Remember the pieces of plywood that I cut the exact size of the 1/4 plywood bottom? I'm using those pieces to line up, and get the correct size for this piece, and to help with its installation.

Image


To locate the position of the top slat I use the fourth base, (the one with no ply on it that's used later for the cap assembly.) to find the exact position.

Image


This slat has to be attached with small 1" long screws so that the screw length doesn't interfere with the track for the door pins. I'm not at all comfortable with this design, a very small amount of these screws are biting into the sides. I'm sure that at some point during the life of these barristers, someone will attempt to lift an empty, or worse, a full barrister box by this top slat and it will just pull right out.

Image


If anyone has any ideas on how this could be attached more securely I'd love to hear from you!

Image


So, with the top slat, and the back brace all attached to the sides and the bottoms, I stacked them up and they fit very well with no gaps or leaning, so I'm very pleased!

Next, I'll put on the backs, and begin building the bottom base.

Image
 
#37 ·
Building the Base

Image


The project is coming right along, its really starting to take shape! I put the backs on, and built the bottom base this weekend.

If anyone is interested in building a set, the plans came from plansnow.com I would offer to send the PDF of the plans to anyone that wants them but they're on my old laptop that died. All I have is the paper set. If you decide to build them I hope the info in this blog helps.

Nothing very interesting about the backs, the only thing worth mentioning is that I attach the backs with tiny #4 screws, this way I'm able to disassemble for sanding and finishing.

Image


I also use my smaller MFT to cross-cut the panels because they're just a hair to wide for the miter saw, and I don't use a cross-cut sled on the table saw.

Image


I start the bottom base by milling up my 4/4 boards for the stretchers and the 8/4 for the legs. With everything cut to the final size and laid out, I make the marks for the Domino's. I'm using two domino's for each joint, this might be a little bit of overkill, but I figure its likely that someone will no doubt push or pull this piece across a carpeted floor at some point during its life!

Image


Image


I reference the Domino machine off the outward facing face of the stretchers using its top fence, as opposed to just laying the unit flat on the bench. I approach it this way because it makes it easy to set the stretchers back a 1/4" from the legs. (More on this below)

Image


By placing a stretcher flat on the work surface, and placing a 1/4 brass spacer bar on top-I'm able to set the fence on the Domino to place the mortises in the legs so that they will be set back 1/4"

Image


Now I just reference the Domino off the face of the legs to make the mortises.

Image


I glue all 16 domino tenons into the stretchers and let them dry before I set them into the legs. The mortises in the stretchers were set to zero clearance, the ones in the legs were set to allow a little room for adjustment. I do it in stages like this because I think it just makes the glue up go easier and faster when the domino's are already glued into the stretchers.

Image


With the mortises cut into all the pieces, I can now taper the legs. I fashioned a jig out of scrap wood and a toggle clamp to make this operation as safe and accurate as possible.

Image


Image


Because the bottom base assembly can't be disassembled, I sand all the parts down to 180 grit before the glue up. A quick plug for Festool: Sanding is the absolute worst part about woodworking, there's no doubt about it. The Festool system makes sanding a lot less of a pain by eliminating, (almost entirely) the dust. The MFT and the different clamps to an excellent job of holding the work down, and the abrasives seem to last forever before they need replaced. I know I must sound like a Festool commercial, but the stuff is just excellent, its a great system that I can't recommend enough.

Image


I do the glue up in stages to make it easier to keep everything aligned.

Image


Image


Finish up by attaching the slat to the base.

Image


Next weekend I'll start the doors. I decided to go with the cope and stick style. Normally, I'd build the top next but I'm still reading up on how to do veneering. (Mike Burton's book: Veneering A Foundation Course)

The top will be birds eye maple, I'd rather just go with a solid wood piece, but I'm not sure where to get it and how much it would cost. It only needs to be a 10 3/4Ă—32" piece, does anyone know where I could get this?

Thanks for reading!

Image
 
#40 ·
Cope and Stick Doors- building a practice door out of MDF

Image


Its been a while since I did some cope and stick doors so I thought I better give it a practice run on the cheap stuff before I break out the maple stock.

These cope and stick operations can get pretty confusing. It looks like it would be easy, but there is a lot that can go wrong! If you don't have any experience with these things practice a lot before you use your good wood. Do not try to do this without a coping sled, its just not worth it, these huge sharp bits bite! So be careful!

Image


The first step is to measure the inside measurement of my barrister boxes. The width was 32 1/8, so I'll want the final width of the doors to be 1/8 shorter, so I'll want the finished door to be 32" The height is 14" so I'll want the height of the door to be 13 7/8 when assembled.

Image


The bottom piece or what I'm calling the rail, is the easy one, its length will just be cut to the finished size we want, the 32". The end pieces, or what I'm calling the stiles, (the short pieces) is a little harder. Its necessary to find out how much shorter to make the stiles to compensate for the thickness, and the joinery.

To arrive at the amount you want to reduce the 14" height-take your rails and place them end to end and measure the distance between the joinery points. (see pic.) I make a set up block that matches this size, this way I can set the miter stops to the 14" that I want, and then just place the block between the stop and the stock. This will insure that I get the correct size.

Image


I cut my short pieces first, (the stiles, or the Cope part of what is called Cope and Stick) My rails & stiles will be 1 1/2 wide so I start by cutting a board that is just shy of 4" wide. This will allow me to machine a board that's an easier width to work with, I'll simply make 2 pieces from this board by ripping 1 1/2" off each side when all the routing is done.

Image


Use the Cope bit on both ends of the stile piece.

Image


Image


Image


Next apply the Stick profile to the long edge of the stile material. Align the bit for the stick profile as shown in the pic below:

Image


Image


Use a backer board to prevent tear-out.

Image


Next, using the Stick bit put the profile onto the long edge of the rails:

Image


When all the pieces are routed, I cut them down to the final width of 1 1/2" on the table saw.

Image


The rails are cut to their final length of 32" using the miter saw with a stop set at 32" Then the glue up and that's it!

Image


Image


The end result is a pretty nice looking door.

Image


Image
 
#44 ·
Preparing Stock for Doors

I special ordered some 4/4 rough quarter sawn maple from my hardwood dealer for the doors and I picked it up Friday afternoon. I gave it a quick look at the dealers and it didn't look so great but I thought it would hopefully be okay once I got to milling it. Well, no such luck, I'm pretty unhappy with it. It clearly is not FAS Select clear furniture grade lumber! This is a huge on going problem that I've been having! I've been all over the state trying to find a dealer that can get some decent lumber but have yet to find one!

The closest and most convenient to my shop stocks nothing but flat sawn 13/16 thick stock that's been run through a thickness planer, but not run through a joiner first so the boards are not truly flat in most cases. Sometimes, with that extra 1/16 of an inch I can flatten them a little when they need it. I often will even go slightly less than 3/4 thick just so that I can at least have flat stock, but still its not quarter-sawn, so good luck if your trying to make door stiles!

I think what must be going on here is all the good lumber is going to the professional shops that are buying 1000 board feet at a time and us amateurs a left with the junk that they reject.

I had to work Saturday so I didn't get a whole lot done this weekend, I got a couple hours of shop time Sunday morning and all I got done was the milling of the stock for the doors. My original plan was to mill it in 4" wide pieces so that I could do the cope and sticks like I showed in my last post. Well that was simply not an option, this stock is crap, its got bows, cups, twists, and knots. So I thought to settle it down a bit I'd rip the rough stock down to 2" wide strips short strips to tame them down a little before I tried to flatten them on the joiner.

This helped quite a bit, but there was a lot of waste! I started with 11 board feet and just made it to my needed amount of around 5 clean board feet! The stuff was twisting and binding the blade while it was being cut, the whole ugly deal.

I'm sure most readers are pretty familiar with the milling process, and so far in this blog I've not covered it, but seeing how this weekend it's all I got done I thought I'd share the way I go about it.

I started by cutting the rough lumber into 2" strips that were about 4" longer than the final length needed. I tried to find clean sections of the boards, but this did not go well there was a lot of waste.

Image


The first thing to do is flatten one face of each board on the joiner. This pic just shows all the rough boards with one flat face:

Image


After getting one flat face, (which was by no means easy with these boards) the next step is to run them through the thickness planer to square up the other face.

Image


With both faces flat, the next step is to run one edge through the joiner. This results in a nice square flat edge to run against the fence of the table saw to arrive at your final width.

Image


Next, I cut the pieces to length using the miter saw and a stop to ensure that all the pieces are exactly the same length.

At the end of it all, the pieces turned out pretty good considering what I started with. Only one piece acted up a little and bowed just a tad. (I think it will be okay though.) Pretty sad though when you consider the wasted wood it took to get here!

Image


It may seem like I'm a bit obsessed with these boards being flat as possible, but my experience has been that if you spend time here making them flat and square, the cope and stick goes a lot smoother, and the joints will be tighter and the faces even. Also, few things ruin a project more than a warped door.

Thanks for reading!
 
#50 ·
Building the Doors

Image


This weekend I built the doors using the maple stock. I covered this process in Barrister Book Case Tutorial #11 so I won't repeat it all here, but if you're interested in learning more about building doors using cope and stick bits check out my #11 tutorial.

Image


For whatever reason, my doors didn't come out exactly square. I don't know what happened, but their off a tad. The strange thing is they're exactly square on the inside rabbit where the glass goes, but the measurement from the front face corners is off 1/8" I have no clue what could have caused this, but something obviously went wrong.

As a result of not being perfectly square, they don't fit into the cases with the same gap all the way around so this will have to be fixed. I could just redo the doors, or I could plane the edges of the doors to square them up. Believe it or not with all the thousands I've spent on tools so far, I've yet to buy a decent quality hand plane, but now I have a perfect excuse to get one! I ordered a Veritas #5 1/4 Bench Plane from Lee Valley.

So I'll have my new plane by next weekend and I should have no trouble shaving a little bit off the top half edge on the left, and the bottom edge on the right, to square these doors right up!

Next will be building the top. The top will have a birds eye maple veneer top, and I am clueless when it comes to veneering. I got Mike Burton's book, Veneering a foundation course and I've looked through it but I still am unclear on the following issues:

1.) I'm planing on using 3/4 MDF for the substrate. It will be around 11" x 32", do I need to veneer both sides of this piece to prevent cupping? (Burton mentioned that veneer can pull due to seasonal change, and cause severe cupping, but wouldn't this only apply to large pieces?)

2.) Should I go with a paper backed veneer, and which adhesive should I use?

3.) Do I have to use a vacuum bag on a piece this size, or could I get by just using caul's and clamps?

4.) The piece will have a 1/4 rabbit that will fit into a grove on the side pieces. Should I veneer the piece over sized, and then cut the final size, and the rabbits into it with the veneer already applied, or make the piece with the rabbits first and then apply the veneer? Obviously, the first way is far easier, but will the veneer which is only 1/40 thick chip out too much when I try to put the rabbit into the edges? (It will be a cross grain rabbit.)

Believe it or not the book was not much help on these issues. The book deals with projects and techniques that are far more advanced than this simple little flat square piece! The book explains all the options, but I'm not sure which ones are the best for this simple little veneering task.

Any help or advise from LJ readers would sure be appreciated!
 
#58 ·
New Plane and Bench, and fixing the doors.

I received my new Veritas #5 1/4 Bench plane from Lee Valley on Wednesday and as usual I'm very happy with the quality and service that I received from Lee Valley. I decided I really needed to invest in a decent workbench to use with hand tools. (My Festool MFTs just don't have enough weight and stability to them for hand tool use.) So I decided to get the smallest bench from Sjoberg, its not really that heavy, but I fixed this problem by bolting it to the concrete floor with 7" bolts! (I don't think it will move!)

Image


Image


Image


The first thing to do this weekend after getting the new bench built and set up was to get the new plane blade sharp and ready to go. I use the scary sharp method with sheets of sandpaper mounted to 1/4 glass, held to strips of MDF with a Veritas MK2 honing guide. I have water stones, as well as the Work Sharp machine, but so far I get the best results using this method. Its easy, no mess, dead flat, and inexpensive.

Image


So now with the new bench all set up and the plane blade sharp it was time to fix those doors. As I said in the last blog entry, something caused them to get just a tad out of square. I start by marking a pencil line that shows the material that needs removed.

Image


I clamp the door in the vise, and clamp a scrap piece to the end to prevent tear out on the cross grain.

Image


A few swipes with the plane and the doors are brought into square.

Next, I drill the holes in the ends of the doors that will receive the dowel that rides in the groove in the sides. I use a dowel jig, and just line it up on a mark 9/16 from the top of the door.

Image


Image


The front top edge, and the lower inside edge of the doors has to be rounded over a little so that they don't rub when they operate. This is done using a 1/2 radius bit raised 3/8 high, I mount the door to a 1/4 piece of MDF to add stability during the routing.

Image


I use a jig to mark the locations for the dowels in the sides. I use a dowel jig clamped to the side to make sure that the holes are 90 degrees to the face. (This step was supposed to be done prior to assembly, but I forgot, normally I would do it on the drill press.)

Image


Image


The back stiffener is removed to load the doors from the rear.

Image


Thanks for reading! Next weekend I'll start on the top.