LumberJocks Woodworking Forum banner
88K views 330 replies 62 participants last post by  builtinbkyn  
#1 ·
The Fiery Pits of Hell

So I got a wild hair when I was cleaning up my table saw.
But first a little background, I have been trying to clean up my shop and make it presentable for pictures and videos. I have been woodworking for 16+ years and I feel confident that I could teach. So I thought the logical place for me to start would be some on-line videos and see where it went from there. It is a slow and arduous process to take a woodworking shop that has been used for years as a factory of furniture making and turn it into a showroom for teaching woodworking, but I am going to give it a try.

Which brings us back to my wild hair. So I took a plane to my workbench that exists as an extended part of my out-feed table and smoothed it down to refinish. My table saw top was coated in years of neglect as well so I carefully sanded it down to a beautiful metal color instead of what was there. I think it bordered on greenish ;). The last zero clearance insert I made for it was about two years ago out of some particleboard and it was looking pretty rough. I had some MDF left over from a form build I did. That is about the only thing I like that stuff for, but I thought it might work well for the insert so I tried it out, we'll see how it works. I cut it out, routed it to size using a pattern following bit and put some set screws in the bottom to adjust it to height. I put some magnets in the back to hold it down good and a short nail in the back end to keep from flying out.

All done it looked o.k., but I wanted more than o.k. so I painted it bright red… There that was better, it looked official. Like a real woodworker, concerned about safety and all that jazz. It looked like it just came off the factory floor. Something inside me beckoned to have some fun with it. It needed more.
"FLAMES!
Image
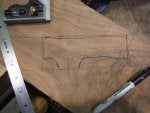
I said to myself. "This sucker needs flames!" So I pulled out some clear drawer liner I use for glass etching sometimes and put a piece on the insert. Using a razor blade I cut out my flames and hit it with some spray paint. A final coat of clear and it was Hot! I like it, it makes me think if I stick my fingers near there they will get burned.
The fiery pits of hell on my table saw. Yeh, that'll do.

Hope you like it. I will try to add to this blog so you guys can follow along as I "pimp my shop;)"

Image


Image


Image


The bear in the last photo is another use of scrap mdf, it is my bear push stick. I usually make them out of solid hardwood, but hey it was there.
Maybe this MDF stuff is growing on me…What am I saying, yuck.
 

Attachments

#93 ·
Tedium in wood

Hi everyone, Hope all is well in woodworkingland. Today was a very slow one, not to mention interrupted at every turn, but I did still manage to get something done.
I always laugh about how quickly a case or cabinet goes together and how easy they seem after making chairs and I ask myself "Why don't I just make cabinets?"
Well I am in the thick of making cabinets and hit a brick wall of sorts with the tills that will hold the tools in place. I figured out my cleat system well enough, but the layout and construction is very tedious.
I managed to get a spokeshave holder done that I am happy enough with and scorp holder that I feel sits a bit low, but I can live with it for now. I am hoping tomorrow will be more productive.
Here is some pics of today's tedium. Enjoy.

For the spokeshave holder I made a mock-up to get the distances between rods right and I am happy with it.

Image


For the scorp holder, it does its' function well, but sits a bit low on the wall and I might redo it down the road.

Image


I like how the modular aspect of the layout in that I can move things around to make a good fit without screwing holes in the wood. I will attach things to the sides permanently once I know what I want there, which may only come after I have put everything together and used it for a bit.

Image


Image


I know it's a few spokeshaves, but it is my most used tool and I like to have a variety to pick from when I use them.
Have fun woodworking. ;)
 

Attachments

#94 ·
Tedium in wood

Hi everyone, Hope all is well in woodworkingland. Today was a very slow one, not to mention interrupted at every turn, but I did still manage to get something done.
I always laugh about how quickly a case or cabinet goes together and how easy they seem after making chairs and I ask myself "Why don't I just make cabinets?"
Well I am in the thick of making cabinets and hit a brick wall of sorts with the tills that will hold the tools in place. I figured out my cleat system well enough, but the layout and construction is very tedious.
I managed to get a spokeshave holder done that I am happy enough with and scorp holder that I feel sits a bit low, but I can live with it for now. I am hoping tomorrow will be more productive.
Here is some pics of today's tedium. Enjoy.

For the spokeshave holder I made a mock-up to get the distances between rods right and I am happy with it.

Image


For the scorp holder, it does its' function well, but sits a bit low on the wall and I might redo it down the road.

Image


I like how the modular aspect of the layout in that I can move things around to make a good fit without screwing holes in the wood. I will attach things to the sides permanently once I know what I want there, which may only come after I have put everything together and used it for a bit.

Image


Image


I know it's a few spokeshaves, but it is my most used tool and I like to have a variety to pick from when I use them.
Have fun woodworking. ;)
The question is are you going to use this for woodworking or hang it in the Louvre. This is just plain beautiful
 

Attachments

#100 ·
Deja Vu All Over Again

Image


Dovetails, I love cutting dovetails. Wait, wasn't I just doing this??? Deja Vu all over again.

Image


Today I milled up and cut the pieces for the door frames. They will be a little undersized in width to accommodate the curves in the frames. The case is 40"x40" and each door will be 19" wide x 40" tall.

Image


Oh hey, before i forget I forgot to tell you all about a few things yesterday. First off I got the last piece of curly western maple that will become the plane till.

Image


I also made a new sign for my door. I had an old painted sign that read "Chairman of the board" on my door, but it was very small and hard to see from any distance so I made a new one on my cnc ;)

Image


Image


It turned out great!!

So the curly panels are glued up and the frames for the doors are done, I just need to make the faces of the doors and carve them wild like the saw till. It has been raining cats and elephants here lately and so I can't get outside to grind. I will probably do most of it by hand.

Image


Image


All in all a pretty good day, I am incredibly blessed to get to do what I love. Especially with this project that is just for me. I don't mind sharing, you can look, but don't touch. Thanks all and have fun woodworking.
TTFN.
 

Attachments

#101 ·
Deja Vu All Over Again

Image


Dovetails, I love cutting dovetails. Wait, wasn't I just doing this??? Deja Vu all over again.

Image


Today I milled up and cut the pieces for the door frames. They will be a little undersized in width to accommodate the curves in the frames. The case is 40"x40" and each door will be 19" wide x 40" tall.

Image


Oh hey, before i forget I forgot to tell you all about a few things yesterday. First off I got the last piece of curly western maple that will become the plane till.

Image


I also made a new sign for my door. I had an old painted sign that read "Chairman of the board" on my door, but it was very small and hard to see from any distance so I made a new one on my cnc ;)

Image


Image


It turned out great!!

So the curly panels are glued up and the frames for the doors are done, I just need to make the faces of the doors and carve them wild like the saw till. It has been raining cats and elephants here lately and so I can't get outside to grind. I will probably do most of it by hand.

Image


Image


All in all a pretty good day, I am incredibly blessed to get to do what I love. Especially with this project that is just for me. I don't mind sharing, you can look, but don't touch. Thanks all and have fun woodworking.
TTFN.
I appreciate that you see you are blessed. I also appreciate you're effort in sharing this journey. I made one blog and it took forever. You're busting these out daily!

Things are looking great.
 

Attachments

#106 ·
Writers block plane

Image


Early this morning the lights flickered to life in the shop revealing that deadly silence of a blank page. Much like a writer with a clean sheet of paper in the type writer (they still use those right?) or an artist with a blank canvass. I sat and stared at the blank sheet of paper I had lain out representing the door to be made. All too many undrawn lines lay waiting for me to choose just the right one knowing the wrong one would spell disaster. Well I guess just like making an omelet, a few trees had to get busted to get this day underway. I finally dove into it and picked lumber that matched in color as best I could and got to it. Like using a block plane, I just needed a different angle.

Image


Image


Image


I broke down some stock and decided on measurements for the side styles.

Image


I made the side that was to be the center thicker to give the tree more beef and to give me room to curve the two doors together. Then I made the top and bottom rails the same width as the thinner style. This all got mortise and tenoned together.

Image


I fought with laying out the tree limbs to get a look I liked. With a combination of mortise and tenon and doweling I had a good half tree laid out. I sliced away the slag and got down to the bones of it.

Image


The slicing away of the fat is fun, a little too fun as I would soon find out.

Image


In my exuberance to cut out the tree shape I cut a bit too wide. I had drawn out where the door frame would be so I would color outside the lines there, but I failed to trace out the panel to give myself an idea of where to stop cutting away wood. Ooops.

Image


Once the shaped are more refined I will rout a slit on the frame to receive the panel which will be cut over-sized to the shapes of the openings. Thankfully I had a few scraps left from milling the panels that I can add to the width.

Image


I got away with one here, on a project like this it is easy to make one cut or mistake that can jeopardize the project. That happens in woodworking a lot and it is how you modify your design and roll with the mistake that will prove how resourceful a woodworker you can be. I get away with crap all the time and I got away with it again. I am just hoping I don't make any more goofs in the finishing of these doors.

Even with all the overthinking and planning I missed one little step and now I have to fix it. Of course now that I have been through it once I know what to look for so the second door should go easier. That is how it goes, the second one is easier the third is a snap and so on. I just didn't want to build a prototype of this, lazy I guess. Hope you enjoyed.
Take care.
 

Attachments

#107 ·
Writers block plane

Image


Early this morning the lights flickered to life in the shop revealing that deadly silence of a blank page. Much like a writer with a clean sheet of paper in the type writer (they still use those right?) or an artist with a blank canvass. I sat and stared at the blank sheet of paper I had lain out representing the door to be made. All too many undrawn lines lay waiting for me to choose just the right one knowing the wrong one would spell disaster. Well I guess just like making an omelet, a few trees had to get busted to get this day underway. I finally dove into it and picked lumber that matched in color as best I could and got to it. Like using a block plane, I just needed a different angle.

Image


Image


Image


I broke down some stock and decided on measurements for the side styles.

Image


I made the side that was to be the center thicker to give the tree more beef and to give me room to curve the two doors together. Then I made the top and bottom rails the same width as the thinner style. This all got mortise and tenoned together.

Image


I fought with laying out the tree limbs to get a look I liked. With a combination of mortise and tenon and doweling I had a good half tree laid out. I sliced away the slag and got down to the bones of it.

Image


The slicing away of the fat is fun, a little too fun as I would soon find out.

Image


In my exuberance to cut out the tree shape I cut a bit too wide. I had drawn out where the door frame would be so I would color outside the lines there, but I failed to trace out the panel to give myself an idea of where to stop cutting away wood. Ooops.

Image


Once the shaped are more refined I will rout a slit on the frame to receive the panel which will be cut over-sized to the shapes of the openings. Thankfully I had a few scraps left from milling the panels that I can add to the width.

Image


I got away with one here, on a project like this it is easy to make one cut or mistake that can jeopardize the project. That happens in woodworking a lot and it is how you modify your design and roll with the mistake that will prove how resourceful a woodworker you can be. I get away with crap all the time and I got away with it again. I am just hoping I don't make any more goofs in the finishing of these doors.

Even with all the overthinking and planning I missed one little step and now I have to fix it. Of course now that I have been through it once I know what to look for so the second door should go easier. That is how it goes, the second one is easier the third is a snap and so on. I just didn't want to build a prototype of this, lazy I guess. Hope you enjoyed.
Take care.
the one thing i like about you brian is you admit your mistakes to us when you could easily pretend to be perfect and wed never know except those of us that have been doing this long enough who make 10 times more mistakes than you do.but hey thats how we grow and learn this craft so thanks for being out in the open i think it really give the new guys encouragement to never give up and just keep trying.and i wish my mistakes came out half as good as yours.see ya next episode.
 

Attachments

#113 ·
Blue tape to the rescue

So like I said yesterday, I goofed up and made my panel openings larger than my panel. I looked back through the stock I had left over and it was too thin to use so I needed to rely on off-cuts to patch my mistakes. Blue tape to the rescue.

Image


Image


Image


Image


Image


I cut out the over-sized shapes that would go into the door panel and used scraps to fill in the empty spots.

Image


I traced the outline of the openings onto the curly maple panel and then used calipers to oversize it and sribe a new line to cut to.

Image


Image


Image


Image


Then I sanded the inside curves smooth.

Image


Once the repairs were made I used a 1/4" slot cutting bit to rout a grove to receive the panels.

Image


I set the bit so it would clear any joinery, but still give me room for carving.

Image


Image


Image


Image


Then I routed away a 1/4" from the face where the tree limbs wouldn't be to give it more depth.

Image


Upon starting the second door I did the thing I forgot to yesterday and laid it all out. I was happy with the repair job so I am not as worried if I decide to go a bit outside the lines.

Image


Image


I had trouble with the tree looking like a bug when I had three branches off to each side so I yanked one out.

Image


I might lower the bottom left branch down a bit more, but so far so good.
Thanks
 

Attachments

#114 ·
Blue tape to the rescue

So like I said yesterday, I goofed up and made my panel openings larger than my panel. I looked back through the stock I had left over and it was too thin to use so I needed to rely on off-cuts to patch my mistakes. Blue tape to the rescue.

Image


Image


Image


Image


Image


I cut out the over-sized shapes that would go into the door panel and used scraps to fill in the empty spots.

Image


I traced the outline of the openings onto the curly maple panel and then used calipers to oversize it and sribe a new line to cut to.

Image


Image


Image


Image


Then I sanded the inside curves smooth.

Image


Once the repairs were made I used a 1/4" slot cutting bit to rout a grove to receive the panels.

Image


I set the bit so it would clear any joinery, but still give me room for carving.

Image


Image


Image


Image


Then I routed away a 1/4" from the face where the tree limbs wouldn't be to give it more depth.

Image


Upon starting the second door I did the thing I forgot to yesterday and laid it all out. I was happy with the repair job so I am not as worried if I decide to go a bit outside the lines.

Image


Image


I had trouble with the tree looking like a bug when I had three branches off to each side so I yanked one out.

Image


I might lower the bottom left branch down a bit more, but so far so good.
Thanks
Pimp sauce.
 

Attachments

#118 ·
Rinse and Repeat

In the summer 1978 issue of FWW, Tage Frid wrote about tool cabinets.
"Why bother making a tool cabinet when a crate with shelves nailed in would hold the tools? I believe if a person wants to make a living as a woodworker and furniture designer, a well-designed and executed tool cabinet is very important. It's a pleasure to have a beautiful tool cabinet, where the tools are properly arranged and easy to find. And when a potential customer comes into the shop and sees a nice cabinet, half the selling job is done right there."

This set of cabinets and a bench is WAY over the top and might be thought to be excessive, but it is going to be my home for the rest of the time I am able to work with wood, hopefully 40+years left, so I want to look at something that inspires me to strive for perfection and make beautiful things. I have been having a good time making it and I look forward to the day I can step back and see the finished product.

So today was "Rinse and Repeat" on the cabinet doors.

Image


I started out by lowering the left bottom branch a bit and drawing out what I liked.
I then did all the joinery to set the cross pieces in with floating tenons and dowels.

Image


When I did the larger side mortises the clamp wasn't deep enough to line the wood up flush with the top of the bench so I added some shims of pine to level it all out then routed the mortises.

Image


Image


Image


Image


The method I am employing to make these doors could be used to make some very decorative raised panel doors if any of you want to try it out. Over-size your frame and cut out the shape you like, then trace on the shape to your thick stock for the raised panel. Use calipers to enlarge the pattern being as accurate as possible. Then cut out the larger pattern and rout it with the matching raised panel bit. I would like to try it some day, but it might have to wait a few years. I think it would put a tombstone panel door to shame.

Image


Image


Image


Image


I am hoping for some good weather next week so I can use my grinder to take away the bulk of the wood to start carving on it.

Image


Image


For now I put the tools down and turn the lights off. It is time to rest a bit and come to it another day. I wish you all a wonderful weekend.
If you would like some more to read, I suggest this note written by woodworker Mark Love. It is a great piece titled "Risk"
http://marklovefurniture.com/risk.pdf
Have fun Woodworking.
 

Attachments

#119 ·
Rinse and Repeat

In the summer 1978 issue of FWW, Tage Frid wrote about tool cabinets.
"Why bother making a tool cabinet when a crate with shelves nailed in would hold the tools? I believe if a person wants to make a living as a woodworker and furniture designer, a well-designed and executed tool cabinet is very important. It's a pleasure to have a beautiful tool cabinet, where the tools are properly arranged and easy to find. And when a potential customer comes into the shop and sees a nice cabinet, half the selling job is done right there."

This set of cabinets and a bench is WAY over the top and might be thought to be excessive, but it is going to be my home for the rest of the time I am able to work with wood, hopefully 40+years left, so I want to look at something that inspires me to strive for perfection and make beautiful things. I have been having a good time making it and I look forward to the day I can step back and see the finished product.

So today was "Rinse and Repeat" on the cabinet doors.

Image


I started out by lowering the left bottom branch a bit and drawing out what I liked.
I then did all the joinery to set the cross pieces in with floating tenons and dowels.

Image


When I did the larger side mortises the clamp wasn't deep enough to line the wood up flush with the top of the bench so I added some shims of pine to level it all out then routed the mortises.

Image


Image


Image


Image


The method I am employing to make these doors could be used to make some very decorative raised panel doors if any of you want to try it out. Over-size your frame and cut out the shape you like, then trace on the shape to your thick stock for the raised panel. Use calipers to enlarge the pattern being as accurate as possible. Then cut out the larger pattern and rout it with the matching raised panel bit. I would like to try it some day, but it might have to wait a few years. I think it would put a tombstone panel door to shame.

Image


Image


Image


Image


I am hoping for some good weather next week so I can use my grinder to take away the bulk of the wood to start carving on it.

Image


Image


For now I put the tools down and turn the lights off. It is time to rest a bit and come to it another day. I wish you all a wonderful weekend.
If you would like some more to read, I suggest this note written by woodworker Mark Love. It is a great piece titled "Risk"
http://marklovefurniture.com/risk.pdf
Have fun Woodworking.
The cabinet is too nice for shop tools. They are fortunate to have you for an owner.
 

Attachments

#127 ·
Bats in the Belfry

Old man winter done kicked me in the caboose, but I managed to drag my butt to the shop and schlep some wood around.
I spent Sunday hanging lights I bought an a school remodel sale and now have the sun set high in my rafters.
Image


I ended up hanging four of these bad boys and they really brighten the place up.

Image


While I was up there hanging these 40lb beasts I thought of that song bats in the belfry, in the shop, boiling society :)
I found all kinds of goodies up in my long term wood storage above my art room.
Image


Image


It was kind of fun up there, you get a good birds eye view of the shop.

Image


Image


Image


Now you can get an idea of how things are laid out.

Image


So today I started on the drawers for the tool cabinet, and I used some old western maple drawer parts I had left over from an old job to make them.

Image


Image


Image


I got two of them done before the weather warmed up enough for me to go outside and grind on one of the doors.

Image


Image


With the last minutes of the day I took a gouge to the tree trunk to give it some texture which I think will look nice and contrast it to the rest of the frame.

Image


Image


I have a crazy idiosyncrasy
it's affinity to serendipity
and in this eternal epiphany
no hypocrisy or duplicity

oh mama we now so hungry
Bats in the Belfry!
 

Attachments

#128 ·
Bats in the Belfry

Old man winter done kicked me in the caboose, but I managed to drag my butt to the shop and schlep some wood around.
I spent Sunday hanging lights I bought an a school remodel sale and now have the sun set high in my rafters.
Image


I ended up hanging four of these bad boys and they really brighten the place up.

Image


While I was up there hanging these 40lb beasts I thought of that song bats in the belfry, in the shop, boiling society :)
I found all kinds of goodies up in my long term wood storage above my art room.
Image


Image


It was kind of fun up there, you get a good birds eye view of the shop.

Image


Image


Image


Now you can get an idea of how things are laid out.

Image


So today I started on the drawers for the tool cabinet, and I used some old western maple drawer parts I had left over from an old job to make them.

Image


Image


Image


I got two of them done before the weather warmed up enough for me to go outside and grind on one of the doors.

Image


Image


With the last minutes of the day I took a gouge to the tree trunk to give it some texture which I think will look nice and contrast it to the rest of the frame.

Image


Image


I have a crazy idiosyncrasy
it's affinity to serendipity
and in this eternal epiphany
no hypocrisy or duplicity

oh mama we now so hungry
Bats in the Belfry!
This is looking awesome! That texture is going to look incredible.
 

Attachments

#131 ·
Another Day Closer

With some projects you can see dramatic progress at the end of the day, this is not one of those projects. I have allotted roughly three months to finish the project knowing it was a huge undertaking. I will undoubtedly have to work on an order or side project during the time it is taking place, but for now I am just concentrating on the build. Like I said there wasn't a big transformation today, but there was progress. I have all the drawer fronts dovetailed and roughly fit to their perspective spots. I thought it would be a good day to show how I do my half blind dovetails. I start by cutting my stock just a bit proud of any openings. Mark your layout lines all the way around the front of the drawer sides and just the side and back of the drawer front. I know there is a big controversy to which is cut first, tails or pins. Normally I would say it doesn't matter, try them both and go with whatever works best for you, but for half blinds, cutting the tails first really does make it easier. Knowing how to do it both ways gives you an advantage.
Draw a line about 1/8"-3/16" in from each side of the drawer side.

Image


Next using dividers I lay out how many pins I would like to have. Fool with it a bit until you have an even spacing.

Image


Then press the tips in to mark the positions.

Image


Image


Mark square lines to reference off.

Image


And lay out the pin cuts.

Image


Image


Start by making your cuts all going in one direction to keep a rhythm.

Image


Then come back from the other direction.

Image


If you miss your line while cutting, don't worry about it as long as the cut is square and you transfer the layout well it won't matter.

Turn the board on its' side and press into the marked line with your chisel and then pair down at an angle to the line to make a trough for the saw to ride in.

Image


Then cut away the waste from where the half pin will go.

Image


Lay the drawer side on a sacrificial board and chop away the waste material. Sometimes I use a coping saw to remove the bulk first, but these were very small so I didn't.

Image


This picture doesn't have the half pins cut away yet.
Next if you have a rake light (by all means use one when dovetailing) lay it as far down as it will go to shine light under the board. I clamp my stock up to the height of the sacrificial board and lay the drawer side on it to lay out the pins. Pull it up to the drawer face just until the light disappears and mark your lines. For dovetails this size I have always used a razor blade to mark the lay out lines, but I recently made a marking knife from a discarded hacksaw blade and I love it. I will make a nice one when the project is all done and probably turn it into a youtube show for everyone.

Image


Image


I then flip the drawer front around in the vise and raise it up (can't wait for my moxon vise).

I don't like to cut to the line with pins this small as it is too easy to ruin them, so I cut just a bit to the side and pair to them later on.

Image


Cut as much as you can up to the depth lines.

Image


In the past I have used the trick where you take an old card scraper and hammer it down to cut the grains in the corners, but I have found that if you are just patient you can get it done without this step.

Start by making the same definition as with the half pins side by pressing just into the depth lines and pairing down to them. This will ensure that when you go to banging out the waste the chisel doesn't wander on you.

Image


I then start removing the waste, but I start a bit from the back giving myself room to pair away to the final depth.

Image


Pair away the waste and clean up the sockets to receive the tails.

Image


If everything went well you should be able to slide it all together with just some light tapping to drive it home and "Voila"

Image


Rinse and repeat for as many drawers as needed. :)

Image


Please take this instruction with a grain of salt as I am not a cabinet maker and don't do dovetails all the time.

Image


So I used a nice board to make the drawer fronts and got them all fitted and they were turning out nice, but I heard the weather report saying today would be the only decent day for a week or so, so I got outside to grind on the second door.

Image


Image


I think they are turning out nicely.

Image


Again I took the last hour of the day to carve the tree texture and used a rake light to show you how it will turn out.

Image


I have been having fun on this project and I thank you all for following along with me. I have been all to happy to take pictures and chronicle the progress.

Thanks,
 

Attachments

#132 ·
Another Day Closer

With some projects you can see dramatic progress at the end of the day, this is not one of those projects. I have allotted roughly three months to finish the project knowing it was a huge undertaking. I will undoubtedly have to work on an order or side project during the time it is taking place, but for now I am just concentrating on the build. Like I said there wasn't a big transformation today, but there was progress. I have all the drawer fronts dovetailed and roughly fit to their perspective spots. I thought it would be a good day to show how I do my half blind dovetails. I start by cutting my stock just a bit proud of any openings. Mark your layout lines all the way around the front of the drawer sides and just the side and back of the drawer front. I know there is a big controversy to which is cut first, tails or pins. Normally I would say it doesn't matter, try them both and go with whatever works best for you, but for half blinds, cutting the tails first really does make it easier. Knowing how to do it both ways gives you an advantage.
Draw a line about 1/8"-3/16" in from each side of the drawer side.

Image


Next using dividers I lay out how many pins I would like to have. Fool with it a bit until you have an even spacing.

Image


Then press the tips in to mark the positions.

Image


Image


Mark square lines to reference off.

Image


And lay out the pin cuts.

Image


Image


Start by making your cuts all going in one direction to keep a rhythm.

Image


Then come back from the other direction.

Image


If you miss your line while cutting, don't worry about it as long as the cut is square and you transfer the layout well it won't matter.

Turn the board on its' side and press into the marked line with your chisel and then pair down at an angle to the line to make a trough for the saw to ride in.

Image


Then cut away the waste from where the half pin will go.

Image


Lay the drawer side on a sacrificial board and chop away the waste material. Sometimes I use a coping saw to remove the bulk first, but these were very small so I didn't.

Image


This picture doesn't have the half pins cut away yet.
Next if you have a rake light (by all means use one when dovetailing) lay it as far down as it will go to shine light under the board. I clamp my stock up to the height of the sacrificial board and lay the drawer side on it to lay out the pins. Pull it up to the drawer face just until the light disappears and mark your lines. For dovetails this size I have always used a razor blade to mark the lay out lines, but I recently made a marking knife from a discarded hacksaw blade and I love it. I will make a nice one when the project is all done and probably turn it into a youtube show for everyone.

Image


Image


I then flip the drawer front around in the vise and raise it up (can't wait for my moxon vise).

I don't like to cut to the line with pins this small as it is too easy to ruin them, so I cut just a bit to the side and pair to them later on.

Image


Cut as much as you can up to the depth lines.

Image


In the past I have used the trick where you take an old card scraper and hammer it down to cut the grains in the corners, but I have found that if you are just patient you can get it done without this step.

Start by making the same definition as with the half pins side by pressing just into the depth lines and pairing down to them. This will ensure that when you go to banging out the waste the chisel doesn't wander on you.

Image


I then start removing the waste, but I start a bit from the back giving myself room to pair away to the final depth.

Image


Pair away the waste and clean up the sockets to receive the tails.

Image


If everything went well you should be able to slide it all together with just some light tapping to drive it home and "Voila"

Image


Rinse and repeat for as many drawers as needed. :)

Image


Please take this instruction with a grain of salt as I am not a cabinet maker and don't do dovetails all the time.

Image


So I used a nice board to make the drawer fronts and got them all fitted and they were turning out nice, but I heard the weather report saying today would be the only decent day for a week or so, so I got outside to grind on the second door.

Image


Image


I think they are turning out nicely.

Image


Again I took the last hour of the day to carve the tree texture and used a rake light to show you how it will turn out.

Image


I have been having fun on this project and I thank you all for following along with me. I have been all to happy to take pictures and chronicle the progress.

Thanks,
Treemendous
 

Attachments

#146 ·
Run Forest!

So there I was chomping down my wheat-grass, vegan, soy-milk all natural, Tortellini for lunch (Hey I live in Oregon, you try going to Scotland and not having the haggis) So anyway there I was eating lunch, staring at the box I had just picked up from the post office.
It had come!!! It was here!!! After months of waiting, my travisher had arrived! I ordered a Peter Galbert travisher and it was finally here. It was produced by Claire Minihan who did an amazing job. I think I was drooling over the box, but the lunch was good too, so was the cookie ;) Gotta eat healthy.

Image


So promptly after lunch I hastened out to the shop and opened my box with a huge grin on my face. I swear I saw that thing give off a golden shimmer when I opened it.

Image


Image


Image


It looked so nice in its' new home.

Image

You can order yours here;
http://www.chairtools.blogspot.com/p/travishers.html

":Now back to our regularly scheduled program:"

Image


Today I started by finishing up the drawers, I chose to go with the same hardware I had used on my tool tote. Though it was walnut and myrtle I though they still matched well enough to keep a flow going.

Image


I have kind of a theme going with the maple and walnut. I think it all started with my saw and vise I made earlier this year.

Image


Image


Image


Image


When it is all said and done it is going to be a maple and walnut wonderland.

I mortised out all the drawer fronts for the Hardware, then made the backs and bottoms and glued them all together.

Image


Image


Image


Once they were glued up I turned my attention to the door fronts. I mortised out for the hinges. I like using soss hinges as they don't show at all on the outside and they would work well for this application where I wanted the door fronts to overlap the frames and still open to close to 180 degrees.

Image


Image


Image


Image


Image


I just managed to get one door hung by the end of the day so I clamped the door panel to it to see how it was going to look and well, you be the judge ;)

Image


Image


Image


I think i am going to embellish the door fronts a bit with some falling leaf inlays tomorrow if I can get to it. Should be fun. Thanks to all of you for following along with me, you have made this very fun for me!
Take care and have fun woodworking!
 

Attachments

#147 ·
Run Forest!

So there I was chomping down my wheat-grass, vegan, soy-milk all natural, Tortellini for lunch (Hey I live in Oregon, you try going to Scotland and not having the haggis) So anyway there I was eating lunch, staring at the box I had just picked up from the post office.
It had come!!! It was here!!! After months of waiting, my travisher had arrived! I ordered a Peter Galbert travisher and it was finally here. It was produced by Claire Minihan who did an amazing job. I think I was drooling over the box, but the lunch was good too, so was the cookie ;) Gotta eat healthy.

Image


So promptly after lunch I hastened out to the shop and opened my box with a huge grin on my face. I swear I saw that thing give off a golden shimmer when I opened it.

Image


Image


Image


It looked so nice in its' new home.

Image

You can order yours here;
http://www.chairtools.blogspot.com/p/travishers.html

":Now back to our regularly scheduled program:"

Image


Today I started by finishing up the drawers, I chose to go with the same hardware I had used on my tool tote. Though it was walnut and myrtle I though they still matched well enough to keep a flow going.

Image


I have kind of a theme going with the maple and walnut. I think it all started with my saw and vise I made earlier this year.

Image


Image


Image


Image


When it is all said and done it is going to be a maple and walnut wonderland.

I mortised out all the drawer fronts for the Hardware, then made the backs and bottoms and glued them all together.

Image


Image


Image


Once they were glued up I turned my attention to the door fronts. I mortised out for the hinges. I like using soss hinges as they don't show at all on the outside and they would work well for this application where I wanted the door fronts to overlap the frames and still open to close to 180 degrees.

Image


Image


Image


Image


Image


I just managed to get one door hung by the end of the day so I clamped the door panel to it to see how it was going to look and well, you be the judge ;)

Image


Image


Image


I think i am going to embellish the door fronts a bit with some falling leaf inlays tomorrow if I can get to it. Should be fun. Thanks to all of you for following along with me, you have made this very fun for me!
Take care and have fun woodworking!
I don't know which I like more, the travisher or the cabinet it lives in. You're doing a bang up job on this, man!
 

Attachments

#151 ·
The Leaves are Falling

I felt like embellishing the doors a bit so today I milled up some leopard wood and made some fall leaves to inlay into the doors. I used a router bit used for a CNC that was 1/16" thick at the end to get into the tight spots and a 3/16" bit for the rest. I cut out the design and taped them in place to see if I liked it. I then traced out the leaves and routed out a recess for them and glued them in place. I then made a stem and did the process again. I finished them off with a few little indications of veins. Not a lot done today, I am really slow at inlays, but I was happy with the result.

Image


Image


Image


Image


Image


Image


Image


Image


Image


Image


Image


Image


Image


Image


I hope you all have a great weekend and have fun woodworking.
 

Attachments

#152 ·
The Leaves are Falling

I felt like embellishing the doors a bit so today I milled up some leopard wood and made some fall leaves to inlay into the doors. I used a router bit used for a CNC that was 1/16" thick at the end to get into the tight spots and a 3/16" bit for the rest. I cut out the design and taped them in place to see if I liked it. I then traced out the leaves and routed out a recess for them and glued them in place. I then made a stem and did the process again. I finished them off with a few little indications of veins. Not a lot done today, I am really slow at inlays, but I was happy with the result.

Image


Image


Image


Image


Image


Image


Image


Image


Image


Image


Image


Image


Image


Image


I hope you all have a great weekend and have fun woodworking.
looking good
 

Attachments

#166 ·
Look Boss, De Plane

I am making a separate plane till to go with the set in progress, but I wanted to have my most used planes close at hand in the cabinet. I also have a few that I have acquired that I would very much like to refurbish and use.
So today I worked on the Plane till that would go into the cabinet.
Image


I started out by taking a picture of the cabinet, the planes I wanted in there and using photoshop to conjure up a likeness of what it might look like.

Image


Image


I had a large piece of maple left over from making the carcass so I squared it up and made a walnut frame to go around it.

Image


I attached some cleats to the back to hang it and made a shelf on the front and top for some old bailey wood planes.

Image


Image


Image


Image


I had intended to stop taking orders when I began this remodel, but somehow one slipped through and I hear there are more on the way.
We got and order for a military commemorative cane. We have made a few of these in the past and they are fun. They get laser engraved and commemorative coins inlaid in the sides.

Image


Image


This one will be made from walnut. I like to use the swirling grain around knots to get my handle material from as it adds to the strength of the handle and gives it a nice look.

Image


Image


The handles are squared up and drilled for the tenon.

Image


Image


The shaft is turned on my mill and then the words are laid out and it's off to the laser engravers.
These canes get a brass collar that I make from a piece of pipe.

Image


Image


Image


Image


Tomorrow I am going to start getting the doors ready to glue up and hang.
Oh, and for all you young ens' the title reference is from a show called "Fantasy Island" I think you could find it on HULU or something.
Thanks all and have fun woodworking.
 

Attachments

#167 ·
Look Boss, De Plane

I am making a separate plane till to go with the set in progress, but I wanted to have my most used planes close at hand in the cabinet. I also have a few that I have acquired that I would very much like to refurbish and use.
So today I worked on the Plane till that would go into the cabinet.
Image


I started out by taking a picture of the cabinet, the planes I wanted in there and using photoshop to conjure up a likeness of what it might look like.

Image


Image


I had a large piece of maple left over from making the carcass so I squared it up and made a walnut frame to go around it.

Image


I attached some cleats to the back to hang it and made a shelf on the front and top for some old bailey wood planes.

Image


Image


Image


Image


I had intended to stop taking orders when I began this remodel, but somehow one slipped through and I hear there are more on the way.
We got and order for a military commemorative cane. We have made a few of these in the past and they are fun. They get laser engraved and commemorative coins inlaid in the sides.

Image


Image


This one will be made from walnut. I like to use the swirling grain around knots to get my handle material from as it adds to the strength of the handle and gives it a nice look.

Image


Image


The handles are squared up and drilled for the tenon.

Image


Image


The shaft is turned on my mill and then the words are laid out and it's off to the laser engravers.
These canes get a brass collar that I make from a piece of pipe.

Image


Image


Image


Image


Tomorrow I am going to start getting the doors ready to glue up and hang.
Oh, and for all you young ens' the title reference is from a show called "Fantasy Island" I think you could find it on HULU or something.
Thanks all and have fun woodworking.
Looks great Brian. Making it modular the way you did, is advantageous. Need something different, the change is easy to implement.

How did you turn that cane? Did you use a router?

Oh, one door needs three leaves :)

Edit: Oh I'm old enough to remember Tattoo :)
 

Attachments

#176 ·
Arrival of benchcraft hardware

Today was a good day! I started out the day by taking the advise many of you had and added a third leaf inlay to the left door face. I then spent the rest of the day carving the door frames where they met the panels to facilitate gluing them up. This way I wouldn't have to worry about possibly nicking the panels when I carve the doors the rest of the way.

I got my hardware in the mail for the workbench!! Very excited to get it especially when I am so close to being done with the cabinets. I will spend tomorrow carving the doors and I am not sure if I will get them hung or not, but I think I am going along well.

Here is the pictures for today..

Image


Image


Image


Image


Image


Sorry, not too many pictures today. If you want to know more about how the day went, just stare at the first picture for about 6 hours ;)

Take care all and thanks,
 

Attachments

#177 ·
Arrival of benchcraft hardware

Today was a good day! I started out the day by taking the advise many of you had and added a third leaf inlay to the left door face. I then spent the rest of the day carving the door frames where they met the panels to facilitate gluing them up. This way I wouldn't have to worry about possibly nicking the panels when I carve the doors the rest of the way.

I got my hardware in the mail for the workbench!! Very excited to get it especially when I am so close to being done with the cabinets. I will spend tomorrow carving the doors and I am not sure if I will get them hung or not, but I think I am going along well.

Here is the pictures for today..

Image


Image


Image


Image


Image


Sorry, not too many pictures today. If you want to know more about how the day went, just stare at the first picture for about 6 hours ;)

Take care all and thanks,
Well, I stared at the first pic, just not for 6 hours! Early Christmas with all the hardware arriving!
 

Attachments

#181 ·
Let's See What's Behind Door #1

So I have finished one door panel and started on the second. Carving is a slow process and I have great respect for carvers. Truly a very hard part of the craft to master. So here are the pictures of the panel that has finish on it.

Image


Image


Image


Image


That curly maple exploded with figure!

Image


Ahh! how cute, I carved our initials in the tree. Bear Loves Kitty
That's where BearKat Wood got it's name.

On to the next panel.

Image


Image


Take care everyone and have fun woodworking.
 

Attachments

#182 ·
Let's See What's Behind Door #1

So I have finished one door panel and started on the second. Carving is a slow process and I have great respect for carvers. Truly a very hard part of the craft to master. So here are the pictures of the panel that has finish on it.

Image


Image


Image


Image


That curly maple exploded with figure!

Image


Ahh! how cute, I carved our initials in the tree. Bear Loves Kitty
That's where BearKat Wood got it's name.

On to the next panel.

Image


Image


Take care everyone and have fun woodworking.
well your not too shabby yourself my friend just wanna say merry Christmas hoping yours is the best and thnks for the show.ps take tomorrow off.
 

Attachments

#189 ·
Hang em' High

Well today I got the doors hung. I still have one door to finish carving and put finish on, but I wanted to see how it was going to look.
Image


The soss hinges worked out nice and I am able to open the doors nearly 180 degrees.
Image


I ended up with a great fit, they close with almost no gap. I set the first door up and using that in I set the second in place. I have yet to install the tension catches that will hold the doors shut, but so far so good.

Image


Image


Image


When I was carving the door frames my boggs curved spokeshave came in handy and it was nice to use a trick of taking off the handles to get into tight spaces. I figured this one out during a chair build I had, but I have also seen Curtis Buchanan use this same trick.

Image


Yesterday we had some green wood we were milling up and it needed to have the ends waxed so I pulled out my crock pot I keep my wax in and warmed it up. I had lost my chunk I used to put on my planes and saws so I snuck into the art room which is behind the chairman sign and grabbed a soap mold and made some nice sea shells of paraffin wax.

Image


Image


I also stuck the drawer handle on the saw till today which looks nice..

Image


Getting closer every day to building that bench I know you are all excited to see. Me too!

Image


Image


Have a nice weekend and have fun woodworking!
 

Attachments

#190 ·
Hang em' High

Well today I got the doors hung. I still have one door to finish carving and put finish on, but I wanted to see how it was going to look.
Image


The soss hinges worked out nice and I am able to open the doors nearly 180 degrees.
Image


I ended up with a great fit, they close with almost no gap. I set the first door up and using that in I set the second in place. I have yet to install the tension catches that will hold the doors shut, but so far so good.

Image


Image


Image


When I was carving the door frames my boggs curved spokeshave came in handy and it was nice to use a trick of taking off the handles to get into tight spaces. I figured this one out during a chair build I had, but I have also seen Curtis Buchanan use this same trick.

Image


Yesterday we had some green wood we were milling up and it needed to have the ends waxed so I pulled out my crock pot I keep my wax in and warmed it up. I had lost my chunk I used to put on my planes and saws so I snuck into the art room which is behind the chairman sign and grabbed a soap mold and made some nice sea shells of paraffin wax.

Image


Image


I also stuck the drawer handle on the saw till today which looks nice..

Image


Getting closer every day to building that bench I know you are all excited to see. Me too!

Image


Image


Have a nice weekend and have fun woodworking!
That's looking really good, Brian!
 

Attachments

#199 ·
Oo La La Deux

Today I piddly farted around and put the catches into the door frames. They are friction catches and needed to be mortised in. All turned out well there.

Image


They hold the doors shut really well and look nice.

Image


Image


I had to take a break from the carving as it was killing my shoulders, not used to that hard work :)
So I decided to get French..
No! Not like that you sicko!
French cleats.

I milled up some slats to inset into the door frames with a lip similar to the back of the cabinet. This will allow me to move things around as I need to and put more frequently used tools where I can get at them easier.

Image


Image


Image


I was thinking if I wanted to I could run a set screw up through the bottom to hold them securely in place.

Image


I will design some fun holders to stick on there that hopefully go with the design.

Image


I liked using the mortiser and square pegs to hang the spokeshaves so I tested that out on a scrap.

Image


Image


Oh, and I got finish put on the drawers.

Image


I will get back at carving tomorrow and I am hoping to start the bench later this week.
Be safe and have fun woodworking.
 

Attachments

#200 ·
Oo La La Deux

Today I piddly farted around and put the catches into the door frames. They are friction catches and needed to be mortised in. All turned out well there.

Image


They hold the doors shut really well and look nice.

Image


Image


I had to take a break from the carving as it was killing my shoulders, not used to that hard work :)
So I decided to get French..
No! Not like that you sicko!
French cleats.

I milled up some slats to inset into the door frames with a lip similar to the back of the cabinet. This will allow me to move things around as I need to and put more frequently used tools where I can get at them easier.

Image


Image


Image


I was thinking if I wanted to I could run a set screw up through the bottom to hold them securely in place.

Image


I will design some fun holders to stick on there that hopefully go with the design.

Image


I liked using the mortiser and square pegs to hang the spokeshaves so I tested that out on a scrap.

Image


Image


Oh, and I got finish put on the drawers.

Image


I will get back at carving tomorrow and I am hoping to start the bench later this week.
Be safe and have fun woodworking.
I missed the mortiser/square peg detail earlier, Brian. Looks good!
 

Attachments

#206 ·
Branching Out.

Image


Image


The cabinet doors are completed and have finish on them. I am very happy with how it turned out. I am still working on laying out where I will hang things in the doors and I think I might make some plates with my CNC that have some neat texture to them. They will probably be done as I can get to them. I have started carving the till frame and I should have about another day to finish it.

Image


Image


I have started to look at the plans of the bench that came with the set and reading back over the workbench book by Scott Landis and Schwarz's Workbench Design Book to start thinking about how this is all going to play out. I have some fun plans for the bench including a plank for holding chairs. I hope it turns out as well as everything else has so far.

Image


So as the title of today's blog says I have branched out from this project. I received an order for a project plan for my hobbit desk build. This is not the first request I have had for this so I decided to take it on. I have been studying sketchup this year and I think I have learned enough to do it justice.

Image


Image


I have had other requests for plans to things I have designed over the years so if there is something that interests you let me know and I will see if I can add it to my list. I am thinking later this year I will put together a chair making DVD with plans and patterns to build two or three different styles of chairs. Let me know what you all might vote in.
The next branch I have decided to climb out onto is the youtube branch. I have a few short videos on youtube that to be frank are pretty lame. I have started a video on the remodel and it will feature the till and the cabinet. It will probably be followed up by maybe two more.

Image


So there it is, that is where I am with everything for now. Big plans ahead. I am working on a few patents for tool designs, videos, sketchup plans and contemplating starting some online classes or dvd classes for chair making. Looks to be a busy year.

Take care everyone,
Be safe and have fun woodworking.
 

Attachments

#207 ·
Branching Out.

Image


Image


The cabinet doors are completed and have finish on them. I am very happy with how it turned out. I am still working on laying out where I will hang things in the doors and I think I might make some plates with my CNC that have some neat texture to them. They will probably be done as I can get to them. I have started carving the till frame and I should have about another day to finish it.

Image


Image


I have started to look at the plans of the bench that came with the set and reading back over the workbench book by Scott Landis and Schwarz's Workbench Design Book to start thinking about how this is all going to play out. I have some fun plans for the bench including a plank for holding chairs. I hope it turns out as well as everything else has so far.

Image


So as the title of today's blog says I have branched out from this project. I received an order for a project plan for my hobbit desk build. This is not the first request I have had for this so I decided to take it on. I have been studying sketchup this year and I think I have learned enough to do it justice.

Image


Image


I have had other requests for plans to things I have designed over the years so if there is something that interests you let me know and I will see if I can add it to my list. I am thinking later this year I will put together a chair making DVD with plans and patterns to build two or three different styles of chairs. Let me know what you all might vote in.
The next branch I have decided to climb out onto is the youtube branch. I have a few short videos on youtube that to be frank are pretty lame. I have started a video on the remodel and it will feature the till and the cabinet. It will probably be followed up by maybe two more.

Image


So there it is, that is where I am with everything for now. Big plans ahead. I am working on a few patents for tool designs, videos, sketchup plans and contemplating starting some online classes or dvd classes for chair making. Looks to be a busy year.

Take care everyone,
Be safe and have fun woodworking.
Do you have a link for your youtube videos? No one is going to think your videos are lame! You do some amazing work. Let people see it!
 

Attachments

#215 ·
Blame it on Star Wars

Hello all, I haven't been keeping up with this blog very well this week. It is because I haven't had a lot to report. I have been trying to finish up the carving on the till, but it has been slow going. I might have to pull out some power carving goodies to get on top of it. I was hoping to get started on the bench this week and I may well get out the maple tomorrow to see if I have enough, I'm little skeptical about it. I might have to alter the design to accommodate it. One half of the till frame is done and it looks good, I can't wait to see that thing completed, but I have been tugged in twenty different directions.

Image


Image


I know I am supposed to be working like mad to get this done before I have a three month long wait list on orders again, but I had to take off Tuesday and go see that new Star Wars thingy. We don't have a theater in my town so we drove the 45 minutes to see it and took care of some errands while we were there.

So back on the farm we got an order for three sets of my candle stick holders.

Image


So I milled up the wood to get those going and helped finish up the cane which is turning out well.

Image


Image


Image


Image


The only thing I did today to add to the big build was to play around with a chisel holder idea for the inside of the left door. I made a mock-up and got the measurements figured.

Image


I have the 5 piece set of bench chisels form Stanley, but I am making slots for the eight piece socket chisels by either Stanley or Lie-Nielsen. Might be five years before I get them, but I thought I should plan ahead ;)

I wanted something that would compliment the design and I haven't used my CNC for anything on this yet so I thought I would work something up.

Image


I milled up some walnut left over from the drawer fronts.

Then I worked up a design I though looked nice.

Image


The top will be the backrest of the holder and the bottom part will be the front that cases them in.

Then stick it in and hit "print"

Image


I think it will work well and go with the design.

Image


Thanks guys, talk to you again soon.
 

Attachments

#216 ·
Blame it on Star Wars

Hello all, I haven't been keeping up with this blog very well this week. It is because I haven't had a lot to report. I have been trying to finish up the carving on the till, but it has been slow going. I might have to pull out some power carving goodies to get on top of it. I was hoping to get started on the bench this week and I may well get out the maple tomorrow to see if I have enough, I'm little skeptical about it. I might have to alter the design to accommodate it. One half of the till frame is done and it looks good, I can't wait to see that thing completed, but I have been tugged in twenty different directions.

Image


Image


I know I am supposed to be working like mad to get this done before I have a three month long wait list on orders again, but I had to take off Tuesday and go see that new Star Wars thingy. We don't have a theater in my town so we drove the 45 minutes to see it and took care of some errands while we were there.

So back on the farm we got an order for three sets of my candle stick holders.

Image


So I milled up the wood to get those going and helped finish up the cane which is turning out well.

Image


Image


Image


Image


The only thing I did today to add to the big build was to play around with a chisel holder idea for the inside of the left door. I made a mock-up and got the measurements figured.

Image


I have the 5 piece set of bench chisels form Stanley, but I am making slots for the eight piece socket chisels by either Stanley or Lie-Nielsen. Might be five years before I get them, but I thought I should plan ahead ;)

I wanted something that would compliment the design and I haven't used my CNC for anything on this yet so I thought I would work something up.

Image


I milled up some walnut left over from the drawer fronts.

Then I worked up a design I though looked nice.

Image


The top will be the backrest of the holder and the bottom part will be the front that cases them in.

Then stick it in and hit "print"

Image


I think it will work well and go with the design.

Image


Thanks guys, talk to you again soon.
man you lazy ass hear I am at 1130 l.a. time posting to you and this is all you have too show - lol happy new year buddy and thanks for the show you better have something great for the new year-peace out my woodworking friend.
 

Attachments

#221 ·
Going live!

Hey all, hope you guys had a nice break. I finally finished the saw till and I am making some good progress on the tool cabinet. I was hoping to be starting on the workbench by now, but I should be able to get at it tomorrow. Better late than never.
The carving of the till took a lot longer than I thought it would. I wanted the art nouveau whips to be really pronounced and it took a lot of work, but I am happy with the results.

Image


Image


Image


Image


Image


Image


I finally got around to scanning in the original drawing for the video so here it is,

Image


Thanks again and enjoy the video.

Image
 

Attachments

#222 ·
Going live!

Hey all, hope you guys had a nice break. I finally finished the saw till and I am making some good progress on the tool cabinet. I was hoping to be starting on the workbench by now, but I should be able to get at it tomorrow. Better late than never.
The carving of the till took a lot longer than I thought it would. I wanted the art nouveau whips to be really pronounced and it took a lot of work, but I am happy with the results.

Image


Image


Image


Image


Image


Image


I finally got around to scanning in the original drawing for the video so here it is,

Image


Thanks again and enjoy the video.

Image
Its coming together nicely. A fine video as well!
 

Attachments

#228 ·
In the thick of it.

Today was the beginning and then end. The Alpha and well, the beta would work I guess. Not really the end, just a good step on the brakes. I cleaned up the shop this morning and pulled out the 94 BF of eastern hard maple I have been saving up for the bench. It is going to free up a lot of room by my mill, but I am sure I will take care of that, can't have any uncluttered corners in a wood shop now can we.

Image


I measured and re-measured and came to a conclusion, I just don't have enough wood. So the plans call for a 4" thick top, I want my bench to be 5'6" long by 32" wide. It will have a walnut spit rail which brings it down to about 30 1/2" wide. All of my maple is just around 8'6" long so I will only be getting one chunk per board length and they all average around 7 1/2" wide. I am not worried about the length so much as I plan to build a carving bench on the opposite side of the doorway. So I started to think I would make the top about 2 1/2" thick in the center and make the skirts thicker, but that is going to give me some issues with the tail vise.

Image


So there I was crying in my beer about it and I get a phone call…..
I have jury duty in the morning and possibly for the next ten days. :(
I knew it was coming, but I had been ignorant to it and now I am on a little vacation.
So I won't be posting anything for a while, but hey, it will give me a chance to address the thickness issue. If any of you have the answer, by all means let me know.
I will check again when I get a chance and if I have enough for 3" center mass with 4" skirting then that will work with the vises. Oh the vexing troubles in life ;) I know I got it good, who am I kidding.
Thanks to all of you for your very kind words with the remodel and I hope to be back here twisting your ears again soon.
TTFN
Have fun and stay safe.
 

Attachments

#229 ·
In the thick of it.

Today was the beginning and then end. The Alpha and well, the beta would work I guess. Not really the end, just a good step on the brakes. I cleaned up the shop this morning and pulled out the 94 BF of eastern hard maple I have been saving up for the bench. It is going to free up a lot of room by my mill, but I am sure I will take care of that, can't have any uncluttered corners in a wood shop now can we.

Image


I measured and re-measured and came to a conclusion, I just don't have enough wood. So the plans call for a 4" thick top, I want my bench to be 5'6" long by 32" wide. It will have a walnut spit rail which brings it down to about 30 1/2" wide. All of my maple is just around 8'6" long so I will only be getting one chunk per board length and they all average around 7 1/2" wide. I am not worried about the length so much as I plan to build a carving bench on the opposite side of the doorway. So I started to think I would make the top about 2 1/2" thick in the center and make the skirts thicker, but that is going to give me some issues with the tail vise.

Image


So there I was crying in my beer about it and I get a phone call…..
I have jury duty in the morning and possibly for the next ten days. :(
I knew it was coming, but I had been ignorant to it and now I am on a little vacation.
So I won't be posting anything for a while, but hey, it will give me a chance to address the thickness issue. If any of you have the answer, by all means let me know.
I will check again when I get a chance and if I have enough for 3" center mass with 4" skirting then that will work with the vises. Oh the vexing troubles in life ;) I know I got it good, who am I kidding.
Thanks to all of you for your very kind words with the remodel and I hope to be back here twisting your ears again soon.
TTFN
Have fun and stay safe.
jury duty!!!i feel for you brian i might be facing that scenario myself in a couple weeks just act crazy and youll be out the first day,in my case no acting required.we need you posting youll be missed.
 

Attachments

#231 ·
The Back Forty

So today juror #31 was not called upon so I got to work on the bench top.
I managed to get the back forty glued up and most of the front slab cut out.

Image


In my last posting I had hinted to the fact that I was unsure as to the amount of wood I had, well I came up with the best solution I could. Even though I had been saving up wood for this build over the last year, it looked like I would be short on the maple, but it will work out nice as the off-cuts will be turned into a carving bench that wasn't in the original plan. I will make a taller bench that can be used standing or sitting in a stool to work on carving work with a cabinet to hold all the knives behind it.

On the back slab of the bench I made the slab thinner than what the plans called for and there will be a step down in the side rails to keep everything level. The back will not get the abuse the front will and it does not receive any clamp hardware so there is no need for it to be as thick as the front.

Image


It will be similar in fashion to this shaker bench, but the boards will still be vertical. The split as I had said before will be offset to the back. It will be about 19" from the front lip to the split rail and another 12" from the rail to the back. This rail setup will allow me to push chair legs up against the split and it will hold the chair from going further back. If I need anything held closer I can use a bench hook, hold fast and batten or just use one of the clamps. The split will be just proud of the tool cabinet doors when they are opened, but eventually the bench will stand out in the open and be accessible from the front or back. I have thought about making a setup for the moxon vise to be attached to the back slab easily which would open a lot of doors for me. I might just do that ;)

So here are some pictures of the slabs and planks so far.

Image


Image


Image


Image


Image


On other news I received notice today that I was awarded a grant to put a chair and bench into my local library. I had wanted to put something in there years ago, but the director of the library was firmly against any art admissions into the library. Just this year the director left and the new director is open to artwork submissions, so I jumped at the chance and when the Cultural Coalition offered grant awards to local artisans I had to go for it. I am very excited to have something locally. I made the chocolate table a few years ago and every time I go in there to get some goodies it is fun to see it, this will be just as fun and I have a wild-ass design for the chair and bench so stay tuned for that. It will get turned into some videos for sure. On that note I will be working on the second video this weekend and finishing up my sketchup plan for the hobbit table, hopefully. I am really slow at sketchup, but I am getting better.

Take care and have fun woodworking!
 

Attachments

#232 ·
The Back Forty

So today juror #31 was not called upon so I got to work on the bench top.
I managed to get the back forty glued up and most of the front slab cut out.

Image


In my last posting I had hinted to the fact that I was unsure as to the amount of wood I had, well I came up with the best solution I could. Even though I had been saving up wood for this build over the last year, it looked like I would be short on the maple, but it will work out nice as the off-cuts will be turned into a carving bench that wasn't in the original plan. I will make a taller bench that can be used standing or sitting in a stool to work on carving work with a cabinet to hold all the knives behind it.

On the back slab of the bench I made the slab thinner than what the plans called for and there will be a step down in the side rails to keep everything level. The back will not get the abuse the front will and it does not receive any clamp hardware so there is no need for it to be as thick as the front.

Image


It will be similar in fashion to this shaker bench, but the boards will still be vertical. The split as I had said before will be offset to the back. It will be about 19" from the front lip to the split rail and another 12" from the rail to the back. This rail setup will allow me to push chair legs up against the split and it will hold the chair from going further back. If I need anything held closer I can use a bench hook, hold fast and batten or just use one of the clamps. The split will be just proud of the tool cabinet doors when they are opened, but eventually the bench will stand out in the open and be accessible from the front or back. I have thought about making a setup for the moxon vise to be attached to the back slab easily which would open a lot of doors for me. I might just do that ;)

So here are some pictures of the slabs and planks so far.

Image


Image


Image


Image


Image


On other news I received notice today that I was awarded a grant to put a chair and bench into my local library. I had wanted to put something in there years ago, but the director of the library was firmly against any art admissions into the library. Just this year the director left and the new director is open to artwork submissions, so I jumped at the chance and when the Cultural Coalition offered grant awards to local artisans I had to go for it. I am very excited to have something locally. I made the chocolate table a few years ago and every time I go in there to get some goodies it is fun to see it, this will be just as fun and I have a wild-ass design for the chair and bench so stay tuned for that. It will get turned into some videos for sure. On that note I will be working on the second video this weekend and finishing up my sketchup plan for the hobbit table, hopefully. I am really slow at sketchup, but I am getting better.

Take care and have fun woodworking!
Good to see you movin' on Brian. Always enjoy your work. So not having juror #31 called, does that mean you're off the hook or are you still in the pool for other cases ? When I've been called here the system has a set number of cases and you can be selected for any of them as they come up.
 

Attachments

#239 ·
Four Ended Candle

Wow what a day, I have been packing things in lately, I think my candle has four ends.
So today I got the bench top surfaced to thickness and cut to length, I glued up the split rail, glued up the candlesticks that I have to do, I helped with some cnc work for the carving side of the shop and helped with a prototype cane head. Then started on video #2 "The Tool Cabinet". I have just about finished a sketchup design I have to do and have the blue prints in to be printed off. I am starting to work up a sketchup design and blue prints for a chair class/dvd. I had some brochures made up for Fridays ceremony.
All in all a big day.

Here is the bench top ready to be mortised out for the tail vise.

Image


I could have cut out the opening section for the tail vise before clamping, but I half forgot to and half didn't care as I thought mortising would give me some options of getting it right where I wanted and leaving it would help keep everything lined up flush. Maybe I was wrong, we'll find out soon.

I used the bench top as a straight edge to clamp to for the split rail glue up.

Image


Image


Image


The candlestick blanks are glued up and I used the same cauls I made the other day for the bench top. I have a feeling those are going to come in handy. I use them to set everything up and then they can be removed after it is clamped, helps keep it all lined up well.

Image


This will make three sets of candlestick holders about 11" tall.

Image


About this time of year we start getting cane orders for college graduation ceremonies. We have been doing them for quite a few years and every year we get crazy orders that we have to figure out how to make. This year among them is a batch of snake heads.

Image


We also have some tiger heads and mountain peaks as well as some large compasses like we have made in the past.

Image


I am going to a grant acceptance ceremony on Friday. I made a proposal to put a chair and bench in our local library and was accepted. They wanted to have some flyers to display, so I got those printed up today.
I went with simple and to the point.

Image


The sketchup design and class I am starting on will be for the chair in the bottom right of the brochure.

I am also very excited that I started on the second and third videos for youtube. "The Tool Cabinet" and "The Bench" I am hoping they turn out good. I am going to do some explaining in "The Tool Cabinet" of the process instead of just a music video like the first one.
I will let you all know when it goes out.

Image


I think that is about it, I am probably forgetting something, but that's all I can think of for now. I am still contracted to jury duty and have to get my work in as I can, but I have managed to get some things done. I am looking forward to turning the bench legs and getting the bench put together.
Thanks everyone for reading along. This has been a wild ride!
Take care and have fun woodworking.
 

Attachments

#240 ·
Four Ended Candle

Wow what a day, I have been packing things in lately, I think my candle has four ends.
So today I got the bench top surfaced to thickness and cut to length, I glued up the split rail, glued up the candlesticks that I have to do, I helped with some cnc work for the carving side of the shop and helped with a prototype cane head. Then started on video #2 "The Tool Cabinet". I have just about finished a sketchup design I have to do and have the blue prints in to be printed off. I am starting to work up a sketchup design and blue prints for a chair class/dvd. I had some brochures made up for Fridays ceremony.
All in all a big day.

Here is the bench top ready to be mortised out for the tail vise.

Image


I could have cut out the opening section for the tail vise before clamping, but I half forgot to and half didn't care as I thought mortising would give me some options of getting it right where I wanted and leaving it would help keep everything lined up flush. Maybe I was wrong, we'll find out soon.

I used the bench top as a straight edge to clamp to for the split rail glue up.

Image


Image


Image


The candlestick blanks are glued up and I used the same cauls I made the other day for the bench top. I have a feeling those are going to come in handy. I use them to set everything up and then they can be removed after it is clamped, helps keep it all lined up well.

Image


This will make three sets of candlestick holders about 11" tall.

Image


About this time of year we start getting cane orders for college graduation ceremonies. We have been doing them for quite a few years and every year we get crazy orders that we have to figure out how to make. This year among them is a batch of snake heads.

Image


We also have some tiger heads and mountain peaks as well as some large compasses like we have made in the past.

Image


I am going to a grant acceptance ceremony on Friday. I made a proposal to put a chair and bench in our local library and was accepted. They wanted to have some flyers to display, so I got those printed up today.
I went with simple and to the point.

Image


The sketchup design and class I am starting on will be for the chair in the bottom right of the brochure.

I am also very excited that I started on the second and third videos for youtube. "The Tool Cabinet" and "The Bench" I am hoping they turn out good. I am going to do some explaining in "The Tool Cabinet" of the process instead of just a music video like the first one.
I will let you all know when it goes out.

Image


I think that is about it, I am probably forgetting something, but that's all I can think of for now. I am still contracted to jury duty and have to get my work in as I can, but I have managed to get some things done. I am looking forward to turning the bench legs and getting the bench put together.
Thanks everyone for reading along. This has been a wild ride!
Take care and have fun woodworking.
You sure are an active and busy man!
Great progess on the bench. Looking forward to see the videos!
 

Attachments

#244 ·
Foundation of woodworking

Just like a well built house, a well rounded approach to woodworking comes form a solid foundation and understanding of the principles of the medium. Understanding wood and how it will respond to your actions and finding a happy dance that will let you enjoy the craft instead of having it dominate you is paramount. This theory transferred well today when I milled up the legs for the bench. It needs to have an accurate, well made foundation to be a solid usable bench. I took my time today as shortcuts here would haunt me later on. I have worked on a hand-me-down bakery table and any manner of 2Ă—4 plywood horizontal surface that would hold a piece of wood, but for this bench and all the pieces included in this remodel I am demanding more. Almost to the point of being anal retentive as I only want to do this once, then get on with life using what I have made.

It was a quick day as I had to get on with other things, but I have the bench top ready to mortice for the legs and he legs are ready to mortise for the stretchers.

I laid out the benchtop to get a sense of the size and I am happy with the measurements. It will end up being 32"x 68" with the split sitting back at 19". I can comfortably reach the other side and it won't hold me out from the cabinet too far.

Image


With the outside trim boards on the bench has a squat look, but that's O.K. so do I.

Image


I milled the leg blanks square and cut one end with a square face, I then cut them all to the same length. I wasn't worried yet about what length, just that they were all the same. I then set up to mill out a tenon on the top that would sit back 1 1/2" from the face and 1/2" from all other sides to go into the bench top.

Image


Image


I have referred to the plans a few times, but for the most part they don't have much bearing on this build. Though they are neat and would look nice in a frame.

Image


I ran around the outside first and then used my tenon jig to finish it off. I made sure to undercut it by a bit so not to have over-cut lines, I hate it when I score thru the shoulder of my tenon and see it after glue up.

Image


My legs were too wide for my jig so I popped the armature off and used a clamp.

Image


I won't be found advertising for products too often unless I really like them. I have received many trial products for free over the years to test and have kept my mouth shut about some of them as they weren't worth it, but I have to take a sec here and convince you to buy one thing.
If there is anything in your shop that will help you improve your accuracy in cutting and milling your lumber it is a Wixey. These things are indispensable and have made a world of difference in how easy my setups are for milling. Get one, there that said we can move on.

Image


The pros will tell you that when you mill thin strips you should always have the strips to the outside of the blade. I had a rocket experience with a cutoff that left a square bruise on my waist for a few months so I know this lesson, but if you sign the waiver you can do what you want, especially if it is your shop. As long as I back up the off-cut and get it past the blade I don't have a problem, so I used this when I was cutting off the waist from the tenons as my jig just wouldn't extend enough to accommodate the alternative.

Image


Image


This also helps with sawdust that wants to shoot at you too, but if you can put the smaller cuts to the outside. There you have been warned. Do as I say, not as I do. This isn't for teaching purposes, if you want to learn go find a woodworking teacher, I am just trying to entertain you and show you how crazy I am!

Image


The faces of the legs will be notched out for the first 1" to allow the skirted additions to the bench-top to sit flush with the legs.

Oh brother, here we go again. They fight like well.. you know!

Image


So anyway, the legs get a relief to house the skirting that will make the top appear a bit thicker and it will be nice to have for extra clamping.

Image


I am working on a system of rails that will mount under the bench and I will be able to reach underneath and push forward to raise the split in the top, it just sounded like a good idea to me. What do you think?
Take care all,
 

Attachments

#245 ·
Foundation of woodworking

Just like a well built house, a well rounded approach to woodworking comes form a solid foundation and understanding of the principles of the medium. Understanding wood and how it will respond to your actions and finding a happy dance that will let you enjoy the craft instead of having it dominate you is paramount. This theory transferred well today when I milled up the legs for the bench. It needs to have an accurate, well made foundation to be a solid usable bench. I took my time today as shortcuts here would haunt me later on. I have worked on a hand-me-down bakery table and any manner of 2Ă—4 plywood horizontal surface that would hold a piece of wood, but for this bench and all the pieces included in this remodel I am demanding more. Almost to the point of being anal retentive as I only want to do this once, then get on with life using what I have made.

It was a quick day as I had to get on with other things, but I have the bench top ready to mortice for the legs and he legs are ready to mortise for the stretchers.

I laid out the benchtop to get a sense of the size and I am happy with the measurements. It will end up being 32"x 68" with the split sitting back at 19". I can comfortably reach the other side and it won't hold me out from the cabinet too far.

Image


With the outside trim boards on the bench has a squat look, but that's O.K. so do I.

Image


I milled the leg blanks square and cut one end with a square face, I then cut them all to the same length. I wasn't worried yet about what length, just that they were all the same. I then set up to mill out a tenon on the top that would sit back 1 1/2" from the face and 1/2" from all other sides to go into the bench top.

Image


Image


I have referred to the plans a few times, but for the most part they don't have much bearing on this build. Though they are neat and would look nice in a frame.

Image


I ran around the outside first and then used my tenon jig to finish it off. I made sure to undercut it by a bit so not to have over-cut lines, I hate it when I score thru the shoulder of my tenon and see it after glue up.

Image


My legs were too wide for my jig so I popped the armature off and used a clamp.

Image


I won't be found advertising for products too often unless I really like them. I have received many trial products for free over the years to test and have kept my mouth shut about some of them as they weren't worth it, but I have to take a sec here and convince you to buy one thing.
If there is anything in your shop that will help you improve your accuracy in cutting and milling your lumber it is a Wixey. These things are indispensable and have made a world of difference in how easy my setups are for milling. Get one, there that said we can move on.

Image


The pros will tell you that when you mill thin strips you should always have the strips to the outside of the blade. I had a rocket experience with a cutoff that left a square bruise on my waist for a few months so I know this lesson, but if you sign the waiver you can do what you want, especially if it is your shop. As long as I back up the off-cut and get it past the blade I don't have a problem, so I used this when I was cutting off the waist from the tenons as my jig just wouldn't extend enough to accommodate the alternative.

Image


Image


This also helps with sawdust that wants to shoot at you too, but if you can put the smaller cuts to the outside. There you have been warned. Do as I say, not as I do. This isn't for teaching purposes, if you want to learn go find a woodworking teacher, I am just trying to entertain you and show you how crazy I am!

Image


The faces of the legs will be notched out for the first 1" to allow the skirted additions to the bench-top to sit flush with the legs.

Oh brother, here we go again. They fight like well.. you know!

Image


So anyway, the legs get a relief to house the skirting that will make the top appear a bit thicker and it will be nice to have for extra clamping.

Image


I am working on a system of rails that will mount under the bench and I will be able to reach underneath and push forward to raise the split in the top, it just sounded like a good idea to me. What do you think?
Take care all,
your a machine man i wish i had your energy.your right about being anal and getting this bench done perfect the first time a sturdy bench like that will last your lifetime and beyond,and i like your idea about being able to raise the split the more versatility the better,lookin good.
 

Attachments

#250 ·
All about that base!

Image


Which came first, the mortise or the tenon?
Well for me today it was the tenon.

Where we left off my dog and cat were at it again
Image


Well our undefeated chunky weight champion is still on top, and I can't get her to find another place to hang out.

Image


I had the legs done and I worked on the stretcher for the sides. The bottom ones were easy, they were just 4" wide and straight. The tops were a bit more complex and needed to have a step to keep the two thicknesses even, but it went well.

Image


Image


Image


Image


I first milled all my tenons on the table saw and then went to the mortiser to chop out all 12 2" deep mortises.

Image


I like using set up bars, they make life easy. Once I had the tenons made all I had to do was stick them in place and trace them out.

Image


Image


If you don't have a mortiser I highly recommend picking one up, "they are so choice" as Ferris would say.

Image


Image


With a little fine tuning everything went together well and I am starting to get really excited about building something in my new spot. I have the candle stick holders that need to go out this week and I have a commission for a music stand that just came in that will need to get done asap, so I have to get wrapping this remodel up soon.

Image


Image


Image


There is still a lot to do to get it all finished, but I am getting closer every day.

I went to a shin-dig on Friday and got my award letter and check for the grant to build a bench and chair for the library. I am very excited to start on that as well.

Image
 

Attachments

#251 ·
All about that base!

Image


Which came first, the mortise or the tenon?
Well for me today it was the tenon.

Where we left off my dog and cat were at it again
Image


Well our undefeated chunky weight champion is still on top, and I can't get her to find another place to hang out.

Image


I had the legs done and I worked on the stretcher for the sides. The bottom ones were easy, they were just 4" wide and straight. The tops were a bit more complex and needed to have a step to keep the two thicknesses even, but it went well.

Image


Image


Image


Image


I first milled all my tenons on the table saw and then went to the mortiser to chop out all 12 2" deep mortises.

Image


I like using set up bars, they make life easy. Once I had the tenons made all I had to do was stick them in place and trace them out.

Image


Image


If you don't have a mortiser I highly recommend picking one up, "they are so choice" as Ferris would say.

Image


Image


With a little fine tuning everything went together well and I am starting to get really excited about building something in my new spot. I have the candle stick holders that need to go out this week and I have a commission for a music stand that just came in that will need to get done asap, so I have to get wrapping this remodel up soon.

Image


Image


Image


There is still a lot to do to get it all finished, but I am getting closer every day.

I went to a shin-dig on Friday and got my award letter and check for the grant to build a bench and chair for the library. I am very excited to start on that as well.

Image
well a nice end to the week looks like you've made some good progress.this bench is going to be your cherry on top the sundae.congragtulations on the library build cant wait to see what you come up with.well looks like I caught your jury duty fever ill be doing my civic duty this Tuesday but if im not picked my time is done for a least a year,not so bad compared to oregons system.until we post again good night.
 

Attachments

#252 ·
sexy legs!!

My legs have curves!!

Image


Image


I got all four legs turned today. The leg with the vise is a tricky one. I wanted it to still have the barley twist so I turned it and then routed out a chunk. I filled that routed out section with wood and then I will rout that out again to accommodate the leg vise hardware.

Image


First I turn the legs round using my mill and a two inch flat bottom bit.

Image


Then I swith over to the two inch barley twist bit.

Image


The mill has a complex set of gears that can give different pitches and directions of twist.
For my twists I always like to have them apposing. I can't stand it when I see a piece with twist parts all going the same direction.

Image


Image


Image


The vise leg was a tricky one and I had to take my time so I didn't chunk it out. I used a three inch long by 1/2" wide down-cut spiral bit to clean it out.

Image


I then filled in the section routed out with lumber that will be again routed to house the leg vise hardware.

Image


Image


It might take a few days before I rout the leg and finish it off. I am not sure what I will tackle tomorrow, but there is plenty to do. I have a set of candle stick holders that need to get the same barley twist, so I will probably get them done and out-a here.

Image


The carving department (A.K.A. my wife) turned out an awesome walnut snake head cane today.

Image


Image


Image


Image


Image


I will take some final photos of it before it gets shipped out. If the clients like it they will end up ordering 20 of them. That will keep us busy for a while.

Take care everyone and thanks for reading.

Hey by the way, if anyone can find a picture of another workbench with ornate legs, I would love to see it.
Thanks
 

Attachments

#253 ·
sexy legs!!

My legs have curves!!

Image


Image


I got all four legs turned today. The leg with the vise is a tricky one. I wanted it to still have the barley twist so I turned it and then routed out a chunk. I filled that routed out section with wood and then I will rout that out again to accommodate the leg vise hardware.

Image


First I turn the legs round using my mill and a two inch flat bottom bit.

Image


Then I swith over to the two inch barley twist bit.

Image


The mill has a complex set of gears that can give different pitches and directions of twist.
For my twists I always like to have them apposing. I can't stand it when I see a piece with twist parts all going the same direction.

Image


Image


Image


The vise leg was a tricky one and I had to take my time so I didn't chunk it out. I used a three inch long by 1/2" wide down-cut spiral bit to clean it out.

Image


I then filled in the section routed out with lumber that will be again routed to house the leg vise hardware.

Image


Image


It might take a few days before I rout the leg and finish it off. I am not sure what I will tackle tomorrow, but there is plenty to do. I have a set of candle stick holders that need to get the same barley twist, so I will probably get them done and out-a here.

Image


The carving department (A.K.A. my wife) turned out an awesome walnut snake head cane today.

Image


Image


Image


Image


Image


I will take some final photos of it before it gets shipped out. If the clients like it they will end up ordering 20 of them. That will keep us busy for a while.

Take care everyone and thanks for reading.

Hey by the way, if anyone can find a picture of another workbench with ornate legs, I would love to see it.
Thanks
Sexy legs Brian. You could probably crank out one of these benches every couple of days, at the rate you seem to be going. Hey, I'm in need of one :)
 

Attachments

#257 ·
sexy legs!!

My legs have curves!!

Image


Image


I got all four legs turned today. The leg with the vise is a tricky one. I wanted it to still have the barley twist so I turned it and then routed out a chunk. I filled that routed out section with wood and then I will rout that out again to accommodate the leg vise hardware.

Image


First I turn the legs round using my mill and a two inch flat bottom bit.

Image


Then I swith over to the two inch barley twist bit.

Image


The mill has a complex set of gears that can give different pitches and directions of twist.
For my twists I always like to have them apposing. I can't stand it when I see a piece with twist parts all going the same direction.

Image


Image


Image


The vise leg was a tricky one and I had to take my time so I didn't chunk it out. I used a three inch long by 1/2" wide down-cut spiral bit to clean it out.

Image


I then filled in the section routed out with lumber that will be again routed to house the leg vise hardware.

Image


Image


It might take a few days before I rout the leg and finish it off. I am not sure what I will tackle tomorrow, but there is plenty to do. I have a set of candle stick holders that need to get the same barley twist, so I will probably get them done and out-a here.

Image


The carving department (A.K.A. my wife) turned out an awesome walnut snake head cane today.

Image


Image


Image


Image


Image


I will take some final photos of it before it gets shipped out. If the clients like it they will end up ordering 20 of them. That will keep us busy for a while.

Take care everyone and thanks for reading.

Hey by the way, if anyone can find a picture of another workbench with ornate legs, I would love to see it.
Thanks
Wow! Maybe a good time to incorporate some bearings on the right front twisted leg. Give it a good spin and a deep Buddhist Om mantra to start the day;) Seriously, great innovation you have been putting down with your remodel. Remarkable to make it your own like this. Keep up the good work Brian.

Solid staff head there Mrs.Noel. Good luck with the contract!
 

Attachments

#263 ·
Last puzzle piece again, the fifth corner ;)

Uh-Oh.

Image


I know I said yesterday I got the last piece of the puzzle, then I get a package today. It was something I ordered two months ago, but Lie-Nielsen had trouble with a batch of bronze so they scrapped a line and had to remake them.

Image


It is always fun to get their packages, I get to catch up on the haps of Portland, ME.

Image


Image


I got my new scratch beader and it looks nice in its' new home. I will make a holder for it one of these days.

Image


Always one tool away from success! No wonder I never have any folding cash in my pocket ;)

So today I got the side panels of the bench glued together. I was worried about having enough stock thickness in the legs for the leg vise hardware so I added a chunk in where it attaches. It doesn't look too hot, but it will be behind the chop and make sure it holds up to plenty of torque.

Image


Image


Image


I used hickory plugs and my mortiser to make square draw bore pegs which worked wonderfully. I offset the holes by about 1/32 and it all just sucked together. It didn't need the clamps once they were in, but I kept them clamped get to get the extra umpf.
Image


Image


Image


Image


Image


Image


Image


Tomorrow I will cut them off proud and chamfer the ends.

That done it was time for a mythbusters base episode. I hunted through the shop for some quarter-sawn walnut for the bases to the candlestick holders. Using quarter sawn helps to keep everything from moving too much so they will hold up over time. I will also run a screw up through the bottom to help hold them together and cover it with a "made in the usa" sticker ;)
I milled up the lumber and used a coffee cup my kid got at a mythbusters' exhibit at the OMSI a few years back.

Image


Then I cut them out and sanded them round.

Image


and routed them with a decorative edge.

Image


Then glued them to the candlestick holders.

Image
 

Attachments

#264 ·
Last puzzle piece again, the fifth corner ;)

Uh-Oh.

Image


I know I said yesterday I got the last piece of the puzzle, then I get a package today. It was something I ordered two months ago, but Lie-Nielsen had trouble with a batch of bronze so they scrapped a line and had to remake them.

Image


It is always fun to get their packages, I get to catch up on the haps of Portland, ME.

Image


Image


I got my new scratch beader and it looks nice in its' new home. I will make a holder for it one of these days.

Image


Always one tool away from success! No wonder I never have any folding cash in my pocket ;)

So today I got the side panels of the bench glued together. I was worried about having enough stock thickness in the legs for the leg vise hardware so I added a chunk in where it attaches. It doesn't look too hot, but it will be behind the chop and make sure it holds up to plenty of torque.

Image


Image


Image


I used hickory plugs and my mortiser to make square draw bore pegs which worked wonderfully. I offset the holes by about 1/32 and it all just sucked together. It didn't need the clamps once they were in, but I kept them clamped get to get the extra umpf.
Image


Image


Image


Image


Image


Image


Image


Tomorrow I will cut them off proud and chamfer the ends.

That done it was time for a mythbusters base episode. I hunted through the shop for some quarter-sawn walnut for the bases to the candlestick holders. Using quarter sawn helps to keep everything from moving too much so they will hold up over time. I will also run a screw up through the bottom to help hold them together and cover it with a "made in the usa" sticker ;)
I milled up the lumber and used a coffee cup my kid got at a mythbusters' exhibit at the OMSI a few years back.

Image


Then I cut them out and sanded them round.

Image


and routed them with a decorative edge.

Image


Then glued them to the candlestick holders.

Image
"Always one tool away from success"

That's hilariously true in my mind.

If I only had this my woodworking would be taken to the next level.
 

Attachments

#268 ·
Two Month Anniversary

So today marks the two month date since I started this remodel. I scheduled for three months, but orders are starting to pile up and the plane till might have to get left off until I can get to it as well as the inside of the tool cabinet. So far so good, but there is still much to do.

I got the base put together today and thee top leveled and mortised in place.

Image


Image


Image


I put a coat of finish on the base before I stuck it together.

Image


Image


Image


Image


Image


Image


Image


Image


Image


Image


Image


Image


Image


Here is what it looked like two months ago.

Image


Image


Image


Image


Image


In other news I got the hobbit desk plans done and they should be going out next week as soon as I get the blueprints back from the printers. I know some happy woodworking Tolkienians that will be happy to get these.

Probably my favorite build of all time and I am not a big hobbit fan or I wasn't until I made the desk and then saw its' doppelganger at the end of the last movie.

Image


Image


Image


I have been trying to get further in the videos, but they are really waiting on me to finish building the items. I have plans to make my first video that is about something else on making a marking knife for dovetailing. It should be fun.
Have a great weekend and thanks to everyone for following along with me on this build.
 

Attachments

#269 ·
Two Month Anniversary

So today marks the two month date since I started this remodel. I scheduled for three months, but orders are starting to pile up and the plane till might have to get left off until I can get to it as well as the inside of the tool cabinet. So far so good, but there is still much to do.

I got the base put together today and thee top leveled and mortised in place.

Image


Image


Image


I put a coat of finish on the base before I stuck it together.

Image


Image


Image


Image


Image


Image


Image


Image


Image


Image


Image


Image


Image


Here is what it looked like two months ago.

Image


Image


Image


Image


Image


In other news I got the hobbit desk plans done and they should be going out next week as soon as I get the blueprints back from the printers. I know some happy woodworking Tolkienians that will be happy to get these.

Probably my favorite build of all time and I am not a big hobbit fan or I wasn't until I made the desk and then saw its' doppelganger at the end of the last movie.

Image


Image


Image


I have been trying to get further in the videos, but they are really waiting on me to finish building the items. I have plans to make my first video that is about something else on making a marking knife for dovetailing. It should be fun.
Have a great weekend and thanks to everyone for following along with me on this build.
Everything is coming along nicely! Can't wait to see your bench finished. Your Sketchup plans looks great and definitely worth all the time and effort you have put into them Brian!
 

Attachments